【转载】重装系统小贴士:ssh、vscode免密登录
ssh安装
apt install openssh-server
然后到cd /etc/ssh下找sshd_config文件(/etc/ssh/sshd_config),打开把允许远程root登录的选项(PermitRootLogin prohibit-password)改为yes
重启ssh服务:/etc/init.d/ssh restart
状态查看:systemctl status ssh
然后在root账号下执行ssh localhost,生成ssh文件夹
E: Could not get lock问题
gitee提交免密
git config --global user.email "账号"
git config --global user.name "密码"
git config --global credential.helper store
克隆仓库代码时,每次执行命令:“git clone ***”都需要输入用户名和密码,多次克隆会显得比较麻烦,而在远程服务器中,输入命令:git config --global credential.helper store,然后重启Vs code即可实现克隆代码的免密登陆。
Ubuntu20.04换源
备份原来的源
sudo cp /etc/apt/sources.list /etc/apt/sources.list.bak
编辑文件
sudo vim /etc/apt/sources.list
将默认源注释,然后再文件开头加入国内源
阿里镜像源:
deb http://mirrors.aliyun.com/ubuntu/ focal main restricted universe multiverse
deb-src http://mirrors.aliyun.com/ubuntu/ focal main restricted universe multiverse

deb http://mirrors.aliyun.com/ubuntu/ focal-security main restricted universe multiverse
deb-src http://mirrors.aliyun.com/ubuntu/ focal-security main restricted universe multiverse

deb http://mirrors.aliyun.com/ubuntu/ focal-updates main restricted universe multiverse
deb-src http://mirrors.aliyun.com/ubuntu/ focal-updates main restricted universe multiverse

deb http://mirrors.aliyun.com/ubuntu/ focal-proposed main restricted universe multiverse
deb-src http://mirrors.aliyun.com/ubuntu/ focal-proposed main restricted universe multiverse

deb http://mirrors.aliyun.com/ubuntu/ focal-backports main restricted universe multiverse
deb-src http://mirrors.aliyun.com/ubuntu/ focal-backports main restricted universe multiverse
清华源:
deb https://mirrors.tuna.tsinghua.edu.cn/ubuntu/ focal main restricted universe multiverse

#deb-src https://mirrors.tuna.tsinghua.edu.cn/ubuntu/ focal main restricted universe multiverse

deb https://mirrors.tuna.tsinghua.edu.cn/ubuntu/ focal-updates main restricted universe multiverse

#deb-src https://mirrors.tuna.tsinghua.edu.cn/ubuntu/ focal-updates main restricted universe multiverse

deb https://mirrors.tuna.tsinghua.edu.cn/ubuntu/ focal-backports main restricted universe multiverse
#deb-src https://mirrors.tuna.tsinghua.edu.cn/ubuntu/ focal-backports main restricted universe multiverse
deb https://mirrors.tuna.tsinghua.edu.cn/ubuntu/ focal-security main restricted universe multiverse
#deb-src https://mirrors.tuna.tsinghua.edu.cn/ubuntu/ focal-security main restricted universe multiverse multiverse
然后更新apt-get update
安装wireshark
根据其环境要求,在Ubuntu18.04下安装3.30+的tshark,以及Wireshark 3.x
consentfactory.com/install-wireshark-3-0-1-ubuntu-18-04/
https://kifarunix.com/install-latest-wireshark-on-ubuntu-18-04/
获取wireshark
mkdir wireshark
cd wireshark/

wget https://2.na.dl.wireshark.org/src/all-versions/wireshark-3.6.14.tar.xz
tar xf wireshark-3.6.14.tar.xz
安装依赖
sudo apt install build-essential pkg-config ninja-build bison flex qt5-default qttools5-dev-tools qtcreator ninja-build libpcap-dev cmake libglib2.0-dev libgcrypt20-dev qttools5-dev qtmultimedia5-dev libqt5svg5-dev

sudo apt install qttools5-dev qttools5-dev-tools libqt5svg5-dev qtmultimedia5-dev build-essential automake autoconf libgtk2.0-dev libglib2.0-dev flex bison libpcap-dev libgcrypt20-dev cmake -y

sudo apt-get install libc-ares-dev
在wireshark主目录下运行cmake ./
然后运行make & make install
配置python软连接
有时刚装完系统,发现python3能用,python不行,需要做一下软连接
sudo ln -s /usr/bin/python3 /usr/bin/python
ps:ubantu18.04自带python3.69,不用再单独安装,装个pip3就行
pycharm项目在Linux下导包错误的解决办法
https://www.cnblogs.com/bigtreei/p/15402092.html
# 安装pip3
apt-get install -y python3-pip
python -m pip install -U pip
\# ln -sf /usr/local/bin/pip3 /usr/bin/pip
\# ln -sf /usr/local/bin/pip3 /usr/local/bin/pip
pip install --upgrade pip
# 安装Python3
apt-get install -y python3.8 python3.8-dev
ln -sf /usr/bin/python3.8 /usr/bin/python
ln -sf /usr/bin/python3.8 /usr/bin/python3
# Python3 For CentOS7
https://zhuanlan.zhihu.com/p/548907024
注:
在下载openssl时使用以下方式
wget --no-check-certificate https://www.openssl.org/source/openssl-1.1.1q.tar.gz
下载python3.8.10
wget https://www.python.org/ftp/python/3.8.10/Python-3.8.10.tgz
wget -c https://npm.taobao.org/mirrors/python/3.8.10/Python-3.8.10.tgz
CentOS7重置登录密码:https://www.wenjianb.com/changshi/6436.html
linux下找不到模块路径
import os
import sys

# 根据实际项目目录结构,将运行目录加入到环境变量中

curPath = os.path.abspath(os.path.dirname(__file__))
rootPath = os.path.split(curPath)[0]
print(rootPath)
sys.path.append('/root/UEBA_GAN')
sys.path.append(rootPath)
VScode免密配置
old
参考
https://zhidao.baidu.com/question/1967237993260985100.html
https://blog.csdn.net/dear_Wally/article/details/124149621 、
生成公钥、秘钥
1、Windows端 用ssh-keygen 生成公钥和秘钥
下用ssh-keygen 生成公钥和秘钥: ssh-keygen.exe -t rsa
可以一直enter,选择默认
复制秘钥文件
2.将公钥文件id_rsa.pub拷贝到服务器上
3.将公钥文件内容追加到authorized_keys文件中
cat ../id_rsa.pub >>authorized_keys
注:如果~/. ssh 目录下不存在authorized_keys文件手动添加:
touch authorized_keys
4.设置vscode免密登录配置,点击VSCode左下角的SSH连接图标,选择“open SSH configuration file”,增加Linux服务器信息
修改权限
chmod 700 .ssh
chmod 600 .ssh/authorized_keys
整合版本(看这个就行)
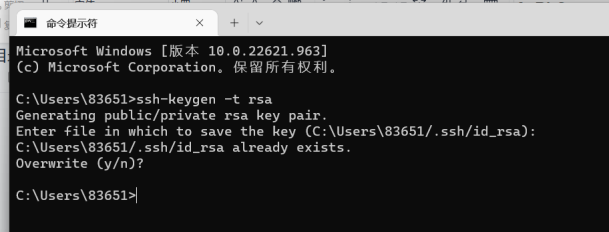
使用windows自带的dos命令行,用"ssh-keygen"重新生成一份密码对,将公钥传到服务器,此时,Vs code就可以不要输入密码,直接免密登录了,具体步骤如下所示。
(1)插件库安装“Remote Development”插件。
(2)打开cmd“命令提示符”,输入:ssh-keygen -t rsa,然后连续回车直到结束。
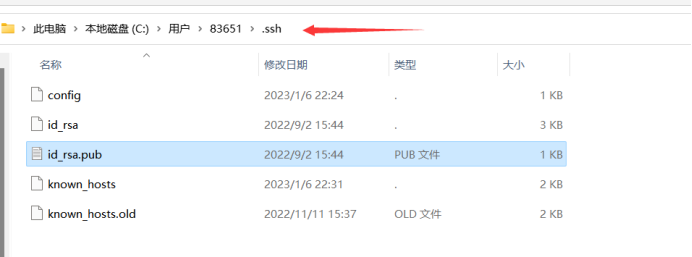
(3)找到.ssh这个文件夹,打开id_rsa_pub这个文件(路径如下图箭头所示),可以用记事本打开,打开后把里面的内容复制好。
(4)在远程服务器中进行(2)同样的操作。

(5)cd ~/.ssh,进入到.ssh文件夹。
(6)打开authorized_keys文件,命令:vim authorized_keys(没有authorized_keys文件将自动创建),把Windows下的id_rsa.pub文件内容复制到authorized_keys文件中。
(7)保存之后,回到Windows下即可实现免密登录
====================================================================================================
既然都回来翻这个了,肯定是在重装虚拟机啥的
如果vscode连不上,记得去known_hosts文件中把之前登录过的对应虚拟机的ip信息删了
【安装pytorch1.10cu113环境@3090】
简单来说,你只需要注意“pytorch1.10cu113”什么版本pytorch对应什么cuda版本即可
安装流程:
- 装miniconda,包括换源七七八八的(注意,不是anaconda)https://www.jianshu.com/p/2f5cf2edaaef
- 用conda安装pytorch https://pytorch.org/get-started/previous-versions/
1、装miniconda
下载
##wget 加网址,中间可以加-c参数,断点续传
wget https://mirrors.tuna.tsinghua.edu.cn/anaconda/miniconda/Miniconda3-latest-Linux-x86_64.sh
安装conda
bash Miniconda3-latest-Linux-x86_64.sh
过程中遇到回车就按回车,yes就输yes,more就按空格,路径都用默认的
激活
root@ubuntu:~# source ~/.bashrc
(base) root@ubuntu:~#
检查一下是否装好conda --help
(base) root@ubuntu:~# conda --help
usage: conda [-h] [-V] command ...

conda is a tool for managing and deploying applications, environments and packages.

Options:

positional arguments:
  command
    clean             Remove unused packages and caches.
    compare           Compare packages between conda environments.
    config            Modify configuration values in .condarc. This is modeled after the git config command. Writes to the user .condarc file (/root/.condarc) by default. Use the --show-sources flag to display
                      all identified configuration locations on your computer.
    create            Create a new conda environment from a list of specified packages.
    info              Display information about current conda install.
    init              Initialize conda for shell interaction.
    install           Installs a list of packages into a specified conda environment.
    list              List installed packages in a conda environment.
    package           Low-level conda package utility. (EXPERIMENTAL)
    remove (uninstall)
                      Remove a list of packages from a specified conda environment.
    rename            Renames an existing environment.
    run               Run an executable in a conda environment.
    search            Search for packages and display associated information.The input is a MatchSpec, a query language for conda packages. See examples below.
    update (upgrade)  Updates conda packages to the latest compatible version.
    notices           Retrieves latest channel notifications.

options:
  -h, --help          Show this help message and exit.
  -V, --version       Show the conda version number and exit.

conda commands available from other packages (legacy):
  content-trust
  env
(base) root@ubuntu:~#
配置镜像加速
# 下面这三行配置官网的channel地址
conda config --add channels r
conda config --add channels conda-forge
conda config --add channels bioconda
##以上三句命令一次性复制粘贴或是单独复制粘贴到服务器
# 清华源
conda config --add channels https://mirrors.tuna.tsinghua.edu.cn/anaconda/pkgs/main/
conda config --add channels https://mirrors.tuna.tsinghua.edu.cn/anaconda/cloud/bioconda/
conda config --add channels https://mirrors.tuna.tsinghua.edu.cn/anaconda/cloud/conda-forge/
conda config --set show_channel_urls yes
查看配置结果cat ~/.condarc
(base) root@ubuntu:~# cat ~/.condarc
channels:
  - https://mirrors.tuna.tsinghua.edu.cn/anaconda/cloud/conda-forge/
  - https://mirrors.tuna.tsinghua.edu.cn/anaconda/cloud/bioconda/
  - https://mirrors.tuna.tsinghua.edu.cn/anaconda/pkgs/main/
  - bioconda
  - conda-forge
  - r
  - defaults
show_channel_urls: true
(base) root@ubuntu:~#
##关掉左上角的(base),运行以下两行代码
conda config --set auto_activate_base false
source ~/.bashrc
##不想关掉也没有关系
到此,miniconda安装完了
下面是用的时候需要做的一些事情
创建一个虚拟环境
你可以理解为运行GAN工程的专用环境,与base环境相互独立
# 创建名为wgan的虚拟环境来安装运行项目所需的库
conda create -y -n  wgan  python=3.8
#如果不加-y,中间会问需要继续进程吗?
#如果不指定,linux一般会默认安装python最新版本,除非所处的环境不能安装最新版本的。

# 创建小环境成功,并成功安装python3版本
# 每建立一个小环境,安装一个python=3的软件作为依赖

# 查看当前conda环境
conda info -e
root@ubuntu:~# conda info -e
# conda environments:
base                  *  /root/miniconda3
wgan                     /root/miniconda3/envs/wgan


# 每次运行前,激活创建的小环境rna
conda activate wgan
##激活成功会出现一个小括号(小环境名字,wgan)
# 退出小环境
conda deactivate
2、安装pytorch1.10@cu113
直接去官网找安装指令就行
https://pytorch.org/get-started/previous-versions/
v1.10.0
Conda

OSX
...

Linux and Windows
# CUDA 11.3
conda install pytorch==1.10.0 torchvision==0.11.0 torchaudio==0.10.0 cudatoolkit=11.3 -c pytorch -c conda-forge

 浙公网安备 33010602011771号