导航控制器(UINavigationController)
导航控制器管理一系列显示层次型信息的场景。它创建一个视图管理器"栈",栈底为根视图控制器,用户在场景间切换时,依次将试图控制器压入栈中,且当前场景的试图控制器位于栈顶。要返回上一级,导航控制器将弹出栈顶的控制器,从而回到它下面的控制器。
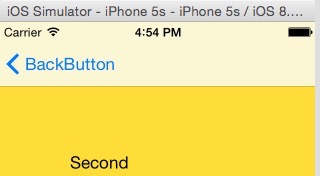
导航控制器还管理一个导航栏(UINavigationBar)。导航栏类似于工具栏,但它是使用导航项(UINavigationItem)实例填充的,该实例被加入到导航控制器管理的每个场景中。默认情况下,场景的导航项包含一个标题和一个Back按钮。Back按钮是以栏按钮项(UIBarButtonItem)的方式加入到导航项的。
导航项在Attributes inspector面板里有三个可设置属性:Title、Prompt和Back Button
Title -- 导航项的标题
Prompt -- 显示在标题上方的文本,向用户提供使用说明
Back Button -- 下一个场景的后退按钮的文本,假如没有设置,默认显示的文本是标题
在任何场景中,都可通过属性parentViewController来获取导航控制器。
UINavigationController分为三个部分:顶部的Navigation Bar,中间的Custom Content以及底部的Navigation toolbar。如图所示:

代码添加UINavigationController:
- (BOOL)application:(UIApplication *)application didFinishLaunchingWithOptions:(NSDictionary *)launchOptions {

    UIViewController *firstVC = [[UIViewController alloc] initWithNibName:@"FirstVC" bundle:nil];

    UINavigationController *navigationController = [[UINavigationController alloc] initWithRootViewController:firstVC];

    self.window.rootViewController = navigationController;
    self.window.backgroundColor = [UIColor greenColor];
    [self.window makeKeyAndVisible];

    SecondVC *secondVC = [[SecondVC alloc] init];
    ThirdVC *thirdVC = [[ThirdVC alloc] init];
    NSArray *array = @[secondVC, thirdVC];
    [navigationController setViewControllers:array animated:YES];

    [navigationController pushViewController:firstVC animated:YES];

    return YES;
}
UIViewController的navigationItem属性
添加navigationItem是UIViewController的一个属性,这个属性是为UINavigationController服务的。这个属性包含以下几个界面元素:
leftBarButtonItem -- 左按钮
rightBarButtonItem -- 右按钮
backBarButtonItem -- 返回按钮
title -- 标题
prompt -- 提示
UIBarButtonItem *leftButton = [[UIBarButtonItem alloc] initWithTitle:@"LeftButton" style:UIBarButtonItemStylePlain target:self action:@selector(test1)];
firstVC.navigationItem.leftBarButtonItem = leftButton;

UIBarButtonItem *rightButton = [[UIBarButtonItem alloc] initWithTitle:@"RightButton" style:UIBarButtonItemStylePlain target:self action:@selector(test1)];
firstVC.navigationItem.rightBarButtonItem = rightButton;

UIBarButtonItem *backButton = [[UIBarButtonItem alloc] initWithTitle:@"BackButton" style:UIBarButtonItemStylePlain target:self action:@selector(test1)];
firstVC.navigationItem.backBarButtonItem = backButton;

firstVC.navigationItem.title = @"My Title";
//firstVC.navigationItem.titleView = [[UIView alloc] init];

firstVC.navigationItem.prompt = @"Just A Prompt";

leftBarButtonItem和rightBarButtonItem可以指定多个按钮,backButton只能指定一个按钮。
设定了prompt会增加NavigationBar的高度。
要进一步自定义title,可以通过titleView属性将title设置成一个自定义的UIView。
通过设定navigationItem.leftItemsSupplementBackButton = YES可以同时显示leftBarButtonItem和backBarButtonItem。
添加单个按钮:
UIBarButtonItem *rightButton = [[UIBarButtonItem alloc] initWithTitle:@"编辑" style:UIBarButtonItemStylePlain target:self action:@selector(test1)];

NSDictionary *attributes = @{NSFontAttributeName: [UIFont fontWithName:@"TimesNewRomanPS-BoldMT" size:14.0f],
                             NSForegroundColorAttributeName: [UIColor greenColor]};

[rightButton setTitleTextAttributes:attributes forState:UIControlStateNormal];

firstVC.navigationItem.rightBarButtonItem = rightButton;
添加多个按钮:
UIBarButtonItem *cleanButton = [[UIBarButtonItem alloc] initWithTitle:@"清空"
                                                                style:UIBarButtonItemStylePlain
                                                               target:self
                                                               action:@selector(cleanTextView)];
UIBarButtonItem *saveButton = [[UIBarButtonItem alloc] initWithTitle:@"保存"
                                                               style:UIBarButtonItemStylePlain
                                                              target:self
                                                              action:@selector(saveTextView)];

firstVC.navigationItem.rightBarButtonItems = @[cleanButton, saveButton];
P.s. UIBarButtonItemStylePlain和UIBarButtonItemStyleDone的区别就是后者字体更粗而已。
利用navigationController.navigationBar.titleTextAttributes属性修改文本外观
NSDictionary *dict = [NSDictionary dictionaryWithObject:[UIColor greenColor] forKey:NSForegroundColorAttributeName];
navigationController.navigationBar.titleTextAttributes = dict;
UIViewController的edgesForExtendedLayout属性与extendedLayoutIncludesOpaqueBars属性
这也是两个与UINavigationController有关联的属性:
edgesForExtendedLayout — 这个属性属于UIExtendedEdge类型,它指定了视图的哪条边需要扩展开;默认值是UIRectEdgeAll(全部扩展),也可以通过UIRectEdgeLeft|UIRectEdgeRight这种方式设定部分扩展定、或设定为UIRectEdgeNone(全部不扩展)。
假如childVC有一个Y坐标为100的子控件,当edgesForExtendedLayout包含了UIRectEdgeTop时,它是从最顶端开始计算Y坐标;否则是从Navigationbar的offsetY开始计算Y坐标。
extendedLayoutIncludesOpaqueBars — 这个属性指定了当Navigationbar使用了不透明图片时,视图是否延伸至Bar所在区域,默认值时NO(不延伸)。当Navigationbar并未使用不透明图片做背景时,该属性无效。
当Navigationbar使用了不透明图片当背景时,各种情况如下:
1. edgesForExtendedLayout默认值(UIRectEdgeAll) && extendedLayoutIncludesOpaqueBars默认值(NO)
虽然edgesForExtendedLayout包含了UIRectEdgeTop,但由于是不透明图片做背景,并且extendedLayoutIncludesOpaqueBars设定了不延伸,这个时候子控件的Y坐标还是从Navigationbar的offsetY开始计算。当隐藏navigationBar时(navigationController.navigationBarHidden = YES),childVC会整体上移
2. edgesForExtendedLayout默认值(UIRectEdgeAll) && extendedLayoutIncludesOpaqueBars为YES
虽然是不透明图片做背景,但extendedLayoutIncludesOpaqueBars设定为延伸,这个时候子控件的Y坐标是从最顶端计算。当隐藏navigationBar时childVC不会改变位置。
可以通过下面的代码来验证这两个属性的各种搭配情况:
CGSize imageSize = CGSizeMake(1, 1);
UIGraphicsBeginImageContextWithOptions(imageSize, YES, 0);
[[UIColor greenColor] set];
UIBezierPath * path = [UIBezierPath bezierPathWithRect:CGRectMake(0, 0, imageSize.width, imageSize.height)];
[path fill];
UIImage *image = UIGraphicsGetImageFromCurrentImageContext ();
UIGraphicsEndImageContext();

[[UINavigationBar appearance] setBackgroundImage:image forBarMetrics:UIBarMetricsDefault];

firstVC.edgesForExtendedLayout = UIRectEdgeNone;

firstVC.extendedLayoutIncludesOpaqueBars = YES;
UINavigationController底部的ToolBar
UIBarButtonItem *one = [[UIBarButtonItem alloc] initWithBarButtonSystemItem:UIBarButtonSystemItemAdd target:nil action:nil];
UIBarButtonItem *two = [[UIBarButtonItem alloc] initWithBarButtonSystemItem:UIBarButtonSystemItemBookmarks target:nil action:nil];
UIBarButtonItem *three = [[UIBarButtonItem alloc] initWithBarButtonSystemItem:UIBarButtonSystemItemAction target:nil action:nil];

navigationController.toolbarHidden = NO;
[firstVC setToolbarItems:[NSArray arrayWithObjects:one, two, three, nil] animated:YES];
UINavigationControllerDelegate
该代理的两个主要方法如下,主要作用是在切换前对目标ViewController进行设置:
- (void)navigationController:(UINavigationController *)navigationController willShowViewController:(UIViewController *)viewController animated:(BOOL)animated
{
    NSLog(@"%@",viewController);
    viewController.view.backgroundColor = [UIColor greenColor];
    NSLog(@"willShowViewController");
}

- (void)navigationController:(UINavigationController *)navigationController didShowViewController:(UIViewController *)viewController animated:(BOOL)animated
{
    NSLog(@"%@",viewController);
    NSLog(@"didShowViewController");
}
UINavigationController的topViewController与visibleViewController属性
topViewController — 获取顶层ViewController
visibleViewController — 获取当前显示的ViewController
绝大多数情况下,topViewController是等于visibleViewController的,对于在topViewController上通过presentViewController跳转到一个新的ViewController情况,topViewController是不等于visibleViewController的。

 浙公网安备 33010602011771号