
spring的依赖注入的四种方式,数组与集合注入;引用注入;内部bean注入
三种注入方式
第一种: 基于构造函数
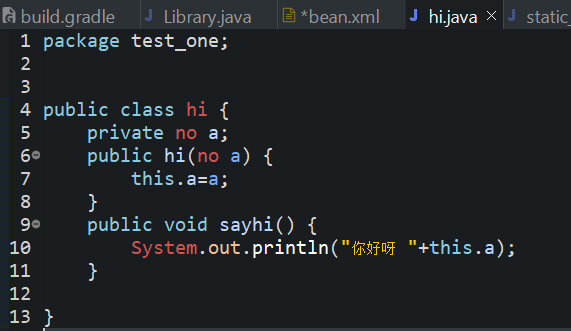
hi.java (bean)
package test_one;

public class hi {
    private String name;
    public hi(String name) {
        this.name=name;
    }
    public void sayhi() {
        System.out.println("你好呀 "+this.name);
    }

}
<bean id="binbin" class="test_one.hi" scope="singleton">
    <constructor-arg name="name" value="斌斌"/>
</bean>
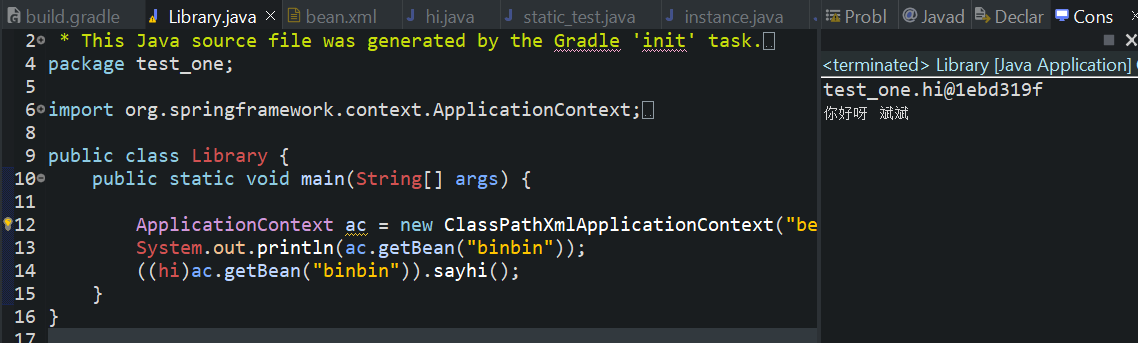
上面是通过配置文件注入字符串
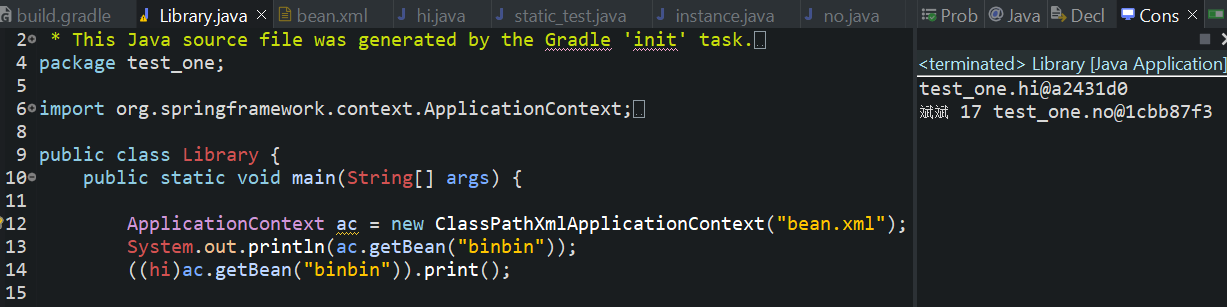
我们来看看如何注入bean
<bean id="binbin" class="test_one.hi" scope="singleton">
    <constructor-arg  ref="No"/>
</bean>
<bean id="No" class="test_one.no"></bean>
<!--通过构造函数,将id="No"的bean 注入到 hi 中
总结:
constructor-arg 元素表示通过构造函数注入
属性:  index: 对应构造函数参数列表的位置
    type:对应构造函数列表里的的数据类型
    name:对应在构造函数列表里的变量名
    value: 赋值
    ref:对应bean类型的id名
一般都是通过name="" value="" 去注入
而注入bean只要 ref="id名"

其他用法:
<constructor-arg type="java.lang.String" value="45"/>
<constructor-arg index="0" value="20"/>

值得注意的是通过参数名称来匹配的方法,代码必须启用了调试标记编译,这样spring才可以从构造函数中查找参数名称
开发者也可以使用@ConstructorProperties注解来显式声明构造函数的名称
public class ExampleBean{
  /***省略字段**/
  @ConstructorProperties({"years","ultimateAnswer"})
  public ExampleBean(int years,String ultimateAnswer){
    this.years=years;
    this.ultimateAnswer=ultimateAnswer;
  }
}
注意: spring的便利之处就是,将value属性的字符串类型自动转换为指定类型
第二种: 基于set方法
hi.java (bean)
package test_one;

public class hi {
    private String name;
    private int age;
    private no a;
    public void setName(String name) {
        this.name = name;
    }
    public void setAge(int age) {
        this.age = age;
    }
    public void setA(no a) {
        this.a = a;
    }

    public void  print() {
        System.out.print(name+" "+age+" "+a);
    }
}
<bean id="binbin" class="test_one.hi" scope="singleton">
    <property name="name" value="斌斌"/>
    <property name="age" value="17"/>
    <property name="a" ref="No"/>
</bean>
<bean id="No" class="test_one.no"></bean>
总结:
property 表示基于set方法注入
属性: name: 对应变量名匹配
    ref: 如果注入的是bean,对应bean的id名
    value: 赋值,spring会自动将字符串类型转换为对应类型
注意:如果注入的是bean,那么对于property来说就要加上name
<property name="a" ref="No"/>
第三种: 使用p命名空间注入
本质还是基于set注入,不过xml的配置更加简单,主要一个命名空间就可以对所有的bean赋值,不用多余的嵌套property
<?xml version="1.0" encoding="UTF-8"?>
<beans xmlns="http://www.springframework.org/schema/beans"
        xmlns:p="http://www.springframework.org/schema/p"
       xmlns:xsi="http://www.w3.org/2001/XMLSchema-instance"
       xsi:schemaLocation="http://www.springframework.org/schema/beans
        http://www.springframework.org/schema/beans/spring-beans.xsd">
<!--使用无参构造函数实例化,使用p命令空间注入-->
<bean id="binbin" class="test_one.hi" scope="singleton" p:name="斌斌" p:age="17" p:a-ref="No"></bean>
<bean id="No" class="test_one.no" p:name="明明"></bean>
第四种:使用c命名空间注入
与p命名空间注入一样,不过是基于构造函数注入
xmlns:c="http://www.springframework.org/schema/c"
<bean id="C" class="test_one.c_name" c:name="i'm c"/>
如果注入的是数组,List , Set , map, Properties
hi.java (bean)
package test_one;

import java.util.List;
import java.util.Map;
import java.util.Properties;
import java.util.Set;

public class hi {
    private String[] myStrs;
    private List<String> myList;
    private Set<Integer> mySet;
    private Map<String,String> myMap;
    private Properties myProps;

    public void setMyStrs(String[] myStrs) {
        this.myStrs = myStrs;
    }
    public void setMyList(List<String> myList) {
        this.myList = myList;
    }
    public void setMySet(Set<Integer> mySet) {
        this.mySet = mySet;
    }
    public void setMyMap(Map<String, String> myMap) {
        this.myMap = myMap;
    }
    public void setMyProps(Properties myProps) {
        this.myProps = myProps;
    }

    public String[] getMyStrs() {
        return myStrs;
    }
    public List<String> getMyList() {
        return myList;
    }
    public Set<Integer> getMySet() {
        return mySet;
    }
    public Map<String, String> getMyMap() {
        return myMap;
    }
    public Properties getMyProps() {
        return myProps;
    }

    public void print() {
        System.out.println("array:"+myStrs[0]+" "+myStrs[1]+"\nList:"+myList+"\nSet:"+mySet+"\nMap:"+myMap+"\nProperties:"+myProps);
    }


}
<!--使用无参构造函数实例化-->
<bean id="binbin" class="test_one.hi" scope="singleton">
<!--给数组注入数据-->
<property name="myStrs">
    <array>
        <value>array_one</value>
        <value>array_two</value>
    </array>
</property>
<!--给List注入数据-->
<property name="myList">
    <array>
        <value>List_one</value>
        <value>List_two</value>
    </array>
</property>
<!--给set集合注入数据-->
<property name="mySet">
    <list>
        <value>1314</value>
        <value>520</value>
    </list>
</property>
<!--注入map数据-->
<property name="myMap">
    <props>
        <prop key="testA">map_one</prop>
        <prop key="testB">map_two</prop>
    </props>
</property>
<!--注入Properties数据-->
<property name="myProps">
    <map>
        <entry key="testA" value="properties_one"/>
        <entry key="testB">
            <value>properties_two</value>
        </entry>
    </map>
</property>
</bean>
可以发现我将array, list,set 的元素混用了,将map和props混用了
也就是说 array,list ,set之间可以混用,map与props之间可以混用。 不过在实际开发时还是元素和数据类型对应使用
如果集合的数据类型是其他类型,在配置文件中,会自动将value的值转化为对应类型
注入Properties数据的另一种方式,更加简便
key=value 的写法
<!--注入Properties数据-->
<property name="myProps">
    <value>
        testA=Properties_one
        testB=Properties_two
    </value>
</property>
引用bean注入
参考:https://www.cnblogs.com/CloudComputing-binbin/p/15939822.html
内部bean注入
内部bean也称为内部匿名bean, 如果需要注入bean并且只用于一个特定的属性,建议使用内部bean
内部bean无法被外部bean引用,哪怕你加上id,她会无视scope标签
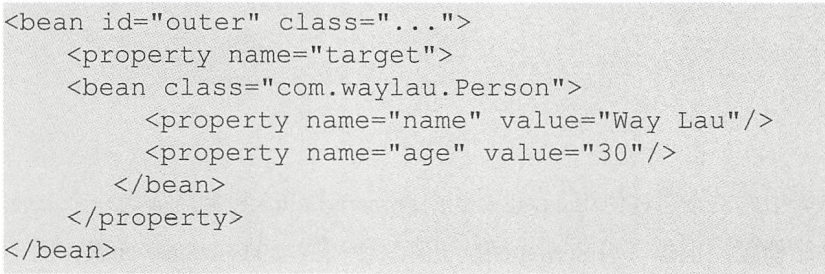
<bean id="binbin" class="test_one.hi" scope="singleton">
<!--给数组注入数据-->
<property name="myStrs">
    <array>
        <bean class="test_one.no" parent="parent"/>
    </array>
</property>
</bean>
那个内部bean是通过抽象bean注入的,想了解抽象bean请参考:三种实例化bean以及非实例化抽象bean
Null以及空字符的值
<bean class="ExampleBean">
    <property name="email" value=""/>
</bean>
什么示例与下列java代码效果一样
ExampleBean.setEmail("");
<null/>元素表示null(空指针)
<bean class="ExampleBean">
    <property name="email">
        <null/>
    </property>
</bean>
与下面的java代码效果一样
ExampleBean.setEmail(null);

 浙公网安备 33010602011771号