


Spring 工程搭建
创建项目
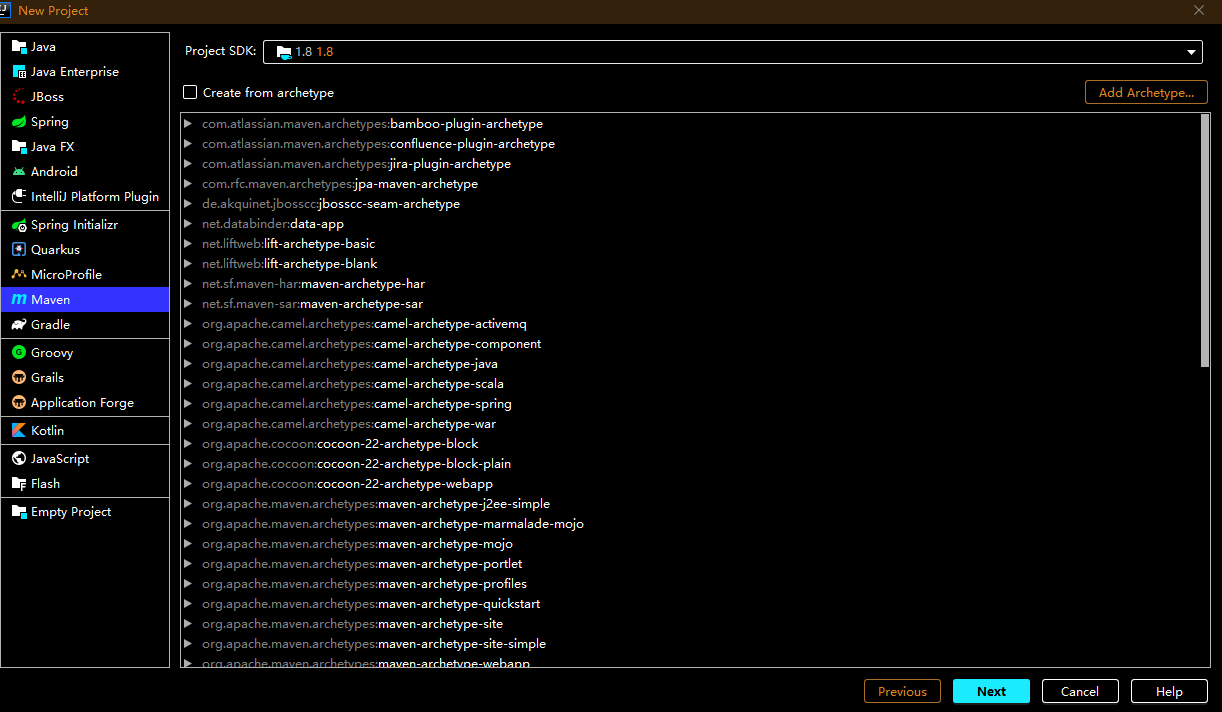
1.使用idea创建Maven工程
- File————new————Project;
- 查看JDK————选择Maven————Next;
![]()
- 输入项目名:SpringDemoLiuJie————next;完成
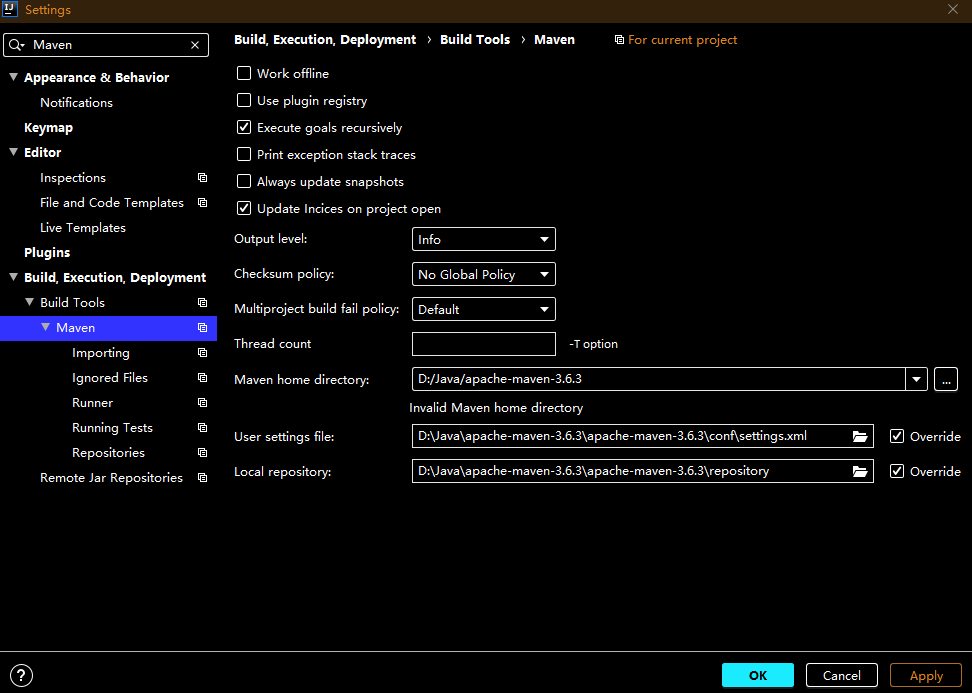
2.配置Maven
- File————Settings————搜索Maven;
- Maven home directory:选择安装路径——D:/Java/IntelliJ IDEA 2020.1/plugins/maven/lib/maven3
- 勾选Overrid将setting文件位置及仓库位置改为自配置;
- User settings file:maven安装路径\conf\setting.xml——D:\Java\apache-maven-3.6.3\apache-maven-3.6.3\conf\settings.xml
- Local repository:maven安装路径\repository——D:\Java\apache-maven-3.6.3\apache-maven-3.6.3\repositor
图解:
搭建配置
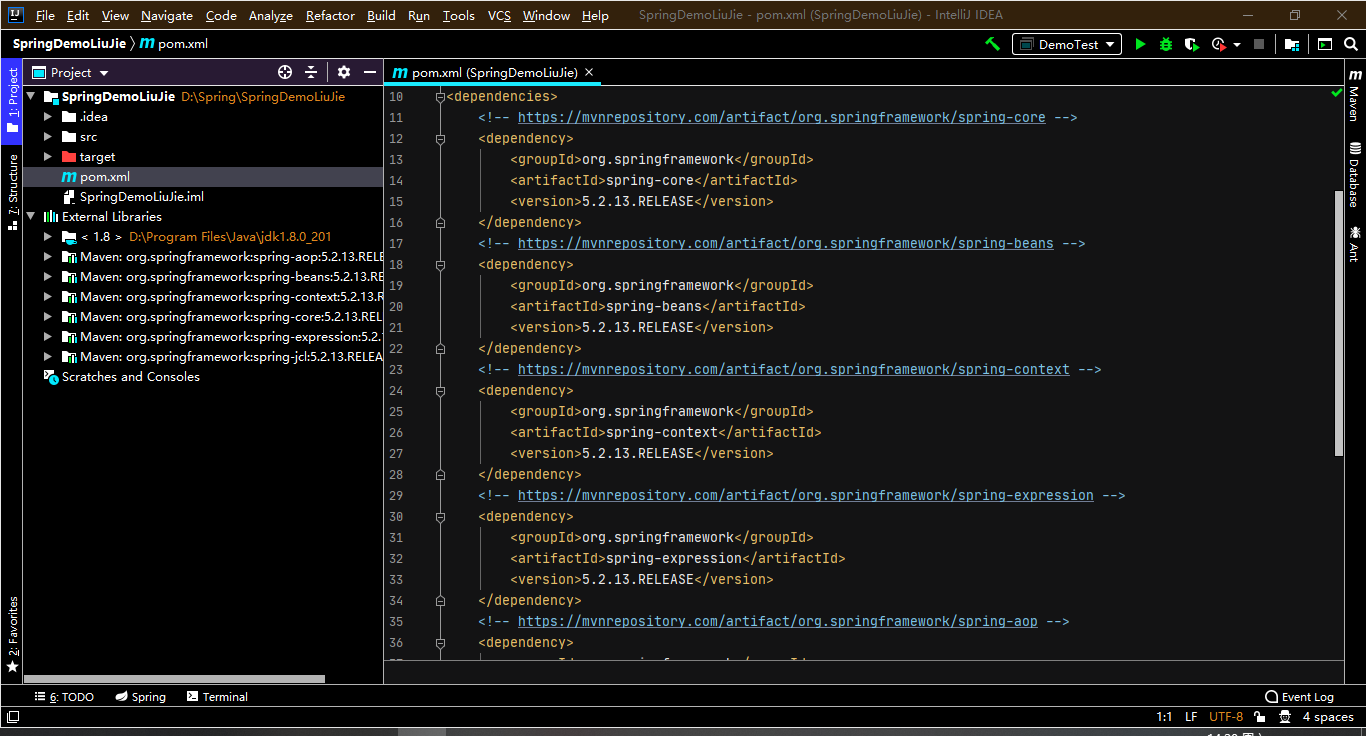
1, 引入依赖jar包
Java基础包:libs目录的四个spring基础包
代码
<dependencies>
    <!-- https://mvnrepository.com/artifact/org.springframework/spring-core -->
    <dependency>
        <groupId>org.springframework</groupId>
        <artifactId>spring-core</artifactId>
        <version>5.2.13.RELEASE</version>
    </dependency>
    <!-- https://mvnrepository.com/artifact/org.springframework/spring-beans -->
    <dependency>
        <groupId>org.springframework</groupId>
        <artifactId>spring-beans</artifactId>
        <version>5.2.13.RELEASE</version>
    </dependency>
    <!-- https://mvnrepository.com/artifact/org.springframework/spring-context -->
    <dependency>
        <groupId>org.springframework</groupId>
        <artifactId>spring-context</artifactId>
        <version>5.2.13.RELEASE</version>
    </dependency>
    <!-- https://mvnrepository.com/artifact/org.springframework/spring-expression -->
    <dependency>
        <groupId>org.springframework</groupId>
        <artifactId>spring-expression</artifactId>
        <version>5.2.13.RELEASE</version>
    </dependency>
    <!-- https://mvnrepository.com/artifact/org.springframework/spring-aop -->
    <dependency>
        <groupId>org.springframework</groupId>
        <artifactId>spring-aop</artifactId>
        <version>5.2.13.RELEASE</version>
    </dependency>
    <!-- https://mvnrepository.com/artifact/org.springframework/spring-jcl -->
    <dependency>
        <groupId>org.springframework</groupId>
        <artifactId>spring-jcl</artifactId>
        <version>5.2.13.RELEASE</version>
    </dependency>
</dependencies>
2.刷新Maven自动下载
3.在\src\main\resources下创建applicationContext.xml配置文件
输入代码:
<?xml version="1.0" encoding="UTF-8"?>
<beans xmlns="http://www.springframework.org/schema/beans"
       xmlns:xsi="http://www.w3.org/2001/XMLSchema-instance"
       xmlns:util="http://www.springframework.org/schema/util"
       xsi:schemaLocation="
        http://www.springframework.org/schema/beans
        https://www.springframework.org/schema/beans/spring-beans.xsd
        http://www.springframework.org/schema/util
        https://www.springframework.org/schema/util/spring-util.xsd
       ">

    <!-- bean definitions here -->
    <bean id="UserService" class="services.impl.UserServicelmpl"/>

</beans>
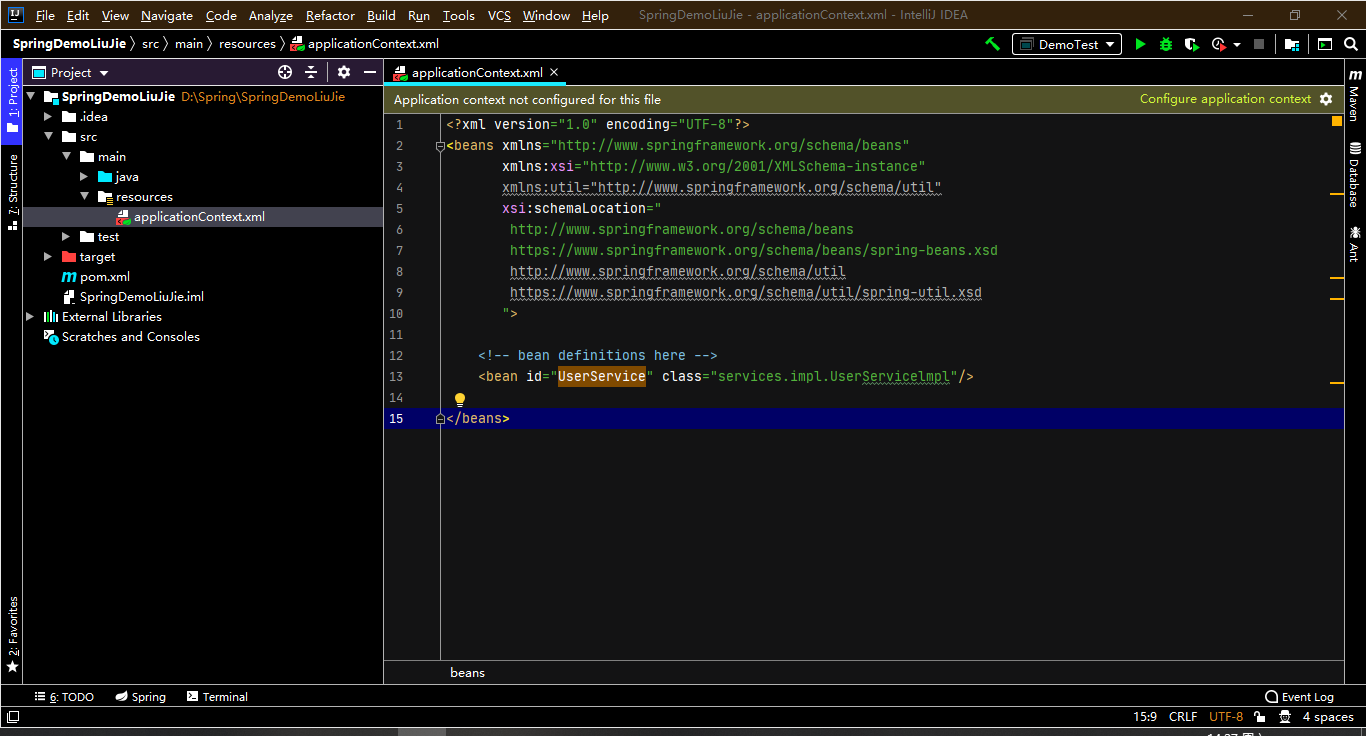
4.刷新
提示:Application context not configured for this file————点Configure application context————ok
测试
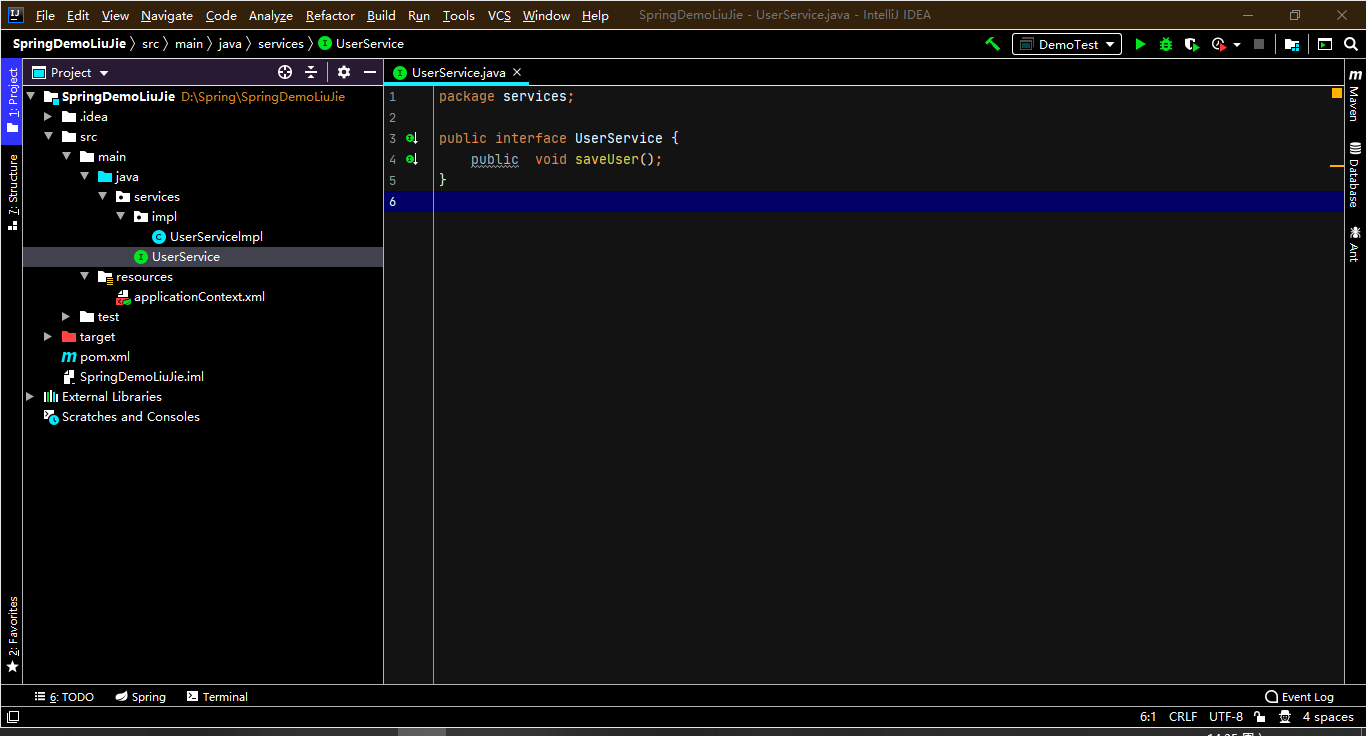
接口类
实现类
实现接口并使用快捷键添加接口方法实现
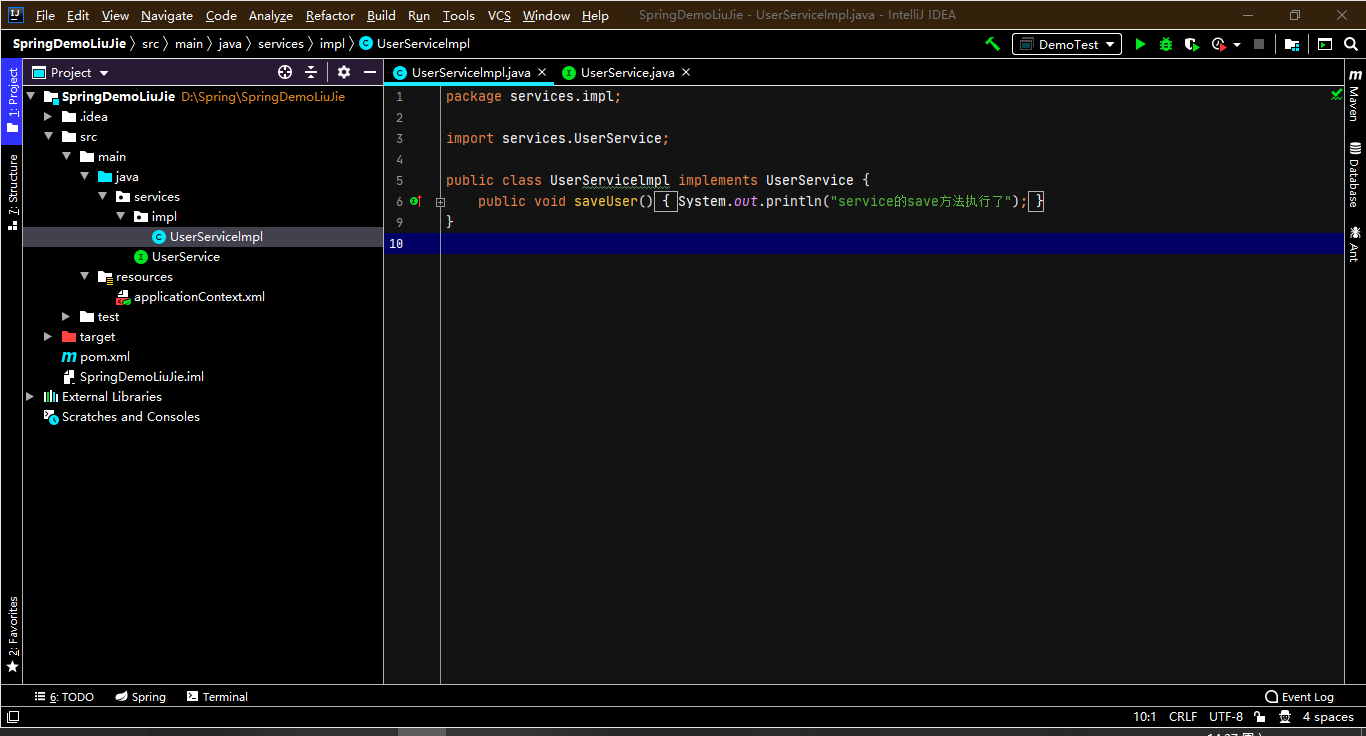
- Alt+Enter打开自动导入框
- 选择第一个自动导入接口方法实现类
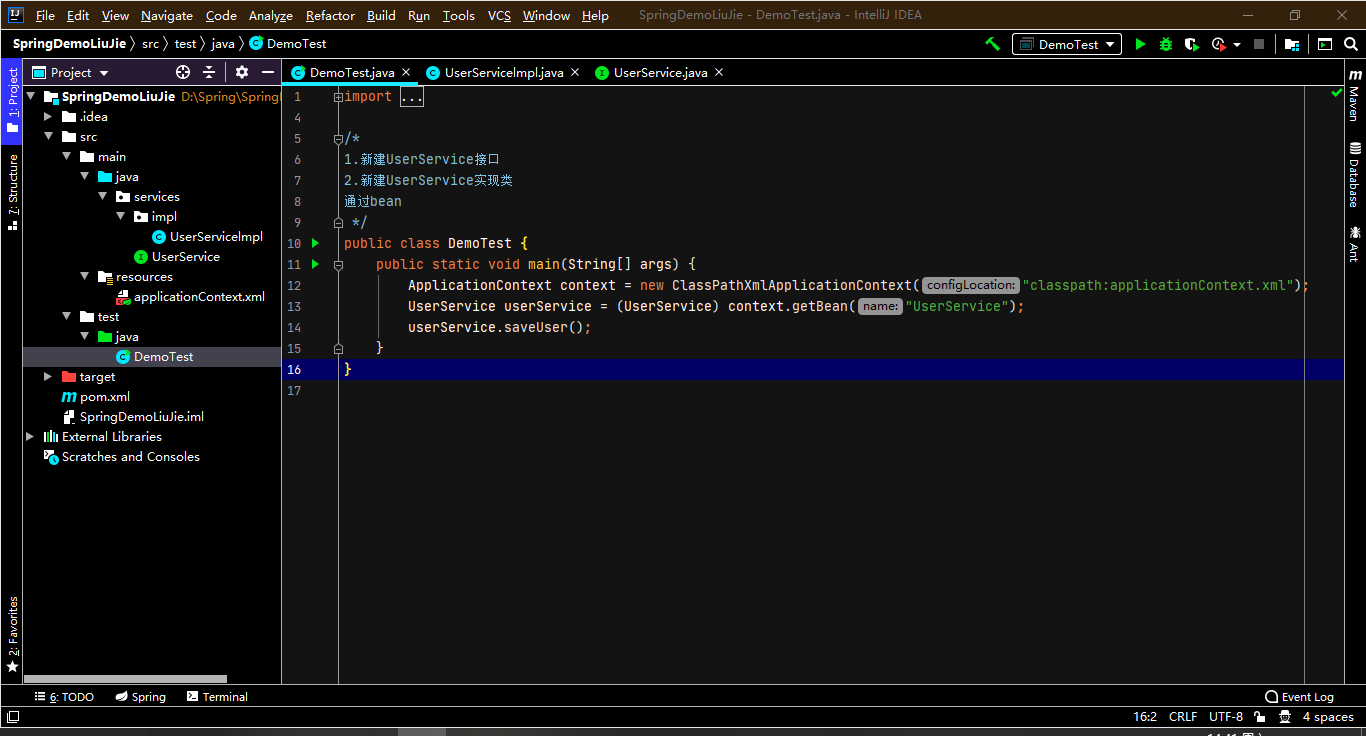
测试类
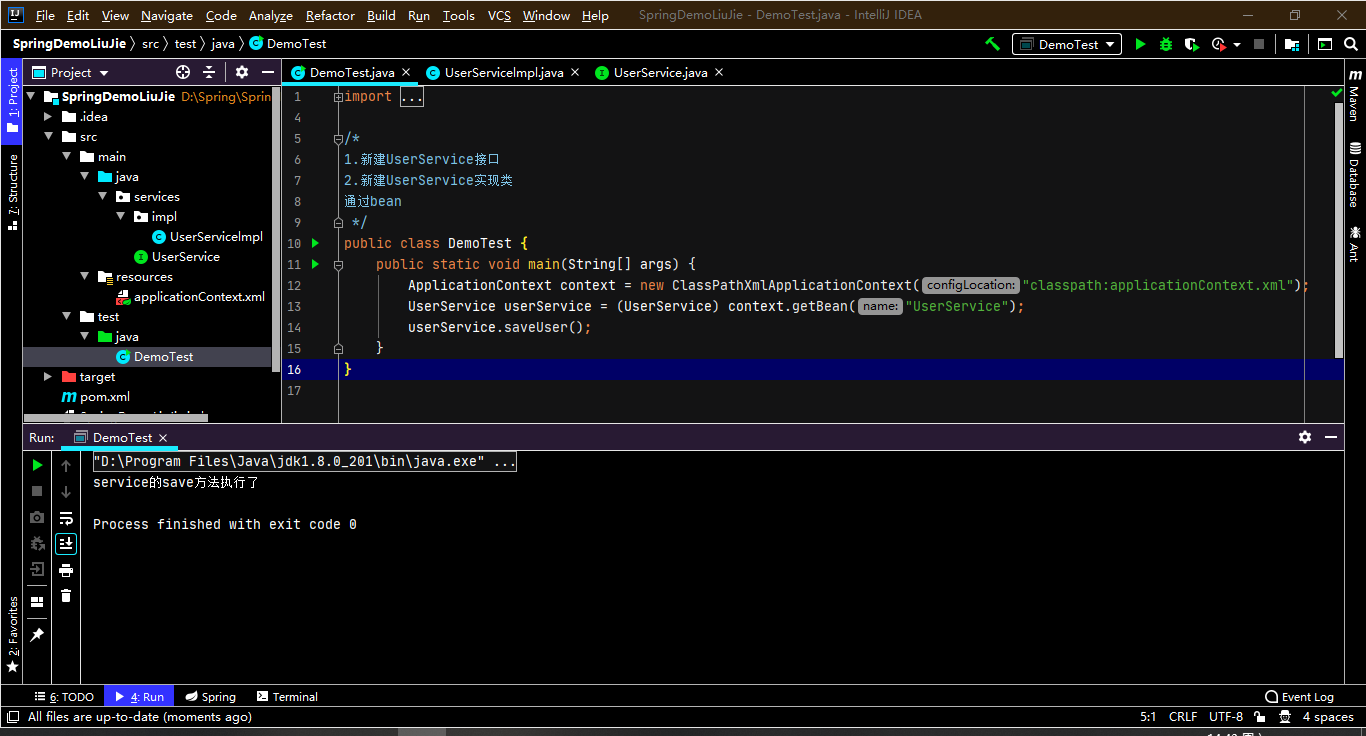
运行结果

 浙公网安备 33010602011771号