react与新公司的学习
1、路由跳转
在绑定事件方法这样写:
onClick={() => this.hand(item.router)}
hand参数中可以为空
hand方法:
    hand = (roter) => {

        this.props.history.push({
            pathname: roter
        })

        // history.replace({
        //     pathname: '/orders-list'
        // })
    }
公司也可以写为:
  hand = (roter) => {
               history.replace({
             pathname: '/orders-list'
         })
    }
但是需要导入history,相当关于是封装了一次。
注意:
这里使用this.props可能报错,要注意,在子组件接受父组件传过来的值时,有没有携带history,要是没携带就在父组件中这样写:
 const { userInfo, history } = this.props;


 //子组件
  <CommonCard
                 showDateType
                hierarchyCode={userInfo?.hierarchyCode}
                history={history}
                orgId={userInfo.orgId}
                cardKey={userInfo.orgId}
              />
这样子组件就可以携带history了。
2、react中假数据输出dom元素
首先定义假数据文件,后导入需要对子文件中
然后用map的方式输出,原理和VUE中v-for循环输出一样的
                        {appSettings.map(item => (
                            <div className="order" >
                                <div className={`orderbox icon__color--${item.theme}`} onClick={() => this.hand(item.router)}>
                                    <IconFont className="orderTop " type={item.type} />
                                </div>
                                <p>{item.title}</p>
                            </div>
                        ))}
这里要是写过滤的话可以这样:
 const apps = appSettings.filter(item => userInfo.isYXC ? item.version.includes('yxc') : item.version.includes('lvt'))


   {apps.map(item => (
                            <div className="order" >
                                <div className={`orderbox icon__color--${item.theme}`} onClick={() => this.hand(item.router)}>
                                    <IconFont className="orderTop " type={item.type} />
                                </div>
                                <p>{item.title}</p>
                            </div>
                        ))}
对filter的理解更加深刻了
这里还有一个知识点:
className={`orderbox icon__color--${item.theme}`}
其实就是一个类className,写法固定模板字符串,在less中需要这样定义:
            .orderbox {

                &.icon__color--blue {
                    background-color: #1F8DED;
                }

                &.icon__color--green {
                    background-color: #3AC485;
                }

                &.icon__color--yellow {
                    background-color: #FEC201;
                }
            }
其中&.icon__color--blue 等同于 orderbox.icon_color--blue
而${item.theme}就是假数据里面的这个
        title: '订单列表',
        type: 'icon-dingdanliebiao',
        router: '/orders-list',
        theme: 'blue'
这样就可以去实现指定类名了。
3、抓包工具whistle的学习
1、先安装whistle
http://wproxy.org/whistle/install.html
2、根据whistle常用指令去开启与停止
$ w2 help  //查看whistle帮助信息+所有命令
$ w2 start  //启动whistle
$ w2 stop   //停止whistle
$ w2 restart  //重启whistle
$ w2 start -p 8899 //修改启用的端口
3、whistle开启后,输入网址,打开调试网页

4、在谷歌应用商店安装xxxxxxx-xxxxx,
并且固定在这里:

5、打开xxxxxxx-xxxxx,配置如下
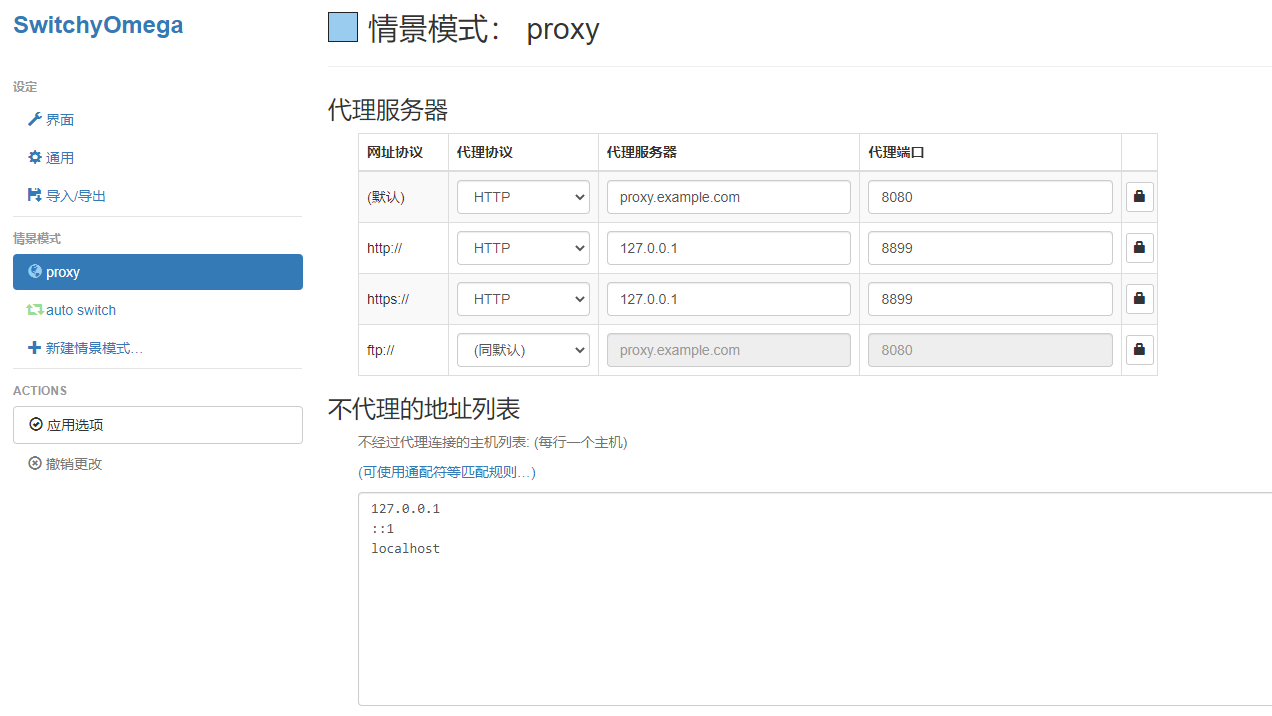
后点击应用选项(保存)
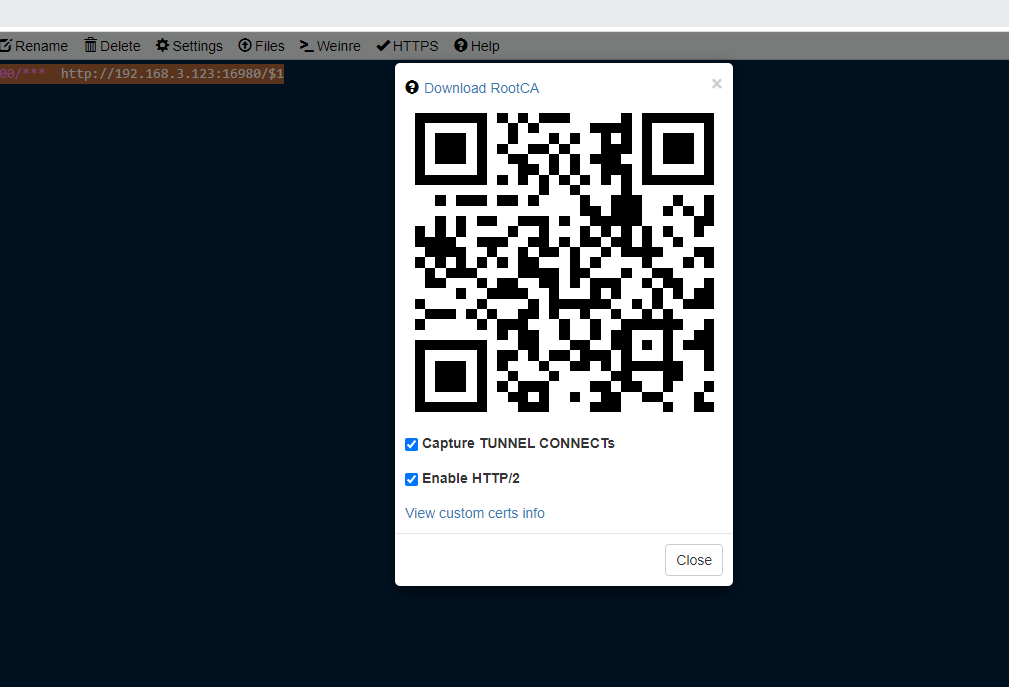
6、在 whistle 打开的网页中,记得安装CA证书
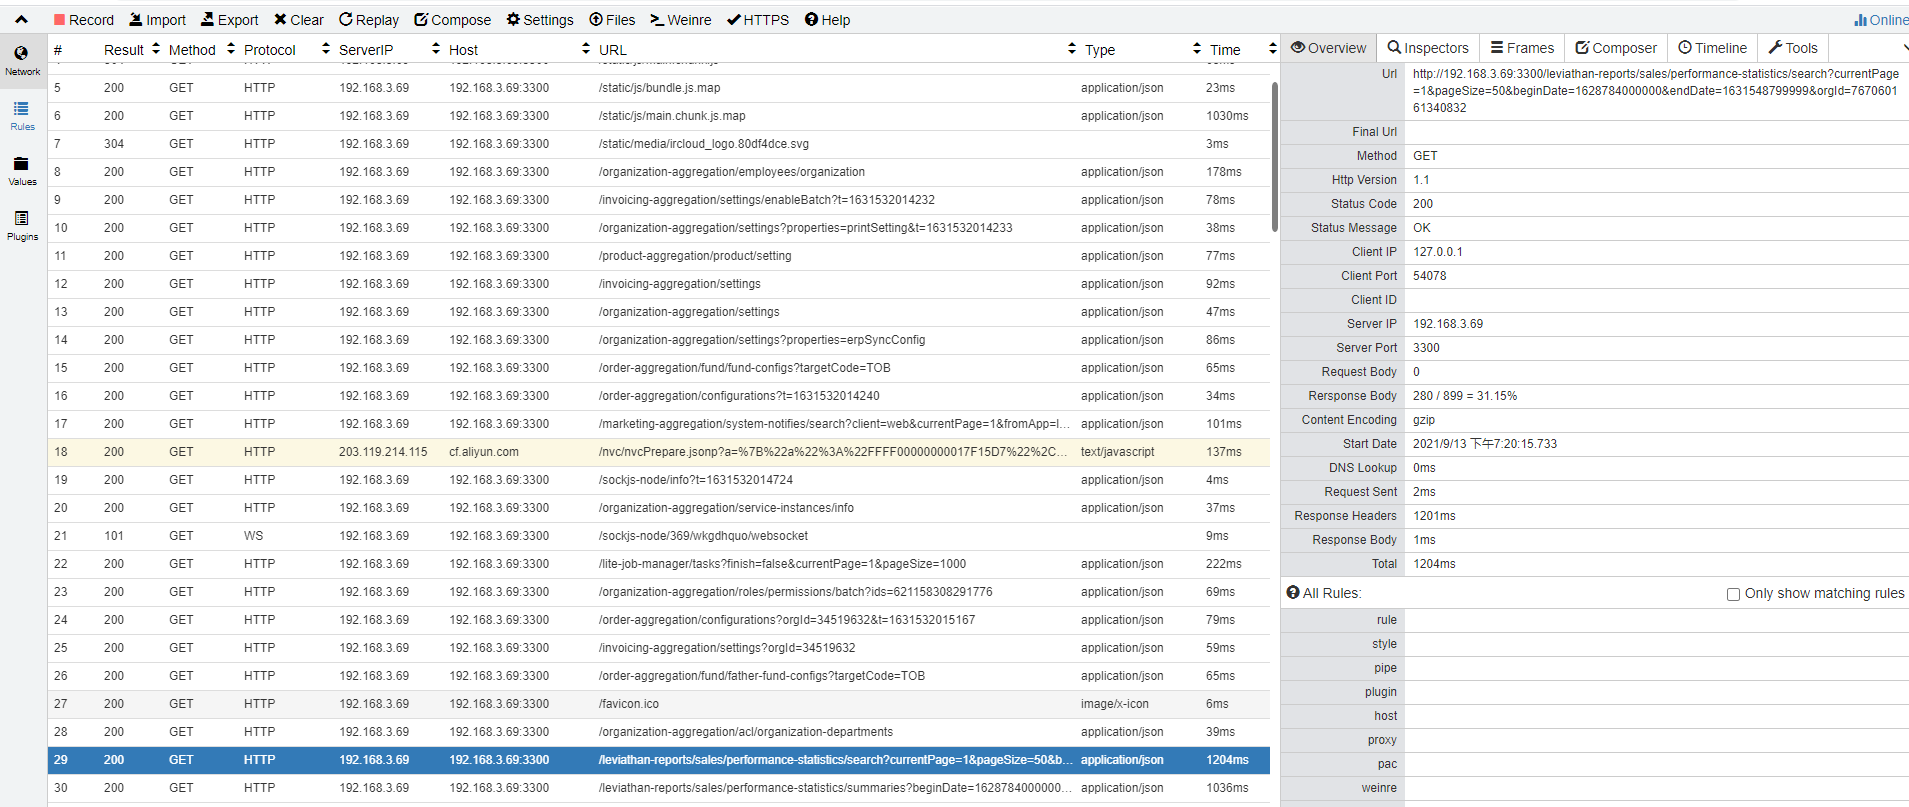
7、创建一个代理

这里的固定写法是^本电脑ip:项目端口/*** 对方电脑ip/$1
最后在Network这里看抓包
感谢同事帮我,简单记录一下

 浙公网安备 33010602011771号