


新项目使用Swagger UI自动生成接口文档,不需要频繁更新接口文档,保证接口文档与代码的一致,值得学习。本文记录swaggerUi与springboot整合的步骤。
依赖添加
        <dependency>
            <groupId>io.springfox</groupId>
            <artifactId>springfox-swagger2</artifactId>
            <version>2.9.2</version>
        </dependency>
        <dependency>
            <groupId>io.springfox</groupId>
            <artifactId>springfox-swagger-ui</artifactId>
            <version>2.9.2</version>
        </dependency>
新增swagger配置类
import org.springframework.context.annotation.Bean;
import org.springframework.context.annotation.Configuration;

import springfox.documentation.builders.ApiInfoBuilder;
import springfox.documentation.builders.PathSelectors;
import springfox.documentation.builders.RequestHandlerSelectors;
import springfox.documentation.service.ApiInfo;
import springfox.documentation.service.Contact;
import springfox.documentation.spi.DocumentationType;
import springfox.documentation.spring.web.plugins.Docket;
import springfox.documentation.swagger2.annotations.EnableSwagger2;

@Configuration
@EnableSwagger2
public class SwaggerConfig {

    @Bean
    public Docket createRestApi() {
        return new Docket(DocumentationType.SWAGGER_2)
                //apiInfo指定测试文档基本信息,这部分将在页面展示
                .apiInfo(apiInfo())
                .select()
                //apis() 控制哪些接口暴露给swagger,
                // RequestHandlerSelectors.any() 所有都暴露
                // RequestHandlerSelectors.basePackage("com.info.*")  指定包位置
                .apis(RequestHandlerSelectors.any())
                .paths(PathSelectors.any())
                .build();
    }

    //基本信息,页面展示
    private ApiInfo apiInfo() {
        return new ApiInfoBuilder()
                .title("测试项目标题")
                .description("接口描述")
                //联系人实体类
                .contact(
                        new Contact("名字", "网址", "邮箱")
                )
                //版本号
                .version("1.0.0-SNAPSHOT")
                .build();
    }
}
在Controller类上增加swagger配置
@RestController
@RequestMapping
//Api注解,描述信息 可通过tag进行分类
@Api(value = "HelloController", description = "HelloController")
public class HelloController {
    @PostMapping("/addPerson")
    //方法描述
    @ApiOperation(notes = "添加人员", value = "addPerson")
    public Person addPerson(
            @ApiParam(name = "name", value = "姓名") @RequestParam("name") String name,
            @ApiParam(name = "age", value = "年龄")  @RequestParam("age") Integer age) {
        Person person = new Person();
        person.setAge(age);
        person.setName(name);

        return repository.save(person);
    }
}
以上配置完成之后,直接启动项目,访问地址:localhost:8080/swagger-ui.html,即可打开如下页面
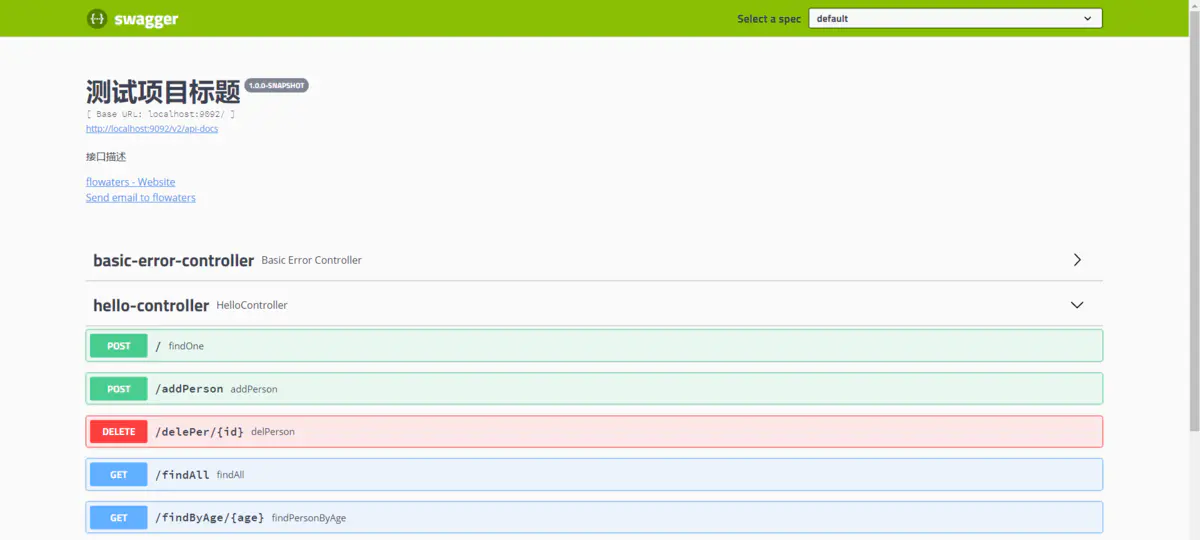
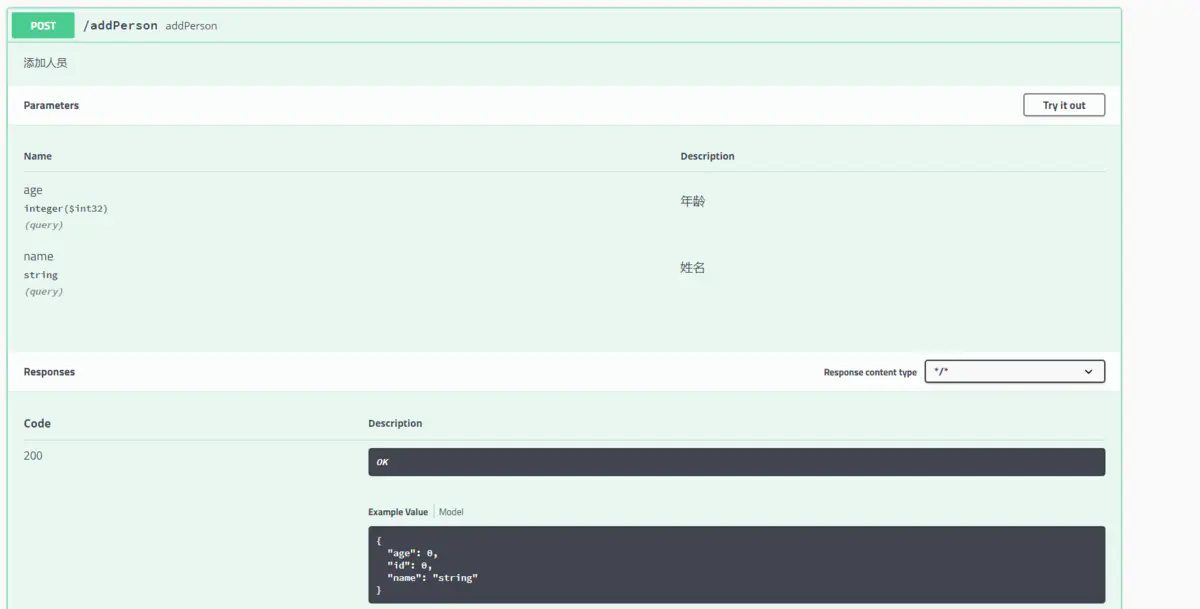
Controller下的所有接口得到展示。展开其中一个可以看到接口详情:
十分强大的工具,只需简单注解即可生成接口文档,代码入侵小。
链接:https://www.jianshu.com/p/5c1111d3b99f

 浙公网安备 33010602011771号