


CentOS7设置Samba共享
本帖转自https://www.tecmint.com/install-samba4-on-centos-7-for-file-sharing-on-windows/
非常详细和好使。
- samba: 这个软件主要提供了 SMB 服务器所需的各项服务程序 (smbd 及 nmbd)、 的文件档、以及其他与 SAMBA 相关的 logrotate 配置文件及开机默认选项档案等;
- samba-client:
这个软件则提供了当 Linux 做为 SAMBA Client 端时,所需要的工具指令,例如挂载 SAMBA 文件格式的 mount.cifs、
取得类似网芳相关树形图的 smbtree 等等;
- samba-common: 这个软件提供的则是服务器与客户端都会使用到的数据,包括 SAMBA 的主要配置文件 (smb.conf)、语法检验指令 (testparm) 等等;
--------------------------------------------------------------懒得翻译的分割线-----------------------------------------------------
In our last article, we showed how to install Samba4 on Ubuntu for basic file sharing between Ubuntu systems and Windows machines. Where we looked at configuring anonymous (unsecure) as well as secure file sharing.
Here, we will describe how to install and configure Samba4 on CentOS 7 (also works on RHEL 7) for basic file sharing between other Linux systems and Windows machines.
Important: Starting from version 4.0, Samba can run as an Active Directory (AD) domain controller (DC). We suggest you read through our special series on setting up Samba4 Active Directory Domain Controller, which includes critical topics for Ubuntu, CentOS, and Windows.
Install Samba4 in CentOS 7
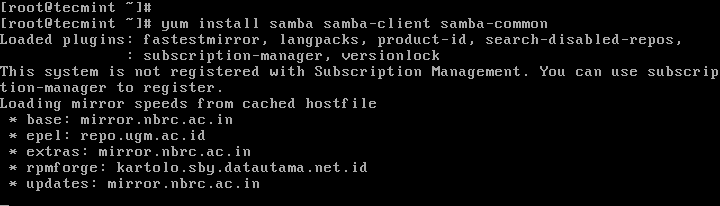
1. First install Samba4 and required packages from the default CentOS repositories using the yum package manager tool as shown.
# yum install samba samba-client samba-common
Install Samba4 on CentOS 7
2. After installing the samba packages, enable samba services to be allowed through system firewall with these commands.
# firewall-cmd --permanent --zone=public --add-service=samba
# firewall-cmd --reload

Open Samba on Firewalld
Check Windows Machine Workgroup Settings
3. Before you proceed to configure samba, make sure the Windows machine is in the same workgroup to be configured on the CentOS server.
There are two possible ways to view the Windows machine workgroup settings:
- Right clicking on “This PC” or “My Computer” → Properties → Advanced system settings → Computer Name.
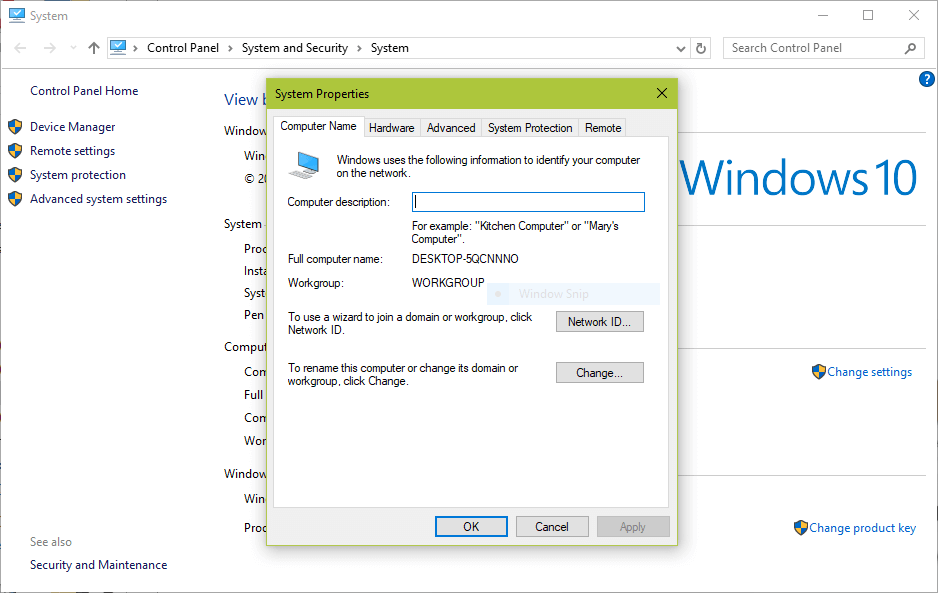
Check Windows WorkGroup
- Alternatively, open the cmd prompt and run the following command, then look for “workstation domain” in the output as shown below.
>net config workstation
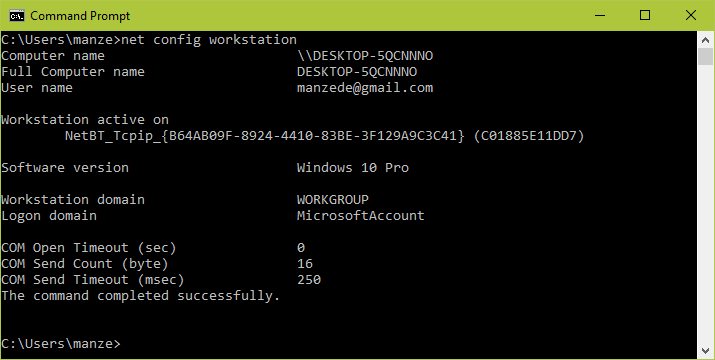
Verify Windows WorkGroup
Configuring Samba4 on CentOS 7
4. The main samba configuration file is /etc/samba/smb.conf, the original file comes with pre-configuration settings which explain various configuration directives to guide you.
But, before configuring samba, I suggest you to take a backup of the default file like this.
# cp /etc/samba/smb.conf /etc/samba/smb.conf.orig
Then, proceed to configure samba for anonymous and secure file sharing services as explained below.
Samba4 Anonymous File Sharing
5. First create the shared directory where the files will be stored on the server and set the appropriate permissions on the directory.
# mkdir -p /srv/samba/anonymous
# chmod -R 0775 /srv/samba/anonymous
# chown -R nobody:nobody /srv/samba/anonymous
Also, you need to change the SELinux security context for the samba shared directory as follows.
# chcon -t samba_share_t /srv/samba/anonymous

Create Samba Shared Directory
6. Next, open the samba configuration file for editing, where you can modify/add the sections below with the corresponding directives.
# vi /etc/samba/smb.conf
[global]
	workgroup = WORKGROUP
	netbios name = centos
	security = user
[Anonymous]
	comment = Anonymous File Server Share
	path = /srv/samba/anonymous
	browsable =yes
	writable = yes
	guest ok = yes
	read only = no
	force user = nobody
7. Now verify current samba settings by running the command below.
# testparm
Load smb config files from /etc/samba/smb.conf
rlimit_max: increasing rlimit_max (1024) to minimum Windows limit (16384)
Processing section "[homes]"
Processing section "[printers]"
Processing section "[print$]"
Processing section "[Anonymous]"
Loaded services file OK.
Server role: ROLE_STANDALONE

Press enter to see a dump of your service definitions

# Global parameters
[global]
	netbios name = centos
	printcap name = cups
	security = USER
	idmap config * : backend = tdb
	cups options = raw
[homes]
	comment = Home Directories
	browseable = No
	inherit acls = Yes
	read only = No
	valid users = %S %D%w%S
[printers]
	comment = All Printers
	path = /var/tmp
	browseable = No
	printable = Yes
	create mask = 0600
[print$]
	comment = Printer Drivers
	path = /var/lib/samba/drivers
	create mask = 0664
	directory mask = 0775
	write list = root
[Anonymous]
 	comment = Anonymous File Server Share
	path = /srv/samba/anonymous
	force user = nobody
	guest ok = Yes
	read only = No
8. Finally, start and enable samba services to start automatically at next boot and also apply the above changes to take effect.
# systemctl enable smb.service
# systemctl enable nmb.service
# systemctl start smb.service
# systemctl start nmb.service
Testing Anonymous Samba File Sharing
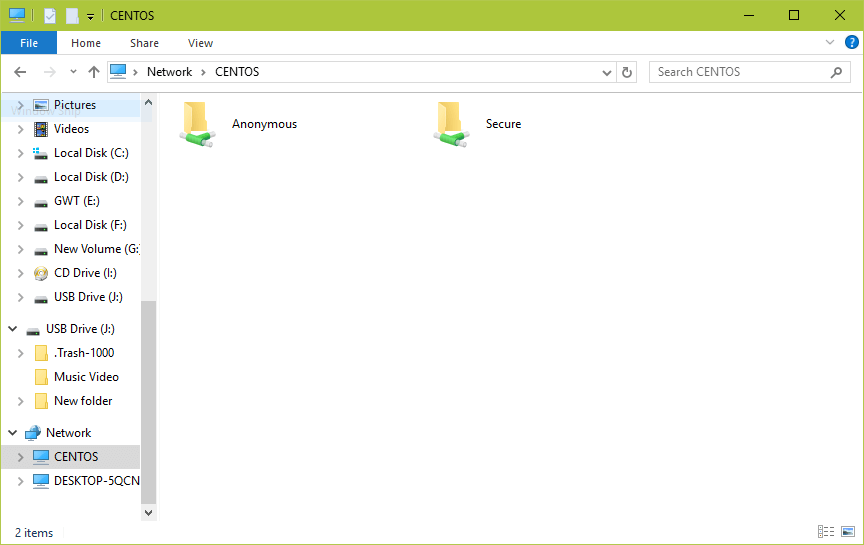
9. Now on the Windows machine, open “Network” from a Windows Explorer window, then click on the CentOS host, or else try to access the server using its IP address (use ifconfig command to get IP address).
e.g. \192.168.43.168.
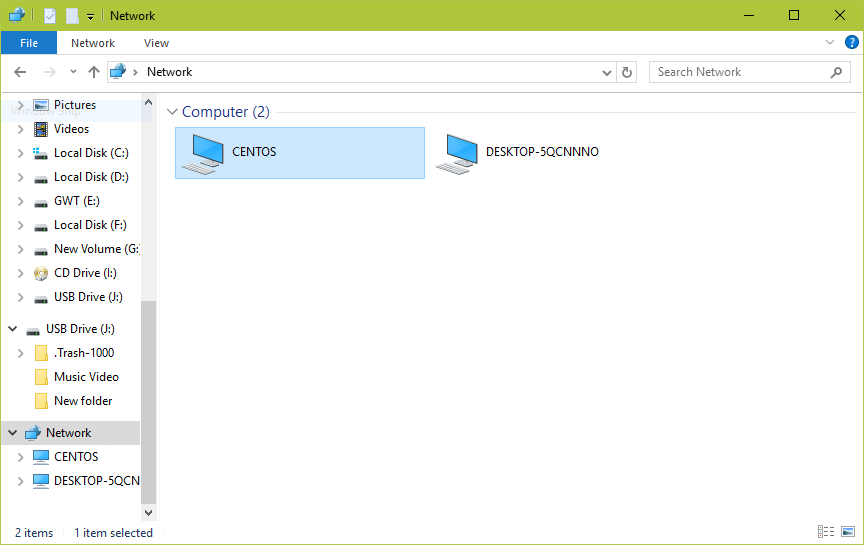
Shared Network Hosts
10. Next, open the Anonymous directory and try to add files in there to share with other users.
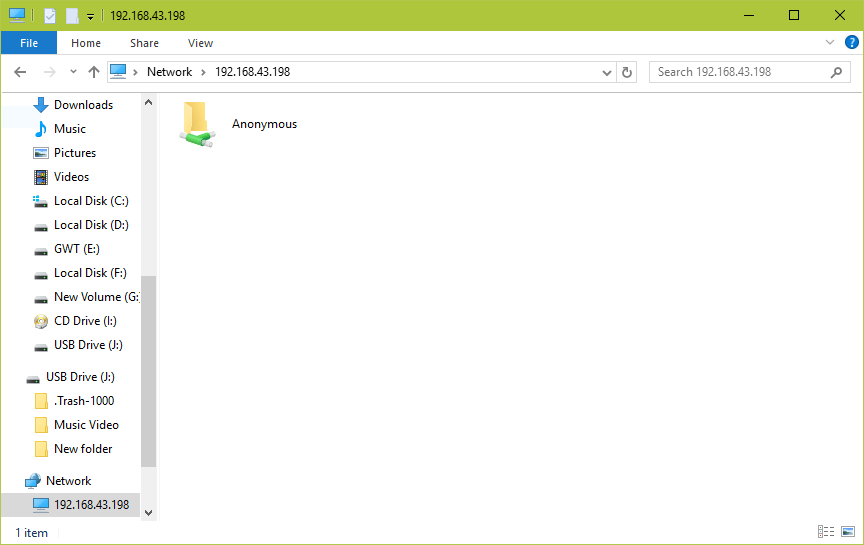
Samba Anonymous Share
Add Files to Samba Anonymous Share
Setup Samba4 Secure File Sharing
11. First start by creating a samba system group, then add users to the group and set a password for each user like so.
# groupadd smbgrp
# usermod tecmint -aG smbgrp
# smbpasswd -a tecmint
12. Then create a secure directory where the shared files will be kept and set the appropriate permissions on the directory with SELinux security context for the samba.
# mkdir -p /srv/samba/secure
# chmod -R 0770 /srv/samba/secure
# chown -R root:smbgrp /srv/samba/secure
# chcon -t samba_share_t /srv/samba/secure
13. Next open the configuration file for editing and modify/add the section below with the corresponding directives.
# vi /etc/samba/smb.conf
[Secure]
	comment = Secure File Server Share
	path =  /srv/samba/secure
	valid users = @smbgrp
	guest ok = no
	writable = yes
	browsable = yes
14. Again, verify the samba configuration settings by running the following command.
$ testparm
Load smb config files from /etc/samba/smb.conf
rlimit_max: increasing rlimit_max (1024) to minimum Windows limit (16384)
Processing section "[homes]"
Processing section "[printers]"
Processing section "[print$]"
Processing section "[Anonymous]"
Loaded services file OK.
Server role: ROLE_STANDALONE

Press enter to see a dump of your service definitions

# Global parameters
[global]
	netbios name = centos
	printcap name = cups
	security = USER
	idmap config * : backend = tdb
	cups options = raw
[homes]
	comment = Home Directories
	browseable = No
	inherit acls = Yes
	read only = No
	valid users = %S %D%w%S
[printers]
	comment = All Printers
	path = /var/tmp
	browseable = No
	printable = Yes
	create mask = 0600
[print$]
	comment = Printer Drivers
	path = /var/lib/samba/drivers
	create mask = 0664
	directory mask = 0775
	write list = root
[Anonymous]
 	comment = Anonymous File Server Share
	path = /srv/samba/anonymous
	force user = nobody
	guest ok = Yes
	read only = No
[Secure]
	comment = Secure File Server Share
	path = /srv/samba/secure
	read only = No
	valid users = @smbgrp
15. Restart Samba services to apply the changes.
# systemctl restart smb.service
# systemctl restart nmb.service
Testing Secure Samba File Sharing
16. Go to Windows machine, open “Network” from a Windows Explorer window, then click on the CentOS host, or else try to access the server using its IP address.
e.g. \192.168.43.168.
You’ll be asked to provide your username and password to login the CentOS server. Once you have entered the credentials, click OK.
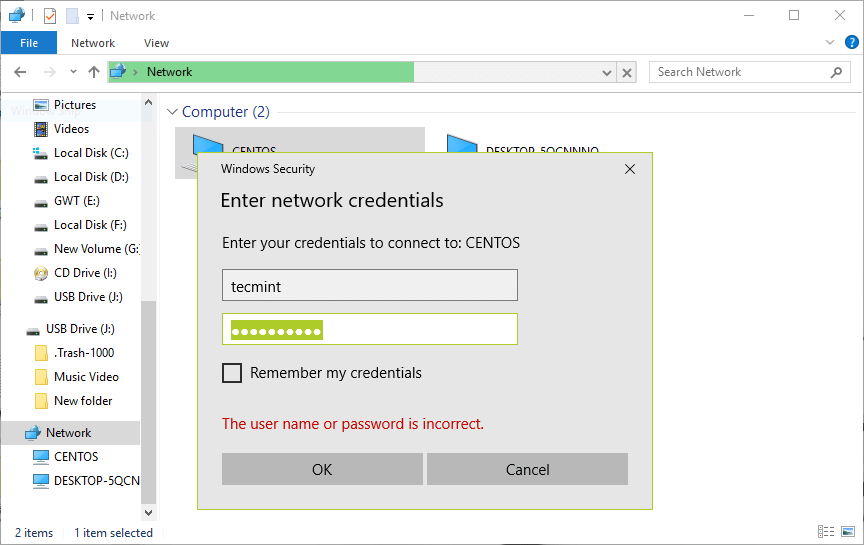
Samba Secure Login
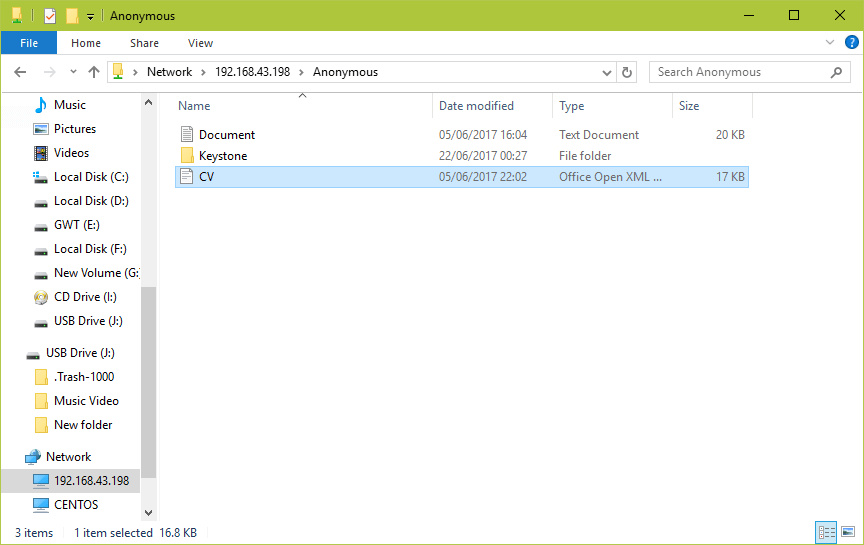
17. Once you successfully login, you will see all the samba shared directories. Now securely share some files with other permitted users on the network by dropping them in Secure directory.
Samba Secure Share Directory
You can also check out these useful articles concerning Samba file sharing on a network.


 浙公网安备 33010602011771号