
走进docker-machine
什么是Docker-Machine?
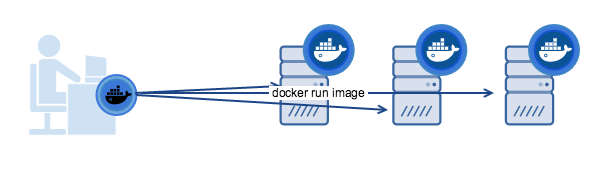
Docker Machine是一种工具,可让您在虚拟主机上安装Docker Engine,并使用docker-machine命令管理主机。简单来说就是给你快速创建一个docker容器环境的,如果你要给100台物理机安装上docker,传统方式就是你一台一台ssh上去安装,但是有了docker-machine你可以快速给100台ecs安装上docker,具体怎么装看完这篇文章你就会明白了!
- 我有一个较旧的桌面系统,想在Mac或Windows上运行Docker
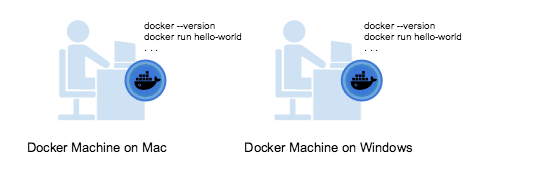
- 我想在远程系统上配置Docker主机
Docker-Machine安装
1.首先咱们要安装Docker(参考之前文章)
2.下载Docker Machine二进制文件并将其解压缩到您的PATH中。
windows
if [[ ! -d "$HOME/bin" ]]; then mkdir -p "$HOME/bin"; fi && \
curl -L https://github.com/docker/machine/releases/download/v0.16.2/docker-machine-Windows-x86_64.exe > "$HOME/bin/docker-machine.exe" && \
chmod +x "$HOME/bin/docker-machine.exe"
mac
curl -L https://github.com/docker/machine/releases/download/v0.16.2/docker-machine-`uname -s`-`uname -m` >/usr/local/bin/docker-machine && \
chmod +x /usr/local/bin/docker-machine
linux
curl -L https://github.com/docker/machine/releases/download/v0.16.2/docker-machine-`uname -s`-`uname -m` >/tmp/docker-machine &&
chmod +x /tmp/docker-machine &&
sudo cp /tmp/docker-machine /usr/local/bin/docker-machine
以下示例我采用得是Centos7安装docker-machine:
 上图显示安装完成,如果出现权限问题请执行chmod +x /usr/local/bin/docker-machine
有兴趣得同学可以安装下TAB键命令补全
#下载脚本(需要FQ)
base=https://raw.githubusercontent.com/docker/machine/v0.16.0
for i in docker-machine-prompt.bash docker-machine-wrapper.bash docker-machine.bash
do
  sudo wget "$base/contrib/completion/bash/${i}" -P /etc/bash_completion.d
done

#配置bash
source /etc/bash_completion.d/docker-machine-prompt.bash
vim ~/.bashrc
#添加
~/.bashrc.
Docker-Machine命令详解
- docker-machine ls:
用于查看当前已经创建的虚拟机
- docker-machine create - --driver virtualbox test
创建一个名为test,驱动为virtualbox的虚拟机-
-- driver指定驱动: windows使用hyperv 、mac使用virtualbox
- docker-machine env test
配置环境变量
- docker-machine ip test
或获取创建test虚拟机的ip信息
- docker-machine stop test / docker-machine start test
停止/开启虚拟机
- docker-machine ssh test
进去虚拟机内部
- docker-machine restart test
重启虚拟机
- docker-machine rm test
删除虚拟机
Docker-Machine实战
在centos7中启动使用docker-machine安装1台虚拟机并且部署服务。
- centos7中安装virtualbox驱动
vim /etc/yum.repos.d/virtualbox.repo
#添加
[virtualbox]
name=Oracle Linux / RHEL / CentOS-$releasever / $basearch - VirtualBox
baseurl=http://download.virtualbox.org/virtualbox/rpm/el/$releasever/$basearch
enabled=1
gpgcheck=1
repo_gpgcheck=1
gpgkey=https://www.virtualbox.org/download/oracle_vbox.asc
#更新yum缓存
yum clean all
yum makecache
#virtualbox
yum install VirtualBox-5.1
- 开始使用docker-machine创建虚拟机
docker-machine create -d virtualbox --virtualbox-memory=4096 \
    --virtualbox-cpu-count=4 --virtualbox-disk-size=40960 \
    --virtualbox-no-vtx-check default
创建完成后输出如下:
[root@docker ~]# docker-machine create -d virtualbox --virtualbox-memory=4096      --virtualbox-cpu-count=4 --virtualbox-disk-size=40960     --virtualbox-no-vtx-check default
Running pre-create checks...
Creating machine...
(default) Copying /root/.docker/machine/cache/boot2docker.iso to /root/.docker/machine/machines/default/boot2docker.iso...
(default) Creating VirtualBox VM...
(default) Creating SSH key...
(default) Starting the VM...
(default) Check network to re-create if needed...
(default) Waiting for an IP...
Waiting for machine to be running, this may take a few minutes...
Detecting operating system of created instance...
Waiting for SSH to be available...
Detecting the provisioner...
Provisioning with boot2docker...
Copying certs to the local machine directory...
Copying certs to the remote machine...
Setting Docker configuration on the remote daemon...
Checking connection to Docker...
Docker is up and running!
To see how to connect your Docker Client to the Docker Engine running on this virtual machine, run: docker-machine env default
查看当前创建的虚拟机
[root@docker ~]# docker-machine ls
NAME      ACTIVE   DRIVER       STATE     URL                         SWARM   DOCKER      ERRORS
default   -        virtualbox   Running   tcp://192.168.99.100:2376           v19.03.12
- 使用虚拟机创建nginx服务 使用虚拟机创建服务有两种方式:
-
进入虚拟机内部使用docker命令
-
使用本地docker客户端,修改docker_host
运行 docker-machine env default指令
[root@docker ~]# docker-machine env default
export DOCKER_TLS_VERIFY="1"
export DOCKER_HOST="tcp://192.168.99.100:2376"
export DOCKER_CERT_PATH="/root/.docker/machine/machines/default"
export DOCKER_MACHINE_NAME="default"
# Run this command to configure your shell:
# eval $(docker-machine env default)
此时运行 eval $(docker-machine env default) 这个脚本会把环境变量临时加载到当前bash中,这时候可以直接操作Docker-Machine创建的虚拟机
启动服务:
docker run -itd -p:8080:80 nginx
验证服务是不是通的:
[root@docker ~]# curl 192.168.99.100:8080
<!DOCTYPE html>
<html>
<head>
<title>Welcome to nginx!</title>
<style>
    body {
        width: 35em;
        margin: 0 auto;
        font-family: Tahoma, Verdana, Arial, sans-serif;
    }
</style>
</head>
<body>
<h1>Welcome to nginx!</h1>
<p>If you see this page, the nginx web server is successfully installed and
working. Further configuration is required.</p>

<p>For online documentation and support please refer to
<a href="http://nginx.org/">nginx.org</a>.<br/>
Commercial support is available at
<a href="http://nginx.com/">nginx.com</a>.</p>

<p><em>Thank you for using nginx.</em></p>
</body>
</html>
[root@docker ~]#
此时可以看到我们创建的虚拟机192.168.99.100内部启动了nginx服务。这时候我们完成了在本地机器上创建一个包含docker环境的虚拟机。
下篇带大家详细介绍Docker-Swarm,敬请期待!
欢迎关注公众号!
公众号回复:
入群,扫码加入我们交流群!


 浙公网安备 33010602011771号