JavaWeb_(视频网站)_二、用户模块3 基本信息维护(上)
用户关注

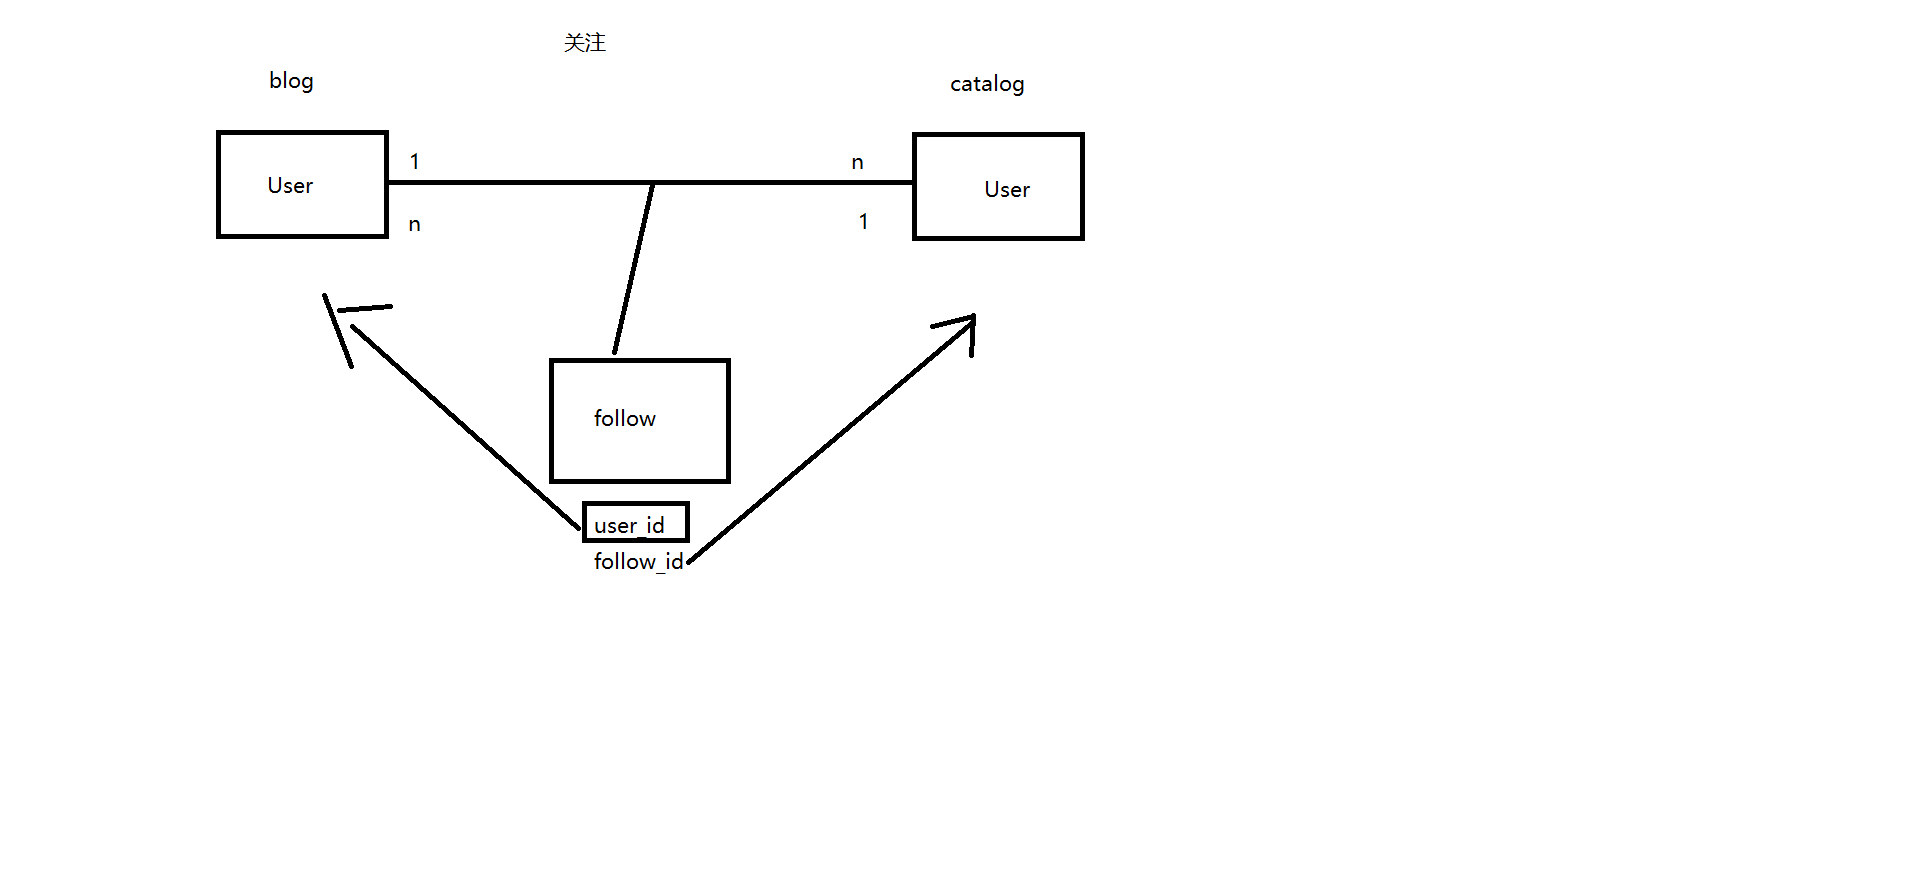
User.java中创建一个Set<>集合的User对象(多对多的关系)
  //该用户关注了哪些用户  在保存的时候,会级联保存所有临时对象
    @ManyToMany(cascade = CascadeType.PERSIST)
    @JoinTable(
            name="user_follow",
            joinColumns = @JoinColumn(name = "user_id"),
            inverseJoinColumns = @JoinColumn(name = "follow_id")
            )
    private Set<User> follows = new HashSet<User>();


package com.Gary.betobe.domain;

import java.util.HashSet;
import java.util.Set;

import javax.persistence.CascadeType;
import javax.persistence.Entity;
import javax.persistence.GeneratedValue;
import javax.persistence.GenerationType;
import javax.persistence.Id;
import javax.persistence.JoinTable;
import javax.persistence.JoinColumn;
import javax.persistence.Lob;
import javax.persistence.ManyToMany;

@Entity
public class User {

    @Id
    @GeneratedValue(strategy = GenerationType.IDENTITY)
    private Long id;

    private String username;
    private String password;
    private String email;

    private String firstName;
    private String lastName;

    private String displayNane;
    //个人首页
    private String webUrl;

    private String phone;
    //个人描述
    @Lob
    //长文本 ->lob对应mysql的数据类型  longtext
    private String description;
    //social Link
    private String qqLink;
    private String weixinLink;

    //封面头像
    private String coverImage;
    //头像
    private String headImage;
    //创建时间
    private String createTime;

    //该用户关注了哪些用户  在保存的时候,会级联保存所有临时对象
    @ManyToMany(cascade = CascadeType.PERSIST)
    @JoinTable(
            name="user_follow",
            joinColumns = @JoinColumn(name = "user_id"),
            inverseJoinColumns = @JoinColumn(name = "follow_id")
            )
    private Set<User> follows = new HashSet<User>();

    //JPA的标准
    protected User()
    {

    }


    public User(Long id, String username, String password, String email, String firstName, String lastName,
            String displayNane, String webUrl, String phone, String description, String qqLink, String weixinLink,
            String coverImage, String headImage, String createTime, Set<User> follows) {
        super();
        this.id = id;
        this.username = username;
        this.password = password;
        this.email = email;
        this.firstName = firstName;
        this.lastName = lastName;
        this.displayNane = displayNane;
        this.webUrl = webUrl;
        this.phone = phone;
        this.description = description;
        this.qqLink = qqLink;
        this.weixinLink = weixinLink;
        this.coverImage = coverImage;
        this.headImage = headImage;
        this.createTime = createTime;
        this.follows = follows;
    }


    public Long getId() {
        return id;
    }
    public void setId(Long id) {
        this.id = id;
    }
    public String getUsername() {
        return username;
    }
    public void setUsername(String username) {
        this.username = username;
    }
    public String getPassword() {
        return password;
    }
    public void setPassword(String password) {
        this.password = password;
    }
    public String getEmail() {
        return email;
    }
    public void setEmail(String email) {
        this.email = email;
    }
    public String getFirstName() {
        return firstName;
    }
    public void setFirstName(String firstName) {
        this.firstName = firstName;
    }
    public String getLastName() {
        return lastName;
    }
    public void setLastName(String lastName) {
        this.lastName = lastName;
    }
    public String getDisplayNane() {
        return displayNane;
    }
    public void setDisplayNane(String displayNane) {
        this.displayNane = displayNane;
    }
    public String getWebUrl() {
        return webUrl;
    }
    public void setWebUrl(String webUrl) {
        this.webUrl = webUrl;
    }
    public String getPhone() {
        return phone;
    }
    public void setPhone(String phone) {
        this.phone = phone;
    }
    public String getDescription() {
        return description;
    }
    public void setDescription(String description) {
        this.description = description;
    }
    public String getQqLink() {
        return qqLink;
    }
    public void setQqLink(String qqLink) {
        this.qqLink = qqLink;
    }
    public String getWeixinLink() {
        return weixinLink;
    }
    public void setWeixinLink(String weixinLink) {
        this.weixinLink = weixinLink;
    }
    public String getCoverImage() {
        return coverImage;
    }
    public void setCoverImage(String coverImage) {
        this.coverImage = coverImage;
    }
    public String getHeadImage() {
        return headImage;
    }
    public void setHeadImage(String headImage) {
        this.headImage = headImage;
    }
    public String getCreateTime() {
        return createTime;
    }
    public void setCreateTime(String createTime) {
        this.createTime = createTime;
    }

    public Set<User> getFollows() {
        return follows;
    }

    public void setFollows(Set<User> follows) {
        this.follows = follows;
    }


}
运行项目,数据库中多出一张user_follow表

UserController.java中实现addFollows请求,传入两个参数,表示谁(id)关注了谁(followId)
  @RequestMapping("/addFollows")
    private String addFollows(String id,String followId)
    {
        User user = userService.findUserById(id);
        User followUser = userService.findUserById(followId);
        //在id的follow集合中添加关系
        user.getFollows().add(followUser);
        //保存关系
        userService.saveUser(user);
        //System.err.println("123123123");
        return "redirect:/index";
    }
测试:登陆网站,模拟用户发送请求,数据库存在id为1的用户和id为10的用户,通过发送www.pinzhi365.com/addFollows?id=1&followId=10请求,让数据库中id为1的用户关注id为10的用户

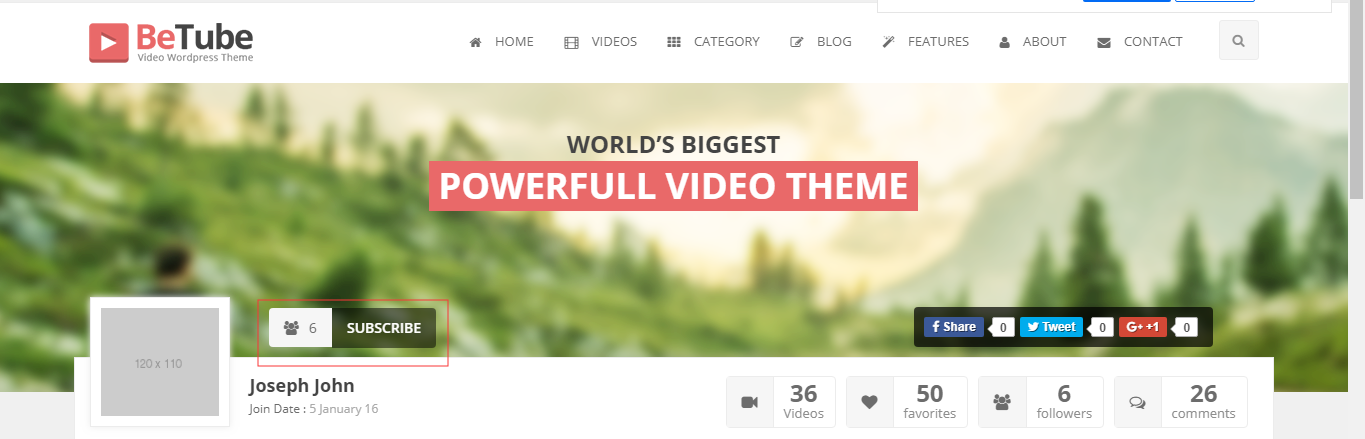
在profile-about-me.html中,编辑点击subscribe按钮触发事件
user-bar.html中
profile-about-me.html中测试点击subscribe按钮触发事件
<script type="text/javascript">
    function followClick()
    {
        layer.msg("我被点击了")
    }
</script>

在user-bar.html中给subscribe的button传递两个参数,一个session.user.id一个user.id
<button th:onclick="|followClick(${session.user.id},${user.id})|">subscribe</button>
UserController.java中完善t添加关注addFollows请求,用户自己不能关注自己,可以关注其他人
    //添加关注
    @RequestMapping("/addFollows")
    @ResponseBody
    private String addFollows(String id,String followId)
    {
        User user = userService.findUserById(id);
        User followUser = userService.findUserById(followId);
        String json = null;

        //自己关注自己
        if(user.getUsername().equals(followUser.getUsername()))
        {
            json = "{\"success\":"+false+"}";
            return json;
        }
        //在id的follow集合中添加关系
        user.getFollows().add(followUser);
        //保存关系
        userService.saveUser(user);
        json = "{\"success\":"+true+"}";
        return json;
    }
给followClick()函数添加参数
//用户关注
function followClick(id,followId)
{
    //layer.msg(followId)
    $.post(
        [[@{~/addFollows}]],
        {"id":id,"followId":followId},
        function(data)
        {
            if(data.success)
            {
                layer.msg("关注成功!!")
            }
            else
            {
                layer.msg("自己不能关注自己哈~")
            }
        },
        "json"
    )
}
完善页面的跳转
UserController.java中处理后台转发页面
//查看User关注视频的ID
    @RequestMapping("findUserVideosById")
    public String findUserVideosById(String id,Model model)
    {

        return "profile-video.html";
    }

    //喜欢视频ID
    @RequestMapping("findUserFavoriteVideosById")
    public String findUserFavoriteVideosById(String id,Model model)
    {

        return "profile-favorite.html";
    }

    //跟随我ID
    @RequestMapping("findUserFollowersById")
    public String findUserFollowersById(String id,Model model)
    {

        return "profile-followers.html";
    }

    //用户评论ID
    @RequestMapping("findUserCommentsById")
    public String findUserCommentsById(String id,Model model)
    {

        return "profile-comments.html";
    }

    //关于我
    @RequestMapping("findUserProfileSettingsById")
    public String findUserProfileSettingsById(String id,Model model)
    {

        return "profile-about-me.html";
    }
profile.html前台完成页面的转发
  <ul class="profile-overview">
    <li class="clearfix"><a class="active" th:href="|findUserAboutMeById?id=${session.user.id}|"><i class="fa fa-user"></i>about me</a></li>
    <li class="clearfix"><a th:href="|findVideosById?id=${session.user.id}|"><i class="fa fa-video-camera"></i>Videos <span class="float-right">36</span></a></li>
    <li class="clearfix"><a th:href="|findFavoriteVideosById?id=${session.user.id}|"><i class="fa fa-heart"></i>Favorite Videos<span class="float-right">50</span></a></li>
    <li class="clearfix"><a th:href="|findFollowersById?id=${session.user.id}|"><i class="fa fa-users"></i>Followers<span class="float-right">6</span></a></li>
    <li class="clearfix"><a th:href="|findCommentsById?id=${session.user.id}|"><i class="fa fa-comments-o"></i>comments<span class="float-right">26</span></a></li>
    <li class="clearfix"><a th:href="|findProfileSettingsById?id=${session.user.id}|"><i class="fa fa-gears"></i>Profile Settings</a></li>
    <li class="clearfix"><a th:href="@{~/signOut}"><i class="fa fa-sign-out"></i>Logout</a></li>
  </ul>
鼠标点击标签后,在Model中加入页面数据,前端使用th:if去加入页面是不是和我们点击的标签一样
  //关于我
  @RequestMapping("findUserProfileSettingsById")
  public String findUserProfileSettingsById(String id,Model model)
  {
    User user = userService.findUserById(id);
    model.addAttribute("user",user);
    model.addAttribute("page","ProfileSettings");
    return "profile-about-me.html";
  }
前端
  <ul class="profile-overview">
    <li class="clearfix"><a th:if="${page} eq 'AboutMe'" class="active" th:href="|/findUserAboutMeById?id=${session.user.id}|"><i class="fa fa-user"></i>about me</a> <a th:if="${page} ne 'AboutMe'" th:href="|/findUserAboutMeById?id=${session.user.id}|"><i class="fa fa-user"></i>about me</a> </li>
    <li class="clearfix"><a th:if="${page} eq 'Videos'" class="active" th:href="|/findUserVideosById?id=${session.user.id}|"><i class="fa fa-video-camera"></i>Videos <span class="float-right">36</span></a><a th:if="${page} ne 'Videos'" th:href="|/findUserVideosById?id=${session.user.id}|"><i class="fa fa-video-camera"></i>Videos <span class="float-right">36</span></a></li>
    <li class="clearfix"><a th:if="${page} eq 'FavoriteVideos'" class="active" th:href="|/findUserFavoriteVideosById?id=${session.user.id}|"><i class="fa fa-heart"></i>Favorite Videos<span class="float-right">50</span></a> <a th:if="${page} ne 'FavoriteVideos'" th:href="|/findUserFavoriteVideosById?id=${session.user.id}|"><i class="fa fa-heart"></i>Favorite Videos<span class="float-right">50</span></a></li>
    <li class="clearfix"><a th:if="${page} eq 'Followers'" class="active" th:href="|/findUserFollowersById?id=${session.user.id}|"><i class="fa fa-users"></i>Followers<span class="float-right">6</span></a><li class="clearfix"><a th:if="${page} ne 'Followers'" th:href="|/findUserFollowersById?id=${session.user.id}|"><i class="fa fa-users"></i>Followers<span class="float-right">6</span></a></li>
    <li class="clearfix"><a th:if="${page} eq 'Comments'" class="active" th:href="|/findUserCommentsById?id=${session.user.id}|"><i class="fa fa-comments-o"></i>comments<span class="float-right">26</span></a><a th:if="${page} ne 'Comments'" th:href="|/findUserCommentsById?id=${session.user.id}|"><i class="fa fa-comments-o"></i>comments<span class="float-right">26</span></a></li>
    <li class="clearfix"><a th:if="${page} eq 'ProfileSettings'" class="active" th:href="|/findUserProfileSettingsById?id=${session.user.id}|"><i class="fa fa-gears"></i>Profile Settings</a><a th:if="${page} ne 'ProfileSettings'"  th:href="|/findUserProfileSettingsById?id=${session.user.id}|"><i class="fa fa-gears"></i>Profile Settings</a></li>
    <li class="clearfix"><a th:href="@{~/signOut}"><i class="fa fa-sign-out"></i>Logout</a></li>
  </ul>
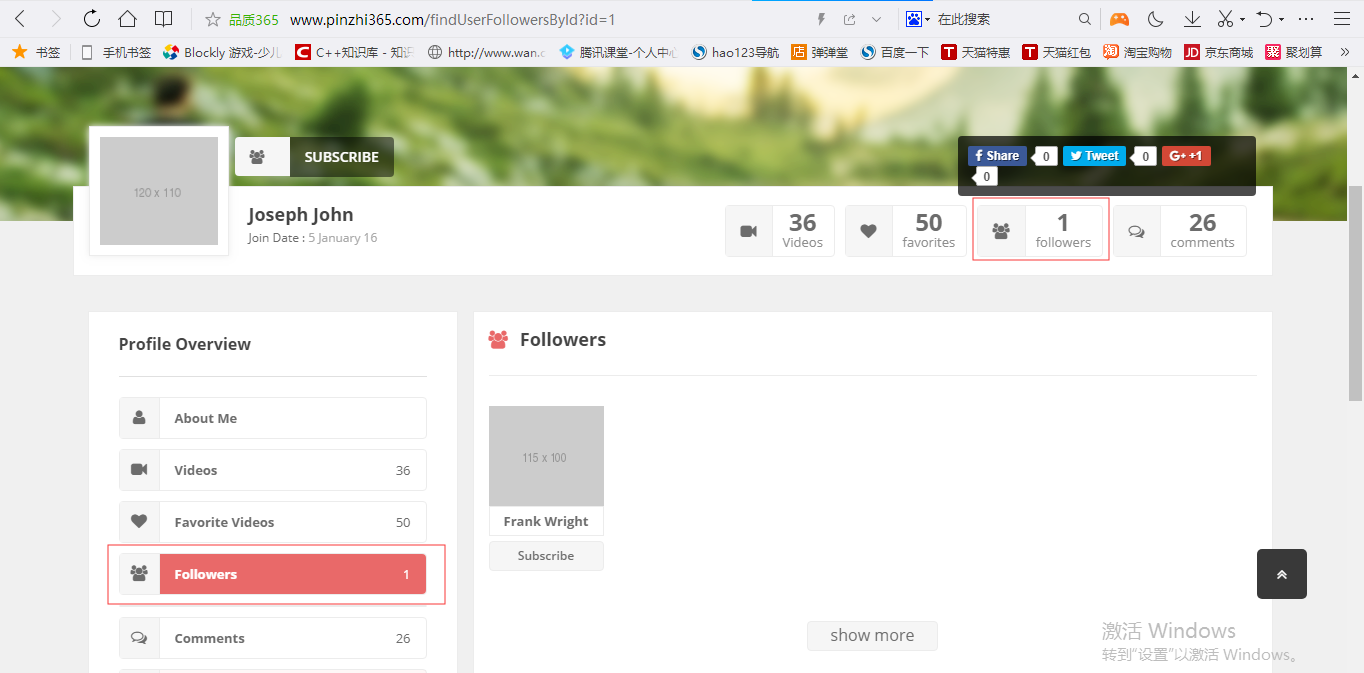
查看所有关注我的用户
所有关注我的用户流程图

在UserController.java的findUserFollowersById()方法中s实现用户被几个人所关注
    //跟随我ID
    @RequestMapping("findUserFollowersById")
    public String findUserFollowersById(String id,Model model)
    {
        User user = userService.findUserById(id);

        //查找当前用户被几个人所关注
        List<User> followersList = userService.findFollowersListById(id);

        model.addAttribute("followersList",followersList);
        model.addAttribute("followersNum",followersList.size());
        model.addAttribute("user",user);
        model.addAttribute("page","Followers");

        return "profile-followers.html";
    }
  @Override
    public List<User> findFollowersListById(String id) {

        //关注了我的所有用户的id
        List<BigInteger> userIdList = userRepository.findFollowersIdListById(new Long(id));
        //最后要给的页面的是User,不是id,所以我们要查询到所有用户
        List<User> userList = new ArrayList<User>();
        for(int i = 0;i<userIdList.size();i++)
        {
            BigInteger longId = userIdList.get(i);
            User user = userRepository.findById(longId.longValue()).get();
            userList.add(user);
        }

        return userList;
    }
在profile-followers.html中遍历出每个粉丝
 <div class="row collapse">
    <div th:each="user:${followersList}" class="large-2 small-6 medium-3 columns">
      <div class="follower">
        <div class="follower-img">
          <img src="http://placehold.it/115x100" alt="followers">
        </div>
      <span>Frank Wright</span>
      <button type="submit" name="follow">Subscribe</button>
  </div>
</div>
头部显示粉丝数量,在user-bar.html中显示出来
<div class="li-text float-left">
  <p class="number-text" th:text="${followersNum}">6</p>
  <span>followers</span>
</div>
在user.bar的SUBSCRIBE左侧显示粉丝数目
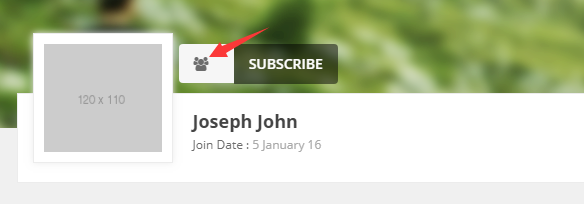
<i class="fa fa-users" th:text="| ${followersNum}|"></i>

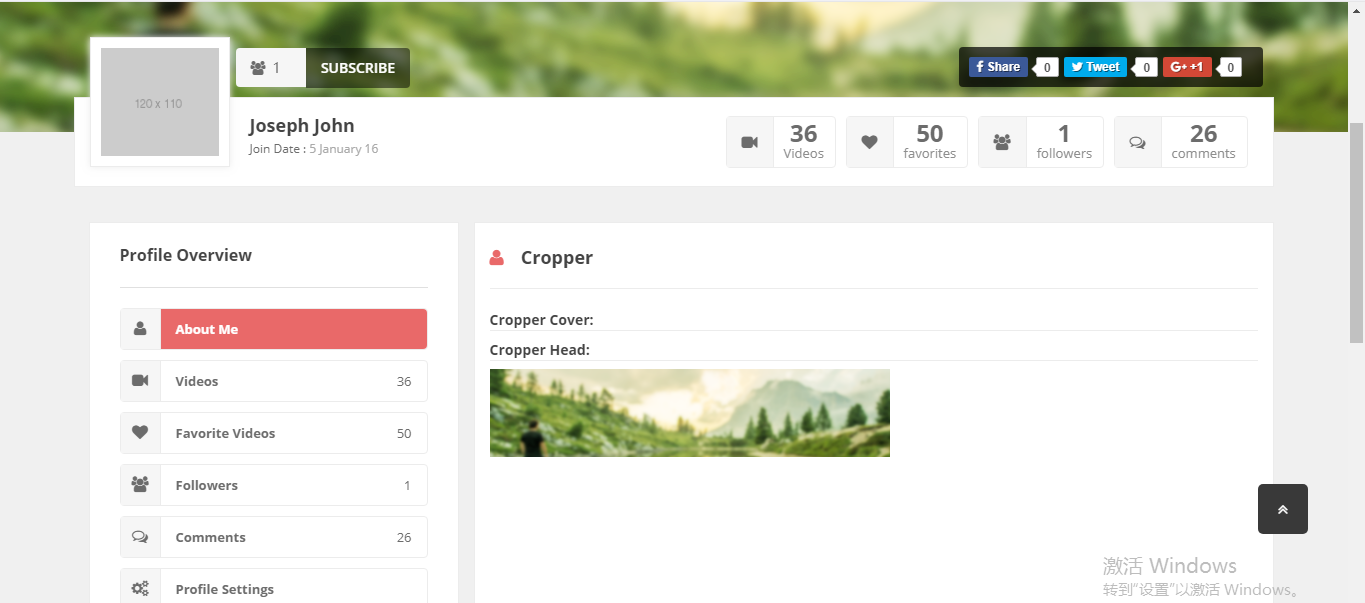
制作用户基本信息维护模块
基本信息维护分图片和非图片
图片——头像、背景
非图片——字段、用户的更新操作
图片使用Cropper插件流程图

引入Cropper页面,并实现跳转到Cropper页面的Controller
    @RequestMapping("/cropper")
    public String cropper(Model model)
    {
        User user = (User) httpSession.getAttribute("user");
        Integer followersNum = userService.findFollowersNumById(user.getId().toString());
        model.addAttribute("followersNum",followersNum);
        model.addAttribute("user",user);
        model.addAttribute("page","AboutMe");
        return "cropper.html";
    }
package com.Gary.betobe.controller;

import javax.servlet.http.HttpSession;

import org.springframework.beans.factory.annotation.Autowired;
import org.springframework.stereotype.Controller;
import org.springframework.ui.Model;
import org.springframework.web.bind.annotation.RequestMapping;

import com.Gary.betobe.domain.User;
import com.Gary.betobe.service.UserService;

@Controller
public class UploadController {

    @Autowired
    private UserService userService;

    @Autowired
    private HttpSession httpSession;

    @RequestMapping("/cropper")
    public String cropper(Model model)
    {
        User user = (User) httpSession.getAttribute("user");
        Integer followersNum = userService.findFollowersNumById(user.getId().toString());
        model.addAttribute("followersNum",followersNum);
        model.addAttribute("user",user);
        model.addAttribute("page","AboutMe");
        return "cropper.html";
    }

}
在Cropper.html中初步使用Cropper进行裁剪图片
<!-- Cropper的地方(位置) -->
<div class="box" style="width: 400px;height: 280px">
  <img id="image" src="../images/user/bg/profile-bg.png">
</div>
    <!-- Cropper -->
    <script type="text/javascript" th:inline="javascript">

        const image = document.getElementById("image");

        var cropper = new Cropper(image,{

            aspectRatio:1920/350,
            viewMode:1,
            preview:".small",
            //关闭双击会改变方式
            toggleDragModeOnDblclick:false

        })

    </script>
图片的替换
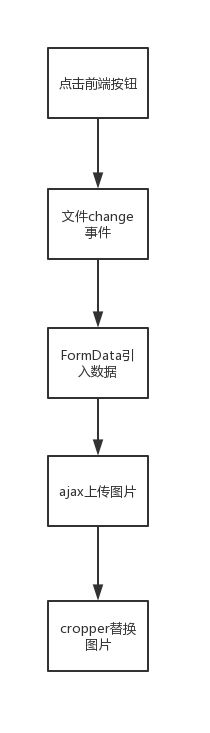
图片文件上传
    @RequestMapping("/cropper")
    public String cropper(@RequestParam("file")MultipartFile file,Model model) throws Exception{
        //保存图片
        //创建文件
        String path = ResourceUtils.getURL("classpath:").getPath()+"static/upload/user/cover";
        //如果路径不存在,创建路径
        File dest = new File(path + "/" + file.getOriginalFilename());
        if(!dest.getParentFile().exists())
        {
            dest.getParentFile().mkdir();
        }
        //保存文件
        file.transferTo(dest);

        User user = (User) httpSession.getAttribute("user");
        Integer followersNum = userService.findFollowersNumById(user.getId().toString());
        model.addAttribute("followersNum",followersNum);
        model.addAttribute("user",user);
        model.addAttribute("page","AboutMe");
        return "cropper.html";
    }
将图片回显到Cropper中
    <script type="text/javascript" th:inline="javascript">
        //获得image
        const image = document.getElementById("image");
        var cropper;
        //初始化Cropper
        window.onload = function()
        {

             cropper = new Cropper(image,{
                //裁剪框比例
                aspectRatio:1920/350,
                viewMode:2,
                //预览
                preview:".small",
                //关闭双击会改变方式
                toggleDragModeOnDblclick:false,
                //拖拽模式
                dragMove:'move',

            })
            cropper.replace("http://www.pinzhi365.com/upload/user/temp/"+[[${fileName}]],false);
        }
cropper.html中将创建一个虚拟表单
    <form th:action="@{~/uploadImage}" method="post">
        <input style="display: none;" type="text" id="base64Input" name="base64">
        <input style="display: none;" type="submit" id="uploadImageSubmit">
    </form>
当用户点击"Save Cover"按钮后,触发uploadImage请求,将用户上传图片请求传输到后端
  <a href="javascript:void(0);" onclick="saveImage()" style="background: #656fc3;border-bottom: 3px solid #424da9" class="button">
    <i class="fa fa-plus"></i>
      Save Cover
  </a>
    <script type="text/javascript" th:inline="javascript">
        //用户关注
        function followClick(id,followId)
        {
            //layer.msg(followId)
            $.post(
                [[@{~/addFollows}]],
                {"id":id,"followId":followId},
                function(data)
                {
                    if(data.success)
                    {
                        layer.msg("关注成功!!")
                    }
                    else
                    {
                        layer.msg("自己不能关注自己哈~")
                    }

                },
                "json"
            )
        }
    </script>
@RequestMapping("/uploadImage")
public String uploadImage(String base64) throws IOException
{
//System.out.println("我被点击到了!!");
User user = (User) httpSession.getAttribute("user");
//System.out.println(base64)可以在表单提交查看后端是否传入该数据
//base64的数据非常大,输出出来的话是空白
//获得classpath在本地的地址
String path = ResourceUtils.getURL("classpath:").getPath()+"static/upload/user/cover";
//保存图片
File file = new File(path);
if(file.exists())
{
file.mkdir();
}
//替换数据
if(base64.indexOf("jpeg")!= -1)
{
base64 = base64.replaceFirst("jpeg", "jpg");
}
//文件名
String upName = UUID.randomUUID().toString()+System.currentTimeMillis()+ "." +base64.substring(11,14);
//将base64中有用的数据保存下来
String iconBase64 = base64.substring(22);
//将base64换位字节数据
byte[] buffer = Base64Coder.decode(iconBase64);
//用FileOutputStream写文件
FileOutputStream out = new FileOutputStream(path + "/" +upName);
out.write(buffer);
out.close();
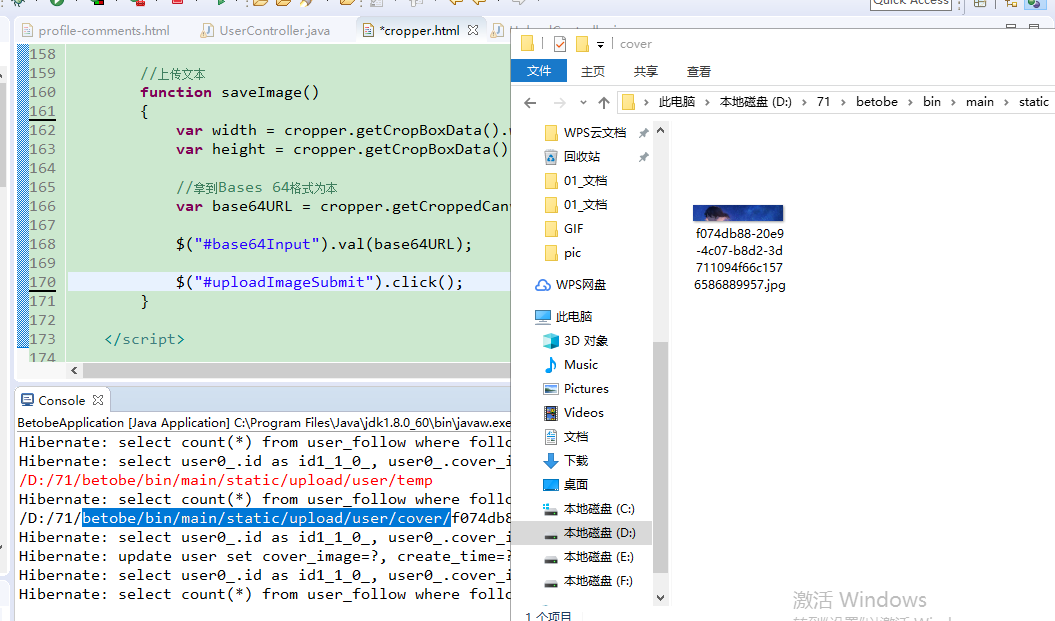
System.out.println(path+"/"+upName);
//保存到数据库
user.setCoverImage("user/cover/"+upName);
userService.saveUser(user);
return "redirect:/findUserProfileSettingsById?id="+user.getId();
}

 浙公网安备 33010602011771号