01-SpringBoot
优缺点
特点
核心功能
搭建环境
application.properties配置文件的配置
application.yml配置文件的配置
集成Mybatis
集成Junit 9.
集成SpringData JPA
一、SpringBoot简介
1.1、Spring优缺点分析
1.1.1、Spring的优点
Spring是Java企业版(Java Enterprise Edition,JEE,也称J2EE)的轻量级代替品。无需开发重量级的Enterprise JavaBean(EJB),Spring为企业级Java开发提供了一种相对简单的方法,通过依赖注入和面向切面编程,用简单 的Java对象(Plain Old Java Object,POJO)实现了EJB的功能。
1.1.2、Spring的缺点分析
虽然Spring的组件代码是轻量级的,但它的配置却是重量级的。一开始,Spring用XML配置,而且是很多XML配 置。Spring 2.5引入了基于注解的组件扫描,这消除了大量针对应用程序自身组件的显式XML配置。Spring 3.0引入 了基于Java的配置,这是一种类型安全的可重构配置方式,可以代替XML。
所有这些配置都代表了开发时的损耗。因为在思考Spring特性配置和解决业务问题之间需要进行思维切换,所以编写配置挤占了编写应用程序逻辑的时间。和所有框架一样,Spring实用,但与此同时它要求的回报也不少。
除此之外,项目的依赖管理也是一件耗时耗力的事情。在环境搭建时,需要分析要导入哪些库的坐标,而且还需要 分析导入与之有依赖关系的其他库的坐标,一旦选错了依赖的版本,随之而来的不兼容问题就会严重阻碍项目的开发进度。
1.2、SpringBoot的概述
1.2.1、SpringBoot解决上述Spring的缺点
SpringBoot对上述Spring的缺点进行的改善和优化,基于约定优于配置的思想,可以让开发人员不必在配置与逻辑业务之间进行思维的切换,全身心的投入到逻辑业务的代码编写中,从而大大提高了开发的效率,一定程度上缩短 了项目周期。
1.2.2、SpringBoot的特点
为基于Spring的开发提供更快的入门体验 开箱即用,没有代码生成,也无需XML配置。同时也可以修改默认值来满足特定的需求 提供了一些大型项目中常见的非功能性特性,如嵌入式服务器、安全、指标,健康检测、外部配置等 SpringBoot不是对Spring功能上的增强,而是提供了一种快速使用Spring的方式
1.2.3、SpringBoot的核心功能
起步依赖起步依赖本质上是一个Maven项目对象模型(Project Object Model,POM),定义了对其他库的传递依赖,这些东西加在一起即支持某项功能。 简单的说,起步依赖就是将具备某种功能的坐标打包到一起,并提供一些默认的功能。 自动配置 Spring Boot的自动配置是一个运行时(更准确地说,是应用程序启动时)的过程,考虑了众多因素,才决定 Spring配置应该用哪个,不该用哪个。该过程是Spring自动完成的。
二、SpringBoot
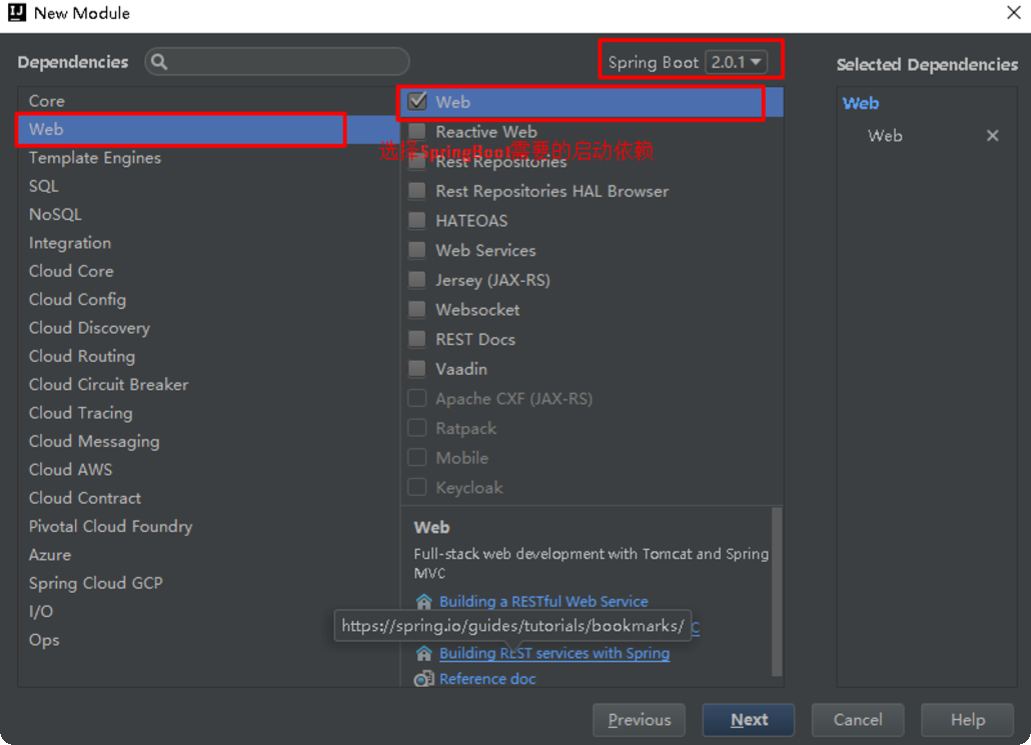
2.1.2、添加SpringBoot的起步依赖
SpringBoot要求,项目要继承SpringBoot的起步依赖 spring-boot-starter-parent
SpringBoot要集成SpringMVC 进行 Controller 的开发,所以项目要导入web的 启动依赖 :spring-boot-starter-web
<parent>
    <groupId>org.springframework.boot</groupId>
    <artifactId>spring-boot-starter-parent</artifactId>
    <version>2.0.1.RELEASE</version>
</parent>
SpringBoot要集成SpringMVC进行Controller的开发,所以项目要导入web的启动依赖
<dependency>
      <groupId>org.springframework.boot</groupId>
      <artifactId>spring-boot-starter-web</artifactId>
</dependency>
2.1.4、编写Controller
在引导类MySpringBootApplication同级包或者子级包中创建QuickStartController
@RestController
public class QueueController {
    @Autowired
    private JmsMessagingTemplate jmsMessagingTemplate;

    @RequestMapping("/send")
    public void send(String text){
        jmsMessagingTemplate.convertAndSend("itcast", text);
    }

    @RequestMapping("/sendmap")
    public void sendMap(){
        Map map=new HashMap<>();
        map.put("mobile", "13900001111");
        map.put("content", "恭喜获得10元代金券");
        jmsMessagingTemplate.convertAndSend("itcast_map",map);
    }
}
2.1.5、测试
执行SpringBoot起步类的主方法,控制台打印日志如下:
通过日志发现,Tomcat started on port(s): 8080 (http) with context path ''
tomcat已经起步,端口监听8080,web应用的虚拟工程名称为空(因为未设置),打开浏览器访问url地址为:http://localhost:8080/quick
2.2、解析
2.2.2、SpringBoot代码解析
@SpringBootApplication:标注SpringBoot的启动类,该注解具备多种功能(后面详细剖析) SpringApplication.run(MySpringBootApplication.class) 代表运行SpringBoot的启动类,参数为SpringBoot 启动类的字节码对象 。
2.2.3、SpringBoot工程热部署
在开发中反复修改类、页面等资源,每次修改后都是需要重新启动才生效,这样每次启动都很麻烦,浪费了大量的时间,可以在修改代码后不重启就能生效,在 pom.xml 中添加如下配置就可以实现这样的功能,称之为热部署:spring-boot-devtools
<!--热部署配置-->
<dependency>
  <groupId>org.springframework.boot</groupId>
  <artifactId>spring-boot-devtools</artifactId>
</dependency>
注意:IDEA进行SpringBoot热部署失败原因
出现如下情况,并不是热部署配置问题,其根本原因是因为Intellij IEDA默认情况下不会自动编译,需要对IDEA进 行自动编译的设置,如下: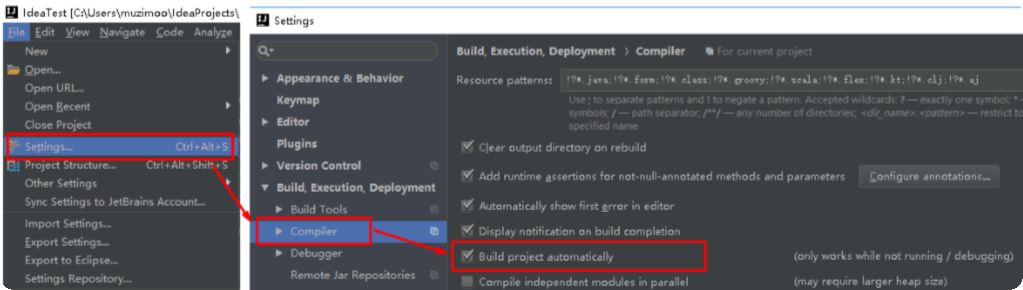
然后 Shift+Ctrl+Alt+/,选择Registry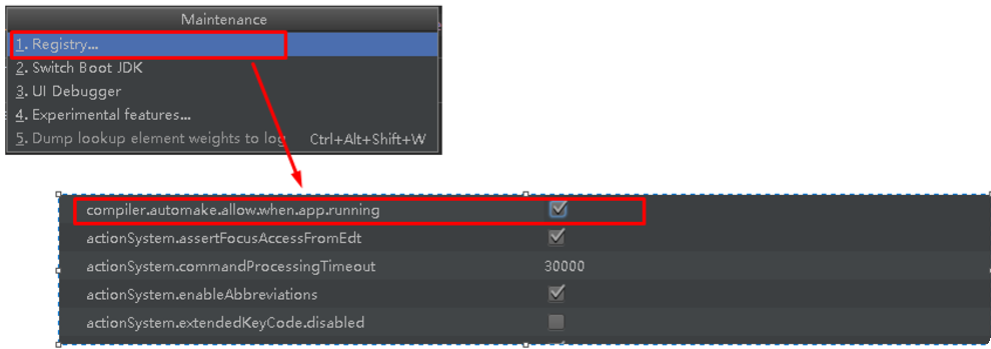
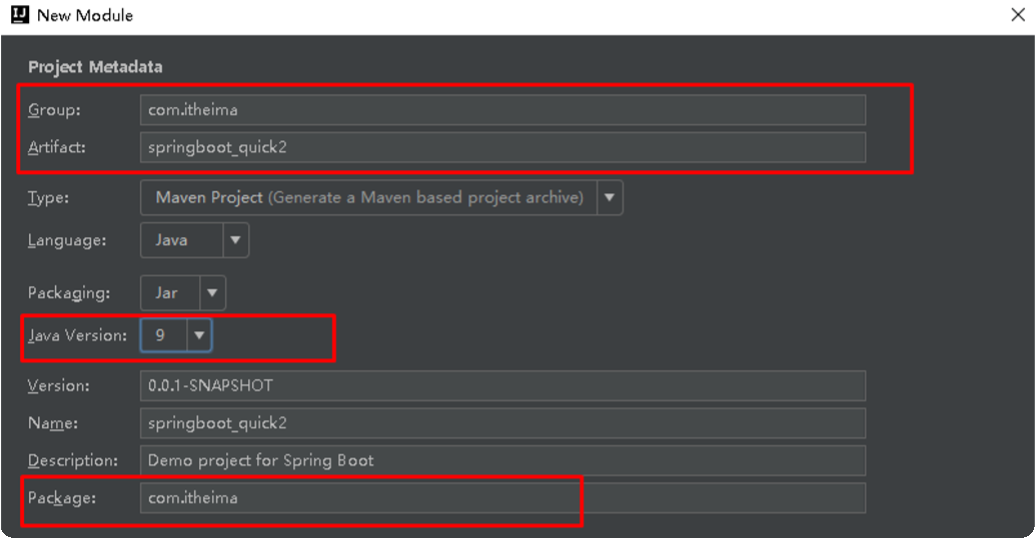
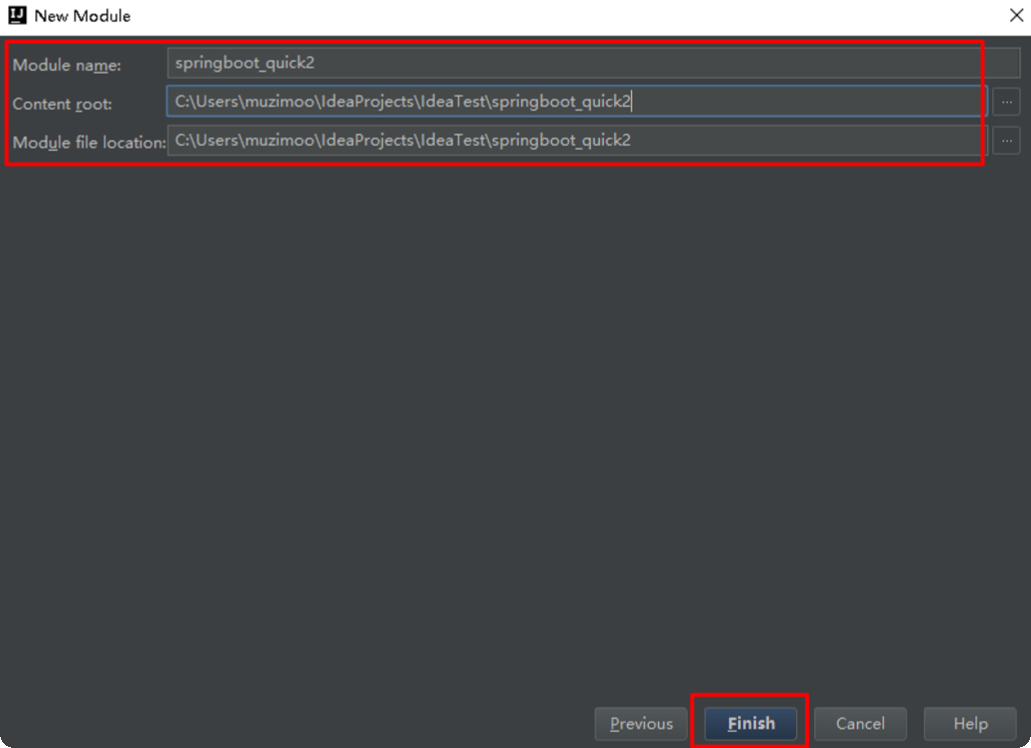
2.2.4、使用idea快速创建SpringBoot项目 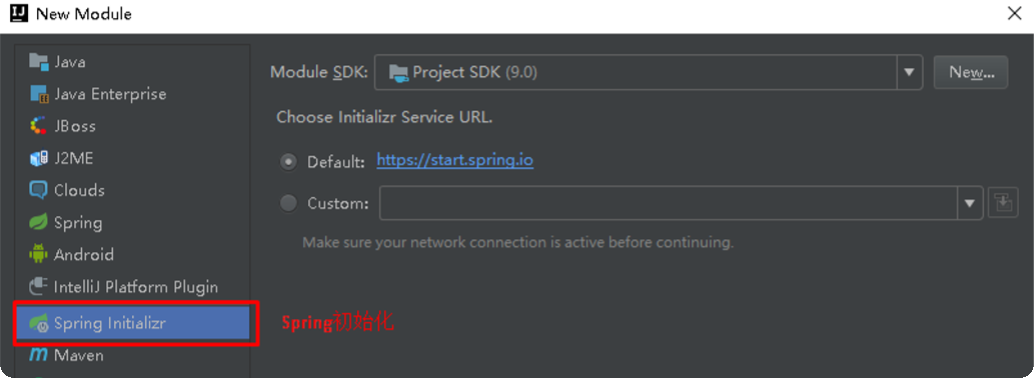
项目目录结构: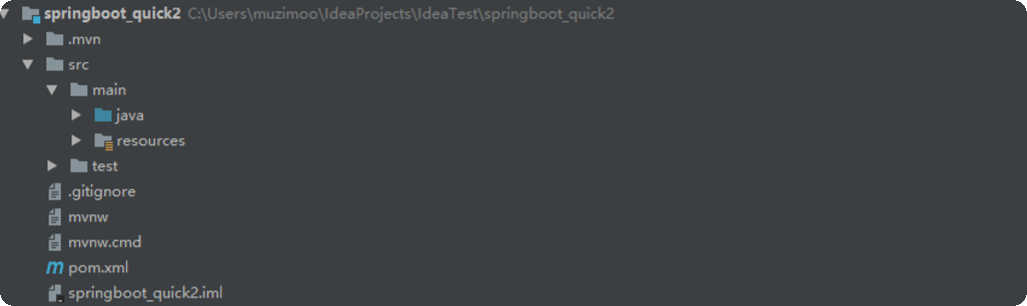
通过 idea 快速创建的 SpringBoot 项目的 pom.xml 中已经导入了我们选择的web的起步依赖的坐标。
可以使用快速入门的方式创建 Controller 进行访问,此不赘述。
三、SpringBoot原理分析
3.1、起步依赖原理分析
3.1.1、分析spring-boot-starter-parent
按住Ctrl点击pom.xml中的spring-boot-starter-parent,跳转到了spring-boot-starter-parent的pom.xml,xml配置如下(只摘抄了部分重点配置):
<parent>
    <groupId>org.springframework.boot</groupId>
    <artifactId>spring-boot-dependencies</artifactId>
    <version>2.1.3.RELEASE</version>
    <relativePath>../../spring-boot-dependencies</relativePath>
</parent>
-->spring-boot-starter-parent 的父工程是 spring-boot-dependencies
spring-boot-starter-dependencies的pom.xml中我们可以发现,一部分坐标的版本、依赖管理、插件管理已经定义好,所以我们的SpringBoot工程继承spring-boot-starter-parent后已经具备版本锁定等配置了。所以起步依赖的作用就是进行依赖的传递。
spring-boot-starter-web的pom.xml中我们可以发现,spring-boot-starter-web就是将web开发要使用的 spring-web、spring-webmvc等坐标进行了“打包”,这样我们的工程只要引入spring-boot-starter-web起步依赖的坐标就可以进行web开发了,同样体现了依赖传递的作用。
3.2、自动配置原理解析
查看启动类MySpringBootApplication上的注解@SpringBootApplication
注解 @SpringBootApplication 的源码


@Target({ElementType.TYPE})
@Retention(RetentionPolicy.RUNTIME)
@Documented
@Inherited
@SpringBootConfiguration
@EnableAutoConfiguration
@ComponentScan(
    excludeFilters = {@Filter(
    type = FilterType.CUSTOM,
    classes = {TypeExcludeFilter.class}
), @Filter(
    type = FilterType.CUSTOM,
    classes = {AutoConfigurationExcludeFilter.class}
)}
)
public @interface SpringBootApplication {
    @AliasFor(
        annotation = EnableAutoConfiguration.class
    )
    Class<?>[] exclude() default {};

    @AliasFor(
        annotation = EnableAutoConfiguration.class
    )
    String[] excludeName() default {};

    @AliasFor(
        annotation = ComponentScan.class,
        attribute = "basePackages"
    )
    String[] scanBasePackages() default {};

    @AliasFor(
        annotation = ComponentScan.class,
        attribute = "basePackageClasses"
    )
    Class<?>[] scanBasePackageClasses() default {};
}
其中,
@SpringBootConguration:等同与@Conguration,既标注该类是Spring的一个配置类
@EnableAutoConguration:SpringBoot自动配置功能开启。
查看注解@EnableAutoConguration
@Target({ElementType.TYPE})
@Retention(RetentionPolicy.RUNTIME)
@Documented
@Inherited
@AutoConfigurationPackage
@Import({AutoConfigurationImportSelector.class})
public @interface EnableAutoConfiguration {
    String ENABLED_OVERRIDE_PROPERTY = "spring.boot.enableautoconfiguration";

    Class<?>[] exclude() default {};

    String[] excludeName() default {};
}
其中,SpringFactoriesLoader.loadFactoryNames 方法的作用就是从META-INF/spring.factories文件中读取指定类对应的类名称列表。
protected AutoConfigurationImportSelector.AutoConfigurationEntry getAutoConfigurationEntry(AutoConfigurationMetadata autoConfigurationMetadata, AnnotationMetadata annotationMetadata) {
    if (!this.isEnabled(annotationMetadata)) {
        return EMPTY_ENTRY;
    } else {
        AnnotationAttributes attributes = this.getAttributes(annotationMetadata);
        List<String> configurations = this.getCandidateConfigurations(annotationMetadata, attributes);
        configurations = this.removeDuplicates(configurations);
        Set<String> exclusions = this.getExclusions(annotationMetadata, attributes);
        this.checkExcludedClasses(configurations, exclusions);
        configurations.removeAll(exclusions);
        configurations = this.filter(configurations, autoConfigurationMetadata);
        this.fireAutoConfigurationImportEvents(configurations, exclusions);
        return new AutoConfigurationImportSelector.AutoConfigurationEntry(configurations, exclusions);
    }
}

protected List<String> getCandidateConfigurations(AnnotationMetadata metadata, AnnotationAttributes attributes) {
    List<String> configurations = SpringFactoriesLoader.loadFactoryNames(this.getSpringFactoriesLoaderFactoryClass(), this.getBeanClassLoader());
    Assert.notEmpty(configurations, "No auto configuration classes found in META-INF/spring.factories. If you are using a custom packaging, make sure that file is correct.");
    return configurations;
}
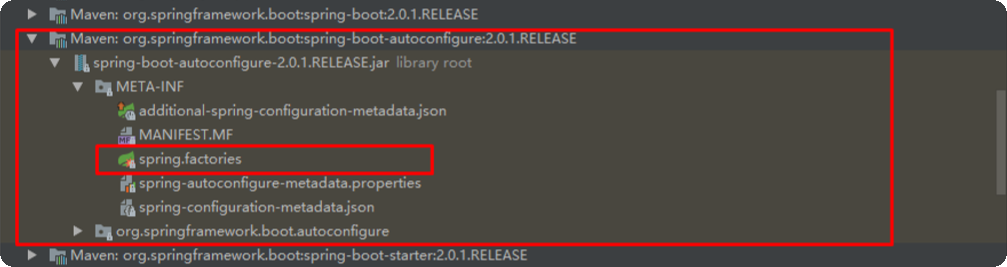
spring.factories 文件中有关自动配置的配置信息如下:
。。。
org.springframework.boot.autoconfigure.web.reactive.function.client.WebClientAutoConfiguration,\
org.springframework.boot.autoconfigure.web.servlet.DispatcherServletAutoConfiguration,\
org.springframework.boot.autoconfigure.web.servlet.ServletWebServerFactoryAutoConfiguration,\
org.springframework.boot.autoconfigure.web.servlet.error.ErrorMvcAutoConfiguration,\
。。。
上面配置文件存在大量的以Conguration为结尾的类名称,这些类就是存有自动配置信息的类,而 SpringApplication在获取这些类名后再加载。
以ServletWebServerFactoryAutoConguration为例分析源码:
@Configuration
@AutoConfigureOrder(-2147483648)
@ConditionalOnClass({ServletRequest.class})
@ConditionalOnWebApplication(
    type = Type.SERVLET
)
@EnableConfigurationProperties({ServerProperties.class})
@Import({ServletWebServerFactoryAutoConfiguration.BeanPostProcessorsRegistrar.class, EmbeddedTomcat.class, EmbeddedJetty.class, EmbeddedUndertow.class})
public class ServletWebServerFactoryAutoConfiguration {
}
其中,
@EnableCongurationProperties(ServerProperties.class) 代表加载ServerProperties服务器配置属性类
进入ServerProperties.class源码如下:
@ConfigurationProperties(
    prefix = "server",
    ignoreUnknownFields = true
)
public class ServerProperties {
    private Integer port;
    private InetAddress address;
    @NestedConfigurationProperty
    private final ErrorProperties error = new ErrorProperties();
    private Boolean useForwardHeaders;
    private String serverHeader;
    private DataSize maxHttpHeaderSize = DataSize.ofKilobytes(8L);
    private Duration connectionTimeout;
    @NestedConfigurationProperty
    private Ssl ssl;
    @NestedConfigurationProperty
    private final Compression compression = new Compression();
    @NestedConfigurationProperty
    private final Http2 http2 = new Http2();
    private final ServerProperties.Servlet servlet = new ServerProperties.Servlet();
    private final ServerProperties.Tomcat tomcat = new ServerProperties.Tomcat();
    private final ServerProperties.Jetty jetty = new ServerProperties.Jetty();
    private final ServerProperties.Undertow undertow = new ServerProperties.Undertow();
    ...
}
其中,
prefix = "server" 表示SpringBoot配置文件中的前缀,SpringBoot会将配置文件中以server开始的属性映射到该类的字段中。映射关系如下: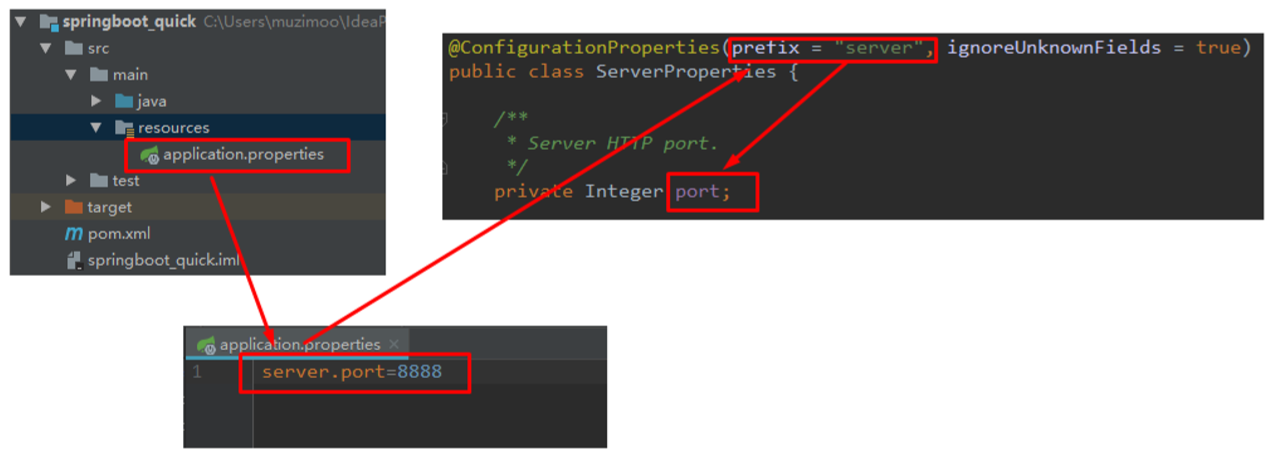
四、SpringBoot的配置文件
4.1、SpringBoot配置文件类型
4.1.1、SpringBoot配置文件类型和作用
SpringBoot是基于约定的,所以很多配置都有默认值,但如果想使用自己的配置替换默认配置的话,就可以使用 application.properties或application.yml(application.yaml)进行配置。
SpringBoot默认会从Resources目录下加载application.properties或application.yml(application.yaml)文件
其中,application.properties文件是键值对类型的文件。除了properties文件外,SpringBoot还可以使用 yml 文件进行配置。
4.1.2、application.yml配置文件
4.1.2.1、yml配置文件简介
YML文件格式是YAML (YAML Aint Markup Language)编写的文件格式,YAML是一种直观的能够被电脑识别的的数 据数据序列化格式,并且容易被人类阅读,容易和脚本语言交互的,可以被支持YAML库的不同的编程语言程序导 入,比如: C/C++, Ruby, Python, Java, Perl, C#, PHP等。YML文件是以数据为核心的,比传统的xml方式更加简 洁。
YML文件的扩展名可以使用 .yml 或者 . yaml。
4.1.2.2、yml配置文件的语法
4.1.2.2.1、配置普通数据
语法: key: value 示例代码:
name: haohao
注意:value之前有一个空格
4.1.2.2.2、配置对象数据
语法:
key:
key1: value1
key2: value2
或者:
key: {key1: value1,key2: value2}
示例代码
person:
    name: haohao
    age: 31
    addr: beijing
#或者
person: {name: haohao,age: 31,addr: beijing}
注意:key1前面的空格个数不限定,在yml语法中,相同缩进代表同一个级别。
4.1.2.2.2、配置Map数据
同上
4.1.2.2.3、配置数组(List、Set)数据
语法:
key:
- value1
- value2
或者:
key: [value1,value2]
示例代码
city:
 - beijing
 - tianjin
 - shanghai
 - chongqing
#或者
city: [beijing,tianjin,shanghai,chongqing]

#集合中的元素是对象形式
student:
 - name:
   zhangsan
   age: 18
   score: 100
 - name: lisi
   age: 28
   score: 88
 - name: wangwu
   age: 38
   score: 90
注意:value1与之间的 - 之间存在一个空格
4.1.3、SpringBoot配置信息的查询
SpringBoot的配置文件,主要的目的就是对配置信息进行修改的,但在配置时的 key 从哪里去查询呢?可查阅SpringBoot的官方文档。
文档URL:
https://docs.spring.io/spring-boot/docs/2.0.1.RELEASE/reference/htmlsingle/#common-applicationproperties
常用的配置摘抄如下:
可以通过配置application.poperties 或者 application.yml 来修改SpringBoot的默认配置
例如:
application.properties文件
server.port=8888
server.servlet.context-path=demo
application.yml文件
server:
    port: 8888
    servlet:
        context-path: /demo
4.2、配置文件与配置类的属性映射方式
4.2.1、使用注解 @Value 映射
我们可以通过@Value注解将配置文件中的值映射到一个Spring管理的Bean的字段上
例如:
application.properties配置如下
person:
    name: zhangsan
    age: 18
或者,application.yml配置如下
#普通数据的配置
name: zhangsan
#对象的配置
#行内对象配置
#person: {name: zhangsan,age: 18,addr: beijing}
#配置数据、集合(普通字符串)
city:
- beijing
- tianjin
- chongqing
- shanghai
#city: [beijing,tianjin,chongqing,shanghai]
#配置数据、集合(对象数据)
student:
- name: tom
age: 18
addr: beijing
- name: lucy
age: 17
addr: tianjin
#student: [{name: tom,age: 18,addr: beijing},{name: lucy,age: 17,addr: tianjin}]
#Map配置
map:
key1: value1
key2: value2
server:
port: 8081
person:
name: tom
age: 19
addr: shanghai
实体Bean代码如下:
@Controller
public class Quick2Controller {

    @Value("${name}")
    private String name;

    @Value("${person.addr}")
    private String addr;

    @RequestMapping("/quick2")
    @ResponseBody
    public String quick2(){
        //获得配置文件的信息

        return "name:"+name+",addr="+addr;
    }

}
4.2.2、使用注解 @CongurationProperties 映射
通过注解@CongurationProperties(prex="配置文件中的key的前缀")可以将配置文件中的配置自动与实体进行映射
@Controller
@ConfigurationProperties(prefix = "person")
public class Quick3Controller {

    private String name;
    private String addr;
    private Integer age;

    @RequestMapping("/quick3")
    @ResponseBody
    public String quick2(){
        //获得配置文件的信息
        return "name:"+name+",addr="+addr+",age="+age;
    }

    public String getName() {
        return name;
    }

    public void setName(String name) {
        this.name = name;
    }

    public String getAddr() {
        return addr;
    }

    public void setAddr(String addr) {
        this.addr = addr;
    }

    public Integer getAge() {
        return age;
    }

    public void setAge(Integer age) {
        this.age = age;
    }
}
注意:使用@CongurationProperties方式可以进行配置文件与实体字段的自动映射,但需要字段必须提供set方法才可以,而使用@Value注解修饰的字段不需要提供set方法。
五、SpringBoot整合其他技术
5.1、整合Mybatis
5.1.1、添加Mybatis的起步依赖
<!--mybatis起步依赖-->
<dependency>
    <groupId>org.mybatis.spring.boot</groupId>
    <artifactId>mybatis-spring-boot-starter</artifactId>
    <version>1.1.1</version>
</dependency>
5.1.2、添加数据库驱动坐标
<!-- MySQL连接驱动 -->
<dependency>
    <groupId>mysql</groupId>
    <artifactId>mysql-connector-java</artifactId>
</dependency>
5.1.3、添加数据库连接信息
在application.properties中添加数据量的连接信息
spring.datasource.driverClassName=com.mysql.jdbc.Driver
spring.datasource.url=jdbc:mysql://127.0.0.1:3306/test?useUnicode=true&characterEncoding=utf8
spring.datasource.username=root
spring.datasource.password=root
5.1.4、创建user表
5.1.5、创建实体Bean
5.1.6、编写Mapper
注意:@Mapper标记该类是一个mybatis的mapper接口,可以被spring boot自动扫描到spring上下文中 5.1.7 配置Mapper映射文件
在src\main\resources\mapper路径下加入UserMapper.xml配置文件"
#spring集成Mybatis环境
#pojo别名扫描包
mybatis.type-aliases-package=com.itheima.domain
#加载Mybatis映射文件
mybatis.mapper-locations=classpath:mapper/*Mapper.xml
5.1.9、编写测试Controller
5.1.10、测试
5.2、SpringBoot整合Junit
5.2.1、添加Junit的起步依赖
<!--SpingBoot集成junit测试的起步依赖-->
<dependency>
    <groupId>org.springframework.boot</groupId>
    <artifactId>spring-boot-starter-test</artifactId>
    <scope>test</scope>
</dependency>
5.2.2、编写测试类
@RunWith(SpringRunner.class)
@SpringBootTest(classes = SpringbootMybatisApplication.class)
public class MybatisTest {
    @Autowired
    private UserMapper userMapper;

    @Test
    public void test(){
        List<User> users = userMapper.queryUserList();
        System.out.println(users);
    }
}
其中,
SpringRunner继承自SpringJUnit4ClassRunner,使用哪一个Spring提供的测试测试引擎都可以
@SpringBootTest 的属性指定的是引导类的字节码对象。
5.3、SpringBoot整合Spring Data JPA
5.3.1、添加Spring Data JPA的起步依赖
<!-- springBoot JPA的起步依赖 -->
<dependency>
    <groupId>org.springframework.boot</groupId>
    <artifactId>spring-boot-starter-data-jpa</artifactId>
</dependency>
5.3.2、添加数据库驱动依赖
<!-- MySQL连接驱动 -->
<dependency>
    <groupId>mysql</groupId>
    <artifactId>mysql-connector-java</artifactId>
</dependency>
5.3.3、在application.properties 中配置数据库和 jpa 的相关属性
#DB Configuration:
spring.datasource.driverClassName=com.mysql.jdbc.Driver
spring.datasource.url=jdbc:mysql://127.0.0.1:3306/test?useUnicode=true&characterEncoding=utf8
spring.datasource.username=root
spring.datasource.password=root

#JPA Configuration:
spring.jpa.database=MySQL
spring.jpa.show-sql=true
spring.jpa.generate-ddl=true
spring.jpa.hibernate.ddl-auto=update
spring.jpa.hibernate.naming_strategy=org.hibernate.cfg.ImprovedNamingStrategy
5.3.4、创建实体配置实体
@Entity
public class User{

    @Id
    @GeneratedValue(strategy = GenerationType.IDENTITY)
    private Long id;
    private String username;
    private String password;
    private String name;

    public Long getId() {
        return id;
    }

    public void setId(Long id) {
        this.id = id;
    }

    public String getUsername() {
        return username;
    }

    public void setUsername(String username) {
        this.username = username;
    }

    public String getPassword() {
        return password;
    }

    public void setPassword(String password) {
        this.password = password;
    }

    public String getName() {
        return name;
    }

    public void setName(String name) {
        this.name = name;
    }

    @Override
    public String toString() {
        return "User{" +
                "id=" + id +
                ", username='" + username + '\'' +
                ", password='" + password + '\'' +
                ", name='" + name + '\'' +
                '}';
    }
}
5.3.5、编写UserRepository
public interface UserRepository extends JpaRepository<User,Long>{
    public List<User> findAll();
}
5.3.6、编写测试类
@RunWith(SpringRunner.class)
@SpringBootTest(classes = SpringbootJpaApplication.class)
public class JpaTest {
    @Autowired
    private UserRepository userRepository;

    @Test
    public void test(){
        List<User> all = userRepository.findAll();
        System.out.println(all);

    }
}
注意:如果是jdk9,执行报错如下:
ClassNotFoundException:javax.xml.bind
原因:jdk缺少相应的jar 解决方案:手动导入对应的maven坐标,如下:
<!--jdk9需要导入如下坐标-->
<dependency>
    <groupId>javax.xml.bind</groupId>
    <artifactId>jaxb-api</artifactId>
    <version>2.3.0</version>
</dependency>
5.4、SpringBoot整合Redis
5.4.1、添加redis的起步依赖
<!-- 配置使用redis启动器 -->
<dependency>
    <groupId>org.springframework.boot</groupId>
    <artifactId>spring-boot-starter-data-redis</artifactId>
</dependency>
5.4.2、配置redis的连接信息
#Redis
spring.redis.host=127.0.0.1
spring.redis.port=6379
5.4.3、注入RedisTemplate测试redis操作
@RunWith(SpringRunner.class)
@SpringBootTest(classes = SpringbootJpaApplication.class)
public class RedisTest {
    @Autowired
    private RedisTemplate<String,String> redisTemplate;

    @Autowired
    private UserRepository userRepository;

    @Test
    public void test() throws JsonProcessingException {
        //1、从redis中获得数据 数据的形式json字符串
        String userListJson = redisTemplate.boundValueOps("user.findAll").get();
        //2、判断redis中是否存在数据
        if(null==userListJson){
            //3、不存在数据 从数据库查询
            List<User> all = userRepository.findAll();
            //4、将查询出的数据存储到redis缓存中
            //向将list集合转换成json格式的字符串  使用jackson进行转换
            ObjectMapper objectMapper = new ObjectMapper();
            userListJson = objectMapper.writeValueAsString(all);
            redisTemplate.boundValueOps("user.findAll").set(userListJson);

            System.out.println("=======从数据库中获得user的数据======");

        }else{
            System.out.println("=======从redis缓存中获得user的数据======");
        }
        //4、将数据在控制台打印
        System.out.println(userListJson);
    }
}


 浙公网安备 33010602011771号