
安卓-PC-Arduino3方通信实现
请仔细理解相关参数,如端口设置、IP设置、COM口设置......等等.....不要盲目COPY.....这涉及手机、电脑和一个单片机,其中一台电脑作为服务器并与单片机相连,负责通过网络与客户端通信(socket)和通过数据线与单片机通过COM口通信(我实验时用的是COM9,其他电脑可能不同需要调整:具体在设备管理器中查看)。
1、Arduino端搭建实现:(这里默认大家都会该系列单片机的代码烧写)


//////////////////////////////////////////////////////////
//Arduino 1.0.x-----Arduino Uno----COM9
//使用3-10号引脚连接8个LED
//////////////////////////////////////////////////////////
int incomingByte = 0;   //输入的数据存储变量
int count=1;
void setup() {
    Serial.begin(9600);// opens serial port, sets data rate to 9600 bps
    for(int i=3;i<=10;i++)//打开3-10号引脚
        pinMode(i,OUTPUT);
}

void loop() {
    while(count){
        Serial.println("please input 0 1 2 3 4 5 6 7 8 9 a");
        count=0;
    }//第一次操作说明,count为了第一次限制
    if (Serial.available() > 0){
        incomingByte = Serial.read();//读取
        Serial.println(incomingByte, DEC);//写入
    }//从COM口读取数据

    switch (incomingByte)//数据处理并对引脚进行调控
    {
    case 48://输入0时将3-10号引脚设为高电位,使所有的灯灭
        for(int i=3;i<=10;i++){
            digitalWrite(i,HIGH);
        }break;
    case 49://输入1从3-10号引脚电位依次设低电位维持0.5s,然后设为高电位,实现流水灯效果
        for(int i=3;i<=10;i++){
            digitalWrite(i,LOW);
            delay(500);
            digitalWrite(i,HIGH);
        }break;
    case 50://输入2流水灯,和输入1时方向相反
        for(int i=10;i>=3;i--){
            digitalWrite(i,LOW);
            delay(500);
            digitalWrite(i,HIGH);
        }break;
    case 51: digitalWrite(3,LOW);break;//输入3,将3号电位调低,只让3号引脚的灯亮
    case 52: digitalWrite(4,LOW);break; //.....
    case 53: digitalWrite(5,LOW);break; //.....
    case 54: digitalWrite(6,LOW);break; //.....
    case 55: digitalWrite(7,LOW);break; //.....
    case 56: digitalWrite(8,LOW);break; //.....
    case 57: digitalWrite(9,LOW);break; //.....
    case 97: digitalWrite(10,LOW);break;//.....
    default:
        for(int i=3;i<=10;i++){
            digitalWrite(i,HIGH);
        }break;//将所电位调高关闭所有灯
    }
}
2、服务器代码:
package serial;

public class SerialBuffer{
    private String Content = "";
    private String CurrentMsg, TempContent;
    private boolean available = false;
    private int LengthNeeded = 1;

    public synchronized String GetMsg(int Length){
        LengthNeeded = Length;
        notifyAll();
        if (LengthNeeded > Content.length()){
            available = false;
            while (available == false){
                try{
                    wait();
                } catch (InterruptedException e) {}
            }
        }
        CurrentMsg = Content.substring(0, LengthNeeded);
        TempContent = Content.substring(LengthNeeded);
        Content = TempContent;
        LengthNeeded = 1;
        notifyAll();
        return CurrentMsg;
    }//本函数从串口(缓冲区)中读取指定长度的一个字符串。
     //参数Length指定所返回字符串的长度。

    public synchronized void PutChar(int c){
        Character d = new Character((char) c);
        Content = Content.concat(d.toString());
        if (LengthNeeded < Content.length()){
            available = true;
        }
        notifyAll();
    }
}
//SerialBuffer.java (用来保存从串口所接收数据的缓冲区)
//在往缓冲区写入数据或者是从缓冲区读取数据的时候,必须保证数据的同步,
//因此GetMsg和PutChar函数均被声明为synchronized并在具体实现中采取措施实现的数据的同步。

A\SerialBuffer
package serial;
import java.io.*;

public class ReadSerial extends Thread
{
    private SerialBuffer ComBuffer;
    private InputStream ComPort;

    public ReadSerial(SerialBuffer SB, InputStream Port){
        ComBuffer = SB;
        ComPort = Port;
    }//本函数构造一个ReadSerial进程,
     //参数SB指定存放传入数据的缓冲区,
     //参数Port指定从串口所接收的数据流
    public void run(){
        int c;
        try{
            while (true){
                c = ComPort.read();
                ComBuffer.PutChar(c);
            }
        } catch (IOException e) {}
    }
}
//ReadSerial.java (从串口读取数据的程序)
//ReadSerial是一个进程,它不断的从指定的串口读取
//数据并将其存放到缓冲区中

B\ReadSerial
package serial;
import java.io.*;
import java.util.*;
import gnu.io.*;

public class SerialBean
{
    static String PortName;
    CommPortIdentifier portId;
    SerialPort serialPort;
    static OutputStream out;
    static InputStream in;
    SerialBuffer SB;
    ReadSerial   RT;

    public SerialBean(int PortID){
        PortName = "COM" + PortID;
    }// 本函数构造一个指向特定串口的SerialBean
    //该串口由参数PortID所指定。PortID = 1 表示COM1

    public int Initialize(){
        int InitSuccess = 1;
        int InitFail    = -1;
          try{
              portId = CommPortIdentifier.getPortIdentifier(PortName);
              try{
                  serialPort = (SerialPort)portId.open("Serial_Communication", 2000);
              } catch (PortInUseException e){
                  return InitFail;
              }//打开一个串口

              try{
                  in = serialPort.getInputStream();
                  out = serialPort.getOutputStream();
              } catch (IOException e){
                  return InitFail;
              }//读写流实例化

              try{
                   serialPort.setSerialPortParams(9600,
                              SerialPort.DATABITS_8,
                              SerialPort.STOPBITS_1,
                              SerialPort.PARITY_NONE);
              } catch (UnsupportedCommOperationException e){
                  return InitFail;
              }//设置串行端口通讯参数

          } catch (NoSuchPortException e){
              return InitFail;
          }

          SB = new SerialBuffer();
          RT = new ReadSerial(SB, in);
          RT.start();
          // return success information
          return InitSuccess;
    }//本函数初始化所指定的串口并返回初始化结果。如果初始化成功返回1,否则返回-1。
    //初始化的结果是该串口被SerialBean独占性使用,其参数被设置为9600, N, 8, 1。
    //如果串口被成功初始化,则打开一个进程读取从串口传入的数据并将其保存在缓冲区中。

    public String ReadPort(int Length){
        String Msg;
        Msg = SB.GetMsg(Length);
        if(Msg==null)Msg="ssdfsdf";
        return Msg;
    }//本函数从串口(缓冲区)中读取指定长度的一个字符串。参数Length指定所返回字符串的长度

    public void WritePort(String Msg){
        int c;
        try{
            for (int i = 0; i < Msg.length(); i++)
                out.write(Msg.charAt(i));
        } catch (IOException e) {}
    }//本函数向串口发送一个字符串。参数Msg是需要发送的字符串

    public void ClosePort(){
        RT.stop();
        serialPort.close();
    }//本函数停止串口检测进程并关闭串口
}
//SerialBean是本类库与其他应用程序的接口。
//该类库中定义了SerialBean的构造方法以及初始化串口
//从串口读取数据,往串口写入数据以及关闭串口的函数

C\ SerialBean
分别把这3个文件放在D盘中然后分别编译:如下(一定要注意-d后面有一个空格+一个点+一个空格).
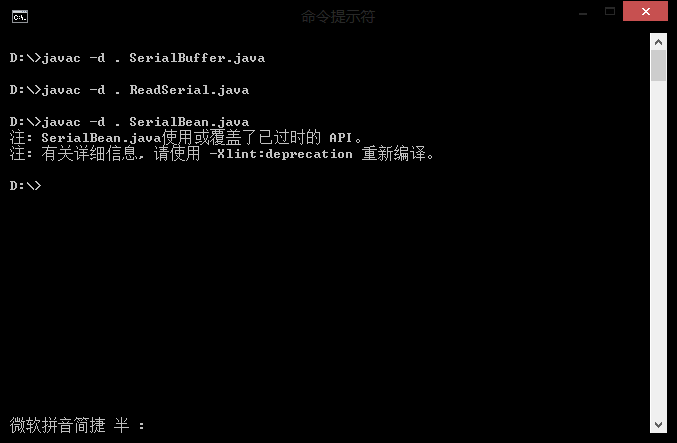
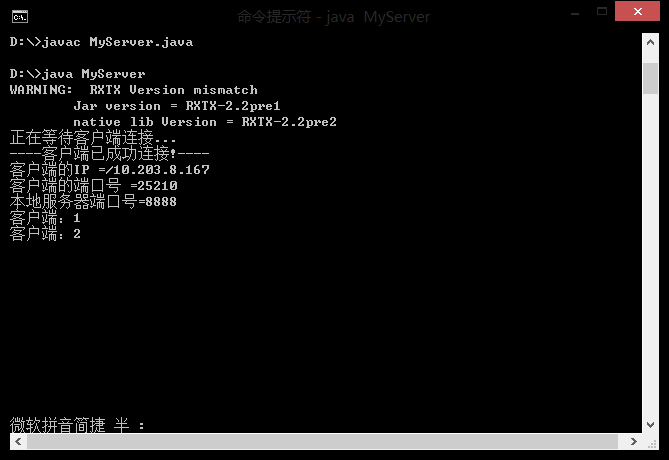
三个java文件编译好之后,你将在D盘看到一个serial文件夹,里面有相应的3个class文件。然后把原来的java文件删除或者移到别的地方(非常重要,不然会在编译服务器和客户端时报错)。然后把服务器代码放到D:盘编译如下:
import java.io.DataInputStream;
import java.io.DataOutputStream;
import java.io.IOException;
import java.net.ServerSocket;
import java.net.Socket;
import serial.*;
import serial.ReadSerial;

public class MyServer implements Runnable{
    public int num=0;
    //服务器连接
    public static ServerSocket serverSocket;
    //连接
    public static Socket socket;
    //端口
    public static final int PORT = 8888;
    public void run() {
    SerialBean SB = new SerialBean(9);//硬件通信部分,构造一个COM9通信口
    SB.Initialize();//初始化该通信端

        DataInputStream dis = null;
        DataOutputStream dos = null;
        try {
            serverSocket = new ServerSocket(PORT);
            System.out.println("正在等待客户端连接...");
            //这里处于等待状态,如果没有客户端连接,程序不会向下执行
            while(true){
                socket = serverSocket.accept();
                dis = new DataInputStream(socket.getInputStream());
                dos = new DataOutputStream(socket.getOutputStream());
                if((num++)==0){
                    System.out.println("----客户端已成功连接!----");
                    //得到客户端的IP
                    System.out.println("客户端的IP =" + socket.getInetAddress());
                    //得到客户端的端口号
                    System.out.println("客户端的端口号 =" + socket.getPort());
                    //得到本地端口号
                    System.out.println("本地服务器端口号=" + socket.getLocalPort());
                }else{
                    //读取数据
                    String clientStr = dis.readUTF();
                    if(clientStr.equals("close"))break;
                    //写出数据
                    dos.writeUTF(clientStr);
                    System.out.println("客户端:" + clientStr);
                    SB.WritePort(clientStr);//将从客户端独到的信息读到COM端口中
                }
            }
            SB.ClosePort();//关闭通信端口
        } catch (IOException e) {
            // TODO Auto-generated catch block
            e.printStackTrace();
        } finally {//我们把流的关闭写在finally里,即使读写出现问题,我们也能正常的关闭流!
            try {
                if (dis != null)
                    dis.close();
                if (dos != null)
                    dos.close();
            } catch (IOException e) {
                // TODO Auto-generated catch block
                e.printStackTrace();
            }
        }
    }
    public static void main(String[] args){
        Thread desktopServerThread = new Thread(new MyServer());
        desktopServerThread.start();
    }
}

3、客户端(安卓APP)代码:
<?xml version="1.0" encoding="utf-8"?>
<manifest xmlns:android="http://schemas.android.com/apk/res/android"
    package="com.himi" android:versionCode="1" android:versionName="1.0">
    <application android:icon="@drawable/icon" android:label="@string/app_name">
        <activity android:name=".MainActivity" android:label="@string/app_name">
            <intent-filter>
                <action android:name="android.intent.action.MAIN" />
                <category android:name="android.intent.category.LAUNCHER" />
            </intent-filter>
        </activity>
    </application>
    <uses-sdk android:minSdkVersion="4" />
    <uses-permission android:name="android.permission.INTERNET" />
</manifest>
<?xml version="1.0" encoding="utf-8"?>
<resources>
    <string name="hello">这里输入文字发给服务器</string>
    <string name="app_name">SocketConnect</string>
    <string name="send">发送</string>
    <string name="get">这里显示服务器发来的信息!</string>
</resources>
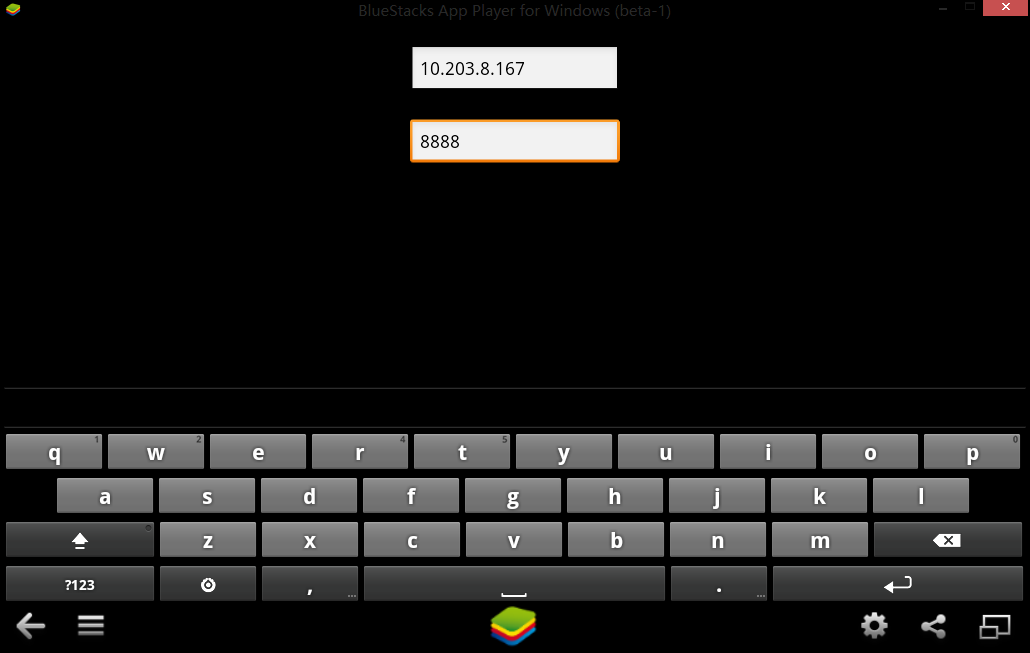
<?xml version="1.0" encoding="utf-8"?>
<RelativeLayout xmlns:android="http://schemas.android.com/apk/res/android"
    android:layout_width="fill_parent"
    android:layout_height="fill_parent" >

    <Button
        android:id="@+id/BTN"
        android:layout_width="fill_parent"
        android:layout_height="wrap_content"
        android:layout_alignParentBottom="true"
        android:layout_alignParentLeft="true"
        android:text="链接" />

    <EditText
        android:id="@+id/ET1"
        android:layout_width="wrap_content"
        android:layout_height="wrap_content"
        android:layout_alignLeft="@+id/ET2"
        android:layout_alignParentTop="true"
        android:layout_marginTop="20dp"
        android:ems="10"
        android:hint="IP" />

    <EditText
        android:id="@+id/ET2"
        android:layout_width="wrap_content"
        android:layout_height="wrap_content"
        android:layout_below="@+id/ET1"
        android:layout_centerHorizontal="true"
        android:layout_marginTop="25dp"
        android:ems="10"
        android:hint="PORT" />

</RelativeLayout>
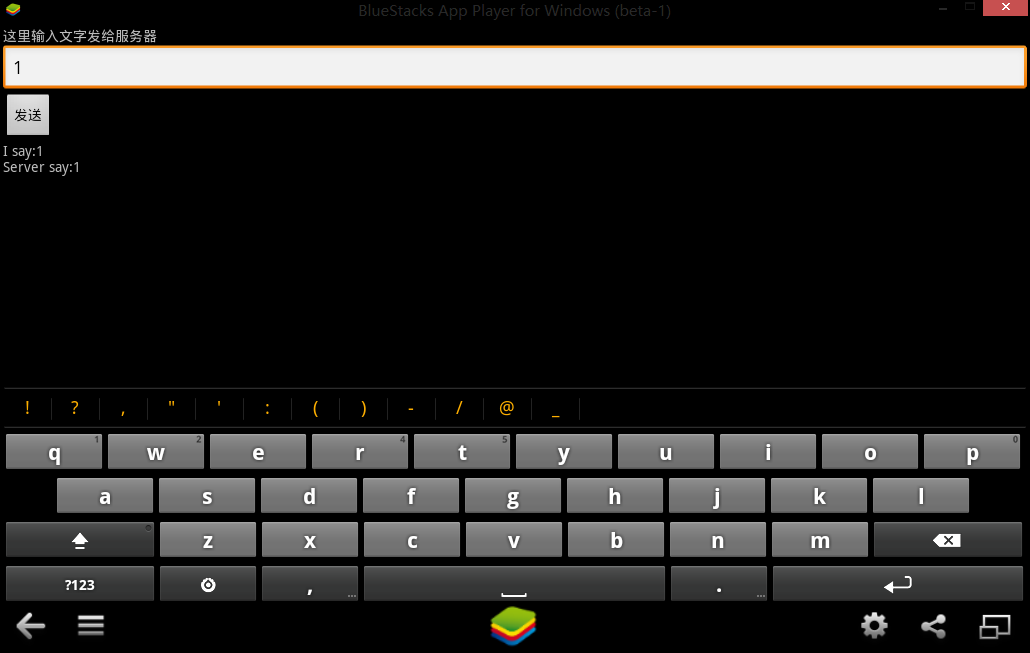
<?xml version="1.0" encoding="utf-8"?>
<LinearLayout xmlns:android="http://schemas.android.com/apk/res/android"
    android:orientation="vertical" android:layout_width="fill_parent"
    android:layout_height="fill_parent">
    <TextView android:layout_width="fill_parent"
        android:layout_height="wrap_content" android:text="@string/hello" />
    <EditText android:id="@+id/edit" android:layout_width="fill_parent"
        android:layout_height="wrap_content" />
    <Button android:id="@+id/Btn_commit" android:layout_width="wrap_content"
        android:layout_height="wrap_content" android:text="@string/send" />
    <TextView android:layout_width="fill_parent" android:id="@+id/tv"
        android:layout_height="wrap_content" android:text="@string/get" />
</LinearLayout>
package com.himi;

import java.io.DataInputStream;
import java.io.DataOutputStream;
import java.io.IOException;
import java.net.Socket;

import android.app.Activity;
import android.os.Bundle;
import android.util.Log;
import android.view.View;
import android.view.Window;
import android.view.WindowManager;
import android.view.View.OnClickListener;
import android.widget.Button;
import android.widget.EditText;
import android.widget.TextView;

public class MainActivity extends Activity {
    private Button btn_ok, btn;
    private EditText edit, et1, et2;
    private TextView tv;
    // Socket用于连接服务器获取输入输出流
    private Socket socket;
    // 服务器server/IP地址
    private String ADDRESS = "10.203.8.167";
    // 服务器端口
    private int PORT = 8888;

    DataInputStream dis = null;
    DataOutputStream dos = null;

    @Override
    public void onCreate(Bundle savedInstanceState) {
        super.onCreate(savedInstanceState);
        this.getWindow().setFlags(WindowManager.LayoutParams.FLAG_FULLSCREEN,
                WindowManager.LayoutParams.FLAG_FULLSCREEN);
        this.requestWindowFeature(Window.FEATURE_NO_TITLE);
        setContentView(R.layout.mains);// 加载登陆窗口

        et1 = (EditText) findViewById(R.id.ET1);// 登陆窗口元素
        et2 = (EditText) findViewById(R.id.ET2);
        btn = (Button) findViewById(R.id.BTN);
        btn.setOnClickListener(new OnClickListener() {
            @Override
            public void onClick(View v1) {
                Log.e("Himi", "btn-begin");
                if(true){
                    // TODO Auto-generated method stub

                    if(et1.getText().toString()!=null)ADDRESS = et1.getText().toString();
                    if(et2.getText().toString()!=null)PORT = Integer.parseInt(et2.getText().toString());
                    Log.e("Himi", "string right");
                    try {
                        // 阻塞函数,正常连接后才会向下继续执行
                        socket = new Socket(ADDRESS, PORT);
                        setContentView(R.layout.main);// 加载控制窗口
                        socket.close();
                        tv = (TextView) findViewById(R.id.tv);// 对话窗口元素
                        edit = (EditText) findViewById(R.id.edit);
                        btn_ok = (Button) findViewById(R.id.Btn_commit);
                        btn_ok.setOnClickListener(new OnClickListener() {
                            @Override
                            public void onClick(View arg0) {
                                Log.e("Himi", "btn-ok-begin");
                                try {
                                    // 阻塞函数,正常连接后才会向下继续执行
                                    Socket socket1 = new Socket(ADDRESS, PORT);
                                    dis = new DataInputStream(socket1
                                            .getInputStream());
                                    dos = new DataOutputStream(socket1
                                            .getOutputStream());
                                    Log.e("Himi", "bdsffdsfsdfsin");
                                    // 向服务器写数据
                                    dos.writeUTF(edit.getText().toString());
                                    String temp = "I say:";
                                    temp += edit.getText().toString();
                                    temp += "\n";
                                    temp += "Server say:";
                                    // 读取服务器发来的数据
                                    temp += dis.readUTF();
                                    tv.setText(temp);
                                } catch (IOException e) {
                                    Log.e("Himi", "Stream error!");
                                    e.printStackTrace();
                                } finally {
                                    try {
                                        if (dis != null)
                                            dis.close();
                                        if (dos != null)
                                            dos.close();
                                        if(socket!=null)
                                            socket.close();
                                    } catch (IOException e) {
                                        // TODO Auto-generated catch block
                                        e.printStackTrace();
                                    }
                                }
                                Log.e("Himi", "btn-ok-end");
                            }
                        });
                    } catch (IOException e) {
                        Log.e("Himi", "Stream error!");
                        //e.printStackTrace();
                    }
                }//if(v1==)end
            }//onclieck()end
        });
    }
}
最后:生成apk文件导入到手机,运行服务器,手机把正确的端口号和IP(服务器IP)输入,点击连接就可以实现连接,界面跳转到对话区,在对话区输入0-9或a就能看到单片机上的灯被有规律的控制啦。

 浙公网安备 33010602011771号