

windows下Android利用ant自动编译、修改配置文件、批量多渠道,打包生成apk文件
原创文章,转载请注明:http://www.cnblogs.com/ycxyyzw/p/4535459.html
android 程序打包成apk,如果在是命令行方式,一般都要经过如下步骤:
1.用aapt命令生成R.java文件
2.用aidl命令生成相应java文件
3.用javac命令编译java源文件生成class文件
4.用dx.bat将class文件转换成classes.dex文件
5.用aapt命令生成资源包文件resources.ap_
6.用apkbuilder.bat打包资源和classes.dex文件,生成unsigned.apk
7.用jarsinger命令对apk认证,生成signed.apk
eclipase手动打包生成apk方式,只不过是eclipase代替我们执行了以上命令而已。
eclipse用起来虽然方便,为什么要使用Ant批量打包Android应用,对于我来说主要有以下两方面考虑:
1、我们在发布App的时候,可能需要发送到十几,甚至几十个不同的分发渠道,比如360手机市场,百度,应用宝等等,我们可能需要对各个渠道的下载量,用户存留和用户使用情况等数据进行分析,比如使用百度移动统计,友盟统计等。为了实现统计功能,我们需要在配置文件中添加一个数据元,来标识我们的应用要发布到哪一个渠道上,因此,若使用传统的方法,我们每发布一个渠道的版本,就需要修改清单文件中的数据元,然后再使用keystore进行签名和打包。若只有一两个分发渠道,工作量还是可以接受的,但是若我们的分发渠道打到几十个的时候,我们如果再手动的进行修改然后签名打包发布,那工作量就很可观了。因此,为解决这种需求,我们采用Ant来实现对Android应用的自动打包。
2、我们做产品的时候,肯定需要经常打不同环境的包,比如开发环境,测试环境,生产环境,这个时候你怎么办,如果用传统方法,你打开发环境包你要把你的服务端IP和图片服务器IP改成开发的,打包,然后打测试的包,你又要改成测试服务器IP和图片服务器IP,这样多麻烦,如果你把这服务端IP和图片服务器IP,配置到一个xml文件里,用ant打包方式实现自动替换,多方便。
ant 自动打包APK一般有以下两种方式:
1、使用原生Ant方式,就是把所有的环境变量和打包的起个步骤都配置到build.xml文件里,这样可以实现,但是这样的话也有不方便之处,你如果引用了第三方library(不是第三方jar包),配置起来可能就比较麻烦了,而且跨平台你可能就要修改一些配置了,比如windows下和linux下批处理文件不同等。所以我更推荐第二种方式,本文也主要介绍第二种方式。
2、使用Android SDK Ant方式,Android SDK中提供了包含之前写过的操作的封装,只需要使用一条命令android update project生成build.xml ,之后再修改配置文件支持不同特性即可,完全不用写ant代码,这些都由Android SDK自动生成。下面我来详细介绍下此种方式。
以我们现在开发的产品为例:
一:设置JAVA环境变量
这个我就不说啥了,做android开发的配置这个是基础。
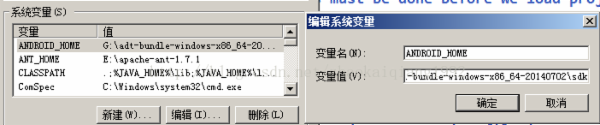
二:配置Android的SDK环境变量
除了需要Java的环境变量,我们还需要配置Android的sdk的位置,名字是ANDROID_HOME,值就是你的android的sdk的位置,比如我的,就如下所示:
二:安装ant并设置ant环境变量
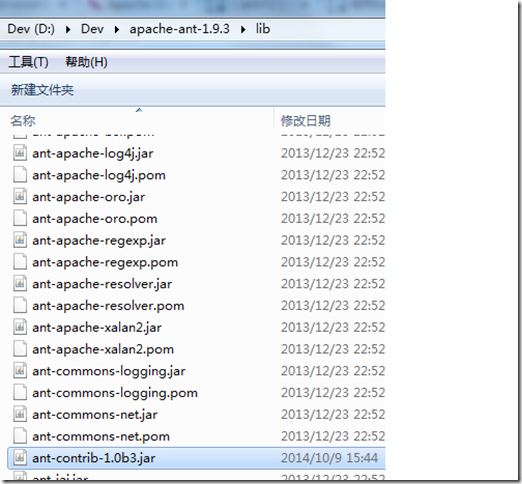
1、在Ant官网(http://ant.apache.org/bindownload.cgi)下载最新Ant包,在http://sourceforge.net/projects/ant-contrib/files 下载Ant扩展包ant-contrib-1.0b3.jar(这个包就是用于循环编译多个渠道包)。
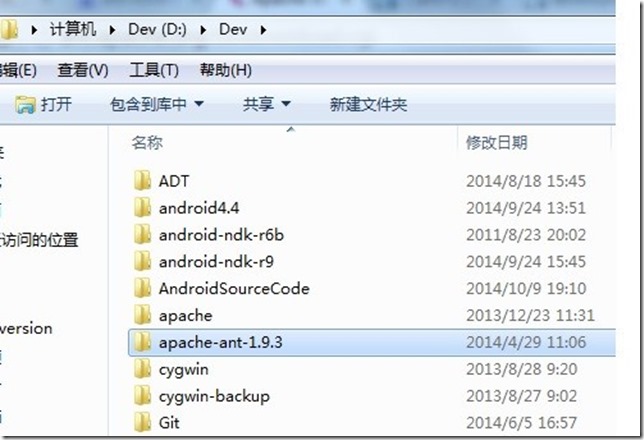
2、将Ant包解压到常用开发工具目录(自行选择,我的放在D:/Dev目录下),然后将下载下来的Ant扩展包ant-contrilb拷贝到Ant安装目录下的lib文件夹中。
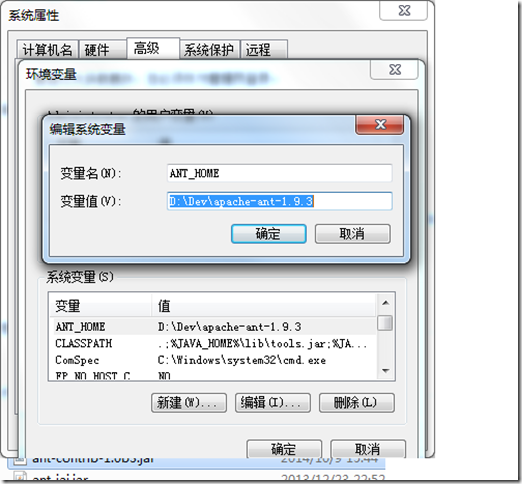
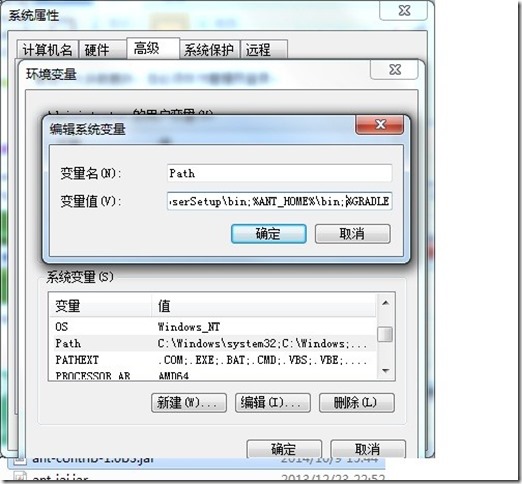
3、设置Ant环境变量:ANT_HOME,变量值指向ant目录。
4、在环境变量Path里增加:%ANT_HOME%/bin;%ANT_HOME%/lib;
5、设置好了之后验证一下。打开CMD 输入ant -version命令出现下面反馈,说明ant 安装成功

三、配置打包项目
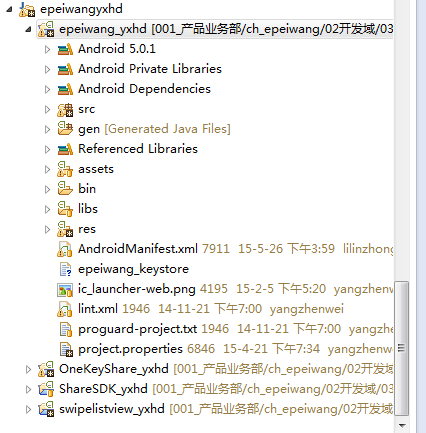
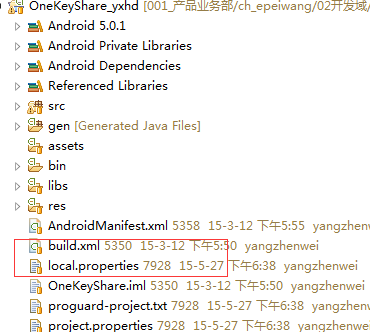
我的项目文件目录如下:
1、生成build.xml文件
打开cmd并进入到epeiwang这个项目目录下 使用android update project -n epeiwang -p . 命令(注意-n表示项目的名称,-p参数后面有个点 表示当前目录)。
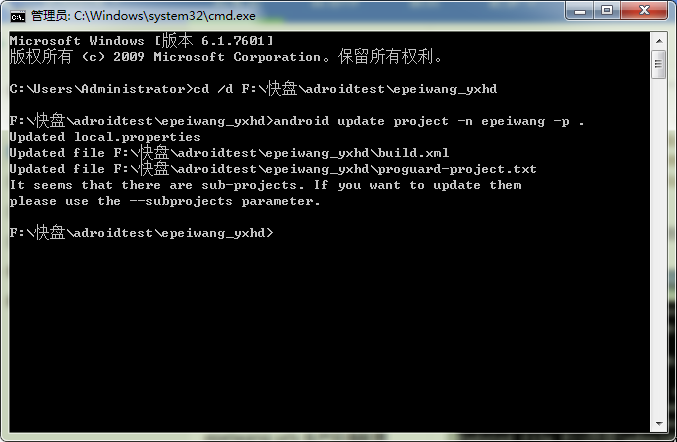
执行这个命令后,会在项目中自动生成build.xml和local.properties文件。
build.xml文件内容如下,并注意红色部门标识的代码。这两个文件是需要用户自己创建的,并存放在当前项目目录下。
<?xml version="1.0" encoding="UTF-8"?>
<project name="epeiwang" default="help">
<!-- The local.properties file is created and updated by the 'android' tool.
It contains the path to the SDK. It should *NOT* be checked into
Version Control Systems. -->
<property file="local.properties" />
<!-- The ant.properties file can be created by you. It is only edited by the
'android' tool to add properties to it.
This is the place to change some Ant specific build properties.
Here are some properties you may want to change/update:
source.dir
The name of the source directory. Default is 'src'.
out.dir
The name of the output directory. Default is 'bin'.
For other overridable properties, look at the beginning of the rules
files in the SDK, at tools/ant/build.xml
Properties related to the SDK location or the project target should
be updated using the 'android' tool with the 'update' action.
This file is an integral part of the build system for your
application and should be checked into Version Control Systems.
-->
<!-- 此文件需要我们自己创建-->
<property file="ant.properties" />
<!-- if sdk.dir was not set from one of the property file, then
get it from the ANDROID_HOME env var.
This must be done before we load project.properties since
the proguard config can use sdk.dir -->
<property environment="env" />
<condition property="sdk.dir" value="${env.ANDROID_HOME}">
<isset property="env.ANDROID_HOME" />
</condition>
<!-- The project.properties file is created and updated by the 'android'
tool, as well as ADT.
This contains project specific properties such as project target, and library
dependencies. Lower level build properties are stored in ant.properties
(or in .classpath for Eclipse projects).
This file is an integral part of the build system for your
application and should be checked into Version Control Systems. -->
<loadproperties srcFile="project.properties" />
<!-- quick check on sdk.dir -->
<fail
message="sdk.dir is missing. Make sure to generate local.properties using 'android update project' or to inject it through the ANDROID_HOME environment variable."
unless="sdk.dir"
/>
<!--
Import per project custom build rules if present at the root of the project.
This is the place to put custom intermediary targets such as:
-pre-build
-pre-compile
-post-compile (This is typically used for code obfuscation.
Compiled code location: ${out.classes.absolute.dir}
If this is not done in place, override ${out.dex.input.absolute.dir})
-post-package
-post-build
-pre-clean
-->
<!-- 此文件需要我们自己创建-->
<import file="custom_rules.xml" optional="true" />
<!-- Import the actual build file.
To customize existing targets, there are two options:
- Customize only one target:
- copy/paste the target into this file, *before* the
<import> task.
- customize it to your needs.
- Customize the whole content of build.xml
- copy/paste the content of the rules files (minus the top node)
into this file, replacing the <import> task.
- customize to your needs.
***********************
****** IMPORTANT ******
***********************
In all cases you must update the value of version-tag below to read 'custom' instead of an integer,
in order to avoid having your file be overridden by tools such as "android update project"
-->
<!-- version-tag: 1 -->
<!-- 表示我们引用了sdk的ant的build文件-->
<import file="${sdk.dir}/tools/ant/build.xml" />
</project>
2、在epeiwangyxhd项目目录下创建ant.properties和custom_rules.xml文件。ant.properties文件定义一些变量例如keystore密码,apk存放目录等;而custom_rules.xml这个文件就是用户自定义的编译规则文件。代码分别如下:
A、ant.properties文件内容如下:
#keystore文件存放目录
key.store=./epeiwang_keystore
#keystore别名
key.alias=epeiwang_keystore
#keystore密码
key.store.password=xxxxxxx
#组织密码
key.alias.password=xxxxxxxx
#如果还没有生成keystore证书,可以使用下面命令在项目目录下生成一个test.keystore证书文件
#generate test.keystore
#keytool -genkey -alias test.keystore -keyalg RSA -validity 20000 -keystore test.keystore
#apk.dir表示存放最终生成apk的目录
apk.dir=./apk
#定义项目名称
app.name=epeiwang
#渠道号,多个渠道号用逗号分隔,每个渠道号不要使用违规字符例如/:等,因为渠道号会在打包的时候放在apk的文件名中,所以包含#违规字符将无法生成最终的apk,哥就是被这个细节给坑了一个下午。这里定义了两个渠道号myapp-12345和BAI-3s322d
market_channels=epeiwang,baidu,91
#测试环境服务器配置
test.server.url=192.168.1.10/epeiwang
test.server.image.url=192.168.1.9
test.epeiwang.url=192.168.1.10
#生产环境服务器配置
rel.server.url=111.111.111.222/epeiwang
rel.server.image.url=111.111.111.229
rel.epeiwang.url=www.epeiwang.com
#测试环境标识 给apk命名的时候用
test.tag.name=test
#生产环境标识 给apk命名的时候用
release.tag.name=release
B、custom_rules.xml文件内容如下:
<?xml version="1.0" encoding="UTF-8"?> <project name="custom_rules" > <!-- 引用ant-contlib这个扩展包,声明一下 --> <taskdef resource="net/sf/antcontrib/antcontrib.properties" > <classpath> <pathelement location="${ant.ANT_HOME}/lib/ant-contrib-1.0b3.jar" /> </classpath> </taskdef> <!-- 定义一个时间变量,打完包后跟渠道号一起命名apk --> <tstamp> <format pattern="yyyyMMddhhmm" property="pktime" unit="hour" /> </tstamp> <!-- 创建apk存放目录 --> <mkdir dir="${apk.dir}" > </mkdir> <!-- 替换参数 然后打包APK --> <target name="replace_parameter" > <!-- 替换服务器配置 --> <replaceregexp byline="false" encoding="UTF-8" flags="g" > <!-- 这个是正则表达式匹配hostconfig中epeiwang_server的值 --> <regexp pattern="epeiwang_server>(.*)</epeiwang_server" /> <substitution expression="epeiwang_server>${server_url}</epeiwang_server" /> <fileset dir="" includes="res/xml/hostconfig.xml" /> </replaceregexp> <replaceregexp byline="false" encoding="UTF-8" flags="g" > <!-- 这个是正则表达式匹配hostconfig中epeiwang_img_server的值 --> <regexp pattern="epeiwang_img_server>(.*)</epeiwang_img_server" /> <substitution expression="epeiwang_img_server>${server_image_url}</epeiwang_img_server" /> <fileset dir="" includes="res/xml/hostconfig.xml" /> </replaceregexp> <replaceregexp byline="false" encoding="UTF-8" flags="g" > <!-- 这个是正则表达式匹配hostconfig中epeiwang_url的值 --> <regexp pattern="epeiwang_url>(.*)</epeiwang_url" /> <substitution expression="epeiwang_url>${epeiwang_url}</epeiwang_url" /> <fileset dir="" includes="res/xml/hostconfig.xml" /> </replaceregexp> </target> <!-- 打包测试环境命令就用这个 --> <target name="deploytest" > <!-- 传服务器配置参数到 replace_parameter这个打包target --> <antcall target="replace_parameter" > <param name="server_url" value="${test.server.url}" /> <param name="server_image_url" value="${test.server.image.url}" /> <param name="epeiwang_url" value="${test.epeiwang.url}" /> </antcall> <!-- 执行循环打包target foreach_replacechannel --> <antcall target="foreach_replacechannel" > <!-- apk命名时候用到的参数 --> <param name="deploy_environment" value="${test.tag.name}" /> </antcall> </target> <!-- 打包生产环境命令就用这个 --> <target name="deployrel" > <!-- 传服务器配置参数到 replace_parameter这个打包target --> <antcall target="replace_parameter" > <param name="server_url" value="${rel.server.url}" /> <param name="server_image_url" value="${rel.server.image.url}" /> <param name="epeiwang_url" value="${rel.epeiwang.url}" /> </antcall> <!-- 执行循环打包target foreach_replacechannel --> <antcall target="foreach_replacechannel" > <!-- apk命名时候用到的参数 --> <param name="deploy_environment" value="${release.tag.name}" /> </antcall> </target> <!-- 循环打包的target --> <target name="foreach_replacechannel" > <!-- 开始循环打包,从market_channels参数中取出一个渠道号用channel标识,然后通过正则修改manifest文件 --> <foreach delimiter="," list="${market_channels}" param="channel" target="modify_manifest" > </foreach> </target> <target name="modify_manifest" > <replaceregexp byline="false" encoding="UTF-8" flags="g" > <!-- 这个是正则表达式匹配manifest中meta,我用的友盟的统计,我 AndroidManifest中的配置为: <meta-data android:value="360shichang" android:name="UMENG_CHANNEL" --> <regexp pattern="android:value="(.*)" android:name="UMENG_CHANNEL"" /> <substitution expression="android:value="${channel}" android:name="UMENG_CHANNEL"" /> <fileset dir="" includes="AndroidManifest.xml" /> </replaceregexp> <!-- 这里设置最终生成包的存放目录以及apk的名称,注意这里是文件名称,所以变量中不允许出现违规字符,否则将无法生成最终的apk(会出现output is not valid 的错误) --> <property name="out.final.file" location="${apk.dir}/${app.name}_${channel}_${deploy_environment}_${pktime}.apk" /> <antcall target="clean" /> <antcall target="release" /> </target> </project>
我的服务器IP配置hostconfig.xml文件内容为:
<?xml version="1.0" encoding="UTF-8"?>
<!-- 为了ant打包时候正则匹配,请不要格式化该文件 -->
<hostconfig>
<epeiwang_server>1111.1111.1111.1/epeiwang</epeiwang_server>
<epeiwang_img_server>1111.1111.1111.1</epeiwang_img_server>
<epeiwang_url>www.epeiwang.com</epeiwang_url>
</hostconfig>
四、打包
1、如果项目中没有引入第三方工程library,那么经过以上环节,就把整个项目Ant打包配置好了,进入CMD,在项目目录下使用ant deployrel命令,自动打生产环境的包,使用 ant deploytest,自动打测试环境的包。

2、如果项目中引入了第三方工程library,比如我的项目,引入三个第三方工程:
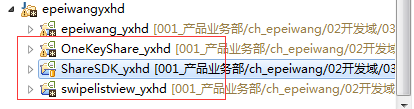
如果执行打包命令,那么会报错,这是因为那个library 还不支持ant自动编译,我们需要先让它也支持(注意:第三方工程要设置为Lib:
project->properties->Android->Library->Is Library 这个勾选上)。
进入到library项目所在的目录,输入命令 android update lib-project -p ./ (注意是 lib-project);

执行完之后,你会发现第三方工程目录下多了build.xml文件和local.properties文件。然后你在执行打包命令就可以成功打包了。
五:总结
1、build.xml和local.properties可以用命令生成,custom_rules.xml和ant.properties可以收藏起来,任何项目中都可以用。
2、ant脚本中还可以加入自动从SVN下载最新版本源码和打包之后通过ftp自动上传到服务器供下载,还可以加入定时打包功能。
3、一些异常情况的解决办法:
异常一:
BUILD FAILED
D:\Android\sdk\tools\ant\build.xml:601: The following error occurred while executing this line:
D:\Android\sdk\tools\ant\build.xml:653: The following error occurred while executing this line:
D:\Android\sdk\tools\ant\build.xml:698: null returned: 1
解决办法:自己项目的build.xml文件中加入:
<property name="aapt.ignore.assets" value="!.svn:!.git:\x3Cdir\x3E_*:.*:!CVS:!thumbs.db:!picasa.ini:!*.scc:*~:crunch" />
异常二:
BUILD FAILED
D:\ProjectDemo\build.xml:83: Cannot find D:\ProjectDemo\android-sdk-windows\tools\ant\build.xml imported from D:\ProjectDemo\build.xml
解决办法:修改local.projects,必须是双斜杠
sdk.dir=D:\\android-sdk-windows
异常三:
[aapt] D:\ProjectDemo\res\layout\activity_main.xml:2: error: Error: String types not allowed (at 'layout_width' with value 'match_parent').
[aapt] D:\ProjectDemo\res\layout\activity_main.xml:2: error: Error: String types not allowed (at 'layout_height' with value 'match_parent').
BUILD FAILED
D:android-sdk-windows\tools\ant\build.xml:650: The following error occurred while executing this line:
D:android-sdk-windows\tools\ant\build.xml:691: null returned: 1
Total time: 1 second
解决办法:当前Andorid版本不支持match_parent属性值,match_parent是Android 8以后开始支持的属性值,修改AndroidManifest中<uses-sdk android:minSdkVersion="8" />最少也要大于8。不过也可以把match_parent改为FILL_PARENT


 浙公网安备 33010602011771号