各种触摸手势
轻按(UITapGestureRecognizer) -- 用一个或多个手指在屏幕上轻按。
按住(UILongPressGestureRecognizer) -- 用一个或多个手指在屏幕上按住。
轻扫(UISwipeGestureRecognizer) -- 用一个或多个手指沿特定方向轻扫。
张合(UIPinchGestureRecognizer) -- 张合手指以缩放对象。
旋转(UIRotationGestureRecognizer) -- 沿圆形滑动两个手指。
平移(UIPanGestureRecognizer) -- 触摸并拖曳。
通过指定要使用的识别器(Recognizer)类型,并将其加入到视图(UIView)中,就能自动收到触发的多点触摸事件。有两种方式添加手势识别器:使用代码或使用Interface Builder编辑器以可视化方式添加。
可视化方式添加手势识别器:
1. 先找到手势控件组

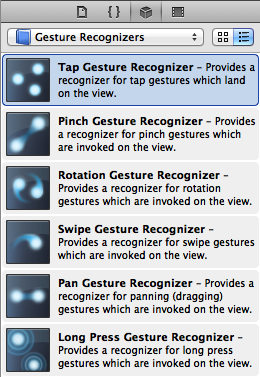
2. 选中某一识别器,直接拖拽到控件上

识别器将作用于该控件,实际是增加了一个属性名为"gestureRecognizers"与该控件的连接。一个识别器可以连接多个控件:

需要注意的是,有一些控件(例如Label)默认没有允许"User Interaction Enabled"。这样手势将不生效,需要勾选后手势才能生效,对应的方法是setUserInteractionEnabled。
![]()
3. 定义操作
![]()
代码添加手势识别器:
- (IBAction)testTap:(id)sender
{
    NSLog(@"Tap");

    //得到触点在视图中的坐标
    CGPoint point = [(UITapGestureRecognizer*)sender locationInView:self.btnTest];
    NSLog(@"x:%.2f,y:%.1f",point.x,point.y);
}

- (void)viewDidLoad
{
    UITapGestureRecognizer *tapRecognizer = [[UITapGestureRecognizer alloc] initWithTarget:self action:@selector(testTap:)];
    tapRecognizer.numberOfTapsRequired = 1;
    tapRecognizer.numberOfTouchesRequired = 1;
    [self.btnTest addGestureRecognizer:tapRecognizer];

    [super viewDidLoad];
}
代码里的initWithTarget:self,是指明方法testTap所属的对象。大多数情况下简单指定为当前类就够了,但有时候也会写在外部类:


#import <Foundation/Foundation.h>

@interface MyClass : NSObject

- (void)testTap;

@end
#import "MyClass.h"

@implementation MyClass

- (void)testTap
{
    NSLog(@"a tap!");
}
#import <UIKit/UIKit.h>
#import "MyClass.h"

@interface ViewController : UIViewController
{
    MyClass *myClass;
}

@property (strong, nonatomic) IBOutlet UIButton *btnTest;

@end
#import "ViewController.h"
#import "MyClass.h"

@implementation ViewController
@synthesize btnTest;

- (void)viewDidLoad
{
    myClass = [[MyClass alloc] init];

    UITapGestureRecognizer *tapRecognizer = [[UITapGestureRecognizer alloc] initWithTarget:myClass action:@selector(testTap)];
    [self.btnTest addGestureRecognizer:tapRecognizer];

    [super viewDidLoad];
}
注意:MyClass *myClass一定要声明在头文件ViewController.h,如果声明在ViewController.m会找不到testTap方法。这是因为在ViewController.m里会把MyClass声明成立局部变量,导致MyClass中的action不能正确识别自身所属的类。
轻按(UITapGestureRecognizer)
轻按手势可以设定按下次数和触点数:
numberOfTapsRequired -- 需要轻按对象多少次才能识别出轻按手势,默认为1。
numberOfTouchesRequired -- 需要有多少个手指在对象上才能识别出轻按手势,默认为1。
轻扫(UISwipeGestureRecognizer)
轻扫手势可以设定方向和触点数:
direction -- 轻扫方向,值是枚举UISwipeGestureRecognizerDirection中的一个,分别为:
UISwipeGestureRecognizerDirectionRight(向右,默认值)
UISwipeGestureRecognizerDirectionLeft(向左)
UISwipeGestureRecognizerDirectionUp(向上)
UISwipeGestureRecognizerDirectionDown(向下)
numberOfTouchesRequired -- 需要有多少个手指在对象上才能识别出轻按手势,默认为1。
P.s 如果要识别并相应不同的轻扫方向,必须实现多个轻扫手势识别器。通过编写代码,可让一个轻扫手势识别器响应多个轻扫方向,但无法区分不同的轻扫方向。例如:
- (void)viewDidLoad
{
    UISwipeGestureRecognizer *leftSwipeGesture = [[UISwipeGestureRecognizer alloc] initWithTarget:self action:@selector(testSwipe:)];
    leftSwipeGesture.direction = UISwipeGestureRecognizerDirectionLeft;
    [self.btnTest addGestureRecognizer:leftSwipeGesture];

    UISwipeGestureRecognizer *upSwipeGesture = [[UISwipeGestureRecognizer alloc] initWithTarget:self action:@selector(testSwipe:)];
    upSwipeGesture.direction = UISwipeGestureRecognizerDirectionUp;
    [self.btnTest addGestureRecognizer:upSwipeGesture];

    [super viewDidLoad];
}

- (IBAction)testSwipe:(id)sender
{
    UISwipeGestureRecognizer *swipeGesture = (UISwipeGestureRecognizer *)sender;
    if(swipeGesture.direction==UISwipeGestureRecognizerDirectionLeft)
    {
        NSLog(@"left swipe!");
    }
    else if(swipeGesture.direction==UISwipeGestureRecognizerDirectionUp)
    {
        NSLog(@"up swipe!");
    }
}
张合(UIPinchGestureRecognizer)
轻扫手势可以设定缩放值和速度:
scale -- 默认为1。在必要的情况下可以通过改变这个值来调整放大缩小因子。
velocity -- (张合手势发生的)速度,初始值为0。
- (void)viewDidLoad
{
    UIPinchGestureRecognizer *pinchGesture = [[UIPinchGestureRecognizer alloc] initWithTarget:self action:@selector(testPinch:)];
    [self.imgView1 addGestureRecognizer:pinchGesture];
    [self.imgView1 setUserInteractionEnabled:YES];
    [super viewDidLoad];
}

- (IBAction)testPinch:(id)sender
{
    CGFloat scale = ((UIPinchGestureRecognizer *)sender).scale;

    self.imgView1.frame = CGRectMake(self.imgView1.frame.origin.x,
                                     self.imgView1.frame.origin.y,
                                     self.imgView1.frame.size.width*scale,
                                     self.imgView1.frame.size.height*scale);
}
旋转(UIRotationGestureRecognizer)
旋转手势可以设定旋转角度和速度:
rotation -- 旋转角度(弧度值,可通过公式转换:度数=弧度数*180/Pi,弧度数=度数*Pi/180),初始值为0,随着每个旋转手势逐渐累积。可以将默认的初始旋转角度0修改为任何值,这样后续的旋转手势将以指定的值为起点。
velocity -- 速度,初始值为0。
- (void)viewDidLoad
{
    UIRotationGestureRecognizer *rotationGesture = [[UIRotationGestureRecognizer alloc] initWithTarget:self action:@selector(testRotation:)];

    [self.imgView1 addGestureRecognizer:rotationGesture];
    [self.imgView1 setUserInteractionEnabled:YES];
    [super viewDidLoad];
}

- (IBAction)testRotation:(id)sender
{
    CGFloat rotation = ((UIRotationGestureRecognizer *)sender).rotation;

    self.imgView1.transform = CGAffineTransformMakeRotation(rotation);
}
摇动识别器
摇动的处理方式与其它手势不同,必须拦截一个类型为UIEventTypeMotion的UIEvent。为此,视图或视图控制器必须是响应者链中的第一响应者(FirstResponder),还必须实现方法motionEnded:withEvent。
step 1. 成为第一响应者(FirstResponder)
通过方法canBecomeFirstResponder允许视图控制器成为第一响应者,这个方法除了返回YES外什么都不做:
- (BOOL)canBecomeFirstResponder
{
    return YES;
}
在视图控制器加载视图后立即发送消息becomeFirstResponder,让视图成为第一响应者:
- (void)viewDidAppear:(BOOL)animated
{
    [self becomeFirstResponder];
    [super viewDidAppear:animated];
}
step 2. 响应摇动手势
实现方法motionEnded:withEvent:
- (void)motionEnded:(UIEventSubtype)motion withEvent:(UIEvent *)event
{
    if(motion == UIEventSubtypeMotionShake)
    {
        NSLog(@"Shaking things up!");
    }
}

 浙公网安备 33010602011771号