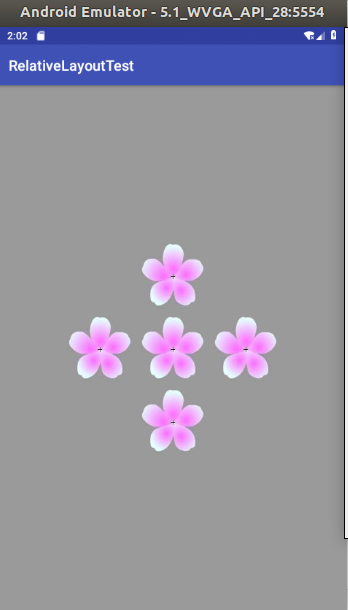
5. 梅花布局效果
相对布局容器中的子组件总是相对其它组件来决定分布位置的,可以考虑先把一个组件放在相对布局容器的中间,然后以该组件为中心,将其它组件分布在该组件的四周,这样就可以形成“梅花” 布局效果。
效果图:
layout.xml
<?xml version="1.0" encoding="utf-8"?>
<RelativeLayout xmlns:android="http://schemas.android.com/apk/res/android"
    xmlns:tools="http://schemas.android.com/tools"
    android:layout_width="match_parent"
    android:layout_height="match_parent"
    android:background="#9a9a9a"
    tools:context=".MainActivity">
    <!--定义该组件位于父容器中间-->
    <TextView
        android:id="@+id/view01"
        android:layout_width="100dp"
        android:layout_height="100dp"
        android:background="@drawable/flower"
        android:layout_centerInParent="true" />
    <!--定义该组件位于view01组件的上方-->
    <TextView
        android:id="@+id/view02"
        android:layout_width="100dp"
        android:layout_height="100dp"
        android:background="@drawable/flower"
        android:layout_above="@id/view01"
        android:layout_alignLeft="@id/view01" />


    <!--定义该组件位于view01组件的下方-->
    <TextView
        android:id="@+id/view03"
        android:layout_width="100dp"
        android:layout_height="100dp"
        android:background="@drawable/flower"
        android:layout_below="@id/view01"
        android:layout_alignLeft="@id/view01" />
    <!--定义该组件位于view01组件的左边-->
    <TextView
        android:id="@+id/view04"
        android:layout_width="100dp"
        android:layout_height="100dp"
        android:background="@drawable/flower"
        android:layout_toLeftOf="@id/view01"
        android:layout_alignTop="@id/view01" />
    <!--定义该组件位于view01组件的右边-->
    <TextView
        android:id="@+id/view05"
        android:layout_width="100dp"
        android:layout_height="100dp"
        android:background="@drawable/flower"
        android:layout_toRightOf="@id/view01"
        android:layout_alignTop="@id/view01" />

</RelativeLayout>
