
ElasticSearch5+logstash的logstash-input-jdbc实现mysql数据同步
在实现的路上遇到了各种坑,再次验证官方文档只能产考不能全信!
ElasticSearch安装就不说了上一篇有说!
安装logstash
官方:https://www.elastic.co/guide/en/logstash/current/installing-logstash.html
1.下载公共密钥
rpm --import https://artifacts.elastic.co/GPG-KEY-elasticsearch
2.添加yum源
vim /etc/yum.repos.d/logstash.repo
文件中写入
[logstash-5.x]
name=Elastic repository for 5.x packages
baseurl=https://artifacts.elastic.co/packages/5.x/yum
gpgcheck=1
gpgkey=https://artifacts.elastic.co/GPG-KEY-elasticsearch
enabled=1
autorefresh=1
type=rpm-md
保存退出
3.使用yum安装
yum install logstash
4.验证是否安装成功
进入 logstash 安装目录
cd /usr/share/logstash
运行
bin/logstash -e 'input { stdin { } } output { stdout {} }'
等待几秒钟 出现
The stdin plugin is now waiting for input:
然后输入
hello world
得到类似的结果
2016-11-24T08:01:55.949Z bogon hello world
安装logstash-input-jdbc插件
1.修改ruby仓库镜像
如果没有安装 gem 的话 安装gem
yum install gem
替换国内的镜像
gem sources --add https://gems.ruby-china.org/ --remove https://rubygems.org/
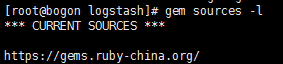
验证是否成功
gem sources -l
修改Gemfile的数据源地址
whereis logstash # 查看logstash安装的位置, 我的在 /usr/share/logstash目录
cd /usr/share/logstash
vim Gemfile
修改 source 的值 为: "https://gems.ruby-china.org/"
vim Gemfile.jruby-1.9.lock # 找到 remote 修改它的值为:
https://gems.ruby-china.org/
或者直接替换源这样你不用改你的 Gemfile 的 source。
gem install bundler


$ bundle config mirror.https://rubygems.org https://gems.ruby-china.org/
然后开始安装
bin/logstash-plugin install logstash-input-jdbc
如果镜像地址没有改错的话应该可以直接安装
或者 进入源码地址的release页面logstash-input-jdbc
2.开始同步 mysql 数据
需要建立 两个文件 一个 .conf后缀的 一个 .sql 后缀
一个 mysql 的Java 驱动包 : mysql-connector-java-5.1.40-bin.jar
filename.conf 内容:
里面的参数可以参考 logstash-input-jdbc官方参考文档
input {
    stdin {
    }
    jdbc {
    # 数据库地址  端口  数据库名
      jdbc_connection_string => "jdbc:mysql://localhost:3306/shen"
    # 数据库用户名
    jdbc_user => "root"
    # 数据库密码
      jdbc_password => "rootroot"
    # mysql java驱动地址
      jdbc_driver_library => "/usr/share/logstash/mysql-connector-java-5.1.40-bin.jar"
      jdbc_driver_class => "com.mysql.jdbc.Driver"
      jdbc_paging_enabled => "true"
      jdbc_page_size => "50000"
      # sql 语句文件
      statement_filepath => "filename.sql"
      schedule => "* * * * *"
      type => "jdbc"
    }
}
output {
 stdout {
        codec => json_lines
    }
   elasticsearch {
        hosts  => "localhost:9200"
        index => "contacts"
     document_type => "contact"
        document_id => "%{id}"
    }
}
filename.sql
select * from a
注意: 在你的数据库里 要有一个数据库名字和filename.conf 里的对应就可以了 表明 和 filename.sql 里的对应就可以了 在表中 有一个id字段是为了和filename.conf 中document_id => "%{id}" 这个参数对应 可以执行修改
然后开始执行
bin/logstash -f fielname.conf
如果出现错误 或者没有结果 可以进入 logs 目录中查看日志

出现类似这样的内容 就可以了
可以通过地址 http://192.168.199.115:9200/contacts/contact/1?pretty=true
查看
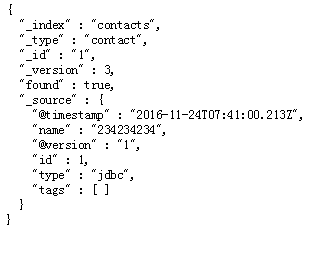
url 参数说明 contacts 是对应 filename.conf 中 index => "contacts" contact 对应document_type => "contact" 1表示id为1 的数据
转载请注明来源http://www.cnblogs.com/phpshen/p/6098333.html

 浙公网安备 33010602011771号