NHibernate初学者指南(2):一个完整的例子
准备开发环境
操作系统:Windows Vista, Windows 7, Windows Server 2003 或 Windows Server 2008
IDE:VS 2010 Professional, VS C# 2010 Express 或 VS Basic 2010 Express
如果不使用Visual Studio,可以使用开源的IDE:
数据库:NHibernate支持主流的关系型数据库,像Oracle,MS SQL Server,MySQL等。我们使用MS SQL Server作为我们的RDBMS,在后面写测试时还会使用SQLite。我安装的是MS SQL Server2008 。
准备NHibernate:从Fluent NHibernate下载,就包括程序所需的所有文件。
定义Model
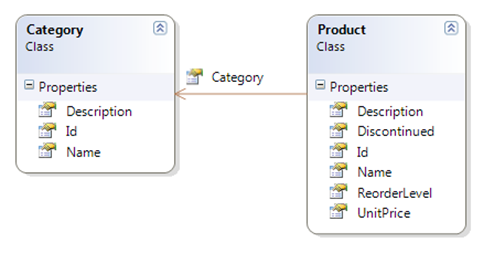
这个例子叫产品库存系统,我们想使用这个程序管理一个小型杂货店的产品列表。产品按类别分组。类别由名字和简短的描述组成。产品有名字,简短描述,类别,单价,重新排序级别,以及一个标识,决定产品是否下架。为了唯一的标识每个类别和产品,它们都有一个ID。如果画一下我们所描述Model的类图,则如下图所示:
注:只有VS的Professional版本类设计器可用,免费的Express版本不可用
下面让我们完成这个简单的产品库存系统(product inventory system)。
1. 在电脑中创建一个文件夹叫NH3BeginnersGuide,在里面再新建一个文件夹叫lib。然后将下载的Fluent NHibernate解压缩到lib文件夹即可。
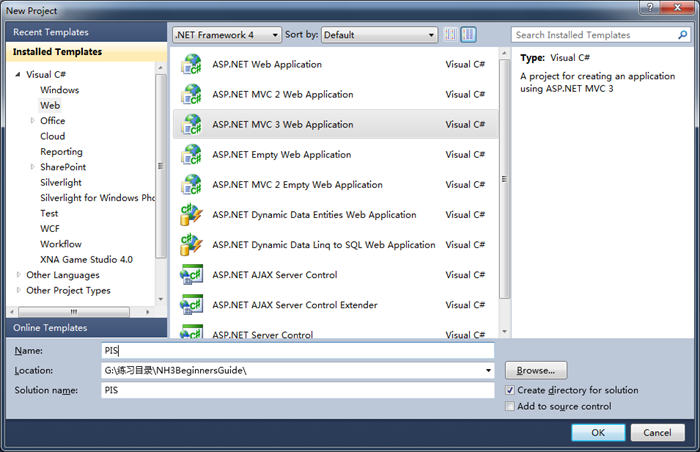
2. 打开Visual Studio,创建一个ASP.NET MVC 3 Web Application。在弹出的“New ASP.NET MVC 3 Project”对话框选择Internet Application,点击“OK”。
3. 在Models文件夹中 分别创建Category和Product类,代码如下:
public class Category
{
    public virtual int Id { get; set; }
    public virtual string Name { get; set; }
    public virtual string Description { get; set; }
}
public class Product
{
    public virtual int Id { get; set; }
    public virtual string Name { get; set; }
    public virtual string Description { get; set; }
    public virtual Category Category { get; set; }
    public virtual decimal UnitPrice { get; set; }
    public virtual int ReorderLevel { get; set; }
    public virtual bool Discontinued { get; set; }
}
映射Model
定义映射有不同的方法,最常见的方法不是以XML的形式定义就是在代码中定义。在这个例子中,选择后者。
1. 在项目中引用FluentNHibernate.dll和NHibernate.dll。
2. 在Models中分别创建CategoryMap和ProductMap类,让它们都继承自ClassMap<T>类,代码如下:
public class CategoryMap : ClassMap<Category>
{
    public CategoryMap()
    {
        Id(x => x.Id);
        Map(x => x.Name).Length(50).Not.Nullable();
        Map(x => x.Description);
    }
}
public class ProductMap : ClassMap<Product>
{
    public ProductMap()
    {
        Id(x => x.Id);
        Map(x => x.Name).Length(50).Not.Nullable();
        Map(x => x.Description);
        Map(x => x.UnitPrice).Not.Nullable();
        Map(x => x.ReorderLevel);
        Map(x => x.Discontinued);
        References(x => x.Category).Not.Nullable();
    }
}
创建数据库架构
我们不手动创建数据库架构,而是让NHibernate为我们创建它。我们需要做的只是创建一个空的数据库。
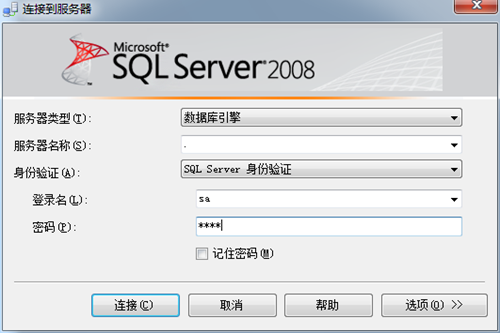
1. 打开SSMS,选择SQL Server身份验证。
2. 创建一个名字为PIS的空数据库。
3. 在Models文件夹中新建一个NHibernateHelper类,代码如下:
public class NHibernateHelper
{
    public static ISessionFactory CreateSessionFactory()
    {
        return Fluently.Configure()
        .Database(MsSqlConfiguration
        .MsSql2008
        .ConnectionString(c => c.FromConnectionStringWithKey("PISConn")))
        .Mappings(m => m.FluentMappings
        .AddFromAssemblyOf<ProductMap>()).ExposeConfiguration(CreateSchema)
        .BuildSessionFactory();
    }

    private static void CreateSchema(Configuration cfg)
    {
        var schemaExport = new SchemaExport(cfg);
        //schemaExport.SetOutputFile("c:\\abc.sql");
        schemaExport.Create(false,
true
);
    }
}
这段代码我不解释,在后面的文章中会详细讲解。其中注释的一行,是NHibernate生成的创建数据库脚本。
4. 打开Web.config,在 <connectionStrings></connectionStrings>节中添加如下代码:
<add name="PISConn" connectionString="Data Source=.;Initial Catalog=PIS;User ID=sa;Password=sasa;Integrated Security=True" providerName="System.Data.SqlClient"/>
5. 新建一个CateogryController,Template选择Empty controller。在Index中添加如下代码:
var factory = NHibernateHelper.CreateSessionFactory();
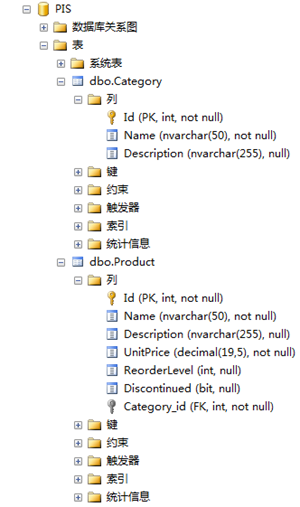
6. 新建Index的View,运行程序,NHibernate会自动创建好数据库的架构。
在C盘下找到abc.sql文件,里面的代码如下:
    if exists (select 1 from sys.objects where object_id = OBJECT_ID(N'[FK1F94D86A856F978E]') AND parent_object_id = OBJECT_ID('[Product]'))
alter table [Product]  drop constraint FK1F94D86A856F978E


    if exists (select * from dbo.sysobjects where id = object_id(N'[Category]') and OBJECTPROPERTY(id, N'IsUserTable') = 1) drop table [Category]

    if exists (select * from dbo.sysobjects where id = object_id(N'[Product]') and OBJECTPROPERTY(id, N'IsUserTable') = 1) drop table [Product]

    create table [Category] (
        Id INT IDENTITY NOT NULL,
       Name NVARCHAR(50) not null,
       Description NVARCHAR(255) null,
       primary key (Id)
    )

    create table [Product] (
        Id INT IDENTITY NOT NULL,
       Name NVARCHAR(50) not null,
       Description NVARCHAR(255) null,
       UnitPrice DECIMAL(19,5) not null,
       ReorderLevel INT null,
       Discontinued BIT null,
       Category_id INT not null,
       primary key (Id)
    )

    alter table [Product]
        add constraint FK1F94D86A856F978E
        foreign key (Category_id)
        references [Category]
7. 创建好数据库的架构后,将schemaExport.Create(false, true); 修改为schemaExport.Create(false, false); 这样程序启动时就不会重新生成数据库的架构了。
实现程序的CRUD
首先,实现插入
1. 在CategoryController中添加Create Action。代码如下:
//
//Get: /Category/Create
public ActionResult Create()
{
    return View();
}

[HttpPost]
public ActionResult Create(Category category)
{
    if (category.Name == null)
    {
        ModelState.AddModelError("", "类别名称不能为空");
        return View(category);
    }
    else
    {
        var factory = NHibernateHelper.CreateSessionFactory();
        using (var session = factory.OpenSession())
        {
            session.Save(category);
        }
        return RedirectToAction("Index");
    }
}
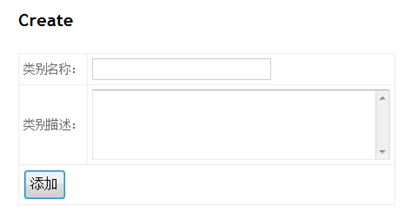
2. 添加对应的View,代码不贴出来了。然后运行,查看效果:
第二,实现查询
1. 修改Index Action。代码如下:
//
// GET: /Category/

public ActionResult Index()
{
    var factory = NHibernateHelper.CreateSessionFactory();
    IEnumerable<Category> categories;
    using (var session = factory.OpenSession())
    {
        categories = session.QueryOver<Category>().List();
    }
    return View(categories);
}
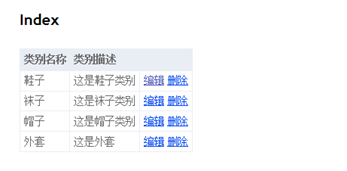
2. 这个步骤跟上面一样,直接看运行效果:
第三,实现修改
1. 添加Edit Action。代码如下:
public ActionResult Edit(int id)
{
    var factory = NHibernateHelper.CreateSessionFactory();
    Category category;
    using (var session = factory.OpenSession())
    {
        category = session.Get<Category>(id);
    }
    return View(category);
}
[HttpPost]
public ActionResult Edit(Category category)
{
    var factory = NHibernateHelper.CreateSessionFactory();
    using (var session = factory.OpenSession())
    {
        ITransaction transactioin = session.BeginTransaction();
        try
        {
            session.Update(category);
            transactioin.Commit();
        }
        catch (Exception)
        {
            transactioin.Rollback();
        }
    }
    return RedirectToAction("Index");
}
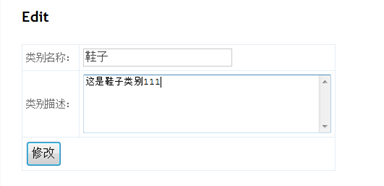
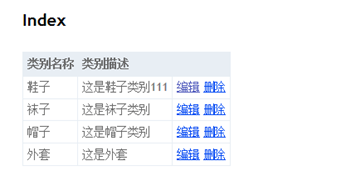
2. 同上,查看运行效果:
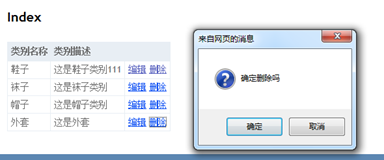
第四,实现删除
1. 添加Delete Action。代码如下:
public ActionResult Delete(int id)
{
    var factory = NHibernateHelper.CreateSessionFactory();
    using (var session = factory.OpenSession())
    {
        ITransaction transaction = session.BeginTransaction();
        try
        {
            var category = session.Get<Category>(id);
            session.Delete(category);
            transaction.Commit();
        }
        catch (Exception)
        {
            transaction.Rollback();
        }
    }
    return RedirectToAction("Index");
}
2. 不用添加View了,直接运行,查看结果:
点击确定即可删除记录。
总结
本来想直接翻译NHibernate 3 Beginner's Guid这本书上的例子,最后还是决定自己写个例子吧。这个例子仅仅是实现了功能,没有考虑太多的东西,相当于Hello World吧。上面用到的很多知识,在后面都会详细讲解,因为我也刚刚接触,很多东西也没有弄的太清楚,相信随着学习的不断深入,也会对NHibernate有更深刻的了解。
最后希望各位朋友指出我的不足,祈求共同进步。
源码下载地址:https://files.cnblogs.com/nianming/NH3BeginnersGuide.rar
说明:为了减小文件大小,我将lib中的文件没有包含进上面的源代码


 浙公网安备 33010602011771号