


今天因为要做一个设置开机画面的功能,主要是让用户可以设置自己的开机画面,应用层需要做让用户选择开机画面图片的功能。所以需要做一个简单的图片浏览选择程序。最后选用Gallery作为基本控件。加入了一些炫一点的元素,做成3D滑动效果。下面是Demo例子截图:
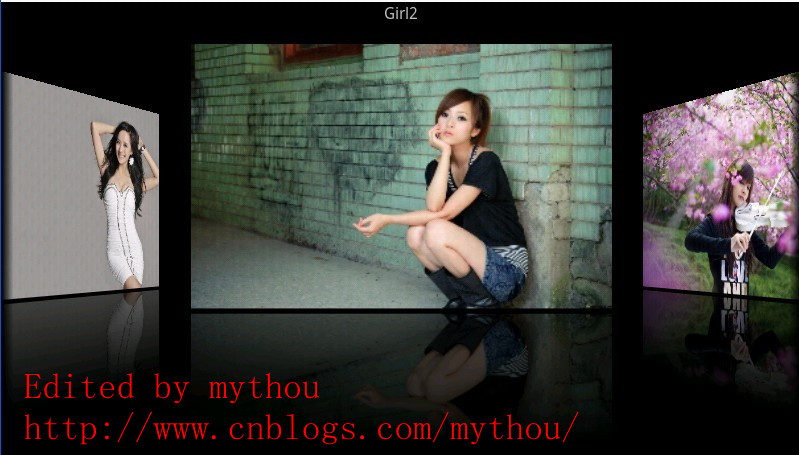
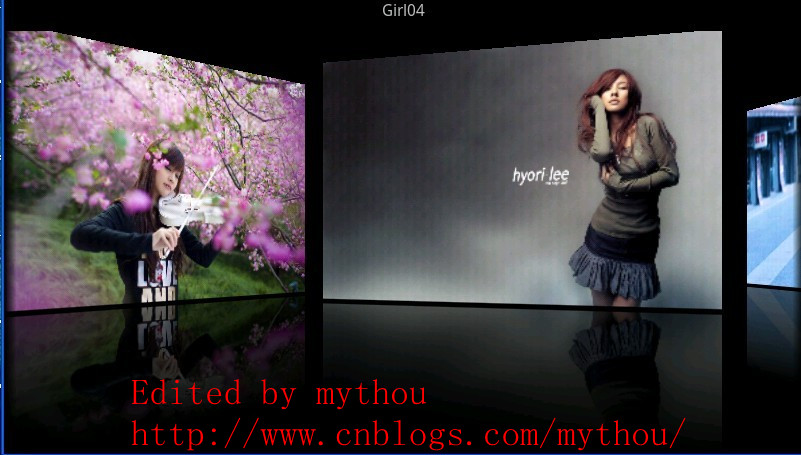
这个效果网上已经很多人做出来了,只是这次需要用到,所以自己也实践了一下(这里例子我也是根据网上一些资料编写)。特意找了几张美女图片给大家养养眼,O(∩_∩)O哈!下面针对一些关键代码进行简要说明,需要做这方面东西的朋友可以看看。这篇文章是实用性文章,理论分析不多。
(PS:新建的QQ群,有兴趣可以加入一起讨论:Android群:322599434)
1、重载Gallery类
因为需要加入倒影和3D切换的效果,因此我们需要重载Gallery类,其中有两个方法我们需要重写,一个是onSizeChanged(),另外一个是getChildStaticTransformation()。下面我们看看onSizeChanged()需要做的事情。
//Edited by mythou
//http://www.cnblogs.com/mythou/
  @Override
    protected void onSizeChanged(int w, int h, int oldw, int oldh)
    {
    //重写计算旋转的中心
        mCoveflowCenter = getCenterOfCoverflow();
        super.onSizeChanged(w, h, oldw, oldh);
    }
上面主要做的事情就是在改变大小的时候,重新计算滑动切换时需要旋转变化的中心。下面计算图片位置时,会重新计算。
//Edited by mythou
//http://www.cnblogs.com/mythou/
  protected boolean getChildStaticTransformation(View child, Transformation trans)
    {
     //图像的中心点和宽度
        final int childCenter = getCenterOfView(child);
        final int childWidth = child.getWidth();
        int rotationAngle = 0;

        trans.clear();
        trans.setTransformationType(Transformation.TYPE_BOTH);        // alpha 和 matrix 都变换

        if (childCenter == mCoveflowCenter)
        {
        // 正中间的childView
            transformImageBitmap((ImageView) child, trans, 0);
        }
        else
        {
        // 两侧的childView
            rotationAngle = (int) ( ( (float) (mCoveflowCenter - childCenter) / childWidth ) * mMaxRotationAngle );
            if (Math.abs(rotationAngle) > mMaxRotationAngle)
            {
                rotationAngle = (rotationAngle < 0) ? -mMaxRotationAngle : mMaxRotationAngle;
            }
       //根据偏移角度对图片进行处理,看上去有3D的效果。
            transformImageBitmap((ImageView) child, trans, rotationAngle);
        }

        return true;
    }
上面就是重载Gallery的时候,需要注意处理的事情,其实主要就是做图形变化,效果图里面的图片斜着显示就是这里处理的结果,目的就是让人看上去有立体感。
2、编写Adapter适配器
我们使用很多控件都涉及适配器,就是用来绑定数据源和目标控件的一个中间件。这里我们需要重载BaseAdapter作为我们Gallery的适配器。主要是处理源图像,加入倒影,生成新的数据源图片。
//Edited by mythou
//http://www.cnblogs.com/mythou/
   public boolean createReflectedForAdapter()
    {
        final int reflectionGap = 4;
        final int Height = 200;
        int index = 0;
        for (Map<String, Object> map : list)
        {
            Integer id = (Integer) map.get("image");
            // 获取原始图片
            Bitmap originalImage = BitmapFactory.decodeResource(mContext.getResources(), id);
            int width = originalImage.getWidth();
            int height = originalImage.getHeight();
            float scale = Height / (float)height;

            Matrix sMatrix = new Matrix();
            sMatrix.postScale(scale, scale);
            Bitmap miniBitmap = Bitmap.createBitmap(originalImage, 0, 0,
                    originalImage.getWidth(), originalImage.getHeight(), sMatrix, true);

            //是否原图片数据,节省内存
            originalImage.recycle();

            int mwidth = miniBitmap.getWidth();
            int mheight = miniBitmap.getHeight();
            Matrix matrix = new Matrix();
            // 图片矩阵变换(从低部向顶部的倒影)
            matrix.preScale(1, -1);
            // 截取原图下半部分
            Bitmap reflectionImage = Bitmap.createBitmap(miniBitmap, 0, mheight/2, mwidth, mheight/2, matrix, false);
            // 创建倒影图片(高度为原图3/2)
            Bitmap bitmapWithReflection = Bitmap.createBitmap(mwidth, (mheight + mheight / 2), Config.ARGB_8888);
            // 绘制倒影图(原图 + 间距 + 倒影)
            Canvas canvas = new Canvas(bitmapWithReflection);
            // 绘制原图
            canvas.drawBitmap(miniBitmap, 0, 0, null);
            Paint paint = new Paint();
            // 绘制原图与倒影的间距
            canvas.drawRect(0, mheight, mwidth, mheight + reflectionGap, paint);
            // 绘制倒影图
            canvas.drawBitmap(reflectionImage, 0, mheight + reflectionGap, null);

            paint = new Paint();
            // 线性渐变效果
            LinearGradient shader = new LinearGradient(0, miniBitmap.getHeight(), 0, bitmapWithReflection.getHeight()
                    + reflectionGap, 0x70ffffff, 0x00ffffff, TileMode.CLAMP);
            paint.setShader(shader);
            // 倒影遮罩效果
            paint.setXfermode(new PorterDuffXfermode(Mode.DST_IN));
            // 绘制倒影的阴影效果
            canvas.drawRect(0, mheight, mwidth, bitmapWithReflection.getHeight() + reflectionGap, paint);
            ImageView imageView = new ImageView(mContext);
        // 设置倒影图片
            imageView.setImageBitmap(bitmapWithReflection);
            imageView.setLayoutParams(new GalleryView.LayoutParams((int)(width * scale),
                    (int)(mheight * 3 / 2.0 + reflectionGap)));
            imageView.setScaleType(ScaleType.MATRIX);
            mImages[index++] = imageView;
        }
        return true;
    }
上面其实就是一个图片处理过程,主要做的事情就是生成倒影,效果图里面底下是有倒影的。就是利用上面算法生成。我们在适配器添加图片的时候,会把适配器原生图片进行处理,加入倒影的效果。这个我们在图片初始化的时候就可以调用处理,具体代码可以查看Demo里面的代码关系。
具体图片滑动的过程,Gallery会帮我们处理好,我们要做的事情其实就是提供添加了特效的图片数据源,以及处理3D显示的变化效果,最后都会提供View作为显示图像给Gallery用来显示。
今天主要是说说如何实现Gallery的3D显示切换,Demo的代码很多是基于网上一些现成效果,感谢这些分享成果的开发者。下面是Demo的下载,不清楚的可以把Demo下载下来,运行看看效果然后分析一下代码。代码不多,也不是很复杂。
Gallery3D例子代码:Grallery3DTest2013-7-19.rar
Edited by mythou
原创博文,转载请标明出处:http://www.cnblogs.com/mythou/p/3201126.html

 浙公网安备 33010602011771号