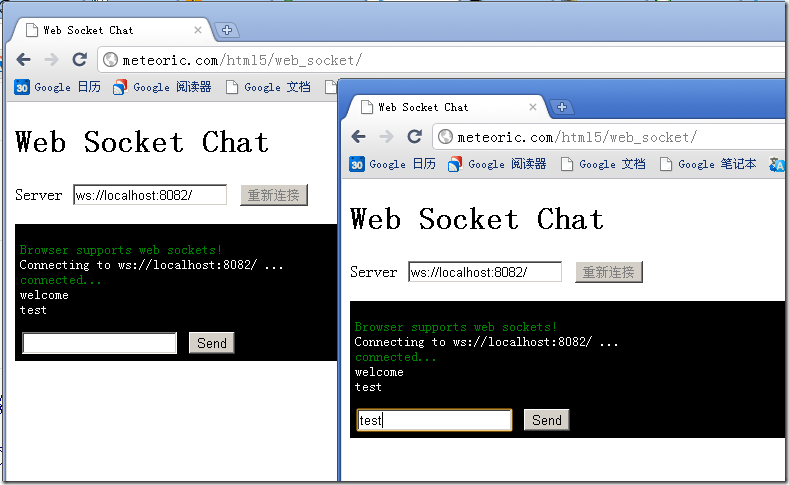
基于Node.js的Web Socket
Node.js就不介绍了(如果你写JavaScript,就应该知道它)
以前看到过很多关于node.js的文章,但一直没有尝试去搭建node.js的环境。这里有一篇文章叫“websocket与node.js的完美结合”
看完那篇文章,依旧没有什么头绪,决定还是step by step…
在笔记本上跑东西就是比较吃力(况且还是低配置~),就懒得去开虚拟机了,决定直接用xp。
关于windows下安装node.js,我参考的一这篇文章:在Windows下试验Node.js,搭建环境的步骤:
1、下载、解压
2、测试node.js
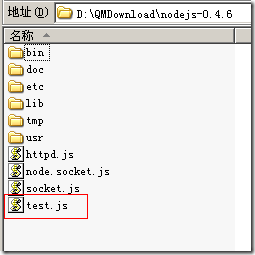
我下载该文档存放于D盘的QMDownload中,如图所示:
至于每个目录的文件内容暂时可不用管,重点是能让node.js能正常工作。我弄了一个test.js,然后在dos下进入该目录,测试node.js是否能正常工作。
node.js中的内容为:
console.log("Hello oschina!");
测试:
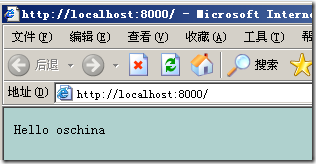
可以再写个例子:
var http = require('http');
server = http.createServer(function (req, res) {
      res.writeHeader(200, {"Content-Type": "text/plain"});
      res.end("Hello oschina\n");
})
server.listen(8000);
console.log("httpd start @8000");
环境应该差不多了。下面要开始用node.js写socketServer了
在谷歌里搜索了很多资料,本想基于一位老外写的模块进行测试,发现跑不起来。
他的项目:Basic-Node.js-Websocket-Chat
启动的时候报找不到utils模块,折腾了半天,也没能跑起来,果断放弃了,继续寻找…
后来找到这篇文章:Node.js and HTML5 Web Sockets,在里面找到别人写好的模块:node.ws.js
它的主页有例子,告诉使用者如何使用它的模块。
var sys = require("sys"),
    ws = require("./ws");

  ws.createServer(function (websocket) {
    websocket.addListener("connect", function (resource) {
      // emitted after handshake
      sys.debug("connect: " + resource);

      // server closes connection after 10s, will also get "close" event
      setTimeout(websocket.end, 10 * 1000);
    }).addListener("data", function (data) {
      // handle incoming data
      sys.debug(data);

      // send data to client
      websocket.write("Thanks!");
    }).addListener("close", function () {
      // emitted when server or client closes connection
      sys.debug("close");
    });
  }).listen(8080);
我下载了ws.js,然后将它放在node.js解压目录下的lib目录中D:\QMDownload\nodejs-0.4.6\lib\ws.js
然后基于这个模块写socket server(socket.js--存放于D:\QMDownload\nodejs-0.4.6目录下):
var sys = require("sys"),
    ws = require("../lib/ws");

var socketPool = [];

var server = ws.createServer(function(socket) {

    socket.addListener("connect", function(res) {
        sys.puts("client connected from:" + socket.remoteAddress + "" + res);
        socket.write("welcome\r\n");

        socketPool.push(this);
    });

    socket.addListener("data", function(data) {
        //socket.write(data);

        for (var i = 0, len = socketPool.length; i < len; i++)
        {
            socketPool[i].write(data);
        }
    });

    socket.addListener("close", function() {
        sys.puts("client close!");

        for (var i = 0, len = socketPool.length; i < len; i++)
        {
            if (this == socketPool[i])
            {
                socketPool.splice(i, 1);
                break;
            }
        }
    });

});

server.listen(8082);
在这里我只是加了一个数组(socket池的概念),因为在测试中,我发现socket.write是可以反馈消息给客户端,但只是那个发送消息过来的客户端,如果要想对消息进行广播(broadcast),我尝试着这里去使用,但并不知道这样写是否有问题(暂时忽略吧~ 等以后有精力再仔细研究了)
接下来是前台页面了,这个相对简单一些,逻辑部分并不多,需要解决的事情:
1、判断当前浏览器是否支持:WebSocket
2、使用WebSocket中的几个常用方法:onopen、onclose、onmessage、send处于一下消息
HTML的源码:
<!DOCTYPE html>
<html>
<head>
<title>Web Socket Chat</title>
<meta http-equiv="content-type" content="text/html;charset=utf-8">
<script src="jquery-1.3.2.min.js" type="text/javascript"></script>1:2: <script type="text/javascript">3: var ws;4: $(document).ready(function () {5:6: if ("WebSocket" in window) {7: debug("Browser supports web sockets!", 'success');8: connect($('#host').val());9: $('#console_send').removeAttr('disabled');10: } else {11: debug("Browser does not support web sockets", 'error');12: };13:14: // function to send data on the web socket15: function ws_send(str) {16: try {17: ws.send(str);18: } catch (err) {19: debug(err, 'error');20: }21: }22:23: // connect to the specified host24: function connect(host) {25:26: debug("Connecting to " + host + " ...");27: try {28: ws = new WebSocket(host); // create the web socket29: } catch (err) {30: debug(err, 'error');31: }32: $('#host_connect').attr('disabled', true); // disable the 'reconnect' button33:34: ws.onopen = function () {35: debug("connected... ", 'success'); // we are in! :D36: };37:38: ws.onmessage = function (evt) {39: debug(evt.data, 'response'); // we got some data - show it omg!!40: };41:42: ws.onclose = function () {43: debug("Socket closed!", 'error'); // the socket was closed (this could be an error or simply that there is no server)44: $('#host_connect').attr('disabled', false); // re-enable the 'reconnect button45: };46: };47:48: // function to display stuff, the second parameter is the class of the <p> (used for styling)49: function debug(msg, type) {50: $("#console").append('<p class="' + (type || '') + '">' + msg + '</p>');51: };52:53: // the user clicked to 'reconnect' button54: $('#host_connect').click(function () {55: debug("\n");56: connect($('#host').val());57: });58:59: // the user clicked the send button60: $('#console_send').click(function () {61: ws_send($('#console_input').val());62: });63:64: $('#console_input').keyup(function (e) {65: if(e.keyCode == 13) // enter is pressed66: ws_send($('#console_input').val());67: });68:69: });</script>
<style type="text/css">
.error {color: red;}
.success {color: green;}
#console_wrapper {background-color: black; color:white;padding:5px;}
#console p {padding:0;margin:0;}
</style>
</head>
<body>
<h1>Web Socket Chat</h1>
<div id="server_wrapper">
<p>Server
<input type="text" name="host" id="host" value="ws://localhost:8082/" />
<input type="submit" name="host_connect" id="host_connect" value="重新连接" />
</p>
</div>
<div id="console_wrapper">
<pre id="console"></pre>
<input type="text" name="console_input" id="console_input" value="" />
<input type="submit" name="console_send" id="console_send" value="Send" />
</div>
</body>
</html>
如果使用flash进行socket进行连接,那么socket server先要返回一个security policy的字符串(解决安全沙箱的问题)


 浙公网安备 33010602011771号