安装jessie记录
1 引言
我是一名linux忠实的用户,从2010年开始,一直在笔记本上用Debiana,Debian是所有 linux发行版里最彻底执行自由软件精神的,从5.0到6.0,从一个初学者为长为中级用户, 越用越发现linux世界的精彩:)。在这三年时间里,学习了emacs这个神器,这是黑客精神 的产物,LaTex是接触的第二个神器,领略了软件中的艺术品。今年5月Debian从6.0升 级到7.0,这次我计划安装testing版,也就是jessie,下面是安装中问题总结,大家看了 有什么问题,观迎讨论。
2 目标
- 开发java程序,eclipse,rabbitvcs
- 写文档,texlive
- 画图,asympote
- 数学,octave
- 翻译,stardict
- 一切的前端,emacs23.4
- windows虚拟,wine
- 游戏,dosbox
3 usb安装
由于笔记本光驱坏了,只能用usb安装了,试了不少方式,用 官方 的方法:
CD 或 DVD 映像直接写入 U 盘,覆盖它当前的内容。例如,使用已有的 GNU/Linux 系统,
CD 或 DVD 映像文件可以参照下面方法写入 U 盘,写之前请确认 U 盘已经卸载:
# cp debian.iso /dev/sdX
# sync
写入后,U盘内容的确是映像的内容了,而且U盘被认成了usb-cdrom,但无法启动!又找 了U盘的量产工具,没敢试。
另一种方法制作U盘是手动复制安装文件和 CD 映像。注意U盘最小容量为1GB (也可以使用较
少容量,请参考 第 4.3.3 节 “手动复制文件到 U 盘 — 灵活的方法”)。

有一个文件合集 hd-media/boot.img.gz 包含所有的安装程序文件(包括内核) 以及
syslinux 和对应的配置文件 。

需要注意的是,虽然方便,但该方法有一个主要缺点:即使 U 盘容量更大,该设备的逻辑尺
寸还是限制在 1 GB。如果您要该 U 盘作其他用途,需要为它重新分区,为剩余容量创建一
个新的文件系统。

使用该映象只须将它直接解压到 U 盘:

# zcat boot.img.gz > /dev/sdX

然后,挂载 U 盘 (mount /dev/sdX /mnt), 现在上面有了 一个 FAT 文件系统 ,然后复制
Debian ISO 映像 (netinst 或完整的 CD) 到里面。卸载 U 盘 (umount /mnt) 就完成了。
写入后,16G的U盘的确只有1G容量了,复制CD ISO映像到U盘中,还是无法启动!
无奈在网上找办法,ultraiso 软碟通,将jessie DVD映像写入,可以启动安装了!启动后 加载光盘时有点技巧,要写入/dev/cdrom,多试几次,一路畅通!
4 无线网卡
安装完系统,第一个问题就是无线网卡无法安装。
机器是thinkpad r400,无线网卡是rt8192se,Debian5.0/6.0中使用源码安装成功, 见 无线网卡安装 ,但在jessie中不行,又到 官网 下载了最新驱动,编译出现如下错误:
[root@localhost rtl_92ce_92se_92de_linux_mac80211_0005.1230.2011]# make
make -C /lib/modules/2.6.32-279.11.1.el6.i686/build M=/var/tmp/rtl_92ce_92se_92de_linux_mac80211_0005.1230.2011 modules
make[1]: Entering directory `/usr/src/kernels/2.6.32-279.11.1.el6.i686'
  CC [M]  /var/tmp/rtl_92ce_92se_92de_linux_mac80211_0005.1230.2011/base.o
/var/tmp/rtl_92ce_92se_92de_linux_mac80211_0005.1230.2011/base.c: In function ‘rtl_action_proc’:
/var/tmp/rtl_92ce_92se_92de_linux_mac80211_0005.1230.2011/base.c:861: error: ‘RX_FLAG_TSFT’ undeclared (first use in this function)
/var/tmp/rtl_92ce_92se_92de_linux_mac80211_0005.1230.2011/base.c:861: error: (Each undeclared identifier is reported only once
/var/tmp/rtl_92ce_92se_92de_linux_mac80211_0005.1230.2011/base.c:861: error: for each function it appears in.)
make[2]: *** [/var/tmp/rtl_92ce_92se_92de_linux_mac80211_0005.1230.2011/base.o] Error 1
make[1]: *** [_module_/var/tmp/rtl_92ce_92se_92de_linux_mac80211_0005.1230.2011] Error 2
make[1]: Leaving directory `/usr/src/kernels/2.6.32-279.11.1.el6.i686'
make: *** [all] Error 2
后来仔细看了源码包中的readme,试了一下第三种方式,居然成功了!
========================================================================================
                III. Compile & Installation & uninstall [2.6.24, 2.6.34]
========================================================================================
We don't support kernel 2.6.24-2.6.34 directly, Because there are
lots of issues in mac80211 from kernel 2.6.24-2.6.34,
So we suggest you to use the latest kernel >= 2.6.35.

but if you want to use our driver in an old kernel,
you can use compat-wireless. this methord can support all kernel
versions higher than 2.6.24, and you can use all functions
of our driver like you use it in the latest kernel version.

You can get more informations of compat-wireless from:
http://wireless.kernel.org/en/users/Download/stable

you should use the following commands to Compile, Installation, or uninstall the driver:

        1. Change to Super User
           sudo su

        2. install compat-wireless driver
           ./compat/script/compat-install.sh

        3. reboot
           reboot

        4. uninstall driver
           ./compat/script/compat-uninstall.sh

        5. you can get more information form follwing webset for how to use compat-wireless:
           http://wireless.kernel.org/en/users/Download/stable

NOTICE:
        1. Maybe you can not use other vendors wireless after you install compat wireless,
           in this situation, you can uninstall compat-wireless use step 4 to recover it.

        2. This install methord can support all versions of kernel, not just 2.6.24-2.6.34,
           you can also use it in the kernel higher than 2.6.35.
5 代理上网
公司上网用代理,apt-get一定要用代理啊,所以在~/,bashrc中加入以下两句:
http_proxy=http://xxxx.xxxx:8080
export http_proxy
当然firefox中也要设置代理,eclipse中的代理有点奇怪,我开始这样设置了,就是不行, 无意中将SOCKS选项中代理未填,居然好了!
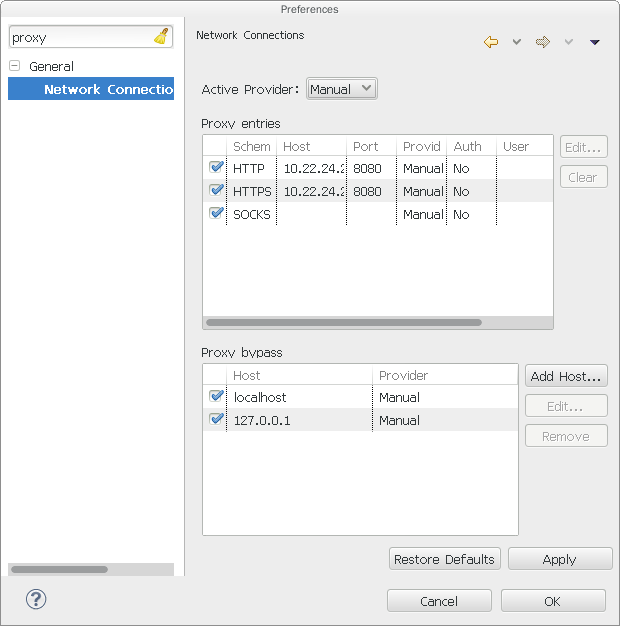
我在emacs中用w3m上网,也要设置代理:
'(w3m-command-arguments (quote ("-o" "http_proxy=http://xxx.xxx:8080"))))
6 rabbitvcs
RabbitVCS给Linux开发者带来了福音,它完全就像Windows下的TortoiseSVN。jessie程序 库中有rabbitvcs,但是安装后鼠标右键并没有版本控制菜单,原因jessie使用的是 gnome3,库里的rabbitvcs只支持gnome2,没办法只能手动安装了。
- 下载源码 RabbitVCS 0.15.3
machine@debian:~$ wget http://rabbitvcs.googlecode.com/files/rabbitvcs-0.15.3.tar.bz2
- 安装依赖:
sudo apt-get install python-nautilus python-configobj python-gtk2 python-glade2
sudo apt-get install python-svn python-dbus python-dulwich subversion meld
- 安装RabbitVCS
machine@debian:~/Downloads$ tar jxvf rabbitvcs-0.15.3.tar.bz2
machine@debian:~/Downloads/rabbitvcs-0.15.3$ cd rabbitvcs-0.15.3/
machine@debian:~/Downloads/rabbitvcs-0.15.3$ sudo python setup.py install –install-layout=deb
machine@debian:~/Downloads/rabbitvcs-0.15.3$ sudo cp clients/nautilus-3.0/RabbitVCS.py /usr/share/nautilus-python/extensions/
- 添加软件链接
## 重启nautilus时,发生错误
machine@debian:nautilus -q
## 添加软件链接
machine@debian:sudo ln -sf /usr/lib/libpython2.7.so.1
/usr/lib/libpython2.7.so.1.0
## 再次重启nautilus
machine@debian:nautilus -q
ok!
7 locale
安装rabbitvcs时,不知怎么,系统的local从zhCN.utf8改为了enGB.utf8,用网上各种 方法都改不过来:
  - 用dpkg-reconfigure locales重新配置locale

  - 手动增加locale,只要把新的locale增加到/etc/locale.gen文件中,再运行
    locale-gen命令即可生成新的locale

# This file lists locales that you wish to have built. You can find a list
# of valid supported locales at /usr/share/i18n/SUPPORTED. Other
# combinations are possible, but may not be well tested. If you change
# this file, you need to rerun locale-gen.
#
zh_CN.GBK GBK
zh_CN.UTF-8 UTF-8

  - 修改/etc/default/locale,结果只是影响root用户的locale
看来locale命令一定是从哪个文件读取了Locale设定的信息,我不知道是不是与开机启动 的一些文件有关,目前先在/etc/X11/Xsession.d/25xchinput-start文件中加入:
export LANG=zh_CN.utf8
export LAN=zh_CN.UTF-8
export LC_ALL=zh_CN.UTF-8
export LC_LANG=zh_CN.UTF-8
重启后locale合适了,但系统菜单还是英文,不过能使用了:),一定是先加载了系统菜单, 才调用/etc/X11/Xsession.d/25xchinput-start文件,以后再研究吧。
machine@debian:~$ locale
LANG=zh_CN.utf8
LANGUAGE=
LC_CTYPE="zh_CN.UTF-8"
LC_NUMERIC="zh_CN.UTF-8"
LC_TIME="zh_CN.UTF-8"
LC_COLLATE="zh_CN.UTF-8"
LC_MONETARY="zh_CN.UTF-8"
LC_MESSAGES="zh_CN.UTF-8"
LC_PAPER="zh_CN.UTF-8"
LC_NAME="zh_CN.UTF-8"
LC_ADDRESS="zh_CN.UTF-8"
LC_TELEPHONE="zh_CN.UTF-8"
LC_MEASUREMENT="zh_CN.UTF-8"
LC_IDENTIFICATION="zh_CN.UTF-8"
LC_ALL=zh_CN.UTF-8
8 tomcat
tomcat是手动安装的,先下载apache-tomcat-6.0.37,解压到/opt/中,然后在 /usr/share/中建立一个链接:
machine@debian:sudo ln -s /opt/apache-tomcat-6.0.37/ /usr/share/tomcat6
开放相关目录权限,用户就可以发布程序了:
machine@debian:sudo chmod 757 /opt/apache-tomcat-6.0.37/
查找logs目录下的信息,只有错误级的信息,没别的辅助内容. 给查错带来了困难,在这种 情况下,是因为Tomcat自身的默认日志没有将一些错误信息输出到控制台或文件,需要配置 Tomcat自身的log,启用详细的调试日志。首先需要准备的文件为:
- log4j.jar , 下载地址 : http://www.apache.org/dist/logging/log4j/1.2.15/apache-log4j-1.2.15.zip
- Tomcat6 所需的 commons-logging.jar,下载地址: http://www.apache.org/dist/commons/logging/binaries/commons-logging-1.1.zip
- log4j配置文件:
log4j.rootLogger=info,console

log4j.appender.console=org.apache.log4j.ConsoleAppender
log4j.appender.console.layout=org.apache.log4j.PatternLayout
log4j.appender.console.layout.ConversionPattern=[cmall] %d{yyyy-MM-dd HH:mm:ss} [%5p] (%F:%L) - %m%n

log4j.logger.freemarker=FATAL
- commons-logging-1.1.jar,log4j-1.2.15.jar,log4j.properties复制到 $CATALINA_HOME/lib下
- 下载 tomcat-juli.jar 和 tomcat-juli-adapters.jar,这两个包是tomcat的扩展内容, 将 tomcat-juli-adapters.jar复制到 $CATALINA_HOME/lib下,将 tomcat-juli.jar覆 盖 $CATALINA_HOME/bin/tomcat-juli.jar
- 删除 $CATALINA_BASE/conf/logging.properties文件,防止 java.util.logging产生0 长度的log文件
现在tomcat可以记录info级别的信息了:)
[cmall] 2013-08-18 17:22:28 [ INFO] (ExecutorConfigurationSupport.java:191) - Shutting down ExecutorService 'taskExecutor'
[cmall] 2013-08-18 17:22:28 [ INFO] (EhCacheManagerFactoryBean.java:164) - Shutting down EhCache CacheManager
[cmall] 2013-08-18 17:22:28 [ INFO] (AbstractEntityManagerFactoryBean.java:441) - Closing JPA EntityManagerFactory for persistence unit 'persistenceUnit'
[cmall] 2013-08-18 17:22:28 [ INFO] (SessionFactoryImpl.java:927) - closing
[cmall] 2013-08-18 17:22:28 [ERROR] (WebappClassLoader.java:1998) - The web application [/CMall] registered the JDBC driver [com.mysql.jdbc.Driver] but failed to unregister it when the web application was stopped. To prevent a memory leak, the JDBC Driver has been forcibly unregistered.
[cmall] 2013-08-18 17:22:28 [ERROR] (WebappClassLoader.java:2192) - The web application [/CMall] appears to have started a thread named [Abandoned connection cleanup thread] but has failed to stop it. This is very likely to create a memory leak.

 浙公网安备 33010602011771号