


Working with Data » Getting started with ASP.NET Core and Entity Framework Core using Visual Studio » 增、查、改、删操作
Create, Read, Update, and Delete operations
By Tom Dykstra
The Contoso University sample web application demonstrates how to create ASP.NET Core 1.0 MVC web applications using Entity Framework Core 1.0 and Visual Studio 2015. For information about the tutorial series, see the first tutorial in the series.
In the previous tutorial you created an MVC application that stores and displays data using the Entity Framework and SQL Server LocalDB. In this tutorial you’ll review and customize the CRUD (create, read, update, delete) code that the MVC scaffolding automatically creates for you in controllers and views.
在前面的教程中,您创建了 MVC 应用程序,使用实体框架和 SQL 服务器 LocalDB来存储和显示数据。在本教程中,您会回顾和自定义 CRUD 代码 (创建、 读取、 更新、 删除),这些代码由 MVC 基架为您自动创建于控制器和视图中。
Note
It’s a common practice to implement the repository pattern in order to create an abstraction layer between your controller and the data access layer. To keep these tutorials simple and focused on teaching how to use the Entity Framework itself, they don’t use repositories. For information about repositories with EF, see the last tutorial in this series.
Sections:
In this tutorial, you’ll work with the following web pages:


Customize the Details page¶ 自定义Details页面
The scaffolded code for the Students Index page left out the Enrollments property, because that property holds a collection. In the Details page you’ll display the contents of the collection in an HTML table.
基架搭建的Students Index页面的代码忽略的Enrollments属性,因为该属性包含一个集合。在Details页面中,你将把该集合的内容显示到HTML表中。
In Controllers/StudentsController.cs, the action method for the Details view uses the SingleOrDefaultAsync method to retrieve a single Student entity. Add code that calls Include. ThenInclude, and AsNoTracking methods, as shown in the following highlighted code.
在Controllers/StudentsController.cs中,关于Details视图的方法使用SingleOrDefaultAsync方法来取回单个Student实体。增加如下高亮的Include. ThenInclude和AsNoTracking方法代码。
public async Task<IActionResult> Details(int? id)
{
    if (id == null)
    {
        return NotFound();
    }

    var student = await _context.Students
        .Include(s => s.Enrollments)
            .ThenInclude(e => e.Course)
        .AsNoTracking()
        .SingleOrDefaultAsync(m => m.ID == id);

    if (student == null)
    {
        return NotFound();
    }

    return View(student);
}
The Include and ThenInclude methods cause the context to load the Student.Enrollments navigation property, and within each enrollment the Enrollment.Course navigation property. You’ll learn more about these methods in the reading related data tutorial.
Include和ThenInclude方法使上下文加载Student.Enrollments导航属性,以及在每个enrollment中的Enrollment.Course导航属性。
The AsNoTracking method improves performance in scenarios where the entities returned will not be updated in the current context’s lifetime. You’ll learn more about AsNoTracking at the end of this tutorial.
AsNoTracking 方法提高了在该场景下的性能,即在当前上下文生命周期中不再更新返回的实体。你将在该教程的末尾学习更多关于AsNoTracking 的内容。
Note
The key value that is passed to the Details method comes from route data.
Route data is data that the model binder found in a segment of the URL. For example, the default route specifies controller, action, and id segments:
    app.UseMvc(routes =>
    {
        routes.MapRoute(
            name: "default",
            template: "{controller=Home}/{action=Index}/{id?}");
    });

    DbInitializer.Initialize(context);
}
In the following URL, the default route maps Instructor as the controller, Index as the action, and 1 as the id; these are route data values.
http://localhost:1230/Instructor/Index/1?courseID=2021
The last part of the URL (”?courseID=2021”) is a query string value. The model binder will also pass the ID value to the Details method id parameter if you pass it as a query string value:
http://localhost:1230/Instructor/Index?id=1&CourseID=2021
In the Index page, hyperlink URLs are created by tag helper statements in the Razor view. In the following Razor code, the id parameter matches the default route, so id is added to the route data.
<a asp-action="Edit" asp-route-id="@item.ID">Edit</a>
In the following Razor code, studentID doesn’t match a parameter in the default route, so it’s added as a query string.
<a asp-action="Edit" asp-route-studentID="@item.ID">Edit</a>
Add enrollments to the Details view¶ 向Details视图添加enrollments
Open Views/Students/Details.cshtml. Each field is displayed using DisplayNameFor and DisplayFor helper, as shown in the following example:
<dt>
    @Html.DisplayNameFor(model => model.EnrollmentDate)
</dt>
<dd>
    @Html.DisplayFor(model => model.EnrollmentDate)
</dd>
After the last field and immediately before the closing </dl> tag, add the following code to display a list of enrollments:
在表示关闭的</dl>标签前的最后一个字段后,添加以下代码来显示enrollments列表:
<dt>
    @Html.DisplayNameFor(model => model.Enrollments)
</dt>
<dd>
    <table class="table">
        <tr>
            <th>Course Title</th>
            <th>Grade</th>
        </tr>
        @foreach (var item in Model.Enrollments)
        {
            <tr>
                <td>
                    @Html.DisplayFor(modelItem => item.Course.Title)
                </td>
                <td>
                    @Html.DisplayFor(modelItem => item.Grade)
                </td>
            </tr>
        }
    </table>
</dd>
If code indentation is wrong after you paste the code, press CTRL-K-D to correct it. 如果粘贴后代码的缩进出现问题,按CTRL-K-D进行修正。
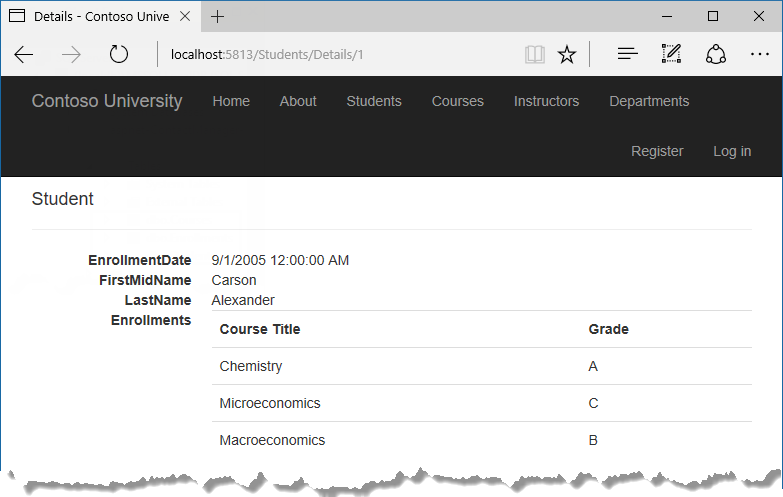
This code loops through the entities in the Enrollments navigation property. For each enrollment, it displays the course title and the grade. The course title is retrieved from the Course entity that’s stored in the Course navigation property of the Enrollments entity.
Run the application, select the Students tab, and click the Details link for a student. You see the list of courses and grades for the selected student:

Update the Create page¶ 更新Creat页面
In StudentsController.cs, modify the HttpPost Create method by adding a try-catch block and removing ID from the Bind attribute.
[HttpPost]
[ValidateAntiForgeryToken]
public async Task<IActionResult> Create(
    [Bind("EnrollmentDate,FirstMidName,LastName")] Student student)
{
    try
    {
        if (ModelState.IsValid)
        {
            _context.Add(student);
            await _context.SaveChangesAsync();
            return RedirectToAction("Index");
        }
    }
    catch (DbUpdateException /* ex */)
    {
        //Log the error (uncomment ex variable name and write a log.
        ModelState.AddModelError("", "Unable to save changes. " +
            "Try again, and if the problem persists " +
            "see your system administrator.");
    }
    return View(student);
}
This code adds the Student entity created by the ASP.NET MVC model binder to the Students entity set and then saves the changes to the database. (Model binder refers to the ASP.NET MVC functionality that makes it easier for you to work with data submitted by a form; a model binder converts posted form values to CLR types and passes them to the action method in parameters. In this case, the model binder instantiates a Student entity for you using property values from the Form collection.)
You removed ID from the Bind attribute because ID is the primary key value which SQL Server will set automatically when the row is inserted. Input from the user does not set the ID value.
将ID从Bind属性删除,因为ID是主键值,当插入一行使将由SQL Server自动设置。用户输入不设置该ID值。
Other than the Bind attribute, the try-catch block is the only change you’ve made to the scaffolded code. If an exception that derives from DbUpdateException is caught while the changes are being saved, a generic error message is displayed. DbUpdateException exceptions are sometimes caused by something external to the application rather than a programming error, so the user is advised to try again. Although not implemented in this sample, a production quality application would log the exception. For more information, see the Log for insight section in Monitoring and Telemetry (Building Real-World Cloud Apps with Azure).
The ValidateAntiForgeryToken attribute helps prevent cross-site request forgery (CSRF) attacks. The token is automatically injected into the view by the FormTagHelper and is included when the form is submitted by the user. The token is validated by the ValidateAntiForgeryToken attribute. For more information about CSRF, see 🔧 Anti-Request Forgery.
Security note about overposting
The Bind attribute that the scaffolded code includes on the Create method is one way to protect against overposting in create scenarios. For example, suppose the Student entity includes a Secret property that you don’t want this web page to set.
基架产生Creat方法代码中的Bind属性,是防止overposting的方法之一。
public class Student
{
    public int ID { get; set; }
    public string LastName { get; set; }
    public string FirstMidName { get; set; }
    public DateTime EnrollmentDate { get; set; }
    public string Secret { get; set; }
}
Even if you don’t have a Secret field on the web page, a hacker could use a tool such as Fiddler, or write some JavaScript, to post a Secret form value. Without the Bind attribute limiting the fields that the model binder uses when it creates a Student instance, the model binder would pick up that Secret form value and use it to create the Student entity instance. Then whatever value the hacker specified for the Secret form field would be updated in your database. The following image shows the Fiddler tool adding the Secret field (with the value “OverPost”) to the posted form values.

The value “OverPost” would then be successfully added to the Secret property of the inserted row, although you never intended that the web page be able to set that property.
It’s a security best practice to use the Include parameter with the Bind attribute to whitelist fields. It’s also possible to use the Exclude parameter to blacklist fields you want to exclude. The reason Include is more secure is that when you add a new property to the entity, the new field is not automatically protected by an Exclude list.
You can prevent overposting in edit scenarios by reading the entity from the database first and then calling TryUpdateModel, passing in an explicit allowed properties list. That is the method used in these tutorials.
An alternative way to prevent overposting that is preferrred by many developers is to use view models rather than entity classes with model binding. Include only the properties you want to update in the view model. Once the MVC model binder has finished, copy the view model properties to the entity instance, optionally using a tool such as AutoMapper. Use _context.Entry on the entity instance to set its state to Unchanged, and then set Property("PropertyName").IsModified to true on each entity property that is included in the view model. This method works in both edit and create scenarios.
Modify the Create view 修改Creat视图
The code in Views/Students/Create.cshtml uses label, input, and span (for validation messages) tag helpers for each field.
in ASP.NET Core 1.0, validation messages aren’t rendered if span elements are self-closing, but scaffolding creates them as self-closing. To enable validation, convert the validation span tags from self-closing to explicit closing tags. (Remove the “/” before the closing angle bracket, and add </span>.) The changes are highlighted in the following example.
<div class="form-group">
    <label asp-for="EnrollmentDate" class="col-md-2 control-label"></label>
    <div class="col-md-10">
        <input asp-for="EnrollmentDate" class="form-control" />
        <span asp-validation-for="EnrollmentDate" class="text-danger"></span> /*源代码是<span asp-validation-for="EnrollmentDate" class="text-danger" />,不修改代码时,不能保存,但不出现错误提示*/
    </div>
</div>
<div class="form-group">
    <label asp-for="FirstMidName" class="col-md-2 control-label"></label>
    <div class="col-md-10">
        <input asp-for="FirstMidName" class="form-control" />
        <span asp-validation-for="FirstMidName" class="text-danger"></span>
    </div>
</div>
<div class="form-group">
    <label asp-for="LastName" class="col-md-2 control-label"></label>
    <div class="col-md-10">
        <input asp-for="LastName" class="form-control" />
        <span asp-validation-for="LastName" class="text-danger"></span>
    </div>
</div>
Note
The 1.0.1 release of the scaffolding tooling generates explicitly closed span tags, but as of September, 2016, the 1.0.1 tooling is not included in the new-project templates. If you want to get the newer version of scaffolding code, you can update project.json to reference the “1.0.0-preview2-update1” release of two NuGet packages: “Microsoft.VisualStudio.Web.CodeGenerators.Mvc” and “Microsoft.VisualStudio.Web.Codegeneration.Tools”.
Run the page by selecting the Students tab and clicking Create New.
Enter names and an invalid date and click Create to see the error message.

This is server-side validation that you get by default; in a later tutorial you’ll see how to add attributes that will generate code for client-side validation also. The following highlighted code shows the model validation check in the Create method.
[HttpPost]
[ValidateAntiForgeryToken]
public async Task<IActionResult> Create(
    [Bind("EnrollmentDate,FirstMidName,LastName")] Student student)
{
    try
    {
        if (ModelState.IsValid)
        {
            _context.Add(student);
            await _context.SaveChangesAsync();
            return RedirectToAction("Index");
        }
    }
    catch (DbUpdateException /* ex */)
    {
        //Log the error (uncomment ex variable name and write a log.
        ModelState.AddModelError("", "Unable to save changes. " +
            "Try again, and if the problem persists " +
            "see your system administrator.");
    }
    return View(student);
}
Change the date to a valid value and click Create to see the new student appear in the Index page.
Update the Edit page
In StudentController.cs, the HttpGet Edit method (the one without the HttpPost attribute) uses the SingleOrDefaultAsync method to retrieve the selected Student entity, as you saw in the Details method. You don’t need to change this method.
Recommended HttpPost Edit code: Read and update
Replace the HttpPost Edit action method with the following code. The changes are highlighted.
        [HttpPost, ActionName("Edit")]
        [ValidateAntiForgeryToken]
        public async Task<IActionResult> EditPost(int? id)
        {
            if (id == null)
            {
                return NotFound();
            }
            var studentToUpdate = await _context.Students.SingleOrDefaultAsync(s => s.ID == id);
            if (await TryUpdateModelAsync<Student>(
                studentToUpdate,
                "",
                s => s.FirstMidName, s => s.LastName, s => s.EnrollmentDate))
            {
                try
                {
                    await _context.SaveChangesAsync();
                    return RedirectToAction("Index");
                }
                catch (DbUpdateException /* ex */)
                {
                    //Log the error (uncomment ex variable name and write a log.)
                    ModelState.AddModelError("", "Unable to save changes. " +
                        "Try again, and if the problem persists, " +
                        "see your system administrator.");
                }
            }
            return View(studentToUpdate);
        }
These changes implement a security best practice to prevent overposting. The scaffolder generated a Bind attribute and added the entity created by the model binder to the entity set with a Modified flag. That code is not recommended for many scenarios because the Bind attribute clears out any pre-existing data in fields not listed in the Include parameter.
这些变化是阻止overposting的最佳安全实践。基架生成了一个Bind属性,并且将由binder生成的实体设置了一个Modified标识。这些代码不推荐用于很多的场景,因为Bind属性清除了一些业已存在的字段数据,这些数据并没有在Include参数中列出来。
The new code reads the existing entity and calls TryUpdateModel to update fields in the retrieved entity based on user input in the posted form data. The Entity Framework’s automatic change tracking sets the Modified flag on the fields that are changed by form input. When the SaveChanges method is called, the Entity Framework creates SQL statements to update the database row. Concurrency conflicts are ignored, and only the table columns that were updated by the user are updated in the database. (A later tutorial shows how to handle concurrency conflicts.)
新代码读取现有实体,并且调用TryUpdateModel来更新字段,这些字段从用户输入的posted form数据中检索得来。EF的自动变更跟踪机制设置了由form输入而变更字段的Modified标识。当调用SaveChanges方法时,EF创建SQL语句来更新数据库的行。并发冲突被忽略,并且只有用户变更的列被更新到数据库中。(后面的教程展示如何处理并发冲突)
As a best practice to prevent overposting, the fields that you want to be updateable by the Edit page are whitelisted in the TryUpdateModel parameters. (The empty string preceding the list of fields in the parameter list is for a prefix to use with the form fields names.) Currently there are no extra fields that you’re protecting, but listing the fields that you want the model binder to bind ensures that if you add fields to the data model in the future, they’re automatically protected until you explicitly add them here.
As a result of these changes, the method signature of the HttpPost Edit method is the same as the HttpGet Edit method; therefore you’ve renamed the method EditPost.
Alternative HttpPost Edit code: Create and attach 备选HttpPost Edit 代码
The recommended HttpPost edit code ensures that only changed columns get updated and preserves data in properties that you don’t want included for model binding. However, the read-first approach requires an extra database read, and can result in more complex code for handling concurrency conflicts. An alternative is to use the approach adopted by the MVC controller scaffolding engine. The following code shows how to implement code for an HttpPost Edit method that attaches an entity created by the model binder to the EF context and marks it as modified. (Don’t update your project with this code, it’s only shown to illustrate an optional approach.)
推荐的HttpPost edit 代码保证只更新变更的列,并且保护你不想包含在模型绑定中的属性。然而,读取优先的方法需要额外读取数据库,并且导致了处理并发冲突时更加复杂的代码。一个替代的的方法是使用MVC控制器基架引擎采用的方法。下列代码显示了如何执行HttpPost Edit方法,该代码附加了一个由EF上下文模型绑定器创建的实体,并且将其标注为modified。(不要用这段代码更新的你的项目,其近用于展示并发冲突)
        public async Task<IActionResult> Edit(int id, [Bind("ID,EnrollmentDate,FirstMidName,LastName")] Student student)
        {
            if (id != student.ID)
            {
                return NotFound();
            }
            if (ModelState.IsValid)
            {
                try
                {
                    _context.Update(student);
                    await _context.SaveChangesAsync();
                    return RedirectToAction("Index");
                }
                catch (DbUpdateException /* ex */)
                {
                    //Log the error (uncomment ex variable name and write a log.)
                    ModelState.AddModelError("", "Unable to save changes. " +
                        "Try again, and if the problem persists, " +
                        "see your system administrator.");
                }
            }
            return View(student);
        }
You can use this approach when the web page UI includes all of the fields in the entity and can update any of them.
当网页包含实体所有字段,并且能更新任何一个字段时,你可以采用这种方法。
Entity States 实体状态
The database context keeps track of whether entities in memory are in sync with their corresponding rows in the database, and this information determines what happens when you call the SaveChanges method. For example, when you pass a new entity to the Add method, that entity’s state is set to Added. Then when you call the SaveChanges method, the database context issues a SQL INSERT command.
An entity may be in one of the following states:
Added. The entity does not yet exist in the database. TheSaveChangesmethod issues an INSERT statement.Unchanged. Nothing needs to be done with this entity by theSaveChangesmethod. When you read an entity from the database, the entity starts out with this status.Modified. Some or all of the entity’s property values have been modified. TheSaveChangesmethod issues an UPDATE statement.Deleted. The entity has been marked for deletion. TheSaveChangesmethod issues a DELETE statement.Detached. The entity isn’t being tracked by the database context.
In a desktop application, state changes are typically set automatically. You read an entity and make changes to some of its property values. This causes its entity state to automatically be changed to Modified. Then when you call SaveChanges, the Entity Framework generates a SQL UPDATE statement that updates only the actual properties that you changed.
(上面讲了很多,但类似于传统的datatable中的datarow的情况)
In a web app, the DbContext that initially reads an entity and displays its data to be edited is disposed after a page is rendered. When the HttpPost Edit action method is called, a new web request is made and you have a new instance of the DbContext. If you re-read the entity in that new context, you simulate desktop processing.
But if you don’t want to do the extra read operation, you have to use the entity object created by the model binder. The simplest way to do this is to set the entity state to Modified as is done in the alternative HttpPost Edit code shown earlier. Then when you call SaveChanges, the Entity Framework updates all columns of the database row, because the context has no way to know which properties you changed.
但是,如果你不想执行这个额外的读取操作,你必须使用模型绑定创建的实体对象。实现该目的的最简单方法是,如同上面讲的额外的HttpPost Edit代码一样,将实体状态设置为Modified。然后,当你调用SaveChange时,EF更新数据库所有行的所有列,因为上下文没有办法知道你改变了哪些属性。
If you want to avoid the read-first approach, but you also want the SQL UPDATE statement to update only the fields that the user actually changed, the code is more complex. You have to save the original values in some way (such as by using hidden fields) so that they are available when the HttpPost Edit method is called. Then you can create a Student entity using the original values, call the Attach method with that original version of the entity, update the entity’s values to the new values, and then call SaveChanges.
如果你想避免读取优先的方法,但是你也想让SQL UPDATE语句仅更新实际发生变化的范围,代码就复杂多了。你必须利用某些方法(例如通过使用隐藏fields)先保存原始值,以便调用HttpPost的Edit方法时,它们是可用的。然后,你就能使用原始值创建一个Stduent实体,并用实体的原始值调用Attach方法,将实体的值更新为新值,然后再调用SaveChanges方法。
Test the Edit page
The HTML and Razor code in Views/Students/Edit.cshtml is similar to what you saw in Create.cshtml, and no changes are required.
Run the application and select the Students tab, then click an Edit hyperlink.

Change some of the data and click Save. The Index page opens and you see the changed data.
Update the Delete page
In StudentController.cs, the template code for the HttpGet Delete method uses the SingleOrDefaultAsync method to retrieve the selected Student entity, as you saw in the Details and Edit methods. However, to implement a custom error message when the call to SaveChanges fails, you’ll add some functionality to this method and its corresponding view.
As you saw for update and create operations, delete operations require two action methods. The method that is called in response to a GET request displays a view that gives the user a chance to approve or cancel the delete operation. If the user approves it, a POST request is created. When that happens, the HttpPost Delete method is called and then that method actually performs the delete operation.
You’ll add a try-catch block to the HttpPost Delete method to handle any errors that might occur when the database is updated. If an error occurs, the HttpPost Delete method calls the HttpGet Delete method, passing it a parameter that indicates that an error has occurred. The HttpGet Delete method then redisplays the confirmation page along with the error message, giving the user an opportunity to cancel or try again.
Replace the HttpGet Delete action method with the following code, which manages error reporting.
public async Task<IActionResult> Delete(int? id, bool? saveChangesError = false)
{
    if (id == null)
    {
        return NotFound();
    }

    var student = await _context.Students
        .AsNoTracking()
        .SingleOrDefaultAsync(m => m.ID == id);
    if (student == null)
    {
        return NotFound();
    }

    if (saveChangesError.GetValueOrDefault())
    {
        ViewData["ErrorMessage"] =
            "Delete failed. Try again, and if the problem persists " +
            "see your system administrator.";
    }

    return View(student);
}
This code accepts an optional parameter that indicates whether the method was called after a failure to save changes. This parameter is false when the HttpGet Delete method is called without a previous failure. When it is called by the HttpPost Delete method in response to a database update error, the parameter is true and an error message is passed to the view.
The read-first approach to HttpPost Delete
Replace the HttpPost Delete action method (named DeleteConfirmed) with the following code, which performs the actual delete operation and catches any database update errors.
[HttpPost, ActionName("Delete")]
[ValidateAntiForgeryToken]
public async Task<IActionResult> DeleteConfirmed(int id)
{
    var student = await _context.Students
        .AsNoTracking()
        .SingleOrDefaultAsync(m => m.ID == id);
    if (student == null)
    {
        return RedirectToAction("Index");
    }

    try
    {
        _context.Students.Remove(student);
        await _context.SaveChangesAsync();
        return RedirectToAction("Index");
    }
    catch (DbUpdateException /* ex */)
    {
        //Log the error (uncomment ex variable name and write a log.)
        return RedirectToAction("Delete", new { id = id, saveChangesError = true });
    }
}
This code retrieves the selected entity, then calls the Remove method to set the entity’s status to Deleted. When SaveChanges is called, a SQL DELETE command is generated.
The create-and-attach approach to HttpPost Delete
If improving performance in a high-volume application is a priority, you could avoid an unnecessary SQL query by instantiating a Student entity using only the primary key value and then setting the entity state to Deleted. That’s all that the Entity Framework needs in order to delete the entity. (Don’t put this code in your project; it’s here just to illustrate an alternative.)
如果优先考虑提高涉及大量数据应用的性能,通过仅使用主键实例化一个Stduent实体,然后再设置该实体的状态为Deleted,你就可以避免不必要的SQL查询了。这就是为了删除这个实体,EF所需要做的所有的事情。(不要将该段代码放到你的项目中;这仅是为了展示一种备选方案)
[HttpPost]
[ValidateAntiForgeryToken]
public async Task<IActionResult> DeleteConfirmed(int id)
{
    try
    {
        Student studentToDelete = new Student() { ID = id };
        _context.Entry(studentToDelete).State = EntityState.Deleted;
        await _context.SaveChangesAsync();
        return RedirectToAction("Index");
    }
    catch (DbUpdateException /* ex */)
    {
        //Log the error (uncomment ex variable name and write a log.)
        return RedirectToAction("Delete", new { id = id, saveChangesError = true });
    }
}
If the entity has related data that should also be deleted, make sure that cascade delete is configured in the database. With this approach to entity deletion, EF might not realize there are related entities to be deleted.
如果该实体有需要被删除的关联数据,请确保数据库中配置了级联删除。使用这种实体删除备选方法,EF不会知道还有关联实体集合要被删除。
Update the Delete view
In Views/Student/Delete.cshtml, add an error message between the h2 heading and the h3 heading, as shown in the following example:
<h2>Delete</h2>
<p class="text-danger">@ViewData["ErrorMessage"]</p>
<h3>Are you sure you want to delete this?</h3>
Run the page by selecting the Students tab and clicking a Delete hyperlink:

Click Delete. The Index page is displayed without the deleted student. (You’ll see an example of the error handling code in action in the concurrency tutorial.)
Closing database connections¶ 关闭数据库连接
To free up the resources that a database connection holds, the context instance must be disposed as soon as possible when you are done with it. The ASP.NET Core built-in dependency injection takes care of that task for you.
要释放数据库连接持有的资源,当时用完毕后必须尽快释放上下文实例。ASP.NET Core内建了完成该工作的注入依赖。
In Startup.cs you call the AddDbContext extension method to provision the DbContext class in the ASP.NET DI container. That method sets the service lifetime to Scoped by default. Scoped means the context object lifetime coincides with the web request life time, and the Dispose method will be called automatically at the end of the web request.
Handling Transactions
By default the Entity Framework implicitly implements transactions. In scenarios where you make changes to multiple rows or tables and then call SaveChanges, the Entity Framework automatically makes sure that either all of your changes succeed or they all fail. If some changes are done first and then an error happens, those changes are automatically rolled back. For scenarios where you need more control – for example, if you want to include operations done outside of Entity Framework in a transaction – see Transactions.
No-tracking queries
When a database context retrieves table rows and creates entity objects that represent them, by default it keeps track of whether the entities in memory are in sync with what’s in the database. The data in memory acts as a cache and is used when you update an entity. This caching is often unnecessary in a web application because context instances are typically short-lived (a new one is created and disposed for each request) and the context that reads an entity is typically disposed before that entity is used again.
在数据库上下文中检索表行和创建代表他们的实体对象,默认情况下它会跟踪的内存中的实体是否与数据库同步。内存中的数据作为缓存和更新实体时使用。此缓存通常是 web 应用程序中不必要因为上下文实例是通常短暂 (新一个是创建和处理每个请求) 和上下文,读取实体通常处理,然后再使用该实体。
You can disable tracking of entity objects in memory by calling the AsNoTracking method. Typical scenarios in which you might want to do that include the following:
- During the context lifetime you don’t need to update any entities, and you don’t need EF to automatically load navigation properties with entities retrieved by separate queries. Frequently these conditions are met in a controller’s HttpGet action methods.
-
在上下文的生命周期中,你不需要更新任何实体,而且你不需要 EF 自动加载导航属性,这些导航属性带有通过查询检索的到的实体。经常,控制器的HttpGet方法满足这些这要求。
- You are running a query that retrieves a large volume of data, and only a small portion of the returned data will be updated. It may be more efficient to turn off tracking for the large query, and run a query later for the few entities that need to be updated.
-
你正在运行一个检索大量数据的查询,而只有少量部分反回的数据将被更新。关闭跟踪再进行查询可能是更有效率的,这样要被更新的少量实体更新后在运行查询。
- You want to attach an entity in order to update it, but earlier you retrieved the same entity for a different purpose. Because the entity is already being tracked by the database context, you can’t attach the entity that you want to change. One way to handle this situation is to call
AsNoTrackingon the earlier query. -
你想要附加一个实体来更新它,但为了不同的目的,你在早些时候检索相同的实体。因为数据库上下文已跟踪了实体,不能附加您想要更改的实体。一种方法来处理这种情况是前面讲到的,对查询调用 AsNoTracking方法。
- 以上几个,还不能理解,不知道是否正确翻译。
For more information, see Tracking vs. No-Tracking.

 浙公网安备 33010602011771号