
5个步骤创建你的第一个RESTFul 服务
1、啥是RESTFul 服务
在我们创建简单小程序前,先来学习下RESTFul 服务。RESTFul服务就是遵循了 Representational State Transfer(可以参考http://blog.csdn.net/zhruifei/article/details/50633495) 这个架构的一种架构。WCF允许我们使用SOAP 通过各种协议,协议包括,HTTP,TCP,MSMQ,Named Pipes等进行交换信息。现在我们通过一个最常用的协议HTTP协议来讲述WCF服务,REST服务通过HTTP来进行最常用的CRUD(Read(GET)/Create(POST)/Update(PUT)/Delete(DELETE))功能,在这里我们先实现一个简单的GET功能
2、创建restful 服务
下面是5步创建你的rest服务并且返回xml格式
- 创建WCF Service Project.
- 准备数据
- 创建Service Contract
- 继承Service
- 配置服务和行为
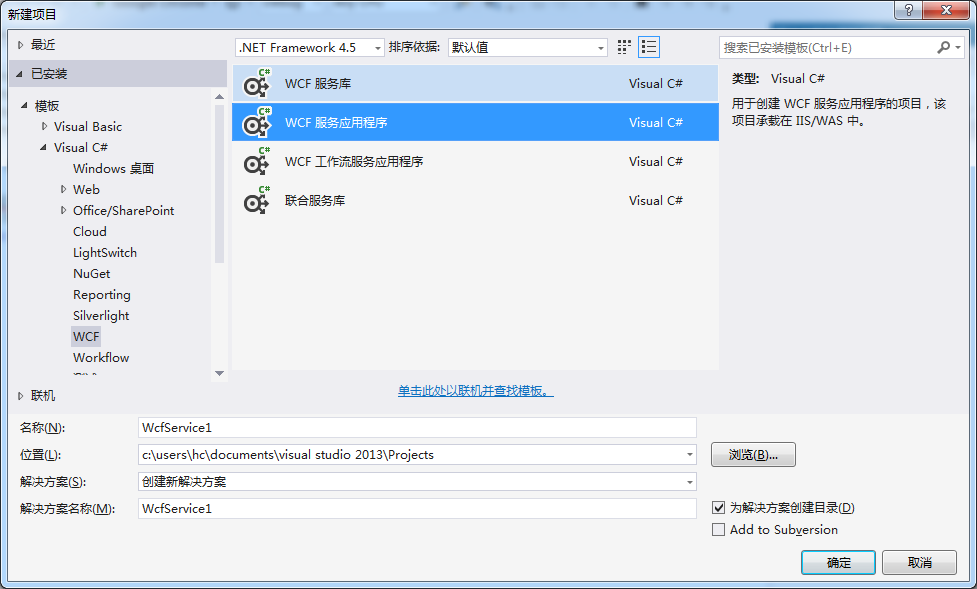
1)打开vs-新建项目-选择WCF服务应用程序
2,新建一个类 car.cs
  [DataContract]
    public class Car
    {
        [DataMember]
        public string color { get; set; }
        [DataMember]
        public double speed { get; set; }
        [DataMember]
        public double price { get; set; }
    }

    public partial class Cars
    {
        public static readonly Cars _instance = new Cars();
        private Cars() { }

        public static Cars Instance
        {
            get { return _instance; }
        }

        public List<Car> CarList
        {
            get { return carLists; }
        }
        private List<Car> carLists = new List<Car>
        {
            new Car { color = "red", speed = 200, price = 200 },
            new Car{color = "blue", speed = 200, price = 200},
            new Car{color="green",speed=300,price=400}
        };

    }
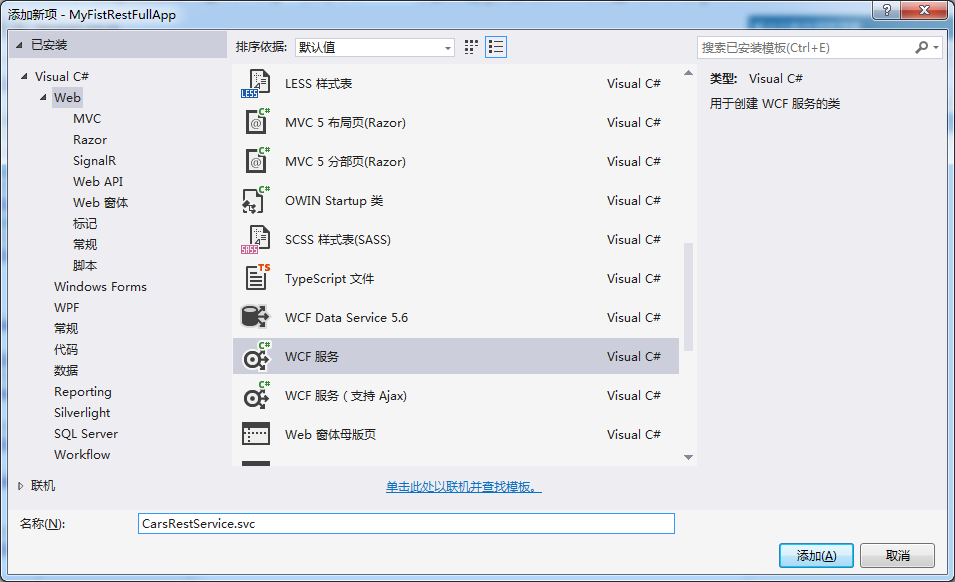
3)新建WCF 服务--如下图所示
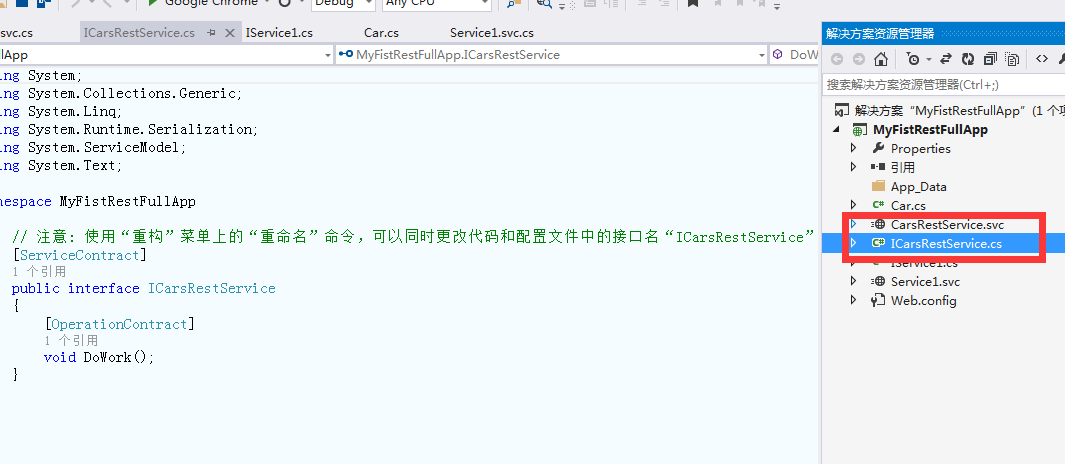
系统将新疆两个文件,包括ICarRestService.cs 接口文件如下图所示:
下面我们将Dowork 方法改为GetCarList 方法
如下所示:

- Method="Get" 代表这Http获取数据的方式
- RequestFormat = WebMessageFormat.Json 请求的数据是JSON格式,当然RequestFormat = WebMessageFormat.Xml 请求的是XML格式
- UriTemplate = "GetCarList/" 请求了URL
5)配置服务和行为
<?xml version="1.0"?>
<configuration>

  <appSettings>
    <add key="aspnet:UseTaskFriendlySynchronizationContext" value="true" />
  </appSettings>
  <system.web>
    <compilation debug="true" targetFramework="4.5" />
    <httpRuntime targetFramework="4.5"/>
  </system.web>
  <system.serviceModel>
    <services>
        <service name="MyRESTService.ProductRESTService" behaviorConfiguration="serviceBehavior">
            <endpoint address=""
                      binding="webHttpBinding"
                      contract="MyRESTService.IProductRESTService"
                      behaviorConfiguration="web"></endpoint>
          </service>
   </services>
    <behaviors>
      <serviceBehaviors>
        <behavior name="serviceBehavior">
                  <serviceMetadata httpGetEnabled="true"/>
                  <serviceDebug includeExceptionDetailInFaults="false"/>
        </behavior>
      </serviceBehaviors>
      <endpointBehaviors>
          <behavior name="web">
                <webHttp/>
            </behavior>
      </endpointBehaviors>
    </behaviors>
    <protocolMapping>
        <add binding="basicHttpsBinding" scheme="https" />
    </protocolMapping>
    <serviceHostingEnvironment multipleSiteBindingsEnabled="true" />
  </system.serviceModel>
  <system.webServer>
    <modules runAllManagedModulesForAllRequests="true"/>
    <!--
        To browse web app root directory during debugging, set the value below to true.
        Set to false before deployment to avoid disclosing web app folder information.
      -->
    <directoryBrowse enabled="true"/>
  </system.webServer>

</configuration>
配置自己写写就明白了 此处的webHTTPBinding 是rest 服务专用的绑定模式
6)然后在浏览器中输入:http://localhost:30547/CarsRestService.svc/GetCarList/
得到的结果如下:

哈哈这样第一个rest 服务就好了,希望可以帮助到你

 浙公网安备 33010602011771号