
一、实例化补充
instance_path和instance_relative_config是配合来用的、
这两个参数是用来找配置文件的,当用app.config.from_pyfile('settings.py')这种方式导入配置文件的时候会用到
from flask import Flask,request
app = Flask(__name__,instance_path=None, instance_relative_config=True)
app.config.from_pyfile('settings.py') # C:\Users\Administrator\PycharmProjects\s6day120\1.实例化补充
# instsnce_path:#如果配置了instance_path,就会去找instance里面的文件
# instance_relative_config: #如果设置为True,配置文件就找不到了,就会去找instance里面的settings.py
app.open_session
print(app.config.get("NNN"))
@app.route('/index') # app.route('/index')  f(index)
def index():
    print(request)
    return "xx"

if __name__ == '__main__':
    app.__call__
    app.run()
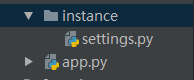
如果设置了instance——releative_config = True,就找不着settings.py文件了,解决办法:就手动创建一个instance的文件夹
二、信号(blinker)
1、flask的内置信号
Flask框架中的信号基于blinker,其主要就是让开发者可是在flask请求过程中定制一些用户行为。说白了也就是flask在列表里面
预留了几个空列表,在里面存东西。信号通过发送通知来帮助你解耦应用。简言之,信号允许某个发送者通知接收者有事情发生了;、

10个信号:
 2. request_started = _signals.signal('request-started')                # 请求到来前执行
 5. request_finished = _signals.signal('request-finished')              # 请求结束后执行

 3. before_render_template = _signals.signal('before-render-template')  # 模板渲染前执行
 4. template_rendered = _signals.signal('template-rendered')            # 模板渲染后执行

 执行2/3/4/5或不执行时出现异常 got_request_exception = _signals.signal('got-request-exception')    # 请求执行出现异常时执行

 6. request_tearing_down = _signals.signal('request-tearing-down')      # 请求执行完毕后自动执行(无论成功与否)
 7. appcontext_tearing_down = _signals.signal('appcontext-tearing-down')# 请求上下文执行完毕后自动执行(无论成功与否)


 1. appcontext_pushed = _signals.signal('appcontext-pushed')            # 请求app上下文push时执行

 8. appcontext_popped = _signals.signal('appcontext-popped')            # 请求上下文pop时执行

 message_flashed = _signals.signal('message-flashed')        # 调用flask在其中添加数据时,自动触发
问题1:特殊的装饰器(@app.before_first_request ;@app.before_request ; @app.after_request)和信号有什么区别?
- 触发信号是没有返回值的,写不写返回值都无所谓
- 特殊的装饰器对返回值是有意义的,当before_request有返回值时就不会执行后续视图函数了,没有返回值的时候才会执行后续函数,而after_request必须有返回值
所以特殊装饰器的功能比信号的功能强大
问题2:通过信号可以做权限吗?
- 本身是做不了的,要想做得用其他的机制配合着来使用,这样做的话会闲的很麻烦,所以我们选择中间件来做
问题3:信号用于做什么呢?
- 只做一些自定义的操作,而且没有返回值
- 降低代码之间的耦合
flask内置信号源码详细
 appcontext_pushed和 appcontext_popped

 1  def full_dispatch_request(self):
 2         # 3、特殊的装饰器:执行被@before_first_request装饰的所有函数
 3         self.try_trigger_before_first_request_functions()
 4         try:
 5             request_started.send(self)   #请求到来前执行信号
 6             #执行@before_request装饰的所有函数
 7             rv = self.preprocess_request()
 8             if rv is None:
 9                 #如果return None就去执行后续视图函数
10                 rv = self.dispatch_request()
11         except Exception as e:
12             rv = self.handle_user_exception(e)
13         #4、执行@after_request装饰的所有的函数,session保存
14         return self.finalize_request(rv)
1 def _render(template, context, app):
2     """Renders the template and fires the signal"""
3
4     before_render_template.send(app, template=template, context=context) #模板渲染前执行
5     rv = template.render(context)
6     template_rendered.send(app, template=template, context=context)  #模板渲染后执行
7     return rv
 1    def finalize_request(self, rv, from_error_handler=False):
 2         response = self.make_response(rv)
 3         try:
 4             response = self.process_response(response)
 5             request_finished.send(self, response=response)
 6         except Exception:
 7             if not from_error_handler:
 8                 raise
 9             self.logger.exception('Request finalizing failed with an '
10                                   'error while handling an error')
11         return response
 1  def handle_exception(self, e):
 2         exc_type, exc_value, tb = sys.exc_info()
 3
 4         got_request_exception.send(self, exception=e)   #出现异常时触发的信号
 5         handler = self._find_error_handler(InternalServerError())
 6
 7         if self.propagate_exceptions:
 8             if exc_value is e:
 9                 reraise(exc_type, exc_value, tb)
10             else:
11                 raise e
12
13         self.log_exception((exc_type, exc_value, tb))
14         if handler is None:
15             return InternalServerError()
16         return self.finalize_request(handler(e), from_error_handler=True)
request_tearing_down
1  def do_teardown_appcontext(self, exc=_sentinel):
2
3         if exc is _sentinel:
4             exc = sys.exc_info()[1]
5         for func in reversed(self.teardown_appcontext_funcs):
6             func(exc)
7         appcontext_tearing_down.send(self, exc=exc)  #请求上下文执行完毕后自动执行(无论成功与否)
2、自定义信号(Blinker的使用)
第一步:创建信号
第二步:将函数注册到信号中: 添加到这个列表
第三步: 发送信号
第四步:运行
具体实现:可参考flask源码,写一个自定义信号
from flask import Flask,flash
from flask.signals import _signals
app = Flask(__name__)

xinhao = _signals.signal("xinhao")#创建信号
#定义函数
def wahaha(*args,**kwargs):
    print("娃哈哈",args,kwargs)

def sww(*args,**kwargs):
    print("爽歪歪",args,kwargs)
# 将函数注册到信号中,添加到这个列表
xinhao.connect(wahaha)
xinhao.connect(sww)

@app.route("/zzz")
def zzz():
    xinhao.send(sender='xxx',a1=123,a2=456)  #触发这个信号,执行注册到列表中的所有函数,这里的参数个上面函数的参数一致
    return "发送信号成功"

if __name__ == '__main__':
    app.run(debug=True)

#打印结果
# 娃哈哈 (None,) {'sender': 'xxx', 'a1': 123, 'a2': 456}
# 爽歪歪 (None,) {'sender': 'xxx', 'a1': 123, 'a2': 456}
三、chain模块简单的测试
v1 = [11,22,33,44]
v2 = [1,4,7,5]
from itertools import chain
ff = []
for i in chain(v1,v2):   #chain会把两个列表连接在一块
    ff.append(i)
print(ff)     #[11, 22, 33, 44, 1, 4, 7, 5]

 浙公网安备 33010602011771号