
实现思维:
1.需要写2个或者多个子布局
2.写一个Java的class去实现将子布局与父类布局铺满。(一个子布局对应一个class)
3.在父类布局中导入fragment布局,并且添加android:name=“”属性;
1.写2个布局:
<?xml version="1.0" encoding="utf-8"?>
<LinearLayout xmlns:android="http://schemas.android.com/apk/res/android"
    android:orientation="vertical"
    android:layout_width="match_parent"
    android:layout_height="match_parent"
    android:background="@color/colorAccent">
    <TextView
        android:layout_marginTop="20dp"
        android:layout_width="wrap_content"
        android:layout_height="wrap_content"
        android:text="下面的布局"
        android:textSize="30sp"
        android:textColor="@color/colorBlack"
        android:maxEms="1"
        android:maxLines="5"
        android:layout_gravity="center"
        />

</LinearLayout>
<?xml version="1.0" encoding="utf-8"?>
<LinearLayout xmlns:android="http://schemas.android.com/apk/res/android"
    android:orientation="vertical"
    android:layout_width="match_parent"
    android:layout_height="match_parent">
    <TextView
        android:layout_marginTop="20dp"
        android:layout_width="wrap_content"
        android:layout_height="wrap_content"
        android:layout_gravity="center"
        android:text="上面的布局"
        android:textSize="30sp"
        android:textColor="@color/colorBlack"
        android:maxEms="1"
        android:maxLines="5"/>
</LinearLayout>
2.Java的class去实现将子布局与父类布局铺满
package com.example.lenovo.mydebrisdemo;

import android.app.Fragment;
import android.os.Bundle;
import android.support.annotation.Nullable;
import android.view.LayoutInflater;
import android.view.View;
import android.view.ViewGroup;

/**
 * Created by lenovo on 2018/5/5.
 */

public class Top extends Fragment {
    @Nullable
    @Override
    public View onCreateView(LayoutInflater inflater, @Nullable ViewGroup container, Bundle savedInstanceState) {
        View view = inflater.inflate(R.layout.top_fragment,container,false);
        return view;
    }
}
package com.example.lenovo.mydebrisdemo;

import android.app.Fragment;
import android.os.Bundle;
import android.support.annotation.Nullable;
import android.view.LayoutInflater;
import android.view.View;
import android.view.ViewGroup;

/**
 * Created by lenovo on 2018/5/5.
 */

public class Button extends Fragment {
    @Nullable
    @Override
    public View onCreateView(LayoutInflater inflater, @Nullable ViewGroup container, Bundle savedInstanceState) {
        View view = inflater.inflate(R.layout.botton_fragment,container,false);
        return view;
    }
}
3.父类布局中导入fragment布局,并且添加android:name=“”属性;
<?xml version="1.0" encoding="utf-8"?>
<LinearLayout xmlns:android="http://schemas.android.com/apk/res/android"
    android:orientation="vertical"
    android:layout_width="match_parent"
    android:layout_height="match_parent">
    <!--id一定要加否则会报错-->
    <fragment
        android:id="@+id/top"
        android:name="com.example.lenovo.mydebrisdemo.Top"
        android:layout_width="match_parent"
        android:layout_height="0dp"
        android:layout_weight="1"/>
    <fragment
        android:id="@+id/button"
        android:name="com.example.lenovo.mydebrisdemo.Button"
        android:layout_width="match_parent"
        android:layout_height="0dp"
        android:layout_weight="1"/>

</LinearLayout>
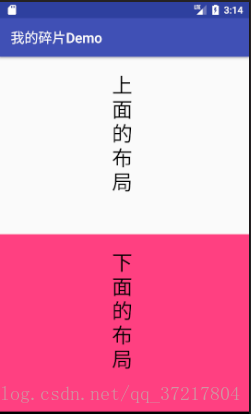
运行效果:
本文来自博客园,作者:观心静 ,转载请注明原文链接:https://www.cnblogs.com/guanxinjing/p/9708627.html
本文版权归作者和博客园共有,欢迎转载,但必须给出原文链接,并保留此段声明,否则保留追究法律责任的权利。
