PS网页设计教程VIII——在Photoshop中设计不同寻常布局
作为编码者,美工基础是偏弱的。我们可以参考一些成熟的网页PS教程,提高自身的设计能力。套用一句话,“熟读唐诗三百首,不会作诗也会吟”。
本系列的教程来源于网上的PS教程,都是国外的,全英文的。本人尝试翻译这些优秀的教程。因为翻译能力有限,翻译的细节上还有待推敲,希望广大网友不吝赐教。
约定:
1、本文的软件是Photoshop CS5版本
2、原教程的截图是英文的,本人在重新制作的基础上,重新截了中文版的图
3、原文中有些操作没有给出参数。本人在反复测试的情况下测定了一些参数,以红色的文字显示。有些错误的参数,直接以红色文字显示正确的参数
例如:(90,22,231,77),表示矩形的左上角的坐标是(90,22),宽231,高77
例如:(90,22),表示矩形的左上角的坐标是(90,22),矩形的其他两个参数教程里已经指定
4、在教程的最后会附上本人的心得。有些是对教程中的一些步骤的优化等。
In this tutorial I will show you how to manipulate some simple shapes, to obtain a wonderful layout. As you have seen I am trying to create unusual layouts. I want to show you that it is possible to create also another type of layouts (not usual ones).
在本教程中我将向您展示如何巧妙处理一些简单的形状,以获取一个精彩的布局。您已经看到我试图创建非同寻常的布局。我想要告诉你它是可能还创建另一种类型的布局 (不是通常的那种)。
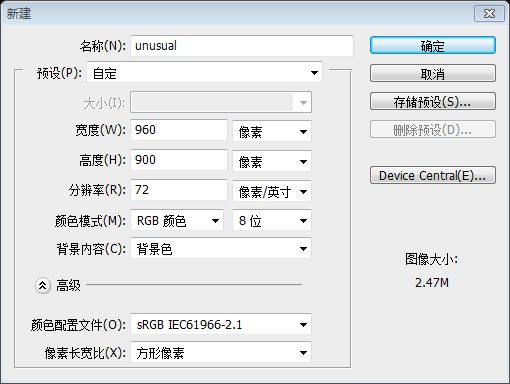
Start by creating a new document (CTRL+N) with the following size: 960 x 900 pixels, and with the background color #5c7a02.
一开始创建新文档(Ctrl+N),尺寸:960px*900px,背景颜色: #5c7a02
Select Rounded Rectangle Tool, and set your corner radius to 50 Pixels
选择圆角矩形工具,设置半径为50px
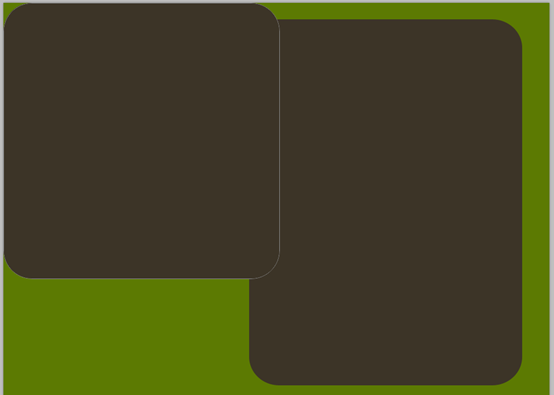
With this tool I will create a shape in the middle of my layout, then I will press on CTRL+T and while I am holding the Shift key down, I will rotate the shape.Right now it doesn’t matter what color you will choose. I will use different colors for each shape I make, because I want to show you where I will place the shapes.Now I will change the color for all this shapes to #3c3427.On the top of my layout I will add another shape, but this time I will use the Rectangle Tool.I will change the color for this shape to # 3c3427, and on the bottom right of this layout I will add another shape.
在页面的中部创建一个圆角矩形,然后按Ctrl+T自由变换,按住Shift键,旋转圆角矩形。现在还没告诉你要用哪种颜色。我将用不同的颜色创建一些圆角矩形,因为我要展示给你我如何摆放这些圆角矩形。现在我要更改这些矩形颜色为#3c3427。在网页的顶部我将添加一个矩形,这次用的是矩形工具。我给这个矩形还是用颜色#3c3427,在布局的右下角我将添加另一个圆角矩形
感觉原教程的操作比较繁琐,于是自己更改了操作步骤,但是最终的效果是一样的。
创建一个圆角矩形(432,29,480,644),颜色:#3c3427
创建一个圆角矩形(0,0,485,485),题外话,(644-50*2)/1.414+50*2≈485
按Ctrl+T,自由变换,旋转45度,按回车确定退出自由变换
再次按Ctrl+T,自由变换,调整参数为(153,29,644,644),按回车确定退出自由变换
按Ctrl+G将两个圆角矩形归并为一组。
复制该组,顺时针旋转90度,调整组到合适的位置(-190,375)
在布局的右下角创建一个圆角矩形(457,677,450,500),颜色还是#3c3427
With Rounded Rectangle Tool, I will create another 2 shapes
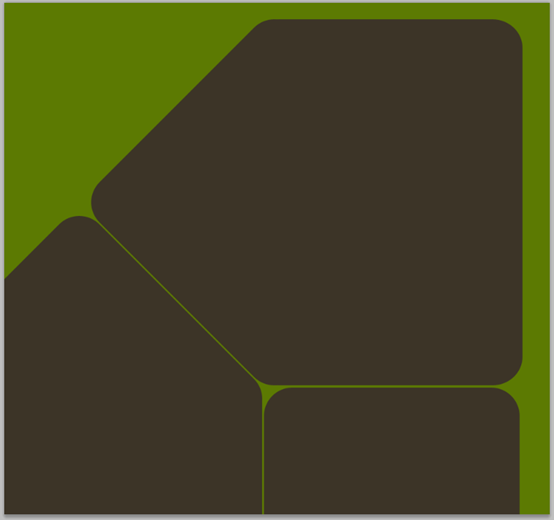
Be sure you have selected both layers in your layer palette, then press on CTRL+T, and with your mouse pointer rotate the shape to the left. I will place my shapes like in the following image. Over this green shape I will have my text button.
用圆角矩形画两个圆角矩形
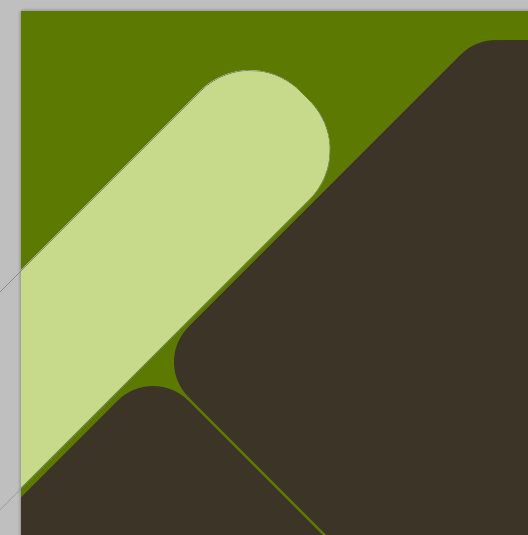
选中这两个图层,按Ctrl+T,用鼠标旋转你的矩形。按照下图布置矩形,在绿色的上方我将添加一些文本按钮
还是按照自己的思路制作
首先设置圆角矩形的半径为70,新建一个圆角矩形,宽970px,高154px,颜色: #c7da8b。按Ctrl+T,旋转-45度,按回车确定。再按Ctrl+T,调整到圆角矩形位置到(-428,59)
复制该图层,按Ctrl+T,调整大小为原来的70%,位置在(-216,96)。颜色更改为#a8ca01
I will create a new layer above all layers, and with my Brush Tool, I will add some points with a big smooth round brush.
在所有的层上面新建一个层,用画笔工具,调整画笔为巨大的光滑的画笔(颜色为白色,画笔的大小为600px,硬度:10%),在图层上添加一些点(三个点)。
Then I will change the blending mode for this layer to overlay
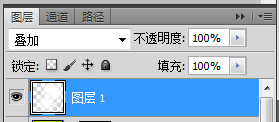
更改该图层的混合模式为叠加
This is my result so far
这是我的结果
Now with Horizontal Type Tool I will write some text. The font I will choose is Bookman Old Style. Italic.
现在用水平文字工具添加一些文本,字体用Bookman Old Style. Italic。
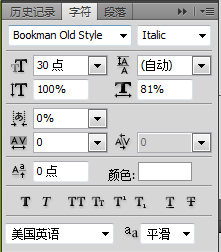
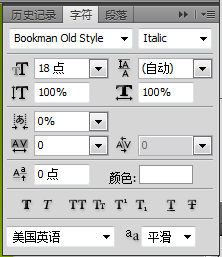
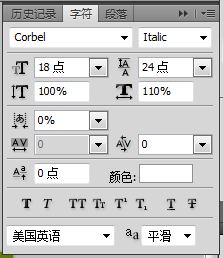
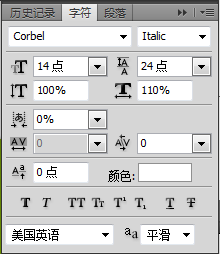
顶部的文字Welcome to our web site和底部的文字Services用如下的字体设置
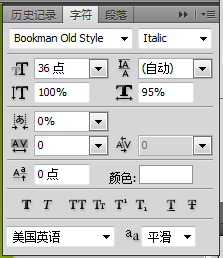
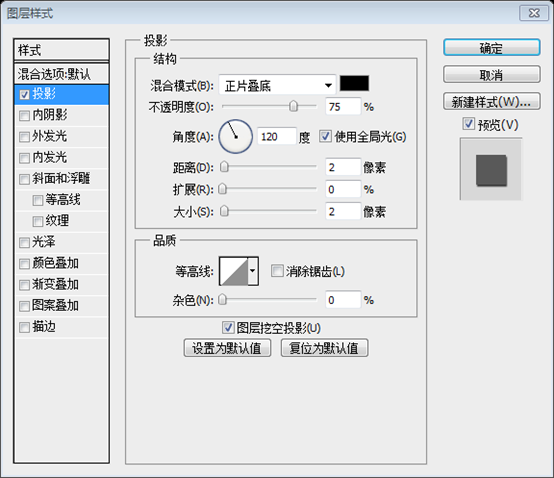
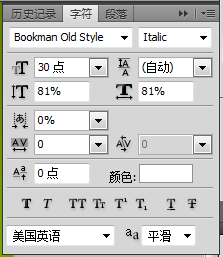
左侧绿色块里的标题文字Grafpedia,用如下的字体设置,并添加图层样式
左侧的绿色块里的菜单文字Home、Products、Portfolio、Contact,用如下的文字设置:
两个栏目倾斜的文字Portfolio、Latest News,用如下的文字设置:
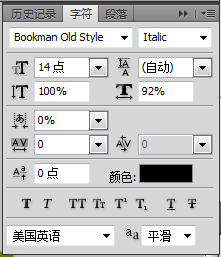
右侧的菜单栏的文字,Company、Products、Program、Contact Us,颜色:黑色。文字设置如下:
Welcome to our web site下的一段文字的文字设置如下:
其余的段落文字,文字设置如下:
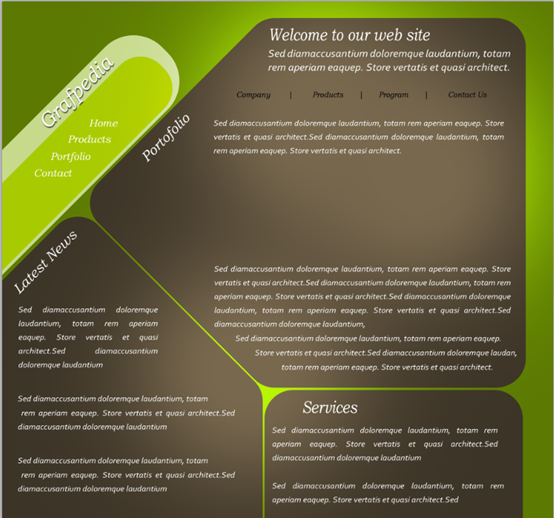
最终的结果如下:
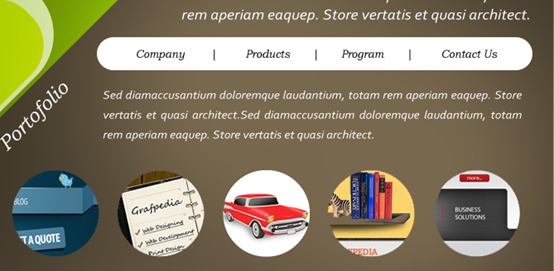
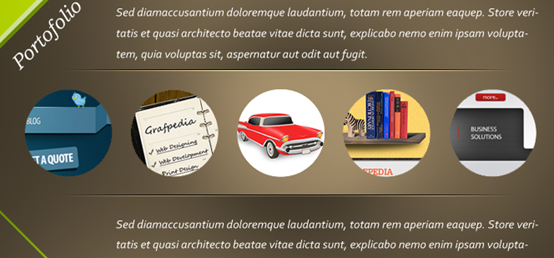
Now I will add some images from my last tutorials in the middle part of my layout. I will cut some round images from my previous tutorials.
我将在页面布局的中部添加一些之前的教程的图片,我将从之前的教程中切一些圆的图片
On the top of the website I will add another rounded shape.
在网站的顶部,添加另一个圆角矩形(361,142,524,40),半径为20px,颜色为白色
I will select Line Tool, and with a thin line (1 pixel) I will create two lines between my text buttons
选择直线工具设置粗细为1px,在文本按钮之间创建两条直线(一条黑色、一条白色)
I will select both line layers in my layer palette, and then I will press on CTRL+E (to merge the layers into a single one). I will select Eraser Tool, and I will use a Soft Mechanical brush with a size between 200 and 300 pixels. Then I will delete the right part of the line.
我将选择这两条直线的图层,按Ctrl+E(合并图层),选择橡皮擦工具,选择一个柔边圆,尺寸在200到300px之间(选择250比较合适),我将删除直线的右半部
I will delete also the left part, and I will make some duplicates after this layer. With Move Tool or with your arrow key I will move the duplicated layers to the bottom.
我同样的要删除左半部分,然后复制该图层。用移动工具移动这些图层到合适的位置
With the same technique as above I will add some lines also on other parts of the layout. You can change the blending mode for this layer to overlay.
用同样的技术在布局的其他部分添加直线。更改这些直线图层的混合模式为叠加
I will create a new layer right under my round images. I will select Brush Tool, and with a round soft brush, I will make a point over my layout in the following spot. Please set your foreground color to black.
新建一个图层在圆的图片的下方。选择画笔工具,选择一个柔边圆工具,按照下图添加一个大点(半径设置为360px,硬度20%)。前景色选择黑色。
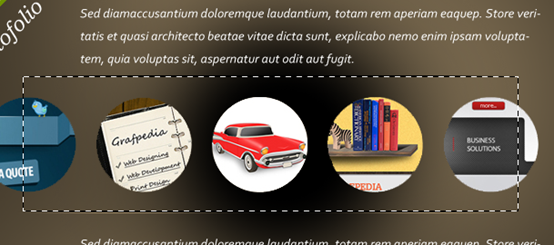
Select Rectangular Marquee Tool, and create a selection like mine.
选择矩形选择工具,创建如下的一个矩形选框
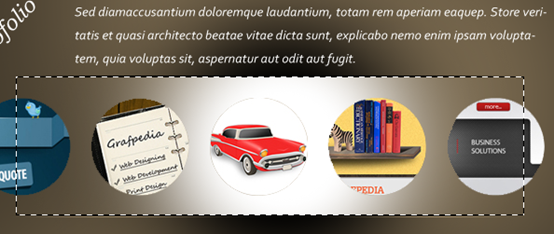
Your selection should be right between the horizontal lines you have placed a few steps ago. Now be sure you have the right layer selected (with the black brush drawing), and now press on CTRL+I, or go to Image > Adjustments > Invert. Your layout will look like this one.
你的选择区域在之前做好的两条水平线之间,选择之前的黑色的大点图层,按Ctrl+I,或点击:图像 > 调整 > 反相,你的布局看起来像如下:
Press on CTRL+D if you have the selection still active, and now change the blending mode for this layer to Overlay, and you can also lower the opacity value to 40 %.
按Ctrl+D取消选择,更改该图层的混合模式为叠加,不透明度为40%
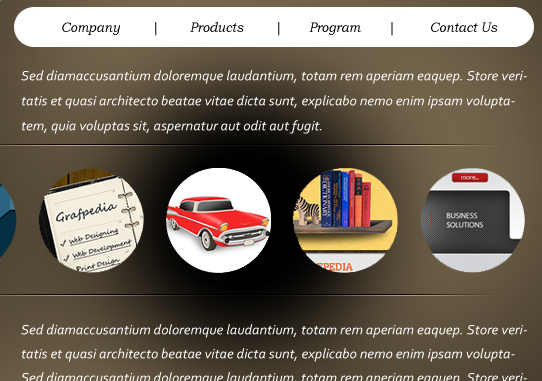
This is how my simple slideshow will look like
这是我的图片滑动栏的效果
Now I will add some round buttons
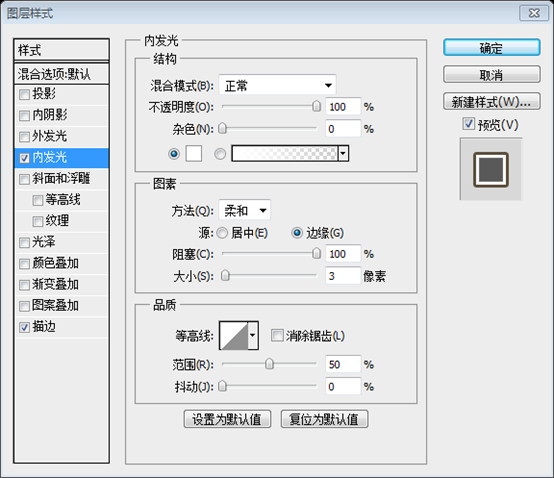
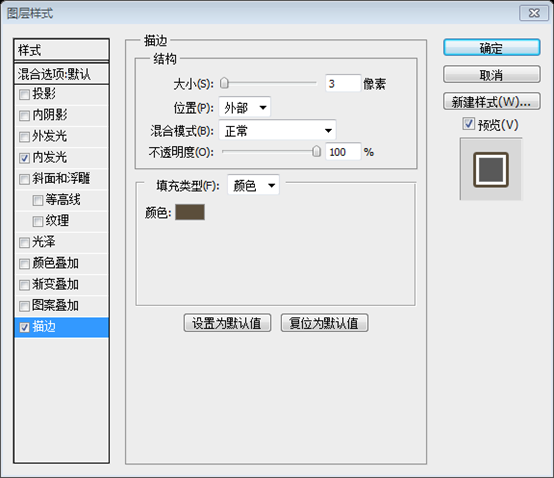
我将在左右两边添加圆按钮(左侧的按钮添加内发光的图层样式,右侧的按钮添加内发光和描边的图层样式)
描边的颜色: #4e4c48
In the middle of my layout I will add also a round shape
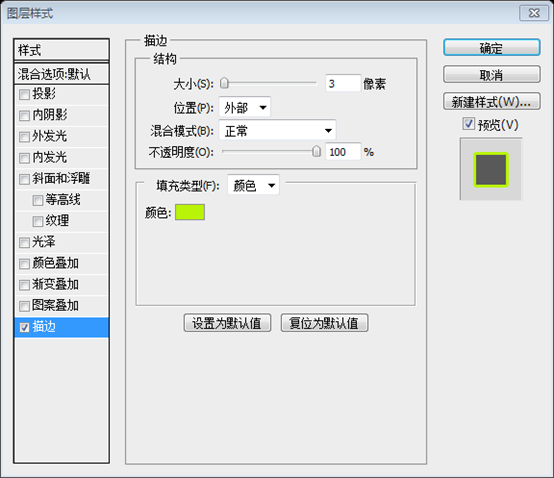
在布局的中部,添加一个圆(带描边,填充颜色:#5a4d3a,描边颜色: #b9f308)
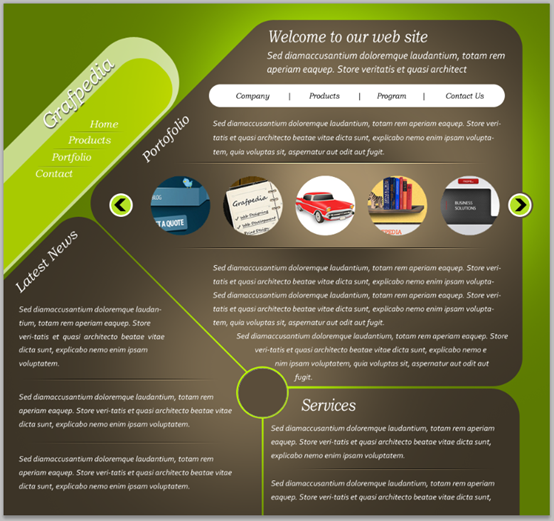
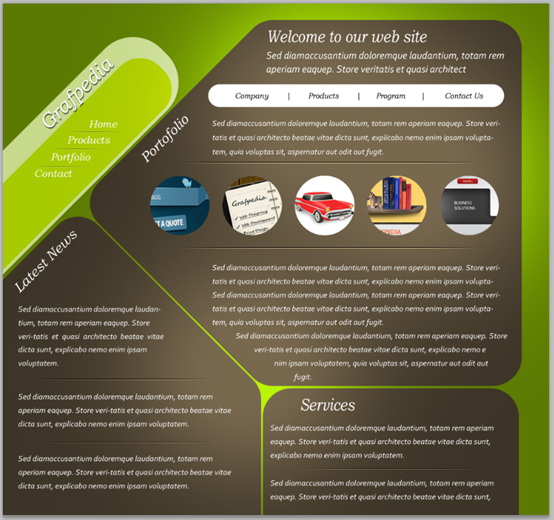
This is my final layout
这是我最终的结果
后记:
这样的布局的确是不常见的
本教程的亮点有:
1、利用橡皮擦的工具实现渐变效果
2、利用图层混合选项为叠加实现高光
3、尤其是教程中的反相的效果,令人叫绝。
















 浙公网安备 33010602011771号