
一、json方式的面向对象
首先要知道,js中出现的东西都能够放到json中。关于json数据格式这里推荐一篇博客:JSON 数据格式
先看下json创建的简单对象:相比基础篇中的构造函数、原型等的创建方式,json方式简单方便;但是缺点很明显,如果想创建多个对象,那么会产生大量重复代码,不可取。
JSON方式适用于只创建一个对象的情况,代码简介又优雅。
 1 <!DOCTYPE html>
 2 <html>
 3     <head>
 4         <meta charset="UTF-8">
 5         <title></title>
 6         <script>
 7             var person = {
 8                 name: "jiangzhou",
 9                 age: 22,
10                 showName: function(){
11                     alert(this); //[Object Object]
12                     alert("姓名:"+this.name);
13                 },
14                 showAge: function(){
15                     alert("年龄:"+this.age);
16                 }
17             };
18             person.showName();
19             person.showAge();
20
21         </script>
22     </head>
23 </html>
JSON在JS面向对象的应用中,主要的一个作用就是命名空间:如果有大量常用的js函数,利用json,我们可以将同一类函数放在一个“类”里,类似于java那样,这样我们就能很好的管理和查找使用这些js函数,看下面的例子就很好理解了。
 1 <!DOCTYPE html>
 2 <html>
 3     <head>
 4         <meta charset="UTF-8">
 5         <title></title>
 6         <script>
 7             //仿java.lang包
 8             var lang = {};
 9
10             /**
11              * 仿java.lang.Math类
12              */
13             lang.Math = {
14                 /**
15                  * 求绝对值
16                  * @param {Object} a
17                  */
18                 abs: function(a){
19                     return a > 0 ? a : -a;
20                 },
21                 /**
22                  * 求最大值
23                  * @param {Object} a
24                  * @param {Object} b
25                  */
26                 max: function(a, b){
27                     return a > b ? a : b;
28                 },
29                 /**
30                  * PI
31                  */
32                 PI: 3.1415926
33             }
34
35             /**
36              * 仿java.lang.String类
37              */
38             lang.String = {
39                 /**
40                  * 求字符串长度
41                  * @param {Object} str
42                  */
43                 length: function(str){
44                     return str.length;
45                 },
46                 /**
47                  * 将字符串转为小写
48                  * @param {Object} str
49                  */
50                 toLowerCase: function(str){
51                     return str.toLowerCase();
52                 },
53                 /**
54                  * 将字符串转为大写
55                  * @param {Object} str
56                  */
57                 toUpperCase: function(str){
58                     return str.toUpperCase();
59                 }
60             }
61
62             //调用
63             alert(lang.Math.abs(-19)); //19
64             alert(lang.Math.PI);
65             alert(lang.String.toUpperCase("abcdefg")); //ABCDEFG
66
67         </script>
68     </head>
69 </html>
二、面向对象的继承
先举个简单的例子来说一下JS中的继承,Student <extends> Person;
在js中,通过call来调用父类的构造方法继承父类的属性(第33行),通过原型来继承父类的方法(第39行)。注意:先调用父类构造函数,再添加自己的属性;先继承父类的方法,再添加自己的方法。
这里解释下为什么调用Person.call(this, name, sex)就相当于是在调用父类的构造方法:先问一下这个call中的this是谁?这里指向对象student吧。
所以,在子构造函数中调用Person.call()时,那么构造函数Person里的两行代码this.name=name, this.sex=sex中this就是代表student了,所以这两行代码相当于是在为student添加name和sex属性。
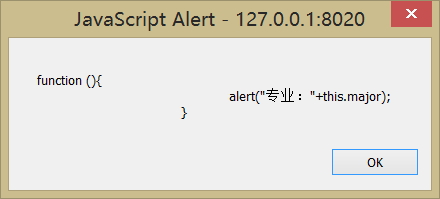
但是,下面的通过原型来继承父类的方法,即Student.prototype = Person.prototype,是有问题的,这种方式将影响父类(继承是不能影响父类的),此时Person的原型中有了个showMajor方法(第50行),为什么呢?先思考下,下面解释。
 1 <!DOCTYPE html>
 2 <html>
 3     <meta charset="UTF-8" />
 4     <head>
 5         <script>
 6
 7             /**
 8              * Person 父类 人
 9              * @param {Object} name 姓名
10              * @param {Object} sex 性别
11              */
12             function Person(name, sex){
13                 this.name = name;
14                 this.sex = sex;
15             }
16             Person.prototype.showName = function(){
17                 alert("姓名:"+this.name);
18             }
19             Person.prototype.showSex = function(){
20                 alert("性别:"+this.sex);
21             }
22
23         /*-----------------------------------------------------*/
24
25             /**
26              * Student   学生 继承 人
27              * @param {Object} name
28              * @param {Object} sex
29              * @param {Object} major 学生特有属性:专业
30              */
31             function Student(name, sex, major){
32                 //调用父类的构造函数
33                 Person.call(this, name, sex);
34
35                 //添加自己的属性
36                 this.major = major;
37             }
38             //继承父类原型中的方法
39             Student.prototype = Person.prototype;
40             //添加自己特有的方法
41             Student.prototype.showMajor = function(){
42                 alert("专业:"+this.major);
43             }
44
45             var student = new Student("bojiangzhou", "男", "信息管理");
46             student.showName();
47             student.showSex();
48             student.showMajor();
49
50             alert(Person.prototype.showMajor);
51         </script>
52     </head>
53 </html>
第50行弹出的信息:
为了解释为什么通过Student.prototype = Person.prototype来继承父类的方法会影响父类,下面举一个数组的例子,一看就知道怎么回事了。
为什么arr1和arr2弹出来的一样呢?第15、16行显示arr1和arr2是一个对象。对象!应该很清楚了吧,arr1和arr2都是指向这个数组对象的一个引用,所以改变arr2时,arr1也变了。
 1 <!DOCTYPE html>
 2 <html>
 3     <head>
 4         <meta charset="UTF-8">
 5     </head>
 6     <script>
 7         var arr1 = [1,2,3,4,5];
 8         var arr2 = arr1;
 9
10         arr2.push(6);
11
12         alert(arr1); //弹出1,2,3,4,5,6
13         alert(arr2); //弹出1,2,3,4,5,6
14
15         alert(typeof arr1); //object
16         alert(typeof arr2); //object
17     </script>
18 </html>
其实我们主要是想获得arr1数组的一个副本,怎么做才能不改变arr1呢,看下面:
 1 <!DOCTYPE html>
 2 <html>
 3     <head>
 4         <meta charset="UTF-8">
 5     </head>
 6     <script>
 7         var arr1 = [1,2,3,4,5];
 8         var arr2 = [];
 9
10         //复制arr1的数据即可
11         for(var i=0;i<arr1.length;i++){
12             arr2[i]=arr1[i];
13         }
14
15         arr2.push(6);
16
17         alert(arr1); //弹出1,2,3,4,5
18         alert(arr2); //弹出1,2,3,4,5,6
19
20     </script>
21 </html>
同样的,我们也可以通过这种方式为继承的子类添加父类原型中的方法,而又不影响父类(38-41行):
 1 <!DOCTYPE html>
 2 <html>
 3     <meta charset="UTF-8" />
 4     <head>
 5         <script>
 6
 7             /**
 8              * Person 父类 人
 9              * @param {Object} name 姓名
10              * @param {Object} sex 性别
11              */
12             function Person(name, sex){
13                 this.name = name;
14                 this.sex = sex;
15             }
16             Person.prototype.showName = function(){
17                 alert("姓名:"+this.name);
18             }
19             Person.prototype.showSex = function(){
20                 alert("性别:"+this.sex);
21             }
22
23         /*-----------------------------------------------------*/
24
25             /**
26              * Student   学生 继承 人
27              * @param {Object} name
28              * @param {Object} sex
29              * @param {Object} major 学生特有属性:专业
30              */
31             function Student(name, sex, major){
32                 //调用父类的构造函数
33                 Person.call(this, name, sex);
34
35                 //添加自己的属性
36                 this.major = major;
37             }
38             //继承父类原型中的方法
39             for(var p in Person.prototype){
40                 Student.prototype[p] = Person.prototype[p];
41             }
42
43             //添加自己特有的方法
44             Student.prototype.showMajor = function(){
45                 alert("专业:"+this.major);
46             }
47
48             var student = new Student("bojiangzhou", "男", "信息管理");
49             student.showName();
50             student.showSex();
51             student.showMajor();
52
53             alert(Person.prototype.showMajor);
54         </script>
55     </head>
56 </html>
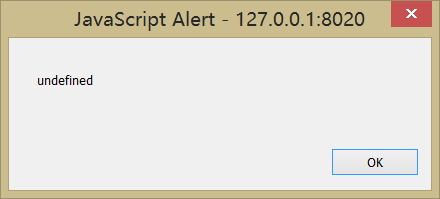
第53行弹出信息:Person中没有showMajor方法了。
最后,以案例篇中最后给出的拖拽例子来应用下继承,那个拖拽有一个问题,就是没有控制拖拽出边界的问题。
先贴出之前的拖拽版本:
drag.js:
 1 /**
 2  * 拖拽
 3  * @param {Object} id div的id
 4  */
 5 function Drag(id){
 6     this.oBox = document.getElementById(id);
 7     this.disX = 0;
 8     this.disY = 0;
 9
10     var _this = this;
11
12     this.oBox.onmousedown = function(){
13         _this.fnDown();
14     }
15 }
16 //鼠标按下
17 Drag.prototype.fnDown = function(ev){
18     var oEvent = ev || event;
19
20     this.disX = oEvent.clientX - this.oBox.offsetLeft;
21     this.disY = oEvent.clientY - this.oBox.offsetTop;
22
23     var _this = this;
24
25     document.onmousemove = function(){
26         _this.fnMove();
27     };
28     document.onmouseup = function(){
29         _this.fnUp();
30     };
31 }
32 //鼠标移动
33 Drag.prototype.fnMove = function(ev){
34     var oEvent= ev || event;
35
36     this.oBox.style.left = oEvent.clientX - this.disX + 'px';
37     this.oBox.style.top = oEvent.clientY - this.disY + 'px';
38 }
39 //鼠标抬起
40 Drag.prototype.fnUp = function(){
41     document.onmousemove = null;
42     document.onmouseup = null;
43 }
drag.html:
 1 <!DOCTYPE html>
 2 <html>
 3     <head>
 4         <meta charset="UTF-8">
 5         <style>
 6             div {
 7                 position: absolute;
 8             }
 9         </style>
10         <title>拖拽</title>
11         <script type="text/javascript" src="../js/drag.js" ></script>
12         <script>
13             window.onload = function(){
14                 var drag1 = new Drag("box1");
15
16                 var drag1 = new Drag("box2");
17             };
18         </script>
19     </head>
20
21 <body>
22     <div id="box1" style="background: red;width: 200px;height: 200px;"></div>
23
24     <div id="box2" style="background: blue;width: 100px;height: 300px;"></div>
25 </body>
26 </html>
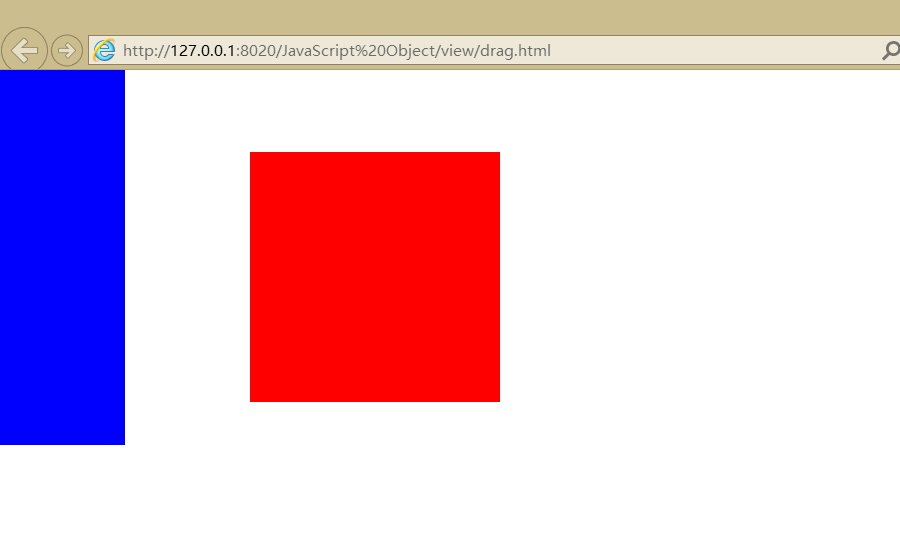
效果:可以看到红色和蓝色的都出边界了,但我们又不想去修改代码,那我们怎么做?学过java的应该都知道可以写一个子类来做一些更加具体的操作,又保留了父类的功能,就是继承。

DragLimit.js:DragLimit继承自Drag,控制了不能出边界
 1 /**
 2  * 限制边界的拖拽,继承自Drag
 3  * @param {Object} id
 4  */
 5 function DragLimit(id){
 6     Drag.call(this, id);
 7 }
 8 //继承方法
 9 for(var p in Drag.prototype){
10     DragLimit.prototype[p] = Drag.prototype[p];
11 }
12 /**
13  * 覆写父类的鼠标移动方法,控制不能移出边界
14  */
15 DragLimit.prototype.fnMove = function(ev){
16     var oEvent= ev || event;
17
18     var left = oEvent.clientX - this.disX;
19     var top = oEvent.clientY - this.disY;
20
21     //控制边界
22     if(left < 0){
23         left = 0;
24     } else if(left > document.documentElement.clientWidth-this.oBox.offsetWidth){
25         left = document.documentElement.clientWidth-this.oBox.offsetWidth;
26     }
27     if(top <= 0){
28         top = 0;
29     } else if(top > document.documentElement.clientHeight-this.oBox.offsetHeight){
30         top = document.documentElement.clientHeight-this.oBox.offsetHeight;
31     }
32
33     this.oBox.style.left = left + 'px';
34     this.oBox.style.top = top + 'px';
35 }
dragLimit.html
 1 <!DOCTYPE html>
 2 <html>
 3     <head>
 4         <meta charset="UTF-8">
 5         <style>
 6             body {
 7                 padding: 0;
 8                 margin: 0;
 9             }
10             div {
11                 position: absolute;
12             }
13         </style>
14         <title>拖拽</title>
15         <script type="text/javascript" src="../js/drag.js" ></script>
16         <script type="text/javascript" src="../js/dragLimit.js" ></script>
17         <script>
18             window.onload = function(){
19                 var drag1 = new Drag("box1");
20
21                 var drag1 = new DragLimit("box2");
22             };
23         </script>
24     </head>
25
26 <body>
27     <div id="box1" style="background: red;width: 200px;height: 200px;"></div>
28
29     <div id="box2" style="background: blue;width: 100px;height: 300px;"></div>
30 </body>
31 </html>
效果:蓝色是不能移出边界的。
三、JS中的对象
js中的对象分为本地对象、内置对象、宿主对象,这里给出W3School文档供参考:ECMAScript 对象类型

 浙公网安备 33010602011771号