

来份ASP.NET Core尝尝
0x01、前言
略懂一二。如果有错误,还望见谅。
开发环境:win10+vs2015+sqlserver2014
0x02、demo
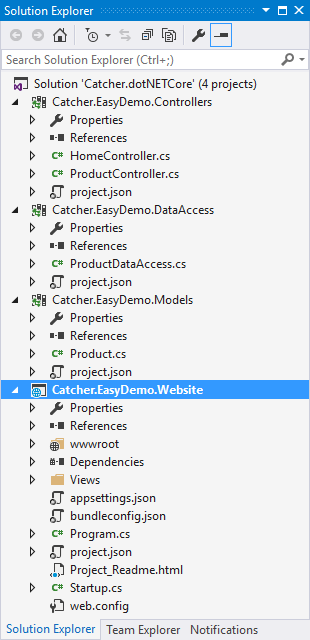
新建一个ASP.NET Core Web Application项目--Catcher.EasyDemo.Website
新建三个Class Library项目:
Catcher.EasyDemo.DataAccess:数据访问
Catcher.EasyDemo.Models:模型
Controller项目需要添加MVC的引用:"Microsoft.AspNetCore.Mvc": "1.0.0"
两种方式,一种是和平常一样的右键->添加引用,另一种是在project.json中的dependencies节点下
面添加 "Catcher.EasyDemo.Controllers": "1.0.0-*",然后就会自动restore,完成之后就能正常跑起
下面的话,在Models中添加一个Product类:
 1 namespace Catcher.EasyDemo.Models
 2 {
 3     public class Product
 4     {
 5         public int ProductId { get; set; }
 6         public string ProductName { get; set; }
 7         public string ProductSource { get; set; }
 8         public decimal ProductPrice { get; set; }
 9     }
10 }
在DataAccess中添加ProductDataAccess类,用于数据交互,里面有用到dapper,所以要添加引用,
以及用到了读取json配置的方法,所以还要添加Microsoft.Extensions.Configuration的引用,同时还要添加Models的引用,方法上面已经说过了。
这里没有用一些复杂的东西,就一个单例模式和一些简单的数据库操作。
  1 using Catcher.EasyDemo.Models;
  2 using Dapper;
  3 using Microsoft.Extensions.Configuration;
  4 using System.Collections.Generic;
  5 using System.Data;
  6 using System.Data.SqlClient;
  7 using System.IO;
  8 using System.Linq;
  9
 10 namespace Catcher.EasyDemo.DataAccess
 11 {
 12     public sealed class ProductDataAccess
 13     {
 14         public static ProductDataAccess Instance
 15         {
 16             get
 17             {
 18                 return Nested.instance;
 19             }
 20         }
 21
 22         class Nested
 23         {
 24             static Nested() { }
 25             internal static readonly ProductDataAccess instance = new ProductDataAccess();
 26         }
 27
 28         /// <summary>
 29         /// get the connection string form the appsettings.json
 30         /// </summary>
 31         /// <returns></returns>
 32         private string GetConnStr()
 33         {
 34             var builder = new ConfigurationBuilder();
 35             builder.SetBasePath(Directory.GetCurrentDirectory());
 36             builder.AddJsonFile("appsettings.json");
 37             var config = builder.Build();
 38             return config.GetConnectionString("dapperConn");
 39         }
 40
 41         /// <summary>
 42         /// open the connection
 43         /// </summary>
 44         /// <returns></returns>
 45         private SqlConnection OpenConnection()
 46         {
 47             SqlConnection conn = new SqlConnection(GetConnStr());
 48             conn.Open();
 49             return conn;
 50         }
 51
 52         /// <summary>
 53         /// get all products
 54         /// </summary>
 55         /// <returns></returns>
 56         public IList<Product> GetAll()
 57         {
 58             using (IDbConnection conn = OpenConnection())
 59             {
 60                 string sql = @"SELECT [ProductId]
 61                                   ,[ProductName]
 62                                   ,[ProductSource]
 63                                   ,[ProductPrice]
 64                               FROM [dbo].[Product]";
 65                 return conn.Query<Product>(sql).ToList();
 66             }
 67         }
 68
 69         /// <summary>
 70         /// delete the product by product's id
 71         /// </summary>
 72         /// <param name="pid">id of the product</param>
 73         /// <returns></returns>
 74         public bool Delete(int pid)
 75         {
 76             using (IDbConnection conn = OpenConnection())
 77             {
 78                 string sql = string.Format(@"DELETE FROM [dbo].[Product] WHERE [ProductId]={0} ", pid.ToString());
 79                 return conn.Execute(sql) > 0;
 80             }
 81         }
 82
 83         /// <summary>
 84         /// add the product
 85         /// </summary>
 86         /// <param name="product">entity of the product</param>
 87         /// <returns></returns>
 88         public bool Add(Product product)
 89         {
 90             using (IDbConnection conn = OpenConnection())
 91             {
 92                 string sql = string.Format(@"INSERT INTO [dbo].[Product]
 93            ([ProductName]
 94            ,[ProductSource]
 95            ,[ProductPrice])
 96      VALUES
 97            ('{0}','{1}',{2})", product.ProductName, product.ProductSource, product.ProductPrice);
 98                 return conn.Execute(sql) > 0;
 99             }
100         }
101     }
102 }
 1 using Microsoft.AspNetCore.Mvc;
 2 using Catcher.EasyDemo.Models;
 3 using Catcher.EasyDemo.DataAccess;
 4
 5 namespace Catcher.EasyDemo.Controllers
 6 {
 7     public class ProductController :  Controller
 8     {
 9         /// <summary>
10         /// Index
11         /// </summary>
12         /// <returns></returns>
13         public IActionResult Index()
14         {
15             return View(ProductDataAccess.Instance.GetAll());
16         }
17
18         /// <summary>
19         /// Add
20         /// </summary>
21         /// <returns></returns>
22         public IActionResult Add()
23         {
24             return View();
25         }
26         [HttpPost]
27         public IActionResult Add(Product product)
28         {
29             bool isOK = ProductDataAccess.Instance.Add(product);
30
31             if (isOK)
32             {
33                 return RedirectToAction("Index");
34             }
35             else
36             {
37                 TempData["err"] = "sorry!there were some errors!Please try again.";
38                 return View();
39             }
40         }
41
42         /// <summary>
43         /// Delete
44         /// </summary>
45         /// <param name="pid"></param>
46         /// <returns></returns>
47         public IActionResult Delete(int pid)
48         {
49             bool isOK = ProductDataAccess.Instance.Delete(pid);
50
51             if (isOK)
52             {
53                 return RedirectToAction("Index");
54             }
55             else
56             {
57                 TempData["err"] = "sorry!there were some errors!Please try again.";
58                 return View("Index");
59             }
60         }
61     }
62 }
添加Index.cshtml
 1 @model IEnumerable<Catcher.EasyDemo.Models.Product>
 2 @{
 3     ViewData["Title"] = "Product Index";
 4 }
 5 <a asp-action="Add" asp-controller="Product">Add a New Product</a>
 6 <div class="container">
 7     <table class="table table-responsive">
 8
 9         <thead>
10             <tr>
11                 <td>ID</td>
12                 <td>Name</td>
13                 <td>Price</td>
14                 <td>Source</td>
15                 <td>Opreation</td>
16             </tr>
17         </thead>
18
19         <tbody>
20             @foreach (var item in Model)
21             {
22                 <tr>
23                     <td>@item.ProductId</td>
24                     <td>@item.ProductName</td>
25                     <td>@item.ProductPrice</td>
26                     <td>@item.ProductSource</td>
27                     <td>
28                         <a asp-action="Delete" asp-controller="Product" asp-route-pid="@item.ProductId">Delete</a>
29                     </td>
30                 </tr>
31             }
32         </tbody>
33     </table>
34 </div>
视图与mvc用的法大致相同,不同就是TagHelper,不过大部分是一看就知道是什么意思,要做什么操作,也不做过多解释。
 1 @model Catcher.EasyDemo.Models.Product
 2 @{
 3     ViewData["Title"] = "Add";
 4 }
 5 <div class="container">
 6     <form asp-action="Add" asp-controller="Product" method="post">
 7         <div class="form-group">
 8             <label asp-for="ProductName">Name</label>
 9             <input asp-for="ProductName" type="text" placeholder="enter the product name" />
10         </div>
11         <div class="form-group">
12             <label asp-for="ProductPrice">Price</label>
13             <input asp-for="ProductPrice" type="text" placeholder="enter the product price" />
14         </div>
15         <div class="form-group">
16             <label asp-for="ProductSource">Source</label>
17             <input asp-for="ProductSource" type="text" placeholder="enter the product source" />
18         </div>
19         <div class="form-group">
20             <button type="submit" class="btn btn-primary">Add Product</button>
21         </div>
22     </form>
23 </div>
1 "connectionStrings": {
2     "dapperConn": "server=127.0.0.1;database=nancydemo;user id=sa;password=123;"
3   }
当然,这是在本地的,放到linux时,需要替换成相应的ip
0x03、Linux下运行
在CentOS上安装dotnet core的方式可以看这里,就不在累赘了
安装好了之后,运行dotnet会提示

确定dotnet core 安装成功之后,
进入到相应的目录,运行dotnet 网站对应的dll即可


总之,dotNET Core 用起来感觉不错


 浙公网安备 33010602011771号