
Intellij IDEA创建git,maven的SpringMVC项目
Intellij IDEA创建git,maven的SpringMVC项目
原文链接:http://www.cnblogs.com/blog5277/p/8906120.html
原文作者:博客园--曲高终和寡
******************************************************
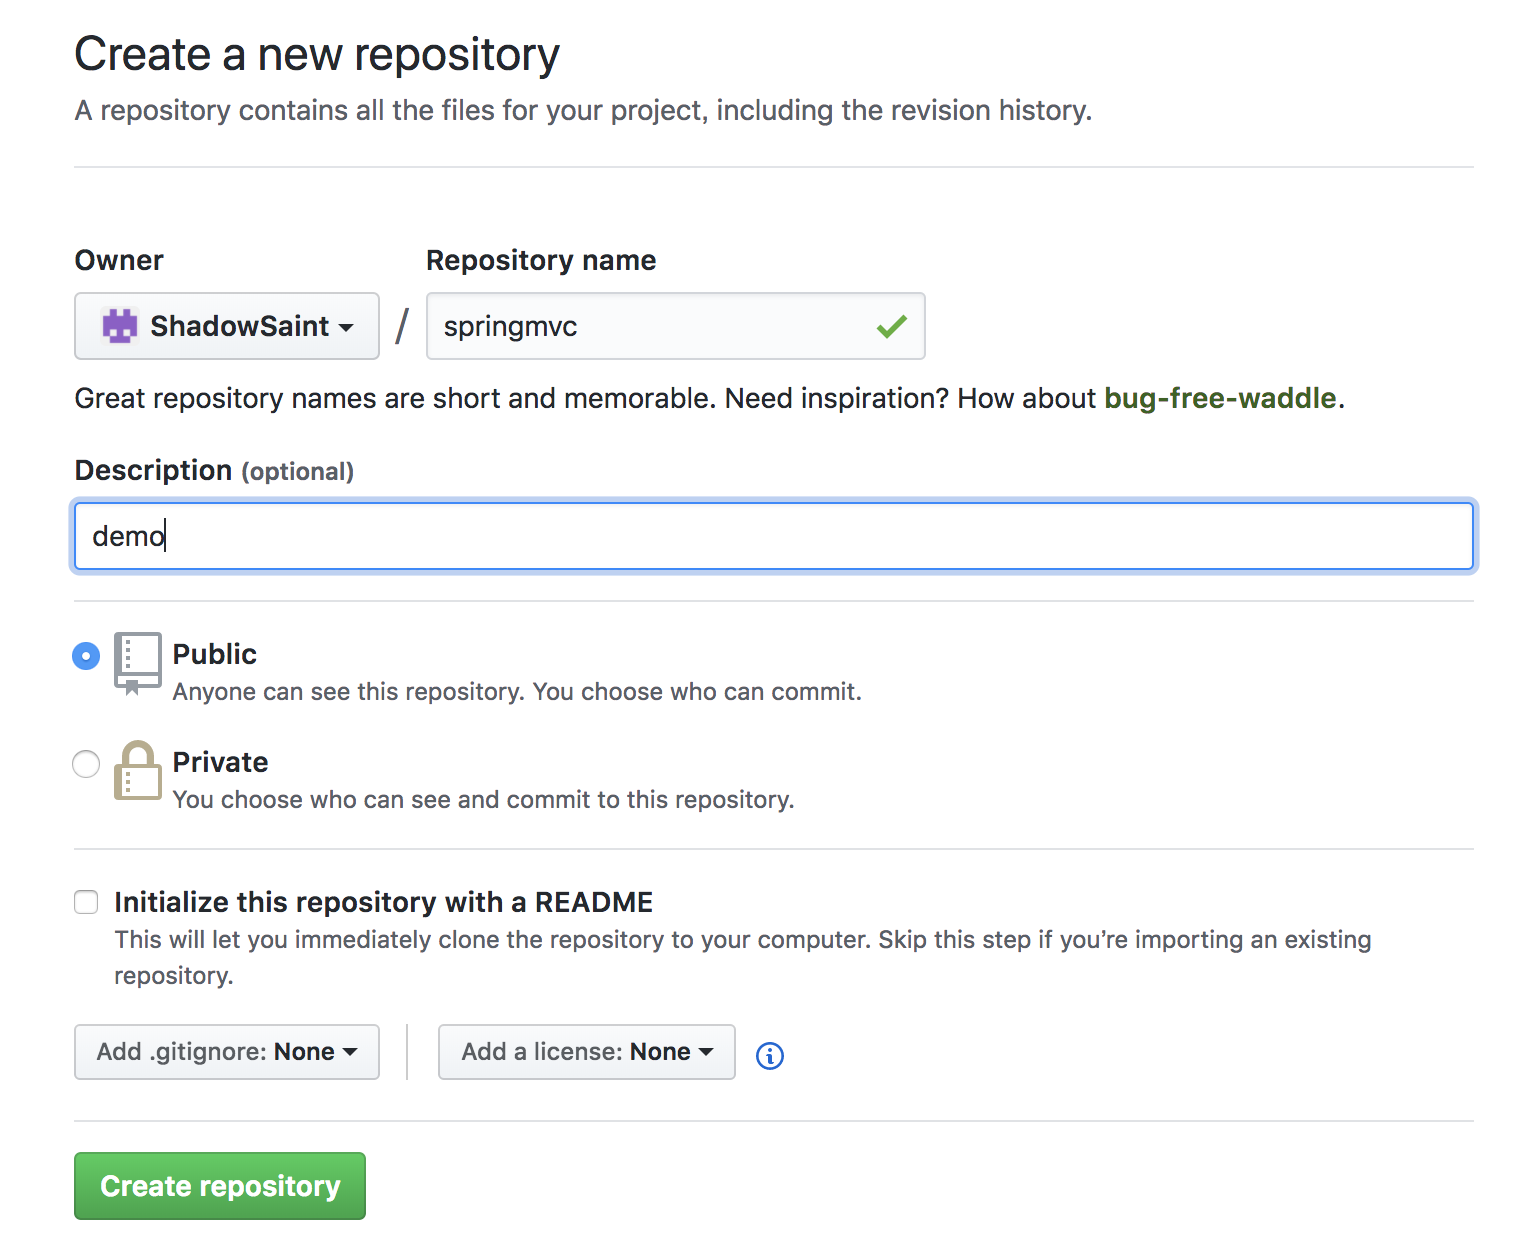
1.在github上(或者私有git)创建git仓库,注意,如果是先建项目,再建git,在git选择本地仓库的时候会提示不是空目录
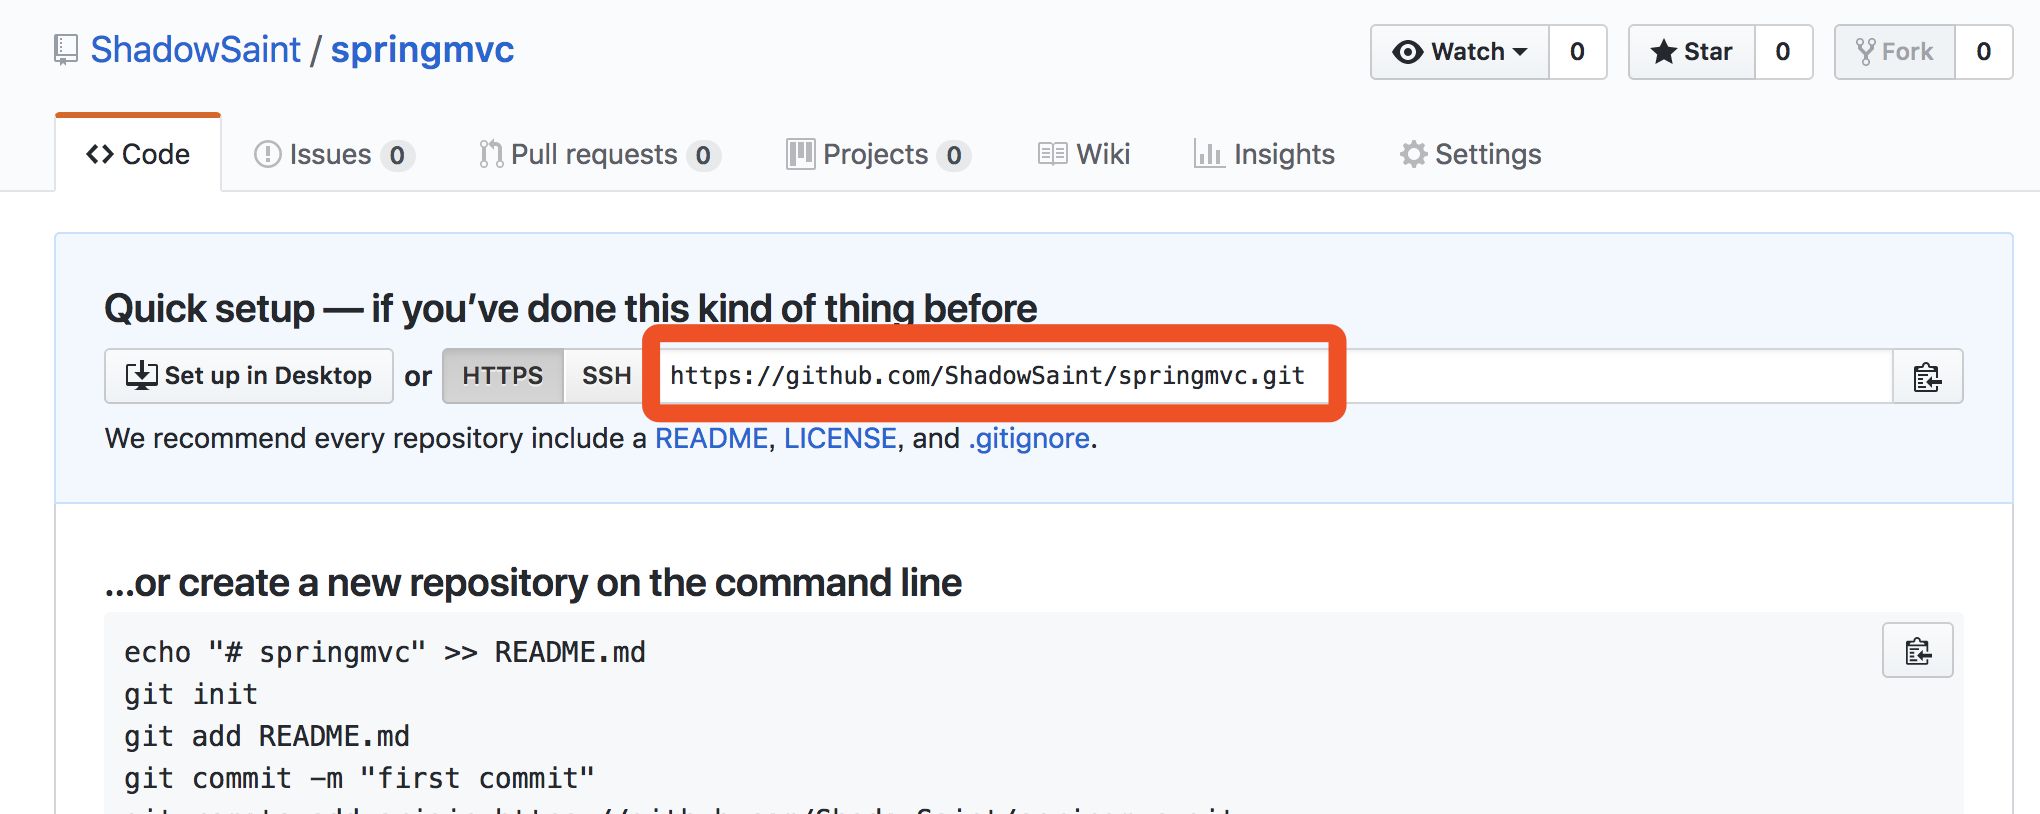
2.复制仓库的git链接
3.打开source tree(或者其他的git可视化工具),新建一个文件夹作为本地仓库
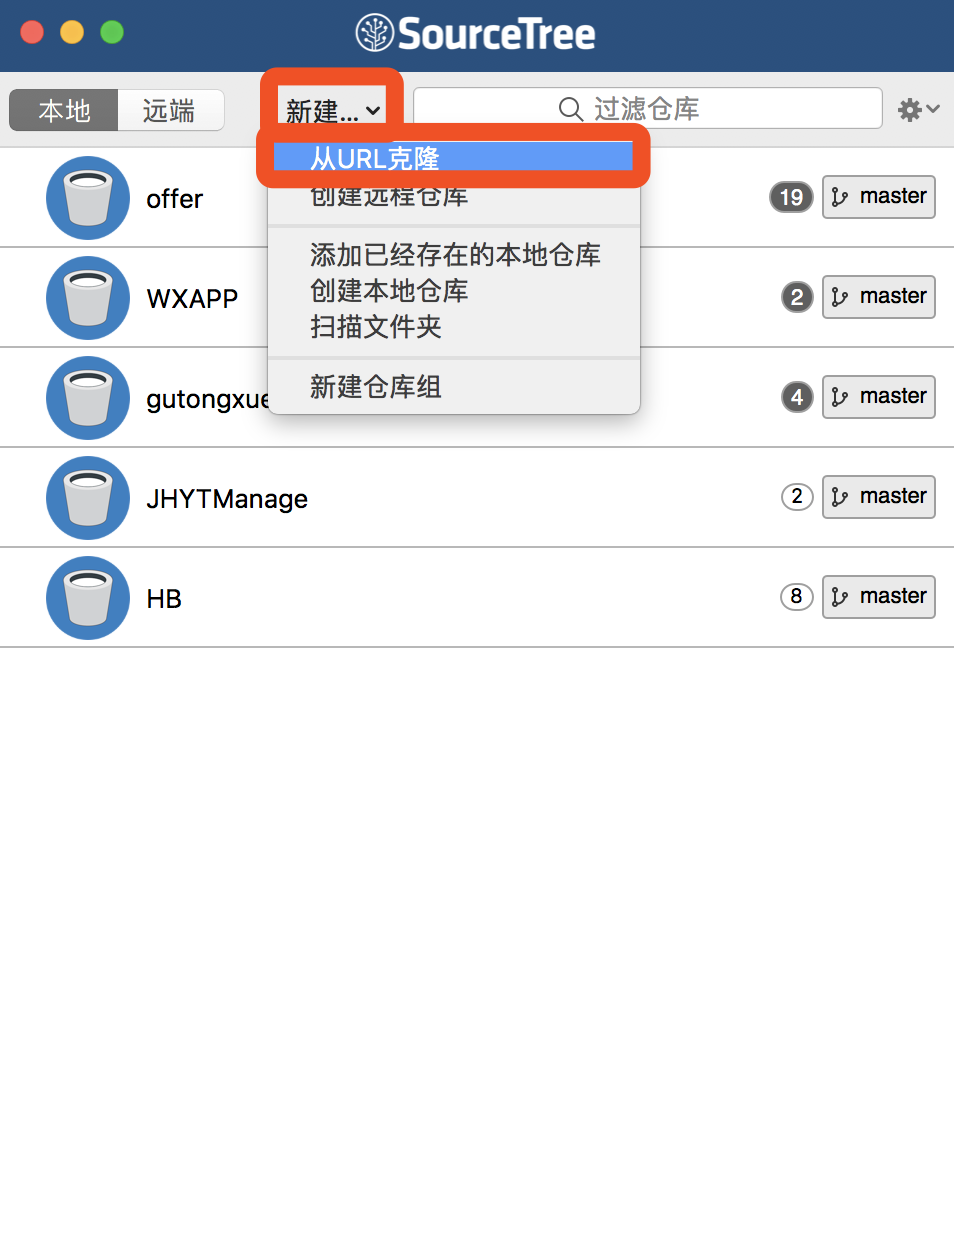
这里新建一个文件夹,克隆

这样git的部分就建好了
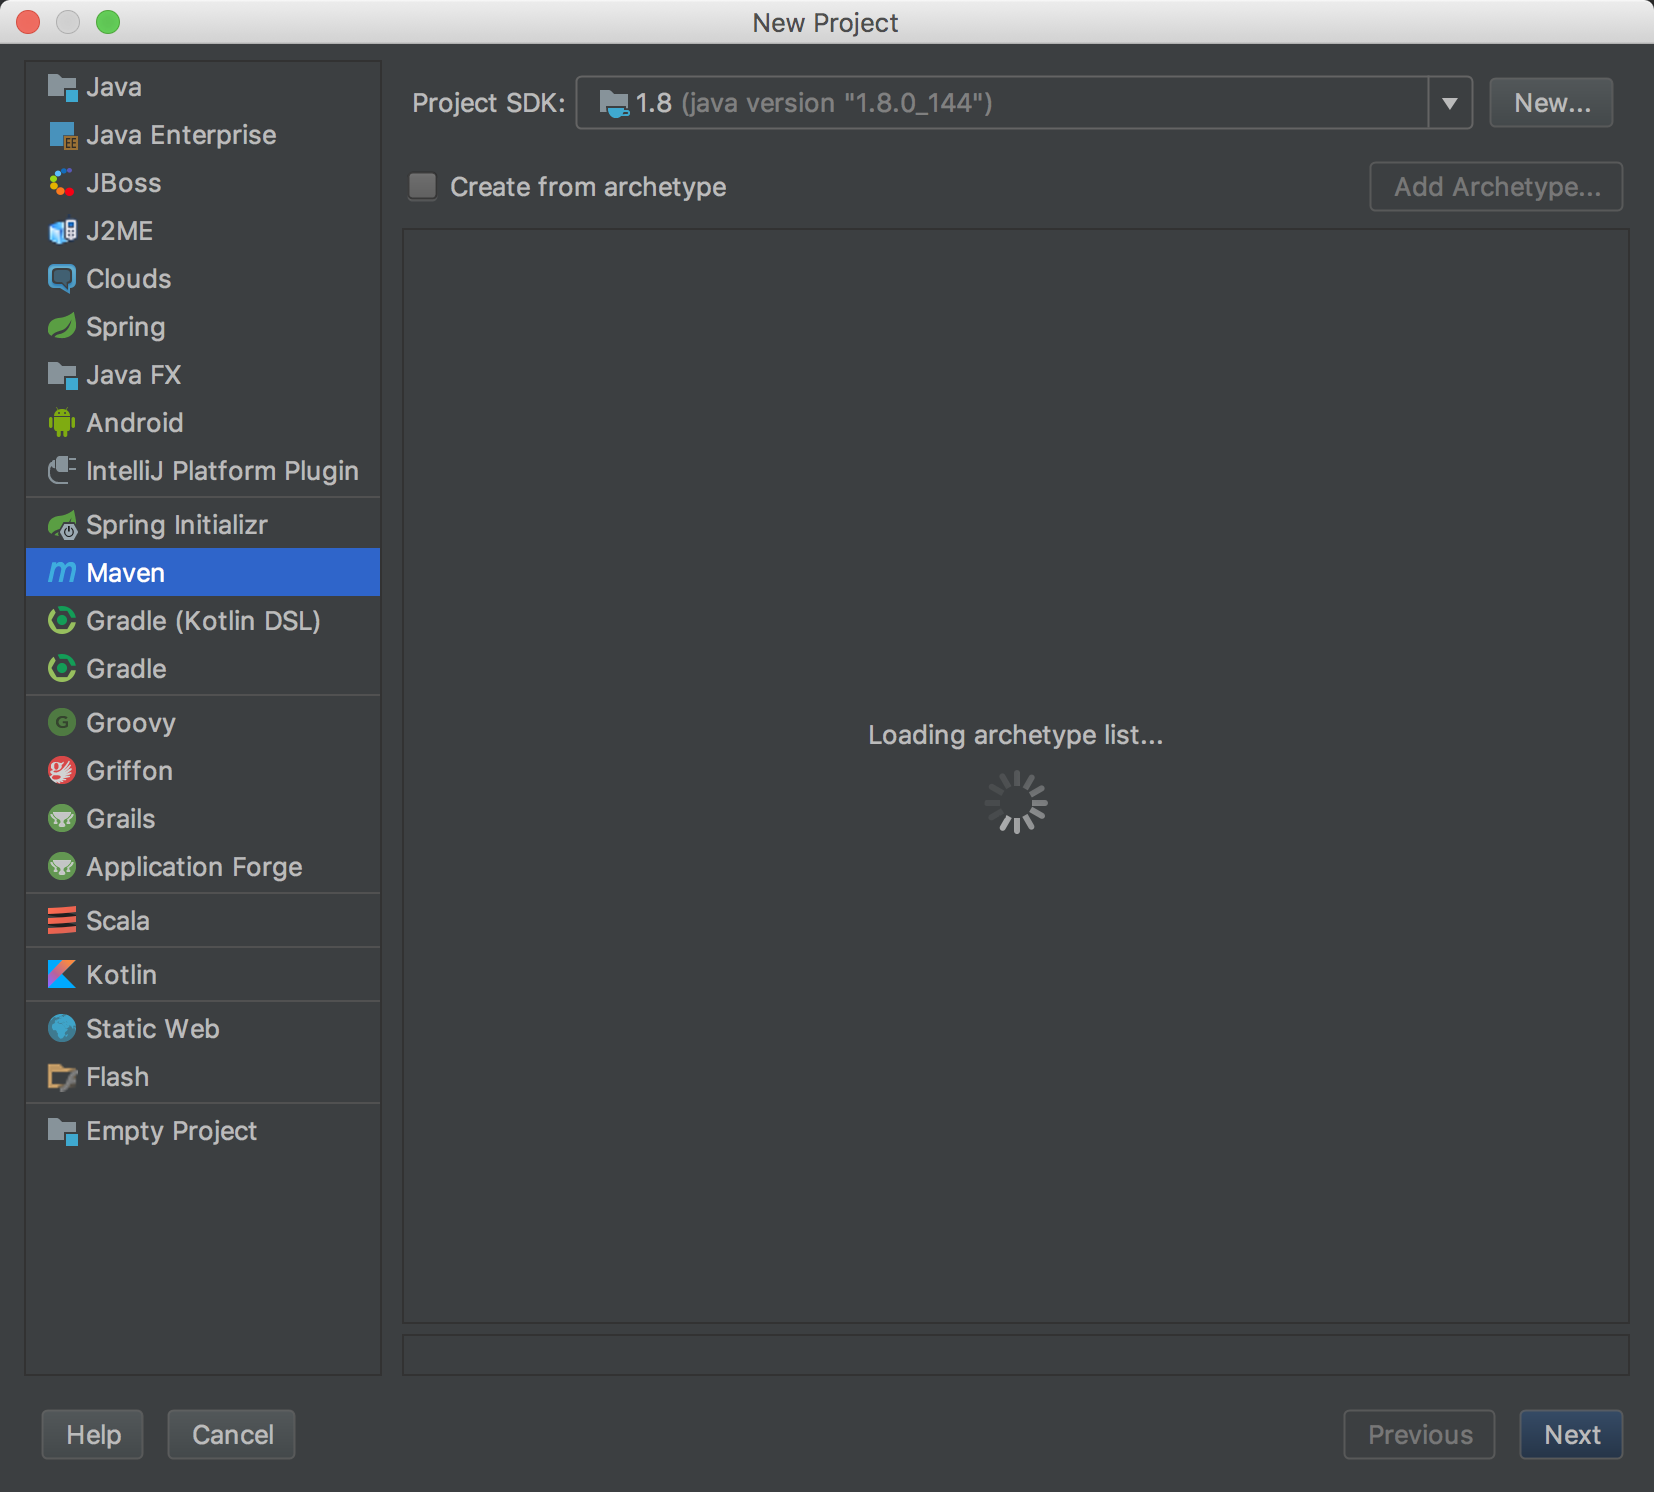
4,打开idea-->file-->new-->new project-->maven-->next
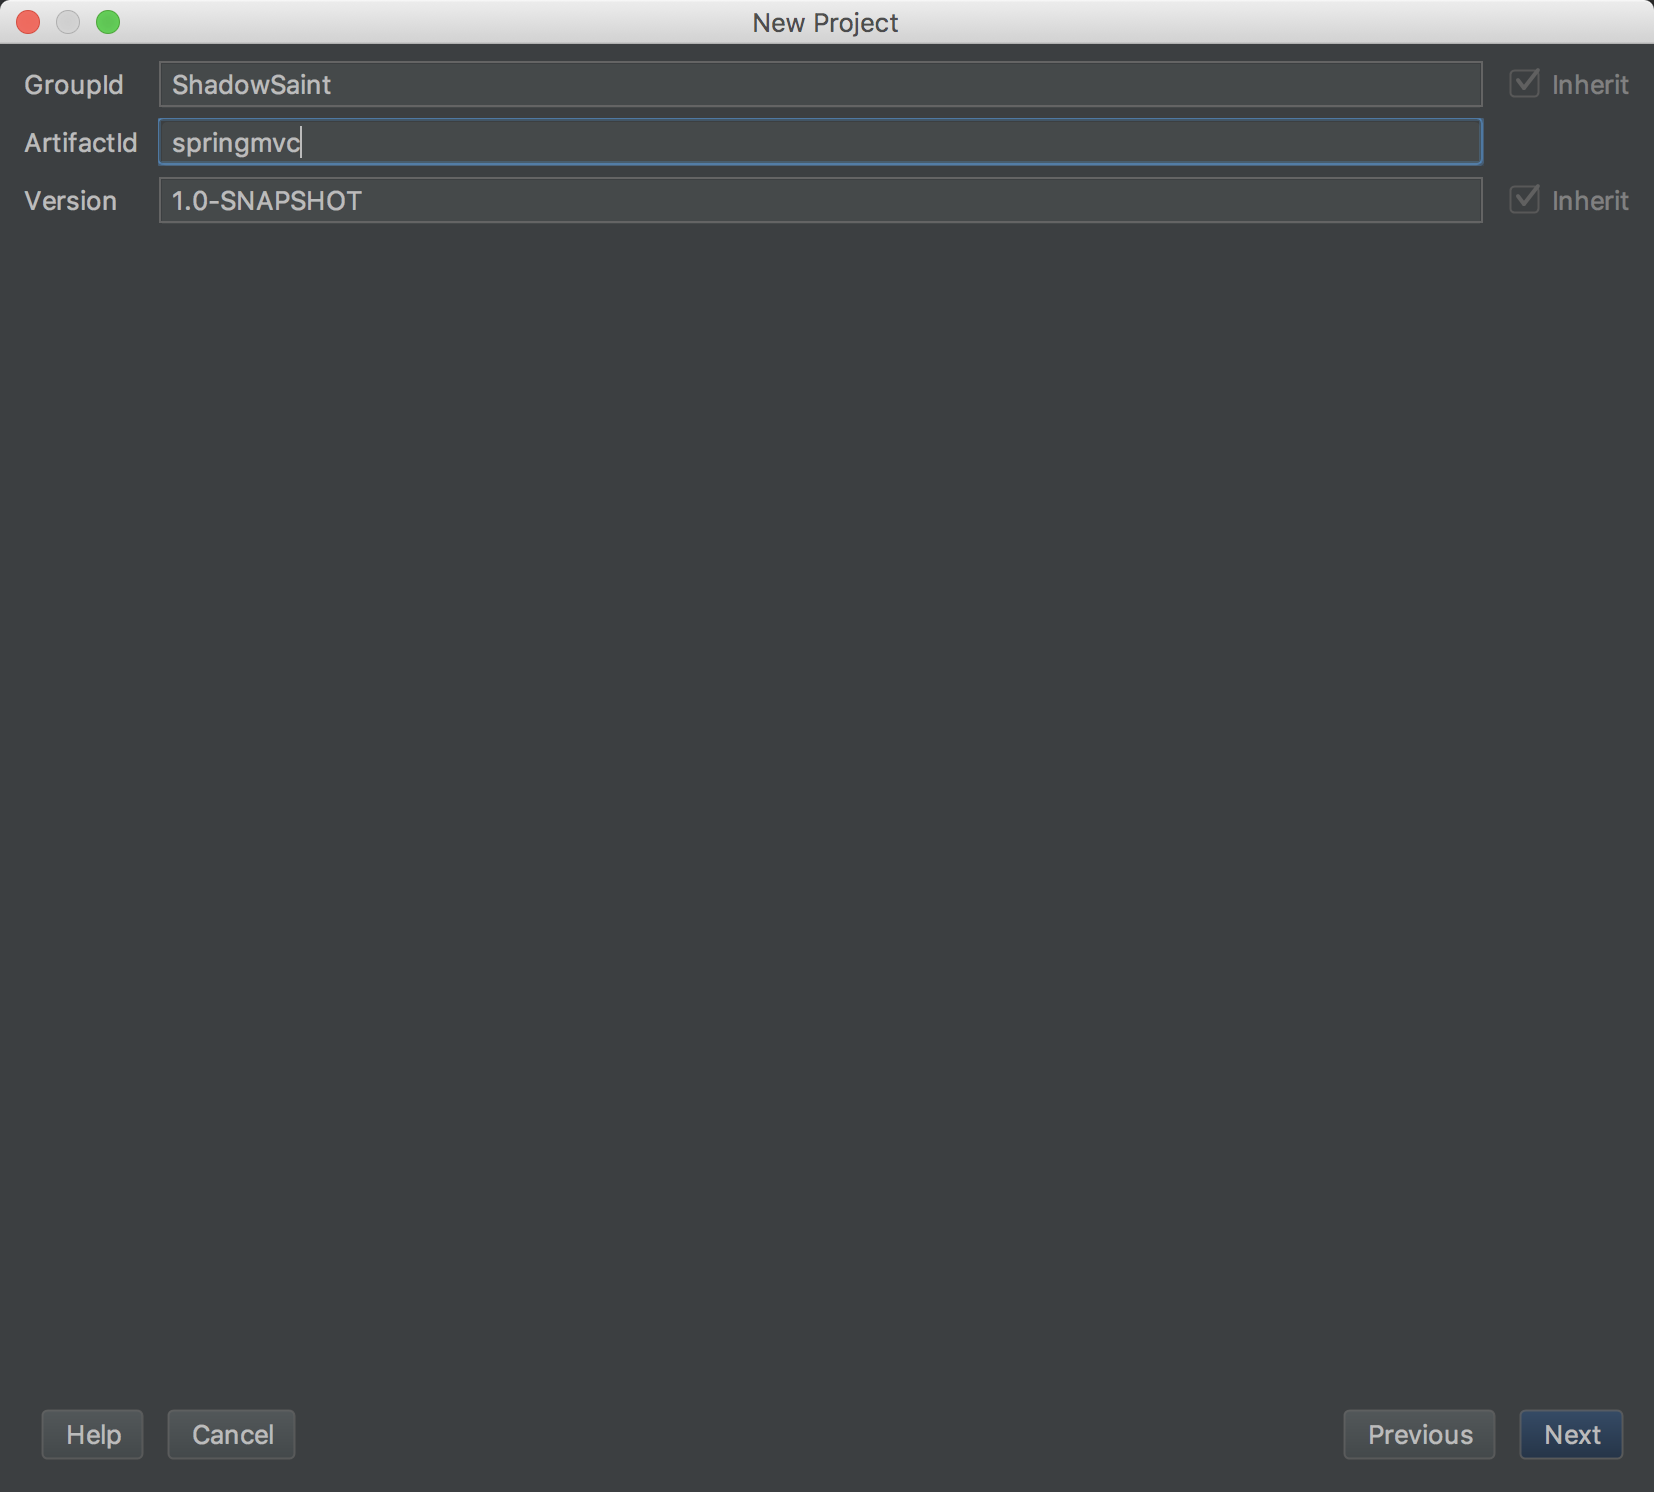
5.这个groupid,就是你们项目组的名字,是什么公司就写什么,个人的话想写什么就写什么,artifactid是这个项目的名字
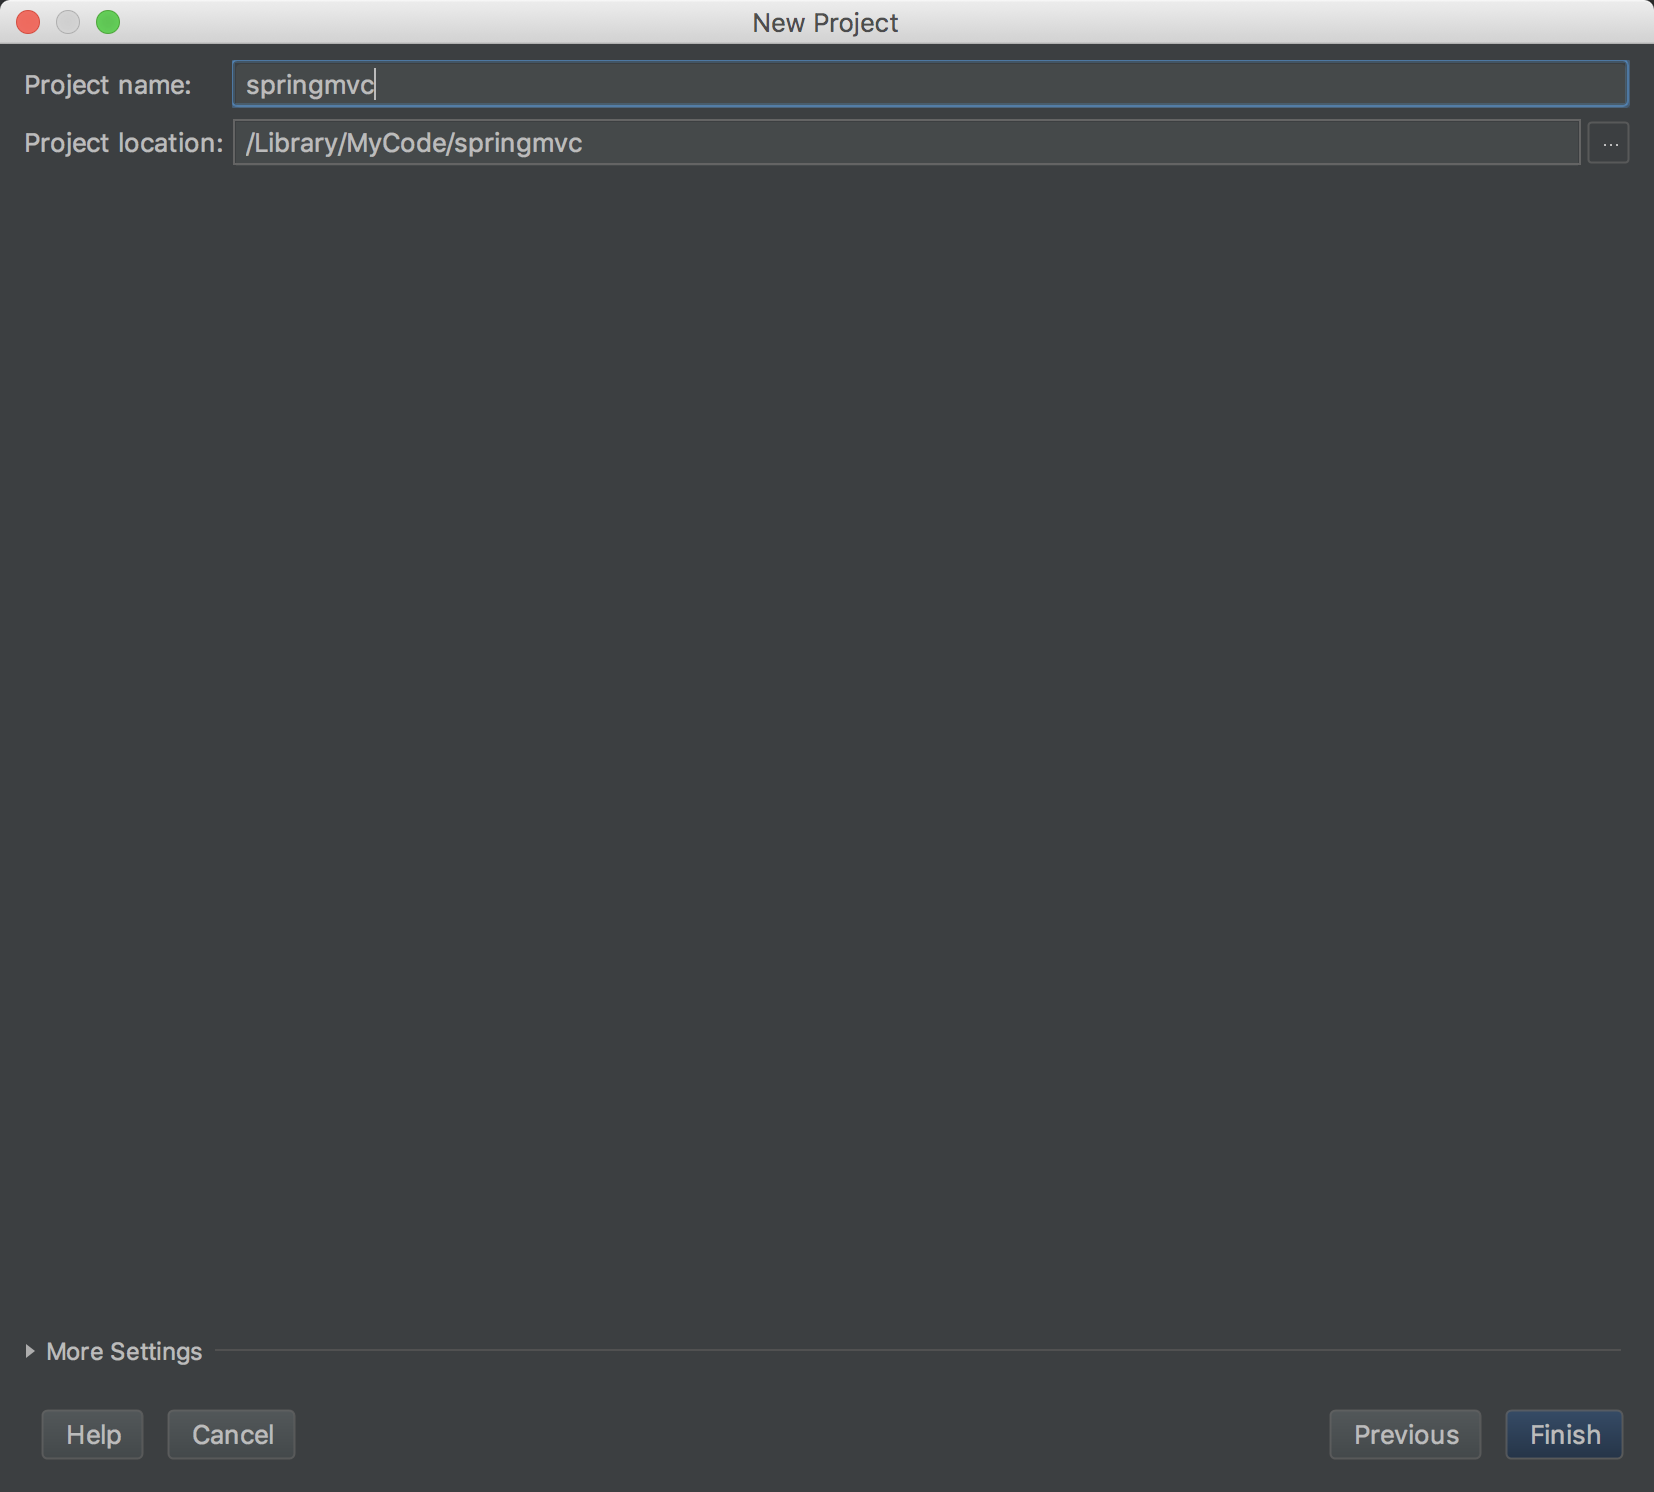
6.选择刚刚你新建的git仓库的路径,建立项目
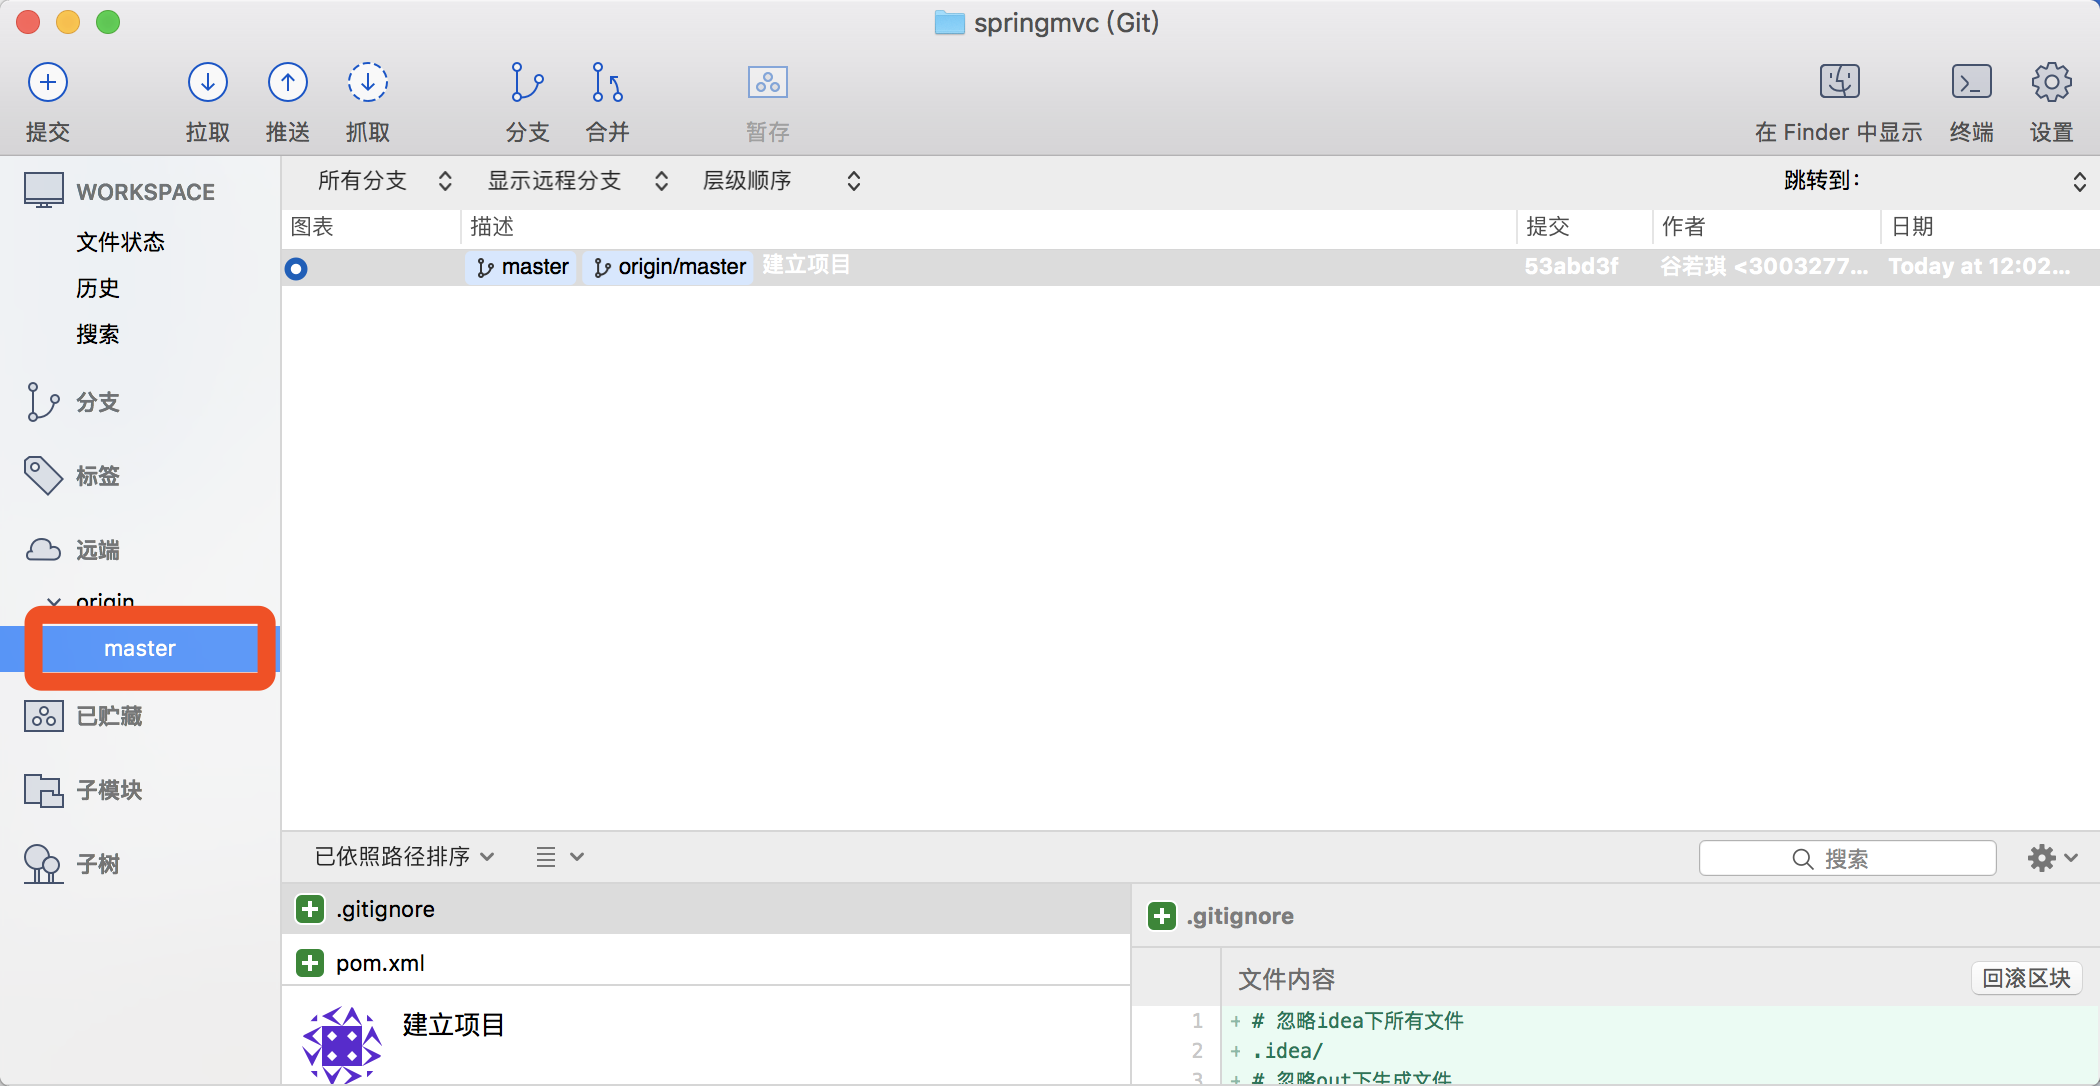
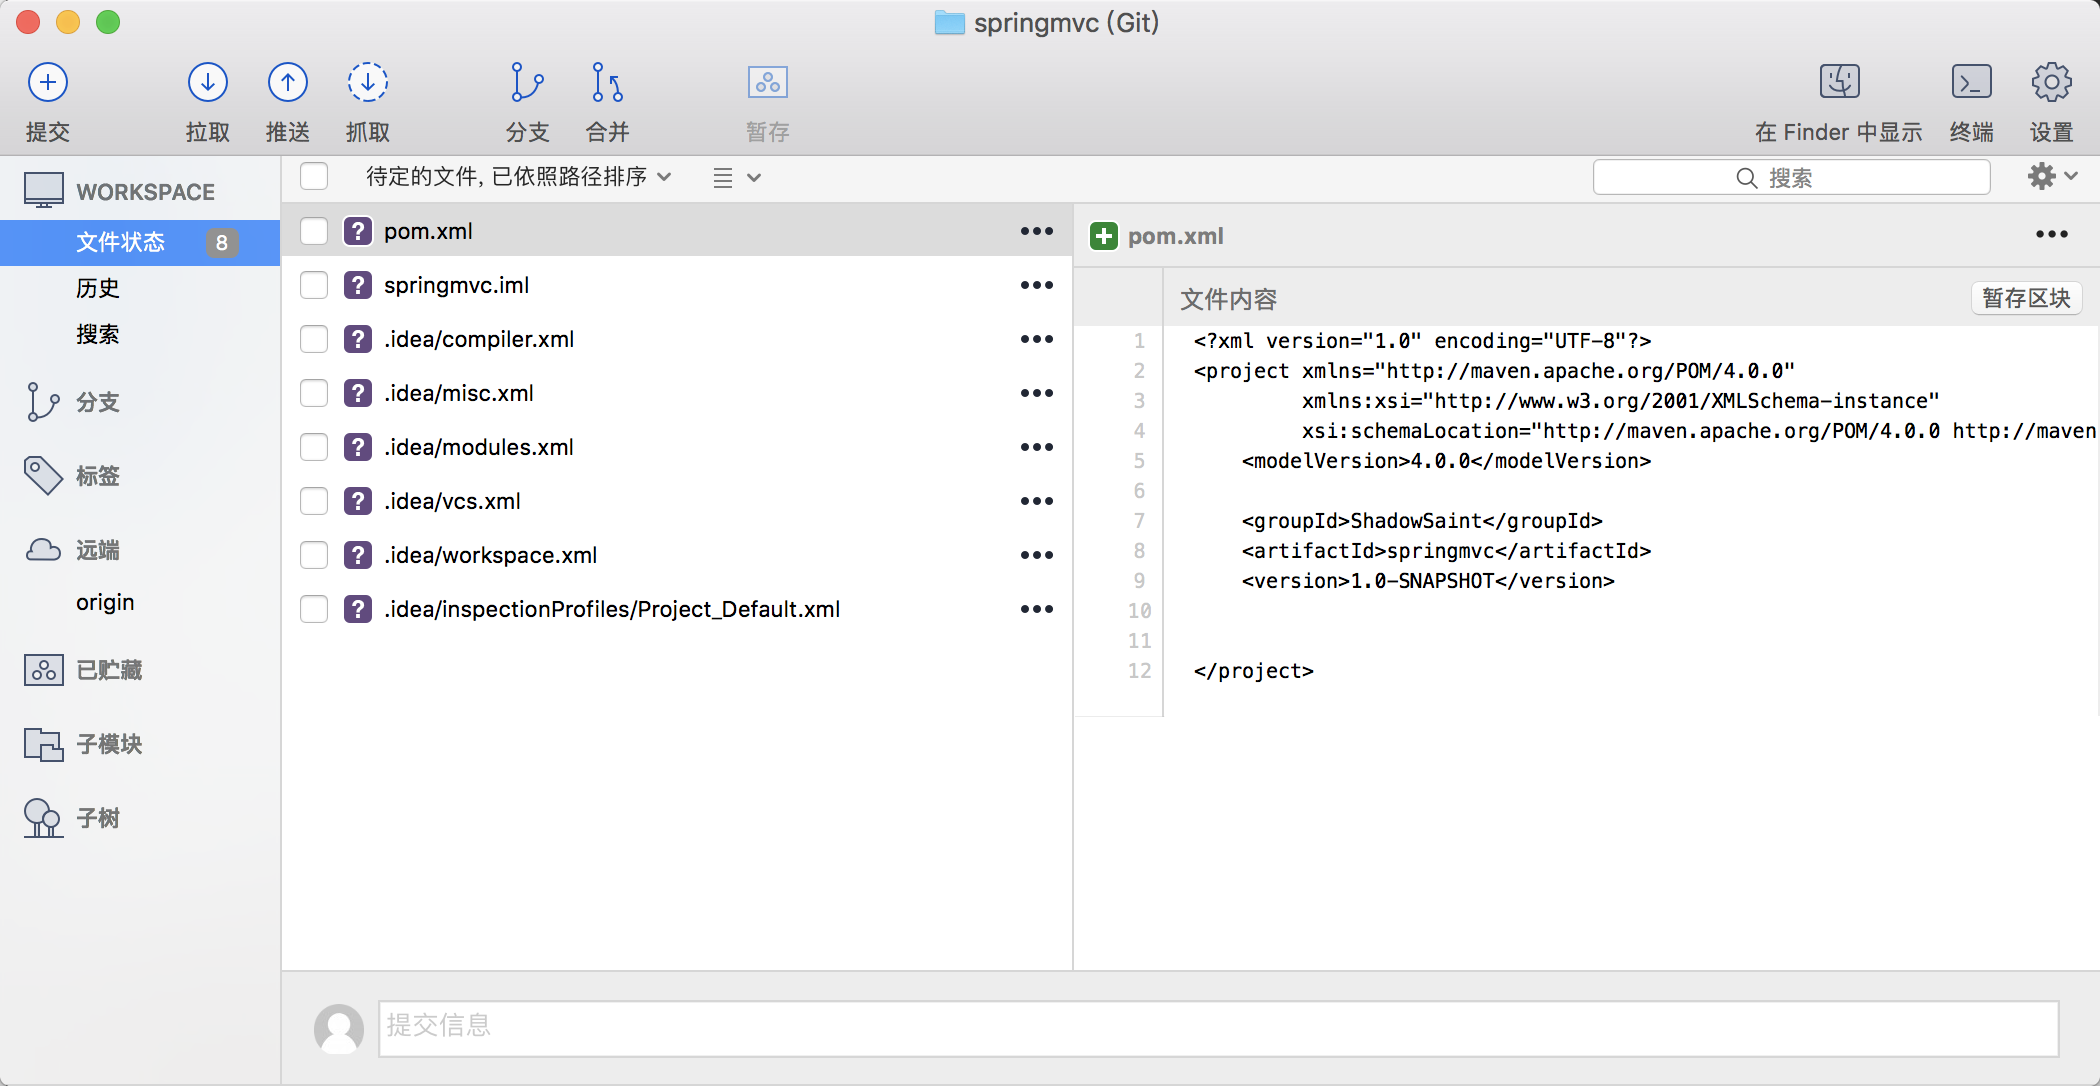
7,这时候你打开总目录就会看到,有两个红的,红色名字说明git里没有收录这两个文件,也说明了git使用成功了

这时候再打开source tree,就能看到里面有一些文件了,这就说明git使用成功了
8.在总目录下,右键-->new-->file(这一步以后再做的时候可以省略,直接把这个文件复制粘贴到新项目里就行了)
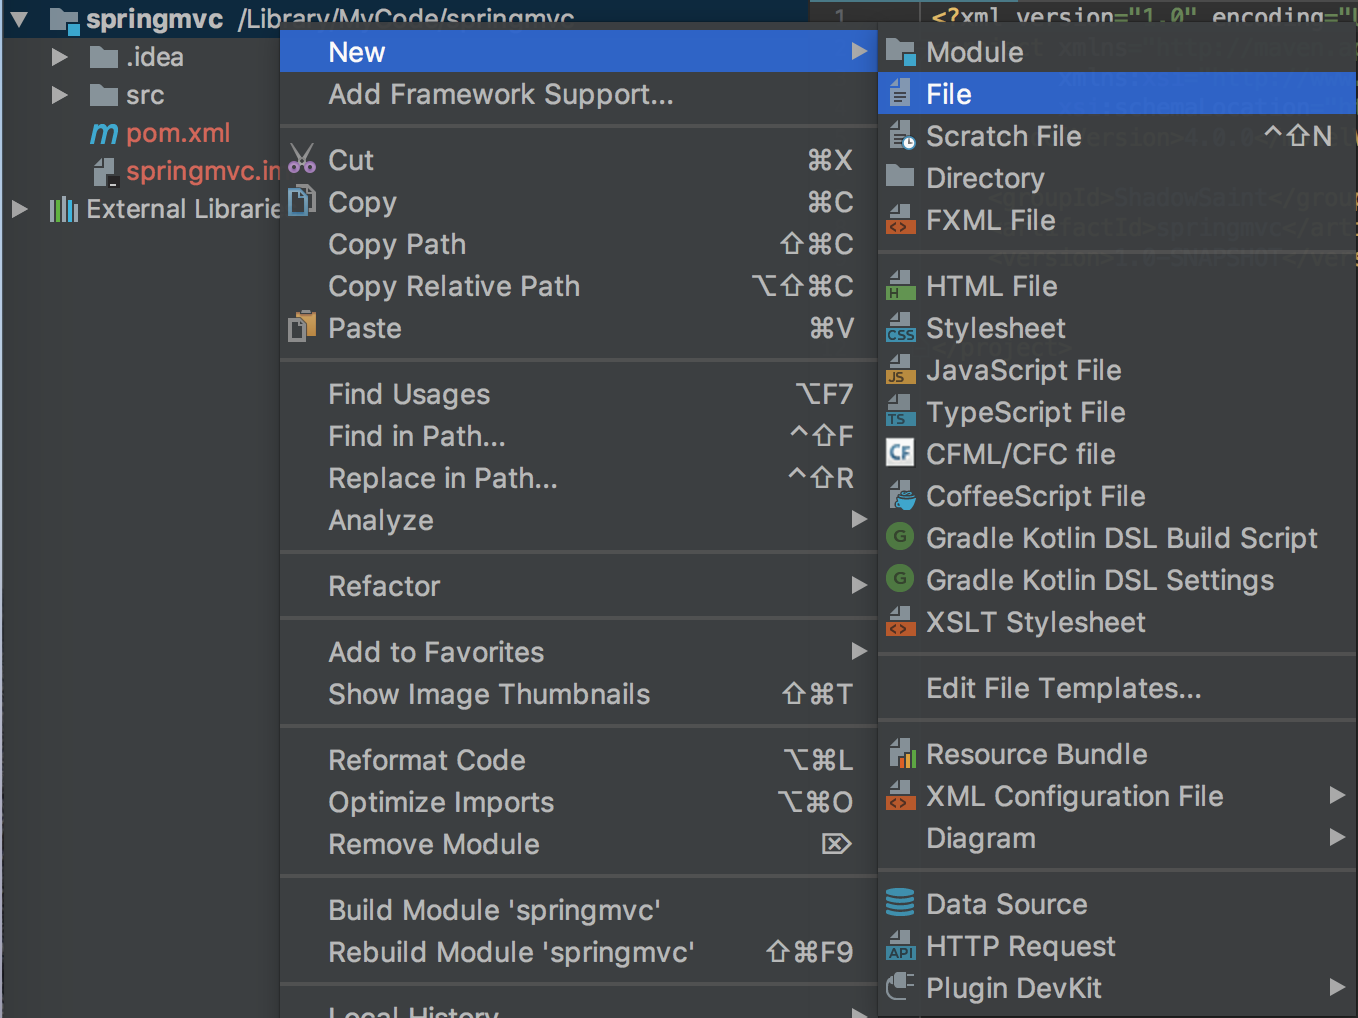
起名 .gitignore
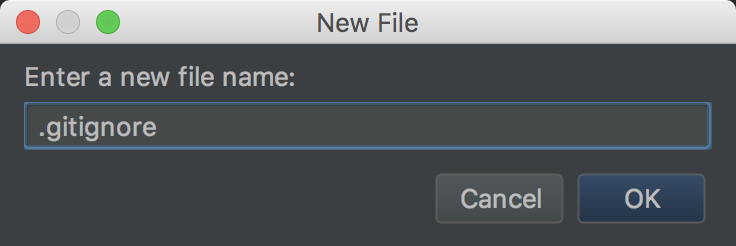
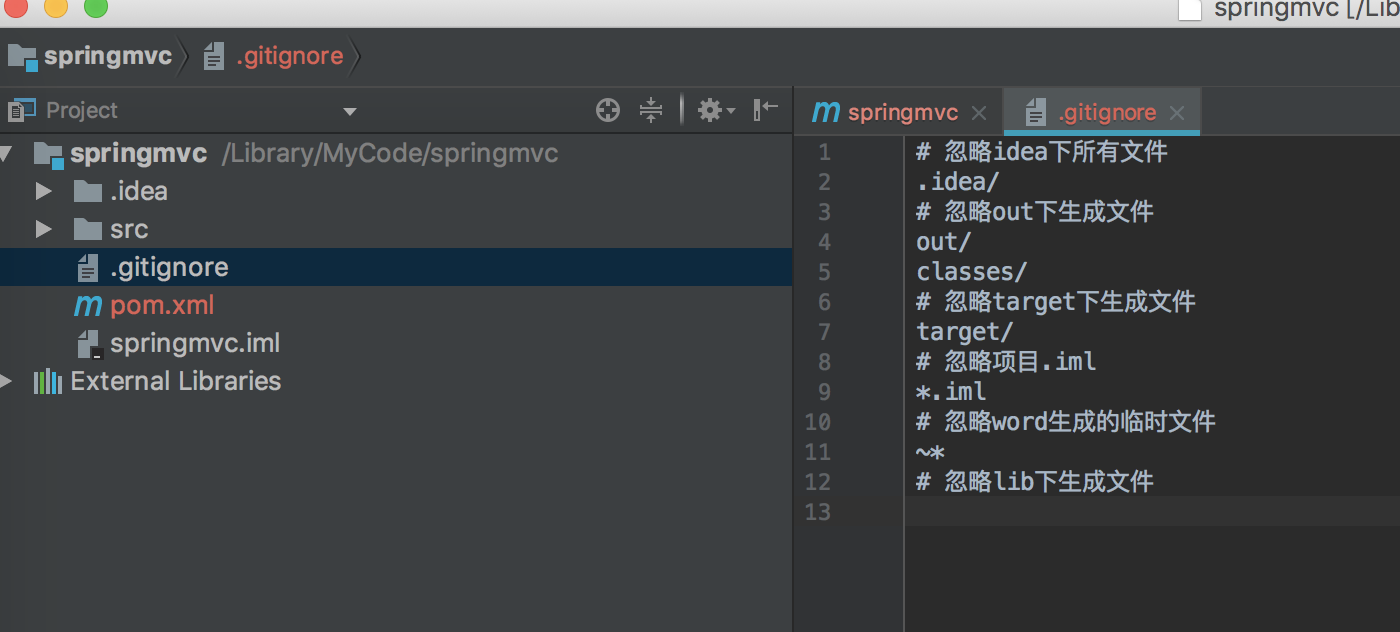
复制以下内容,粘贴进去
# 忽略idea下所有文件
.idea/
# 忽略out下生成文件
out/
classes/
# 忽略target下生成文件
target/
# 忽略项目.iml
*.iml
# 忽略word生成的临时文件
~*
# 忽略lib下生成文件
如下图所示:
这时候再打开你的source tree,你会发现杂七杂八的文件没了,只有你需要的文件了
9.在总目录下,右键-->添加框架支持

往下翻,找到Spring MVC

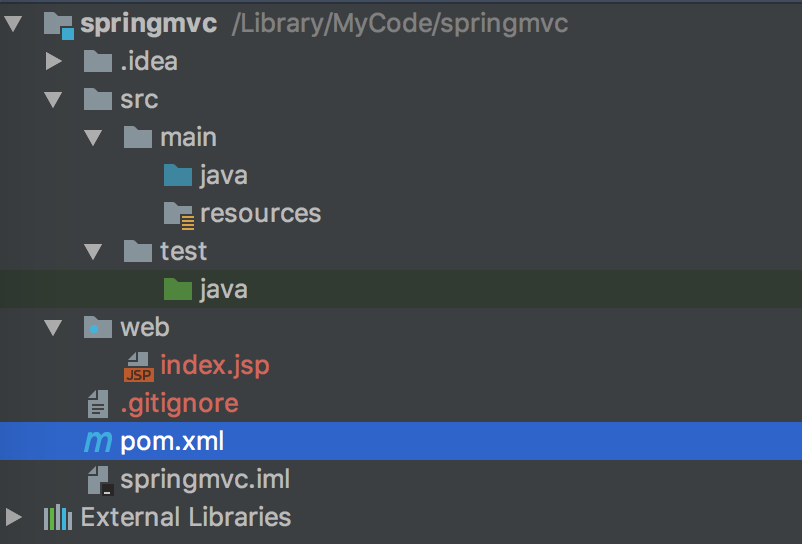
添加完之后就会发现目录下多了web的文件夹
编辑pom.xml文件,在图中所示的地方加入以下代码

<properties>
        <maven.compiler.source>1.8</maven.compiler.source>
        <maven.compiler.target>1.8</maven.compiler.target>
    </properties>

    <dependencies>
        <!-- https://mvnrepository.com/artifact/javax.servlet/javax.servlet-api -->
        <dependency>
            <groupId>javax.servlet</groupId>
            <artifactId>javax.servlet-api</artifactId>
            <version>3.1.0</version>
        </dependency>
        <!-- https://mvnrepository.com/artifact/org.springframework/spring-webmvc -->
        <dependency>
            <groupId>org.springframework</groupId>
            <artifactId>spring-webmvc</artifactId>
            <version>5.0.5.RELEASE</version>
        </dependency>

    </dependencies>
在pom.xml文件上,右键-->maven-->reimport

在web文件夹上,右键-->新建-->文件夹-->起名 WEB-INF ,然后删除掉index.jsp
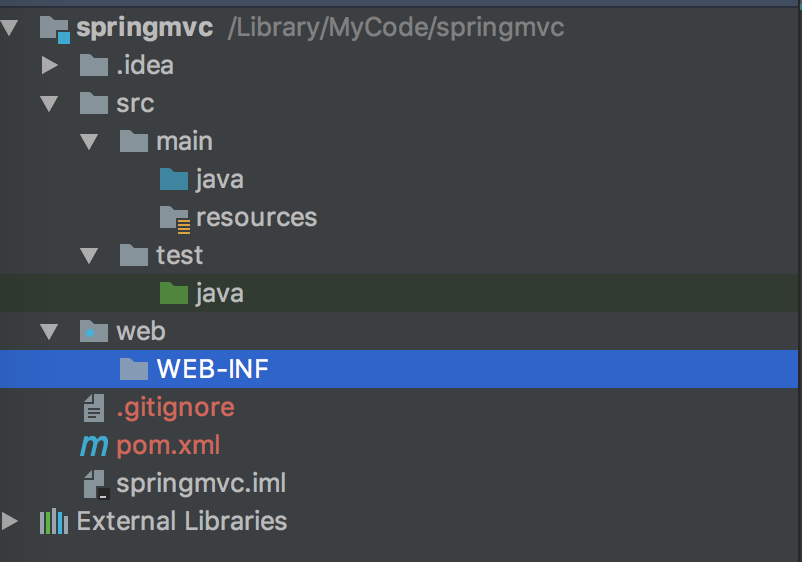
在WEB-INF文件夹上,右键-->新建-->xml-->spring配置(这一步和后面的web.xml配置,以后可以反复利用,直接复制粘贴过去就行了)
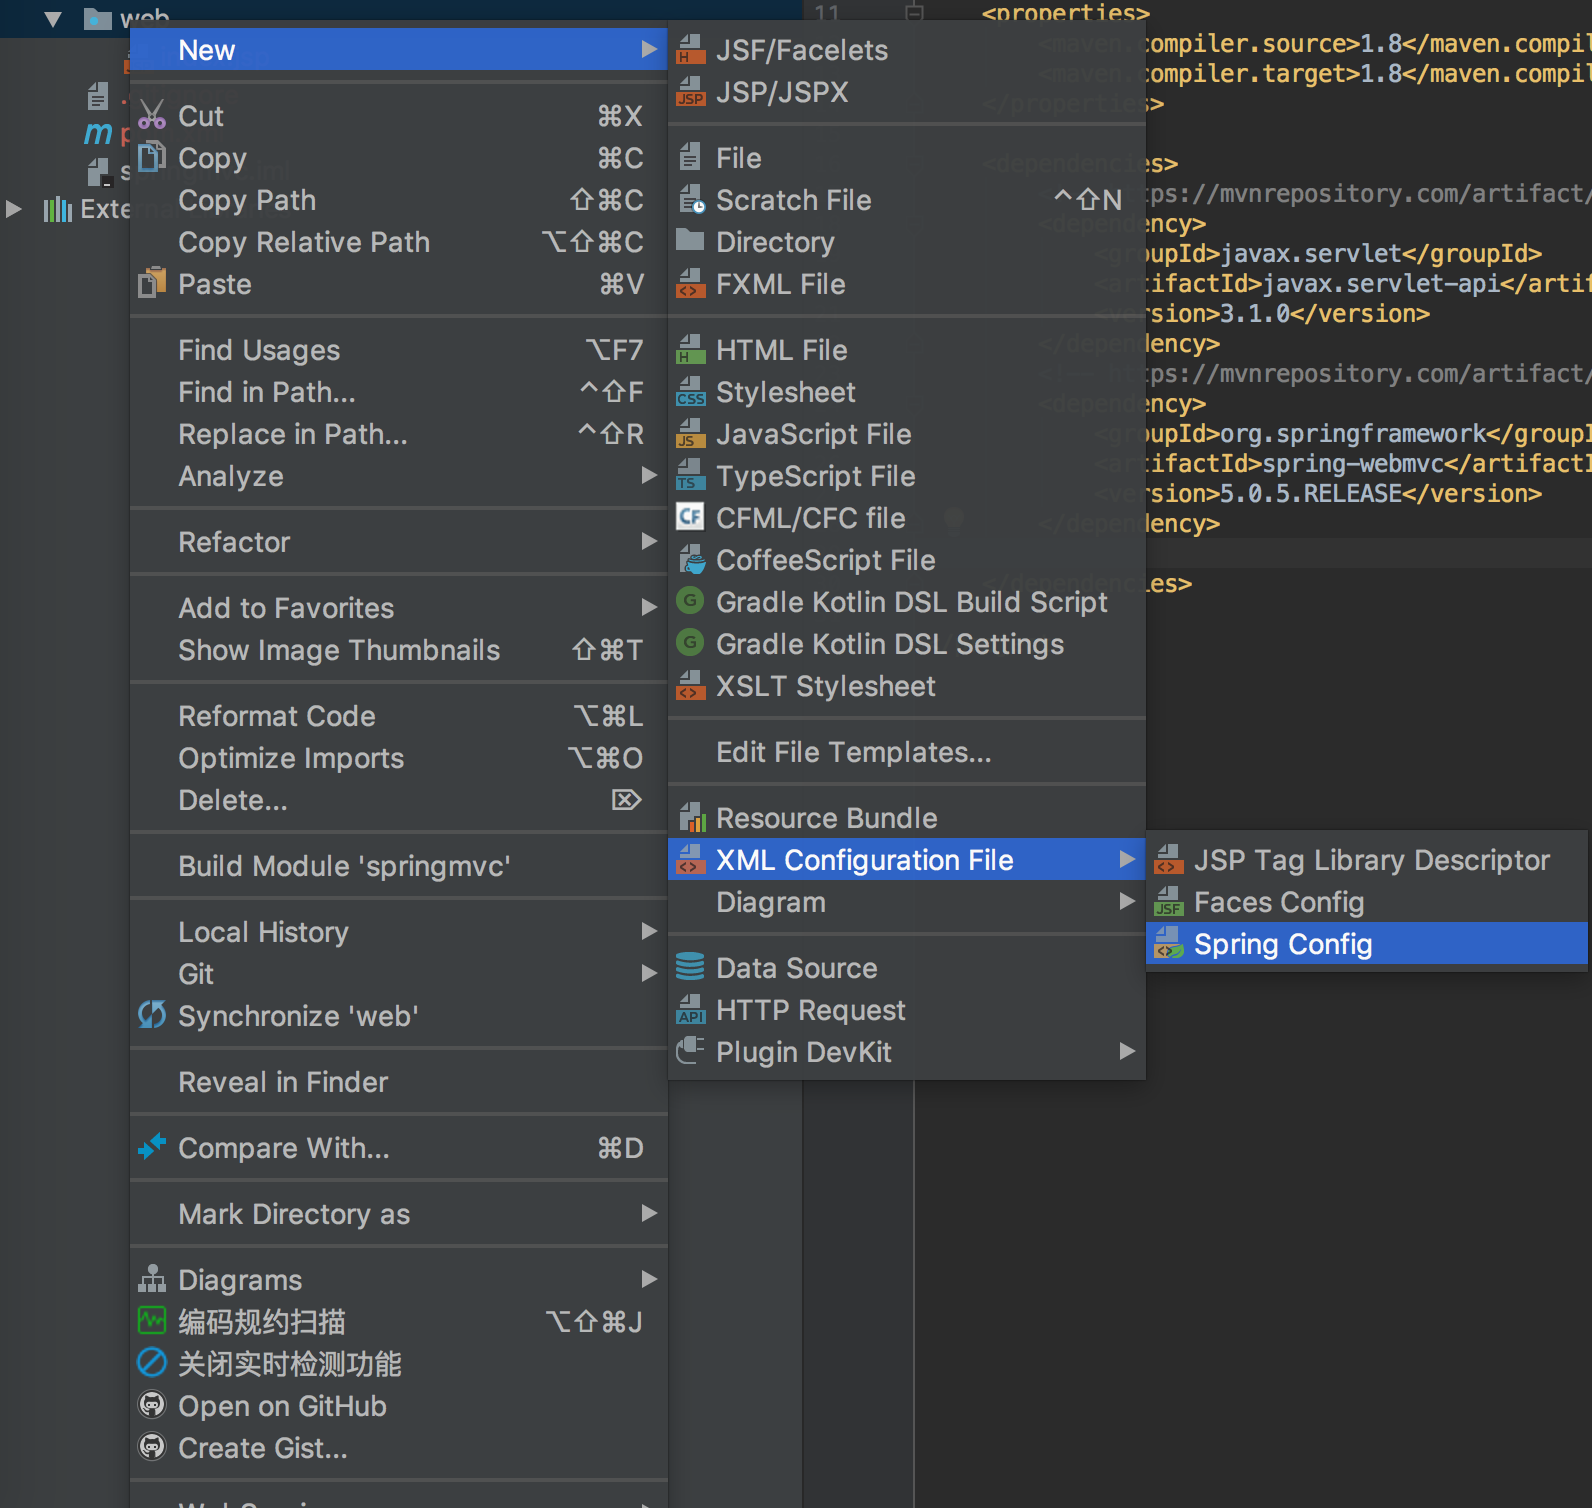
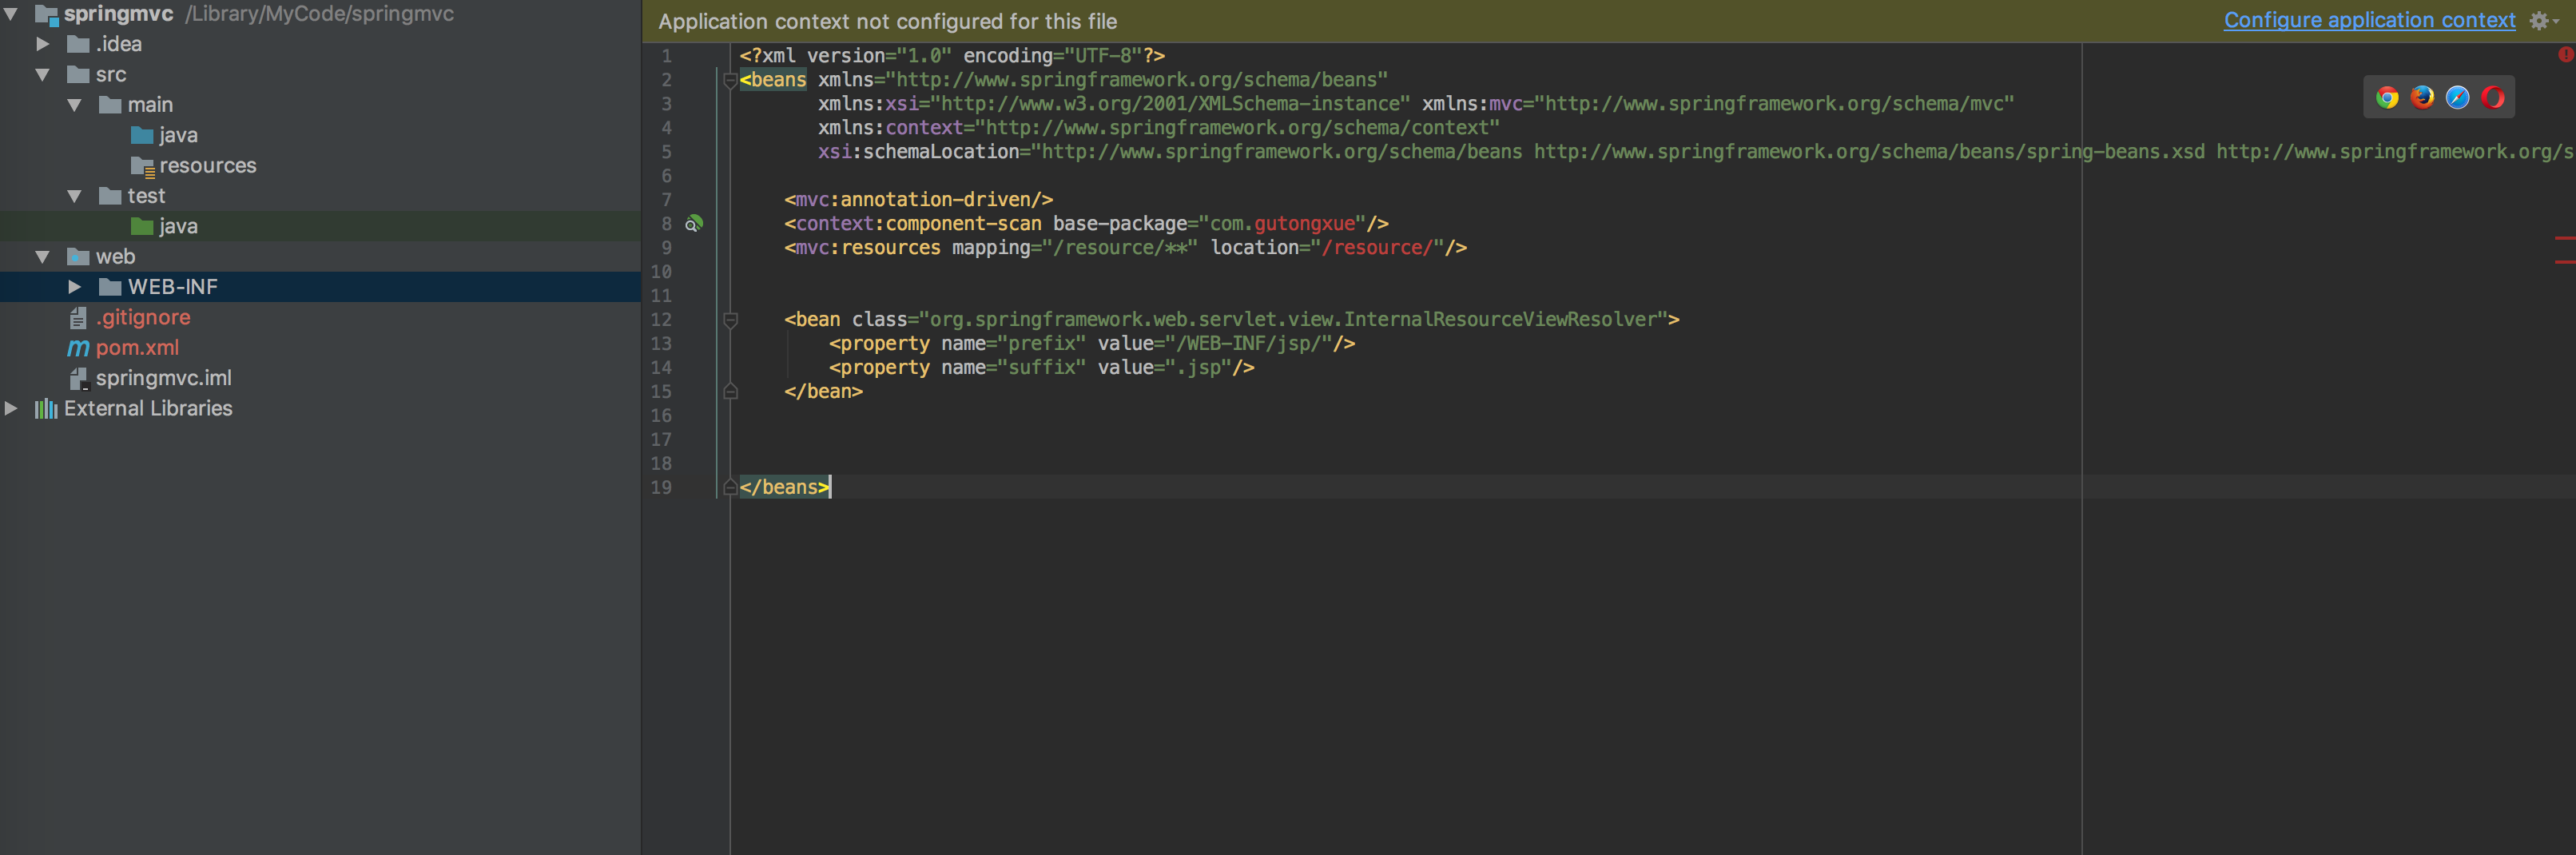
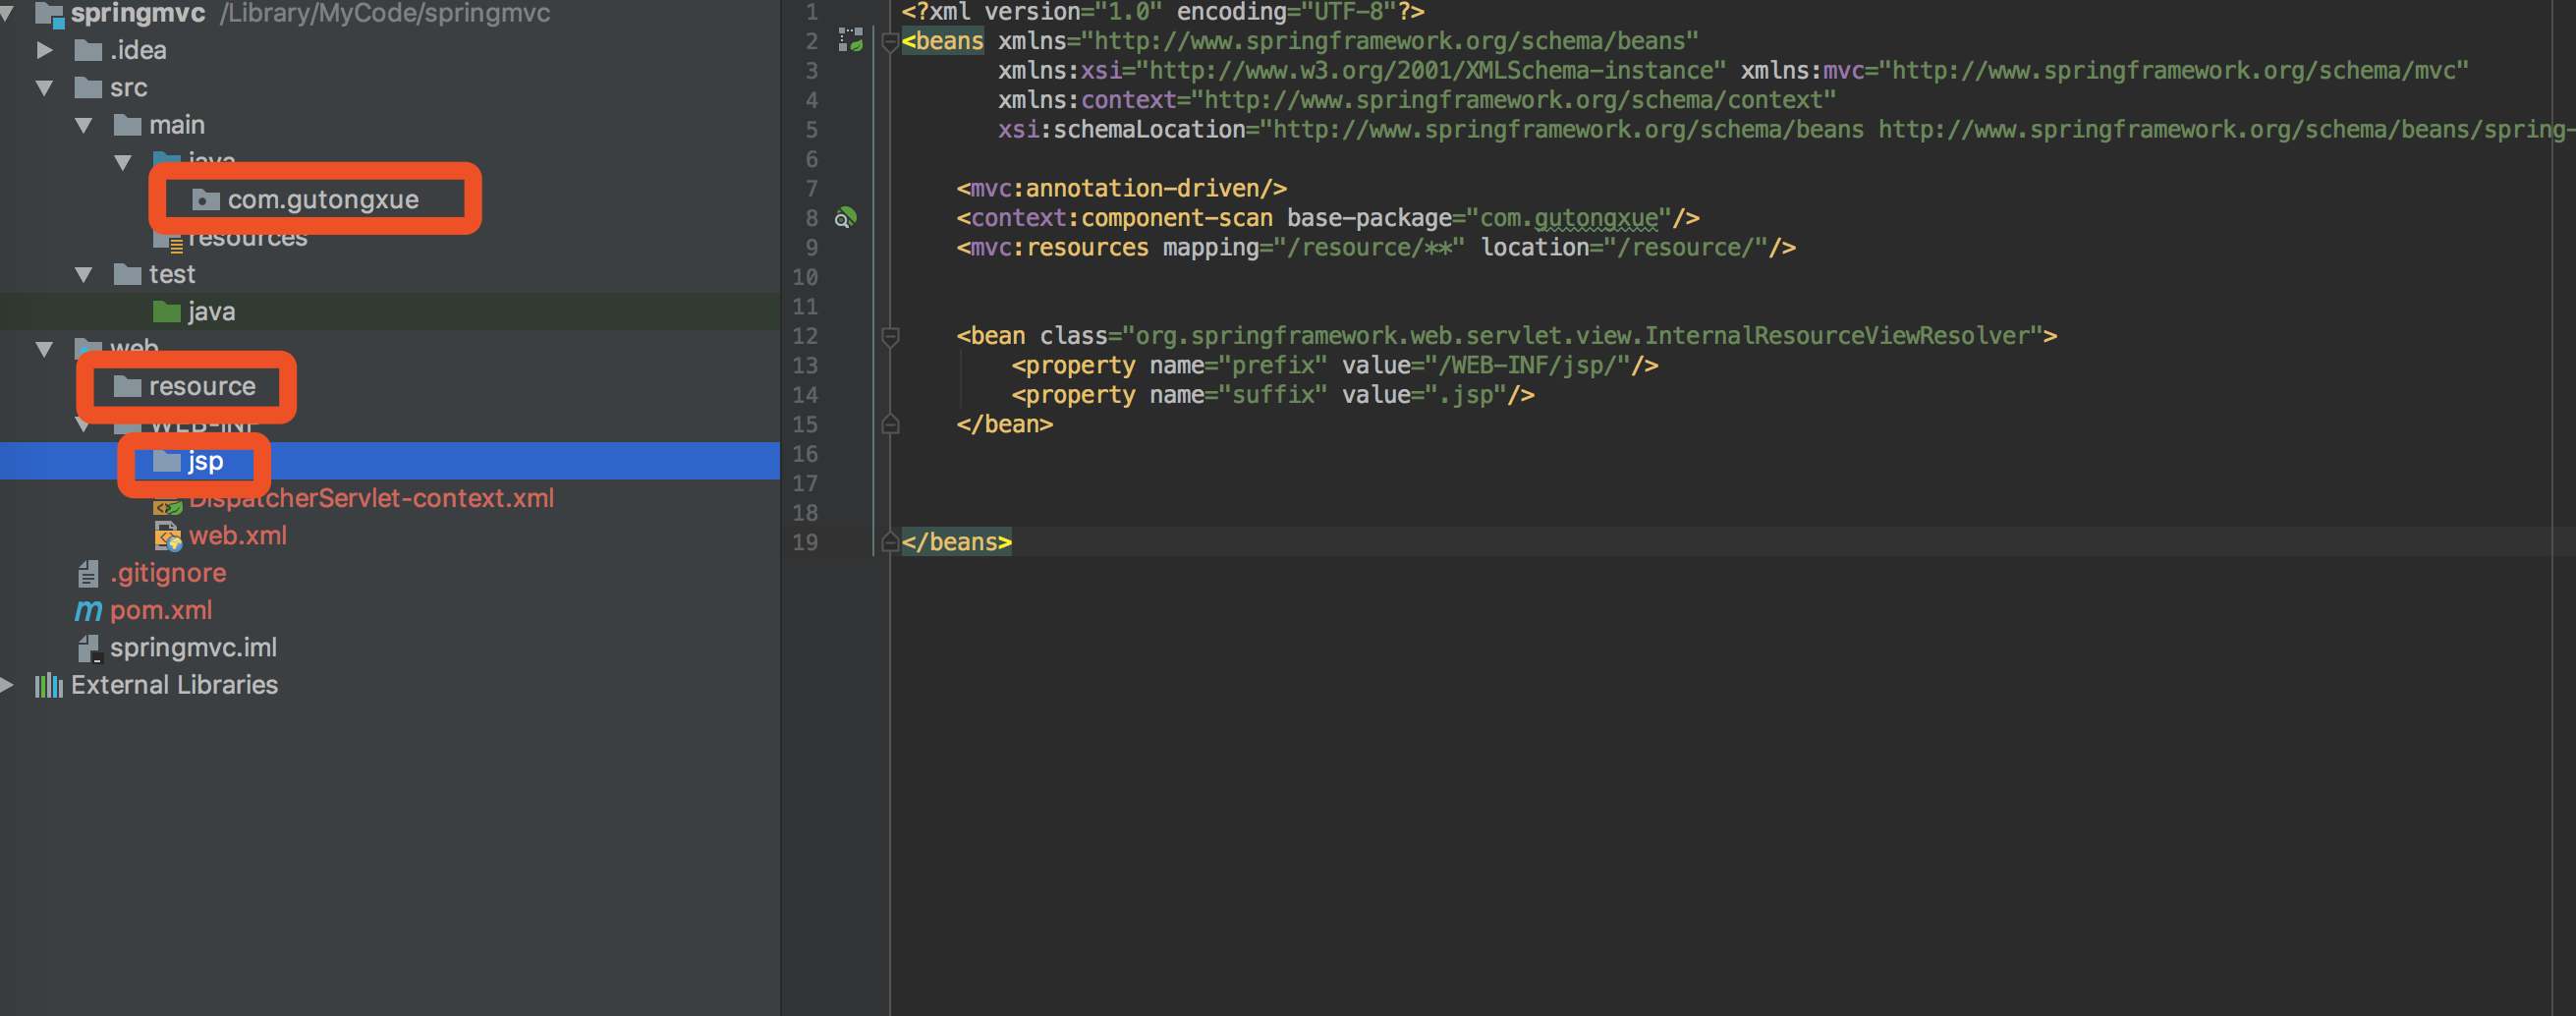
起名 DispatcherServlet-context.xml,编辑内容,全部删掉,换成以下内容
<?xml version="1.0" encoding="UTF-8"?>
<beans xmlns="http://www.springframework.org/schema/beans"
       xmlns:xsi="http://www.w3.org/2001/XMLSchema-instance" xmlns:mvc="http://www.springframework.org/schema/mvc"
       xmlns:context="http://www.springframework.org/schema/context"
       xsi:schemaLocation="http://www.springframework.org/schema/beans http://www.springframework.org/schema/beans/spring-beans.xsd http://www.springframework.org/schema/mvc http://www.springframework.org/schema/mvc/spring-mvc.xsd http://www.springframework.org/schema/context http://www.springframework.org/schema/context/spring-context.xsd">

    <mvc:annotation-driven/>
    <context:component-scan base-package="com.gutongxue"/>
    <mvc:resources mapping="/resource/**" location="/resource/"/>

    <bean class="org.springframework.web.servlet.view.InternalResourceViewResolver">
        <property name="prefix" value="/WEB-INF/jsp/"/>
        <property name="suffix" value=".jsp"/>
    </bean>


</beans>
如下图所示,现在红着没关系
在WEB-INF文件夹上,右键-->新建-->文件-->起名 web.xml
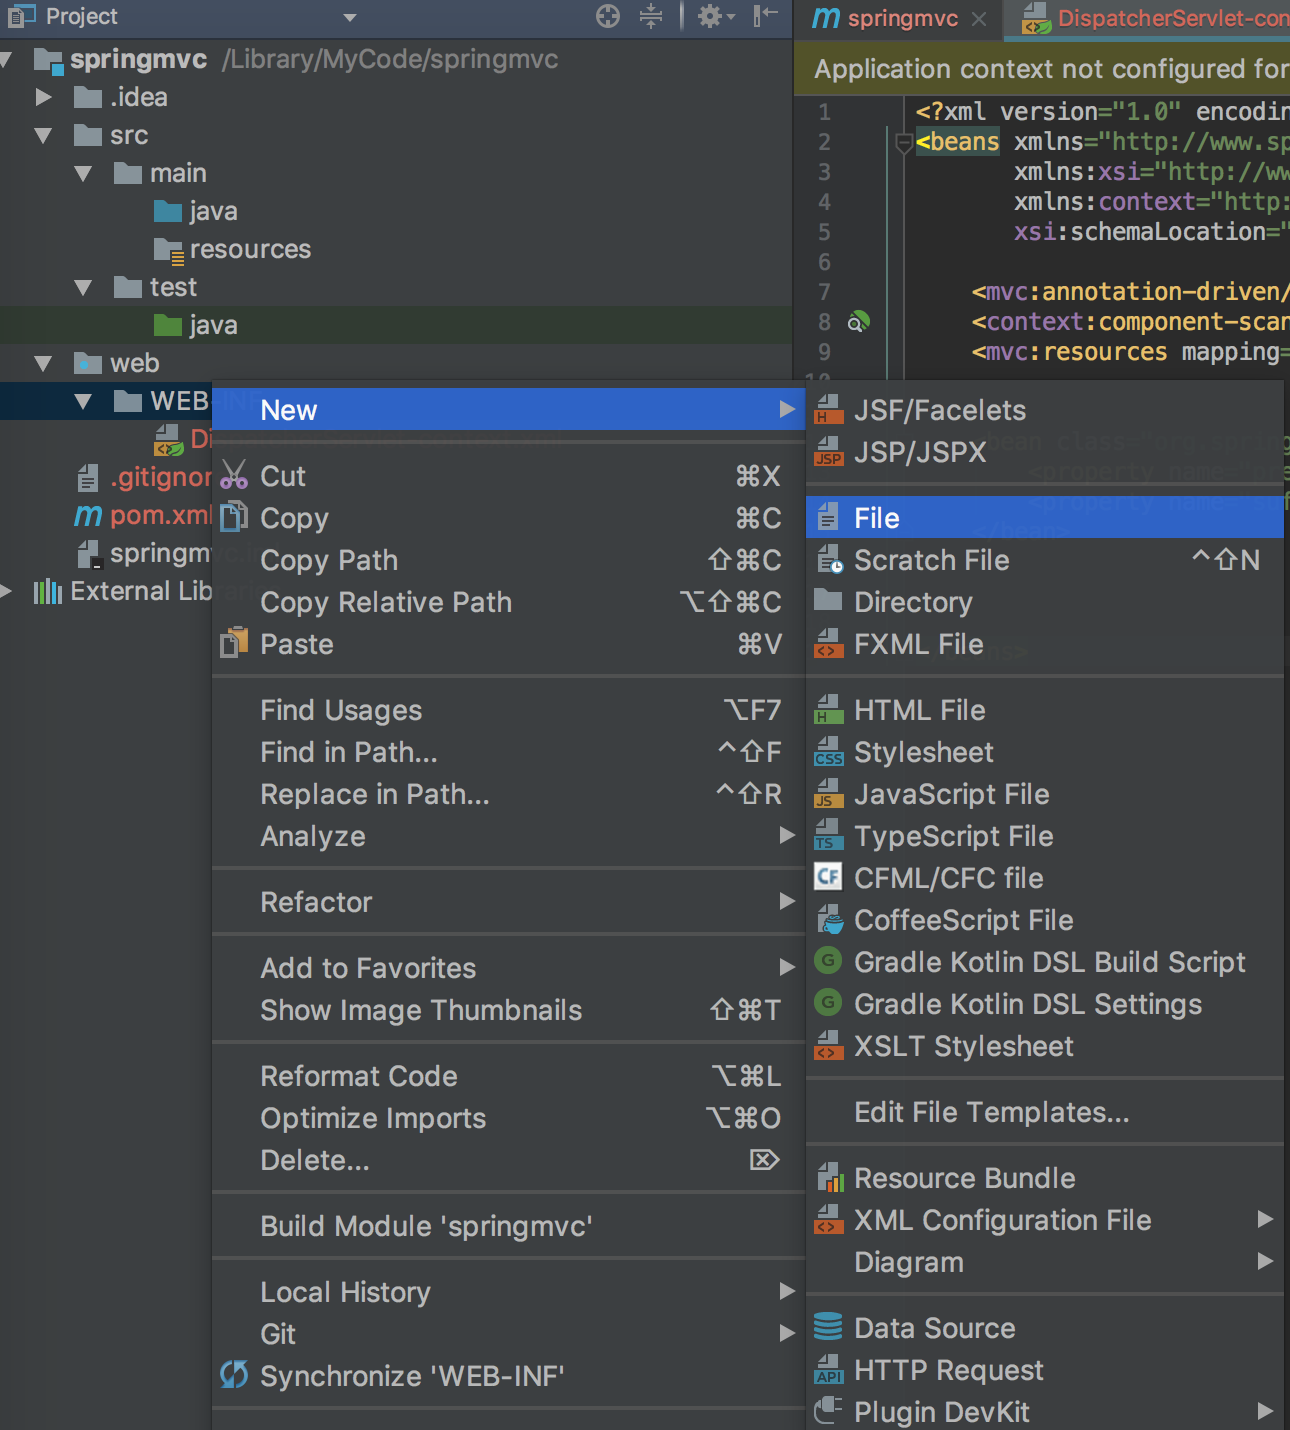
粘贴以下内容
<?xml version="1.0" encoding="UTF-8"?>
<web-app xmlns="http://xmlns.jcp.org/xml/ns/javaee"
         xmlns:xsi="http://www.w3.org/2001/XMLSchema-instance"
         xsi:schemaLocation="http://xmlns.jcp.org/xml/ns/javaee http://xmlns.jcp.org/xml/ns/javaee/web-app_3_1.xsd"
         version="3.1">
    <servlet>
        <servlet-name>DispatcherServlet</servlet-name>
        <servlet-class>org.springframework.web.servlet.DispatcherServlet</servlet-class>
        <init-param>
            <param-name>contextConfigLocation</param-name>
            <param-value>
                /WEB-INF/DispatcherServlet-context.xml
            </param-value>
        </init-param>
    </servlet>
    <servlet-mapping>
        <servlet-name>DispatcherServlet</servlet-name>
        <url-pattern>/</url-pattern>
    </servlet-mapping>

</web-app>
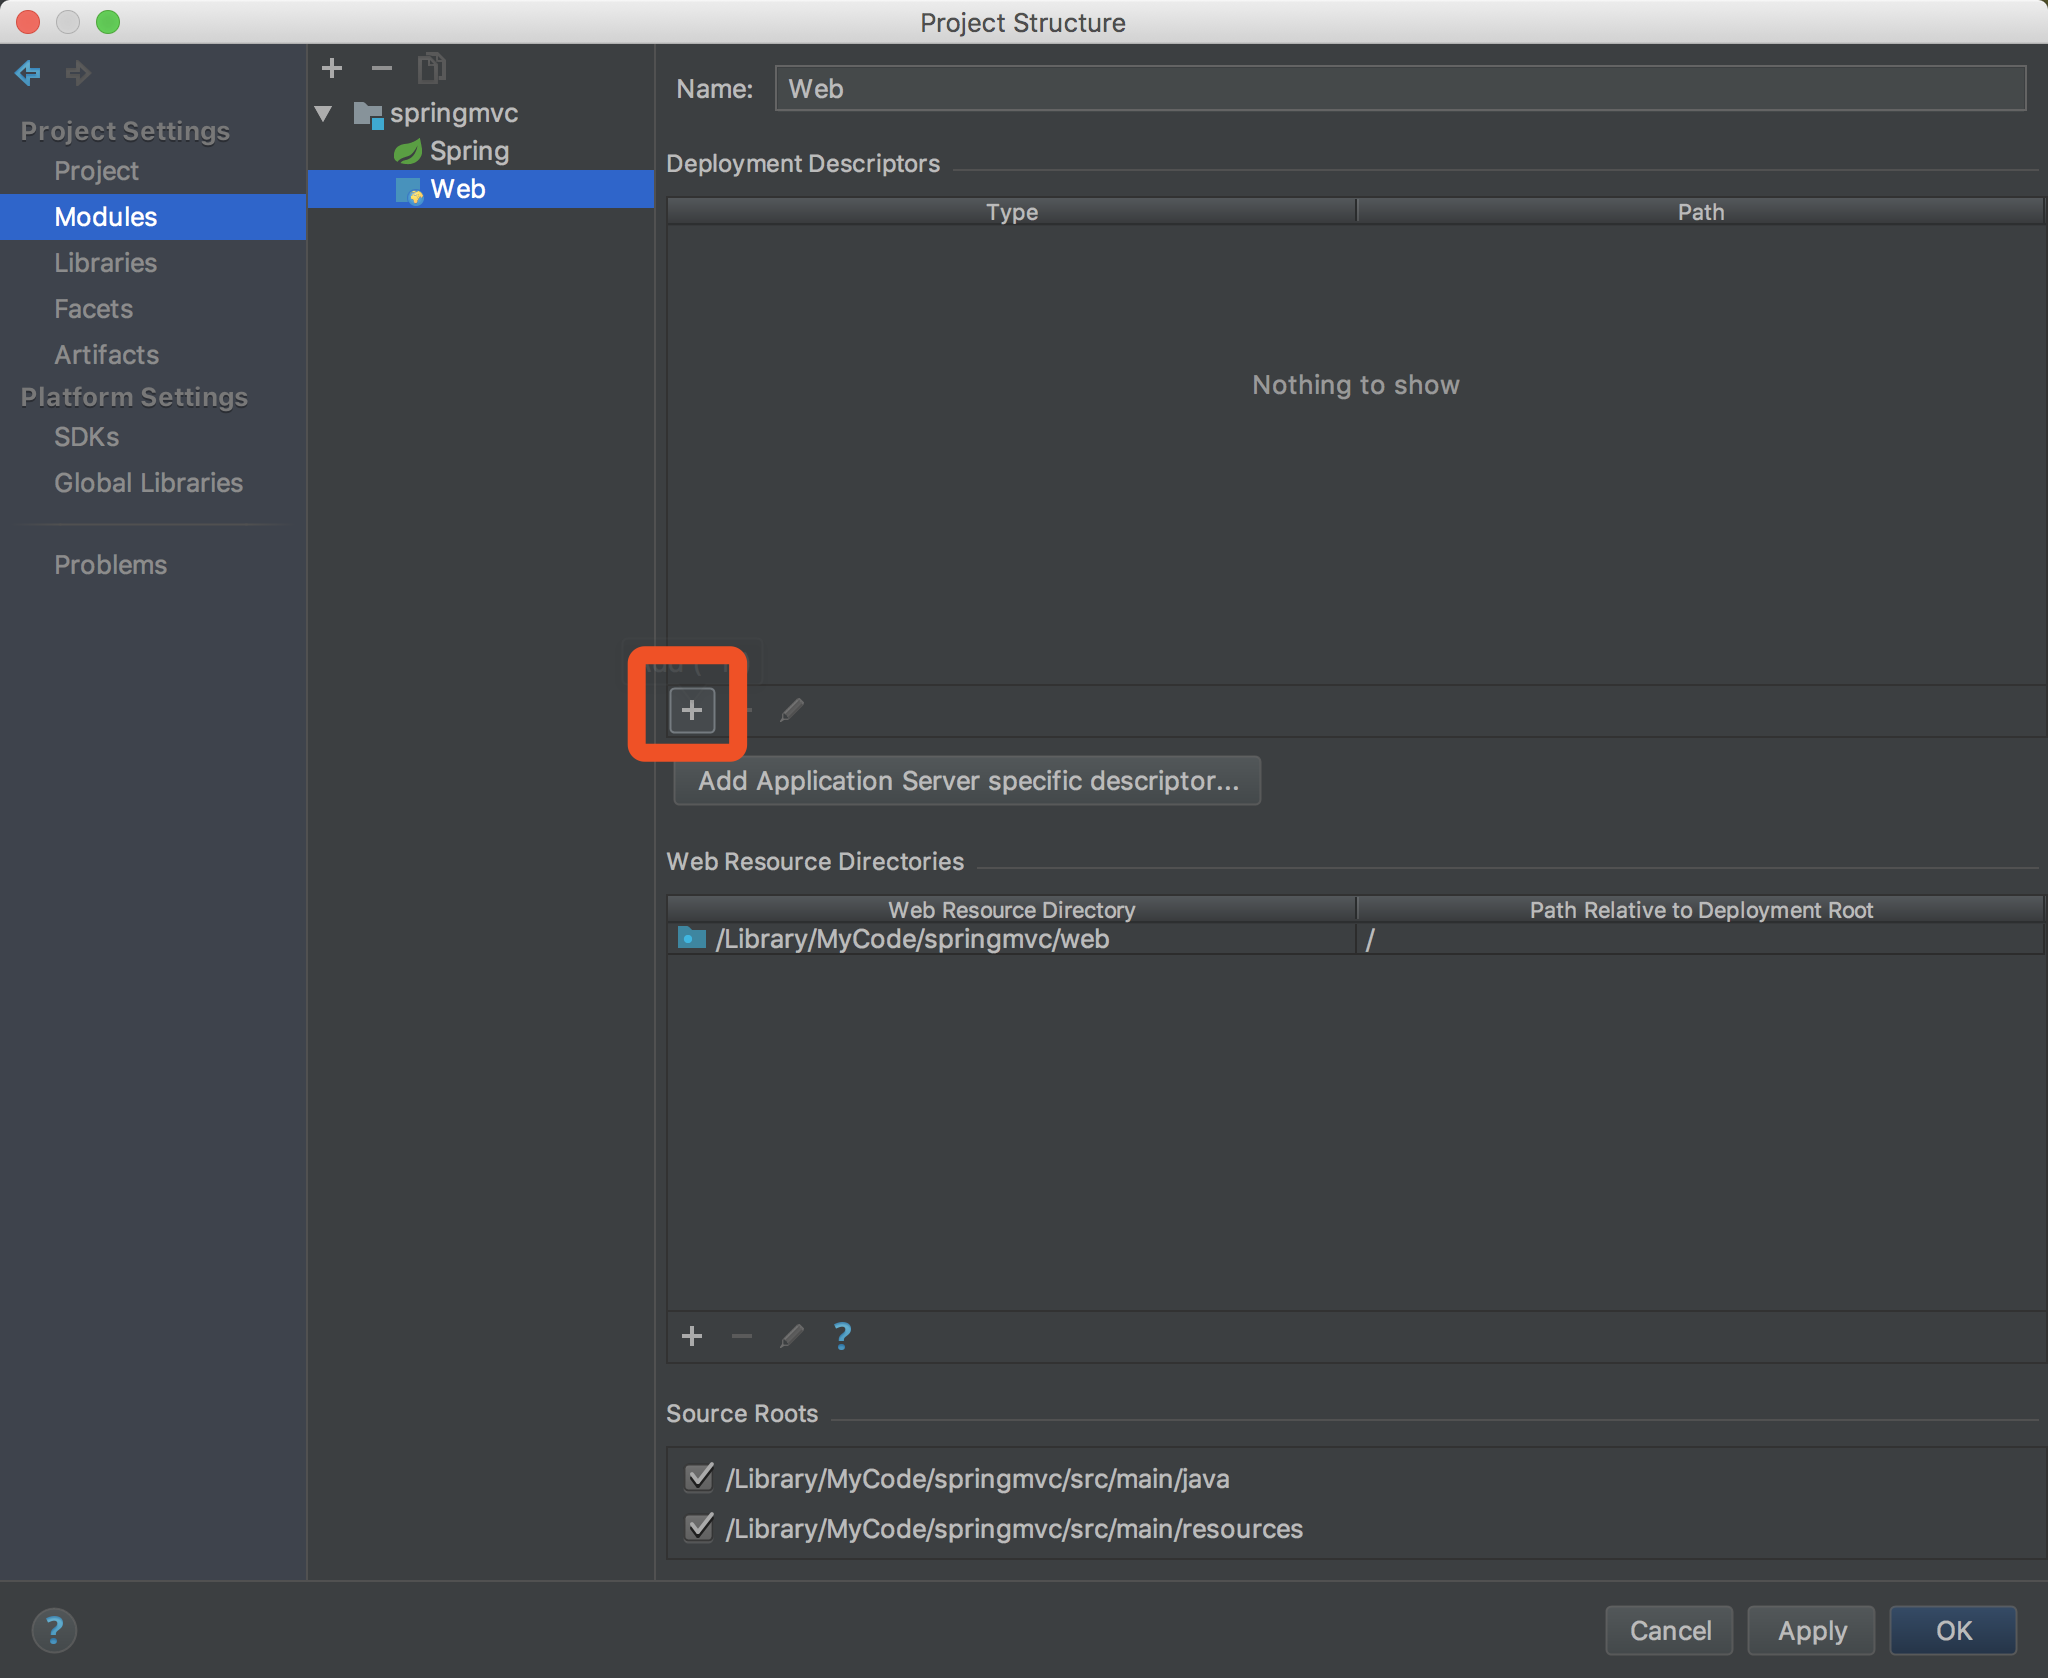
在项目总目录,右键-->打开module设置

在这里,点+号

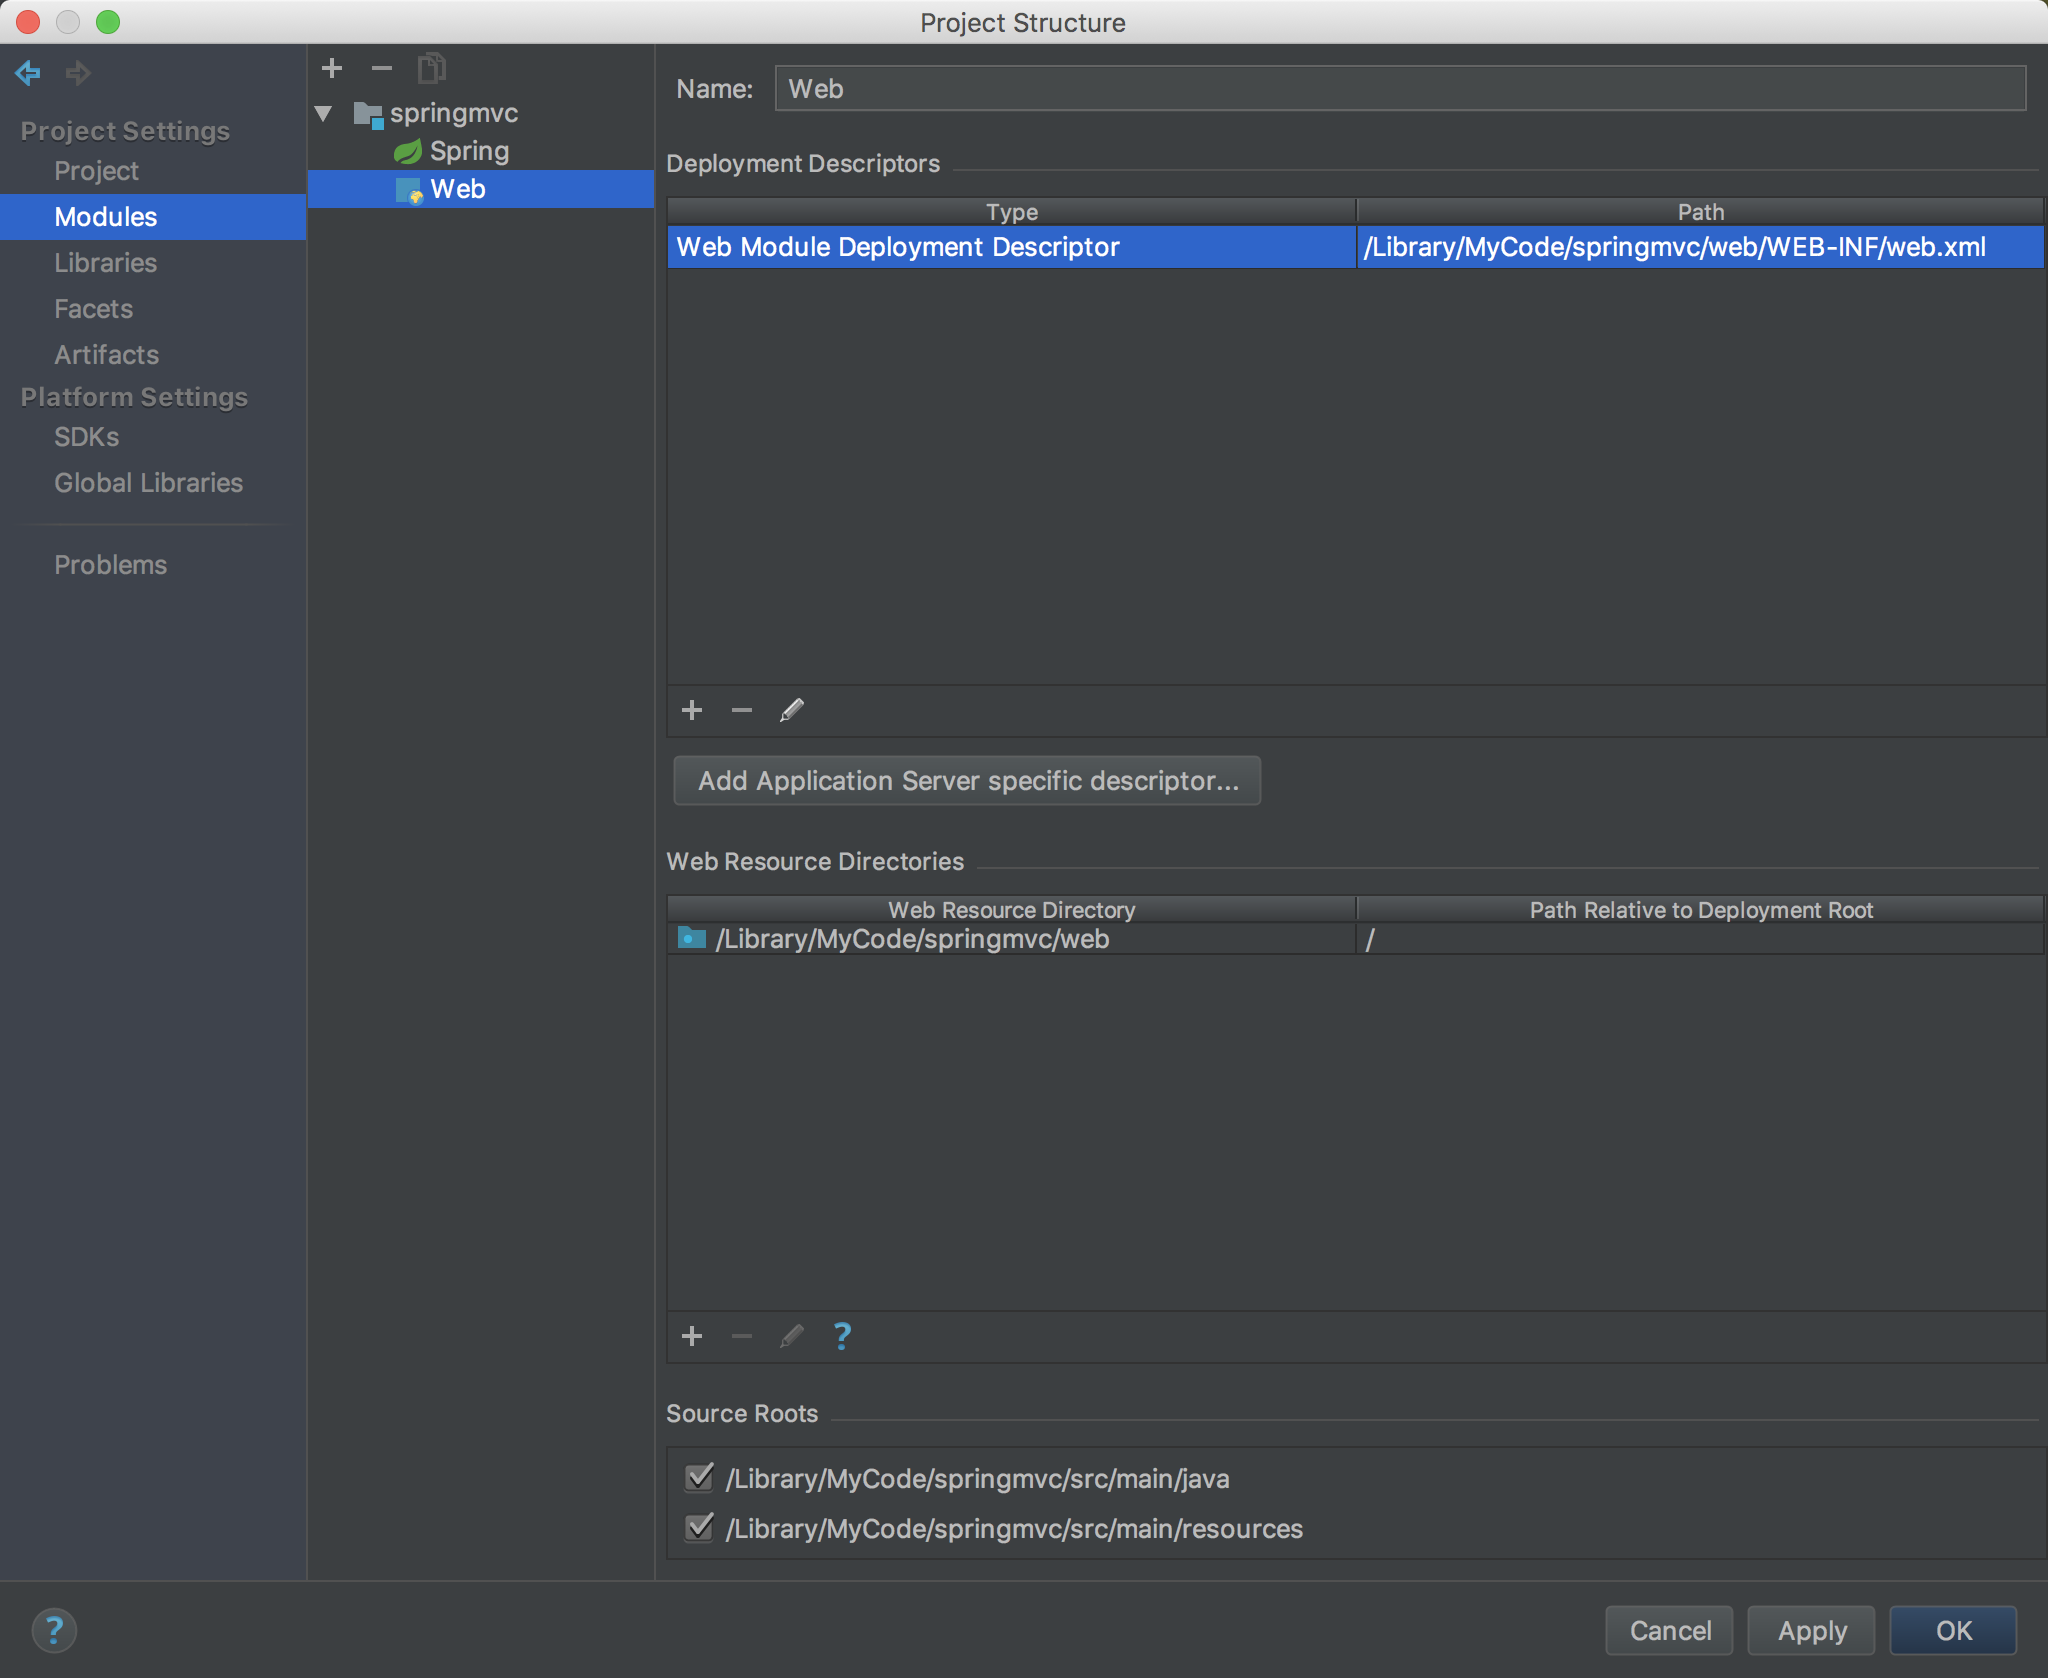
打钩,OK

这里,+号,一路OK
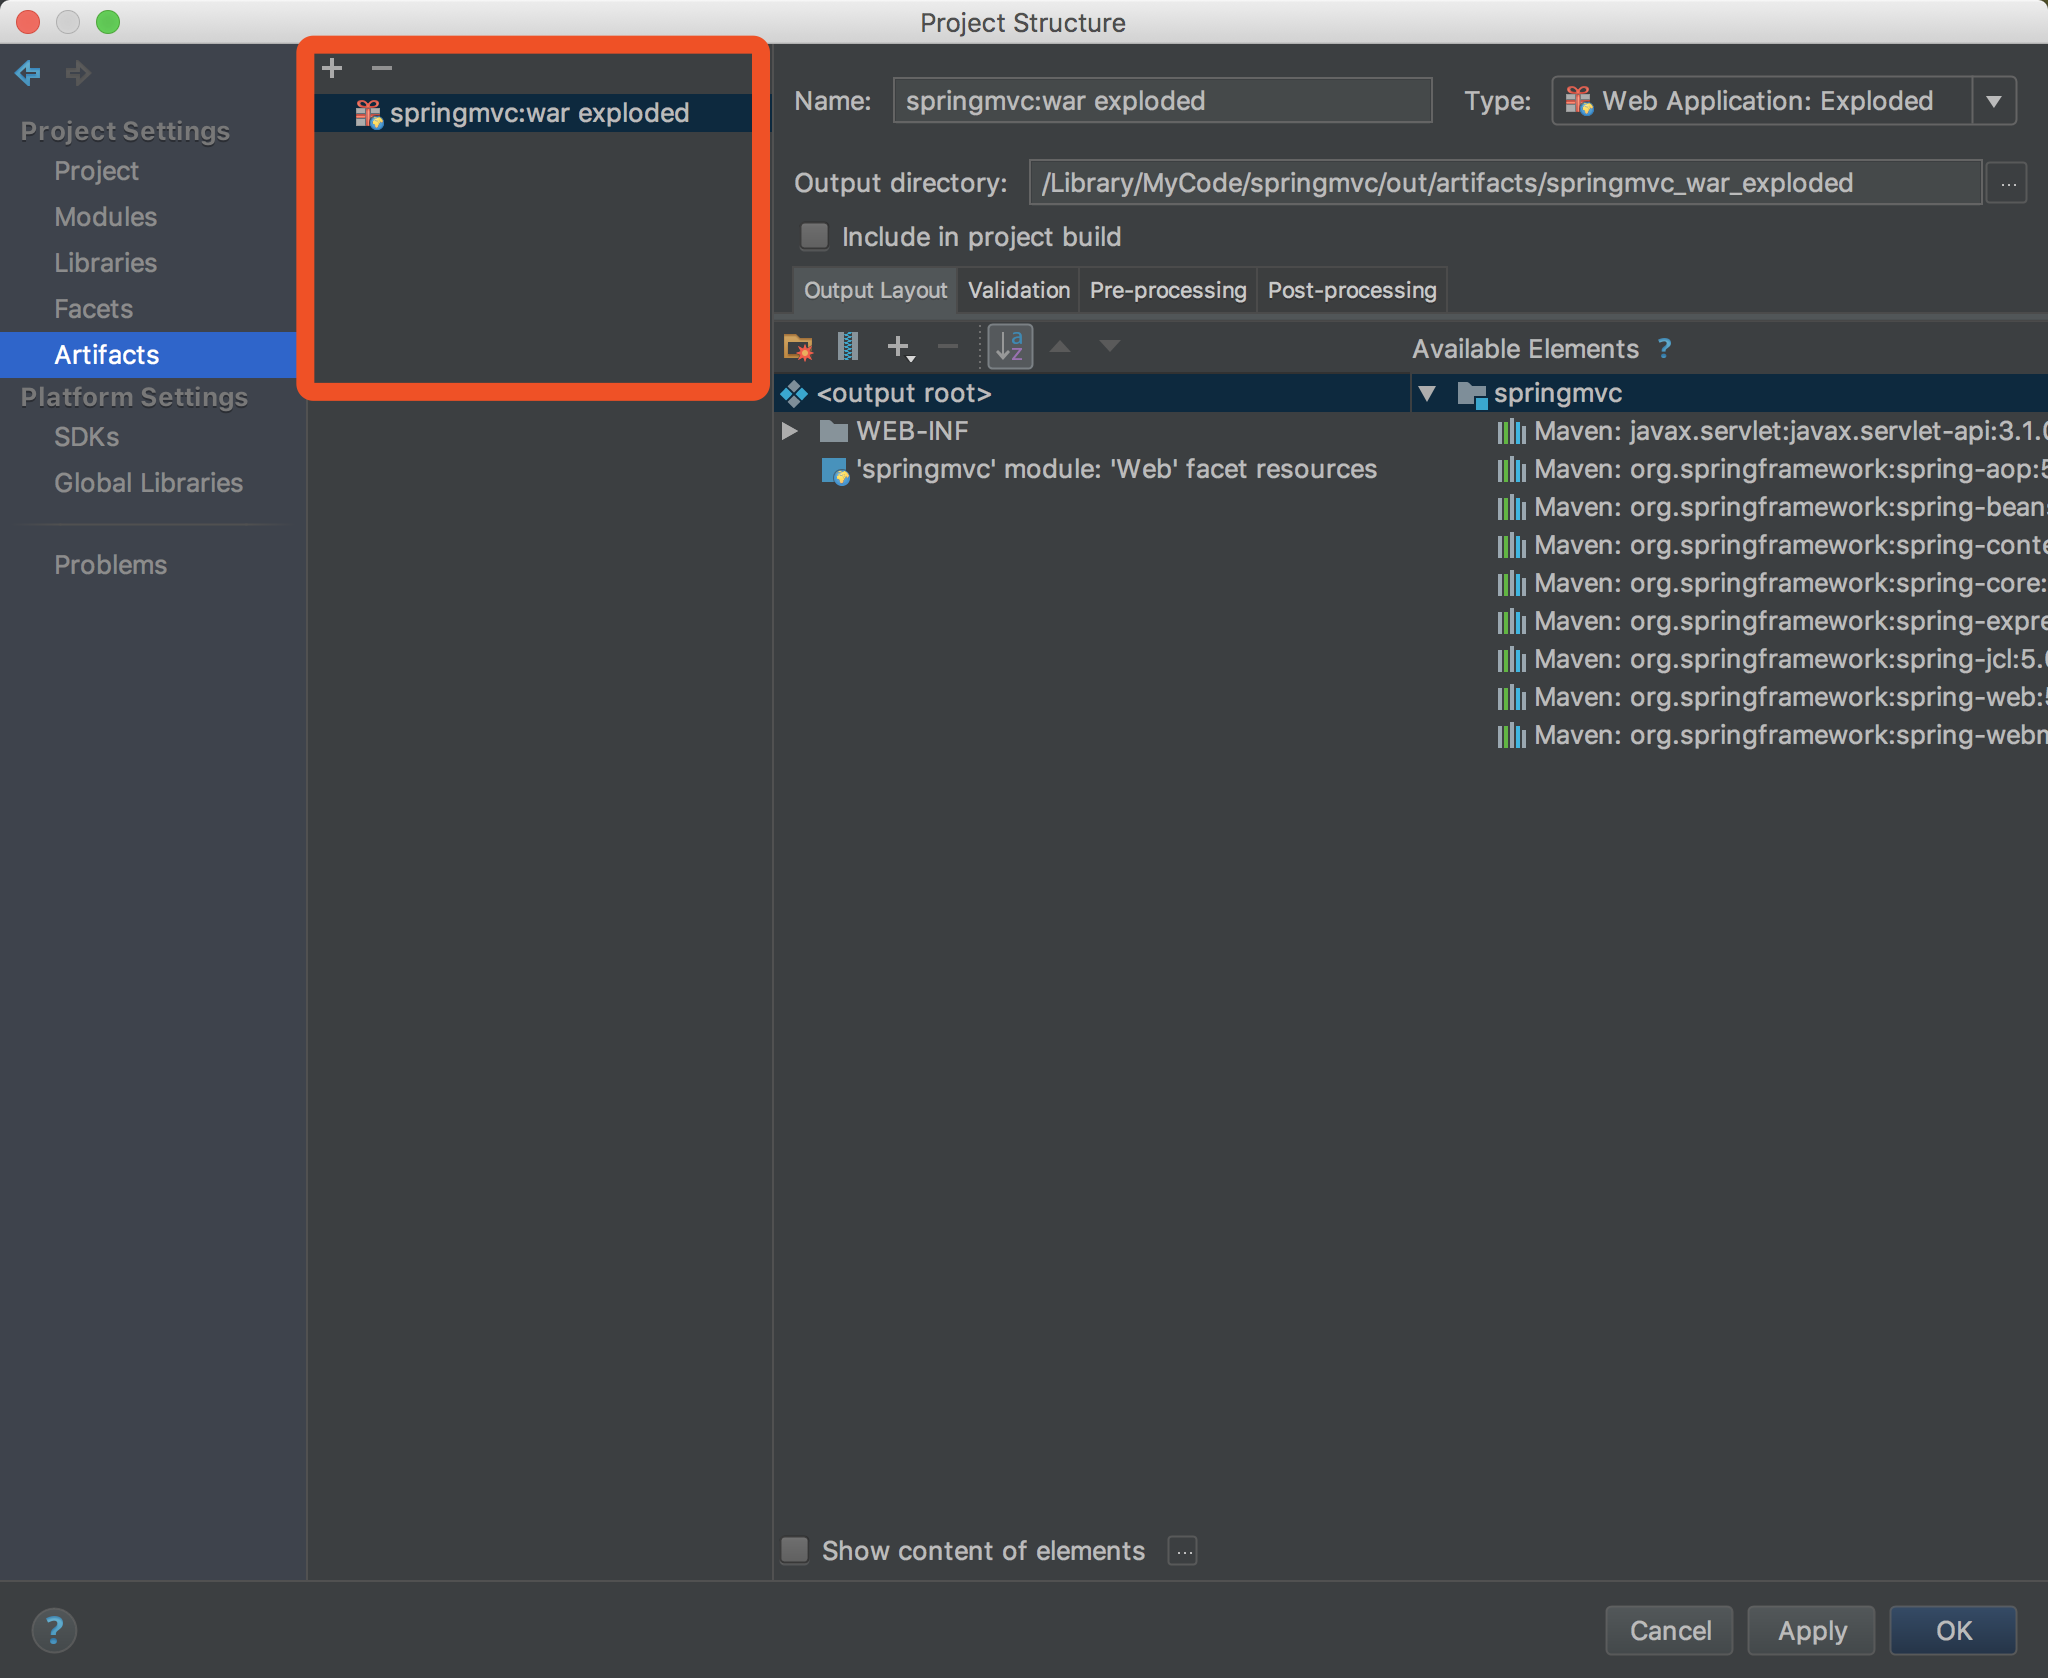
完事后是这样
在这里,要是没有Artifacts的话添加一个,如图这样的,war exploded
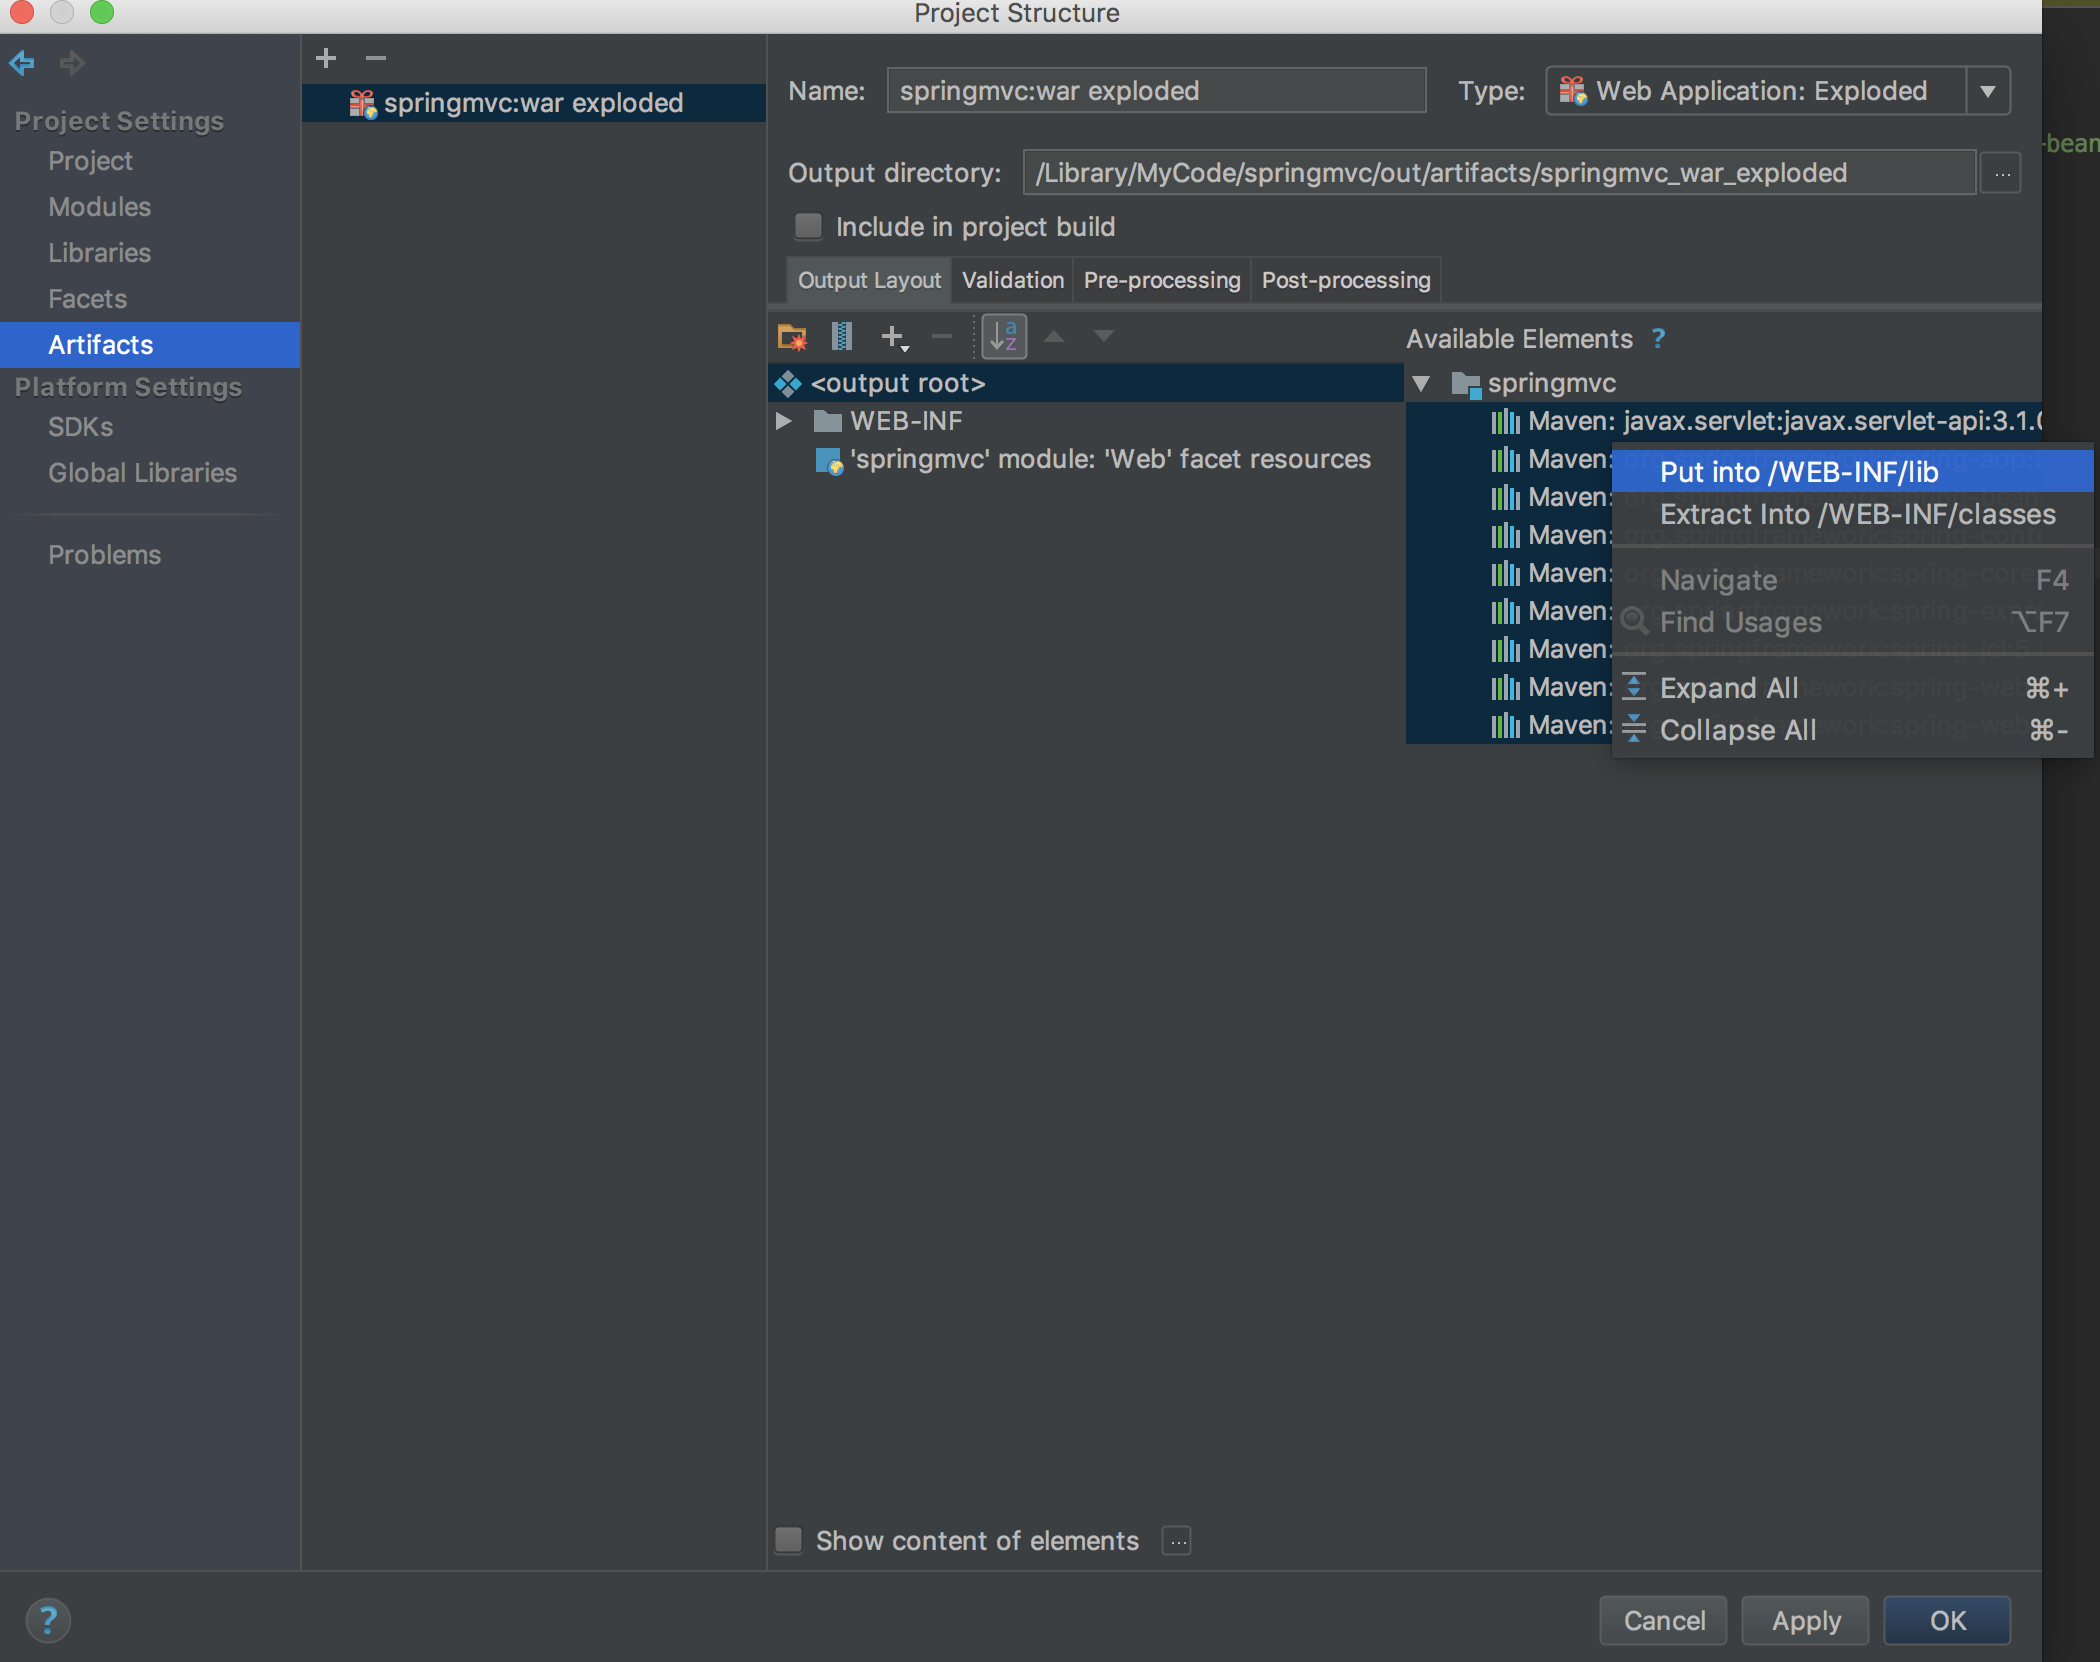
将右边的全选,右键放入,OK
在图中这两个地方创建文件夹,你就会看到之前的xml配置文件已经不红了,注意,在java下,可不是创建了一个叫做 com.gutongxue 的文件夹,而是先创建一个com文件夹,再在com下创建gutongxue文件夹
在图中位置,创建controller,这个自己敲代码吧,练习一下
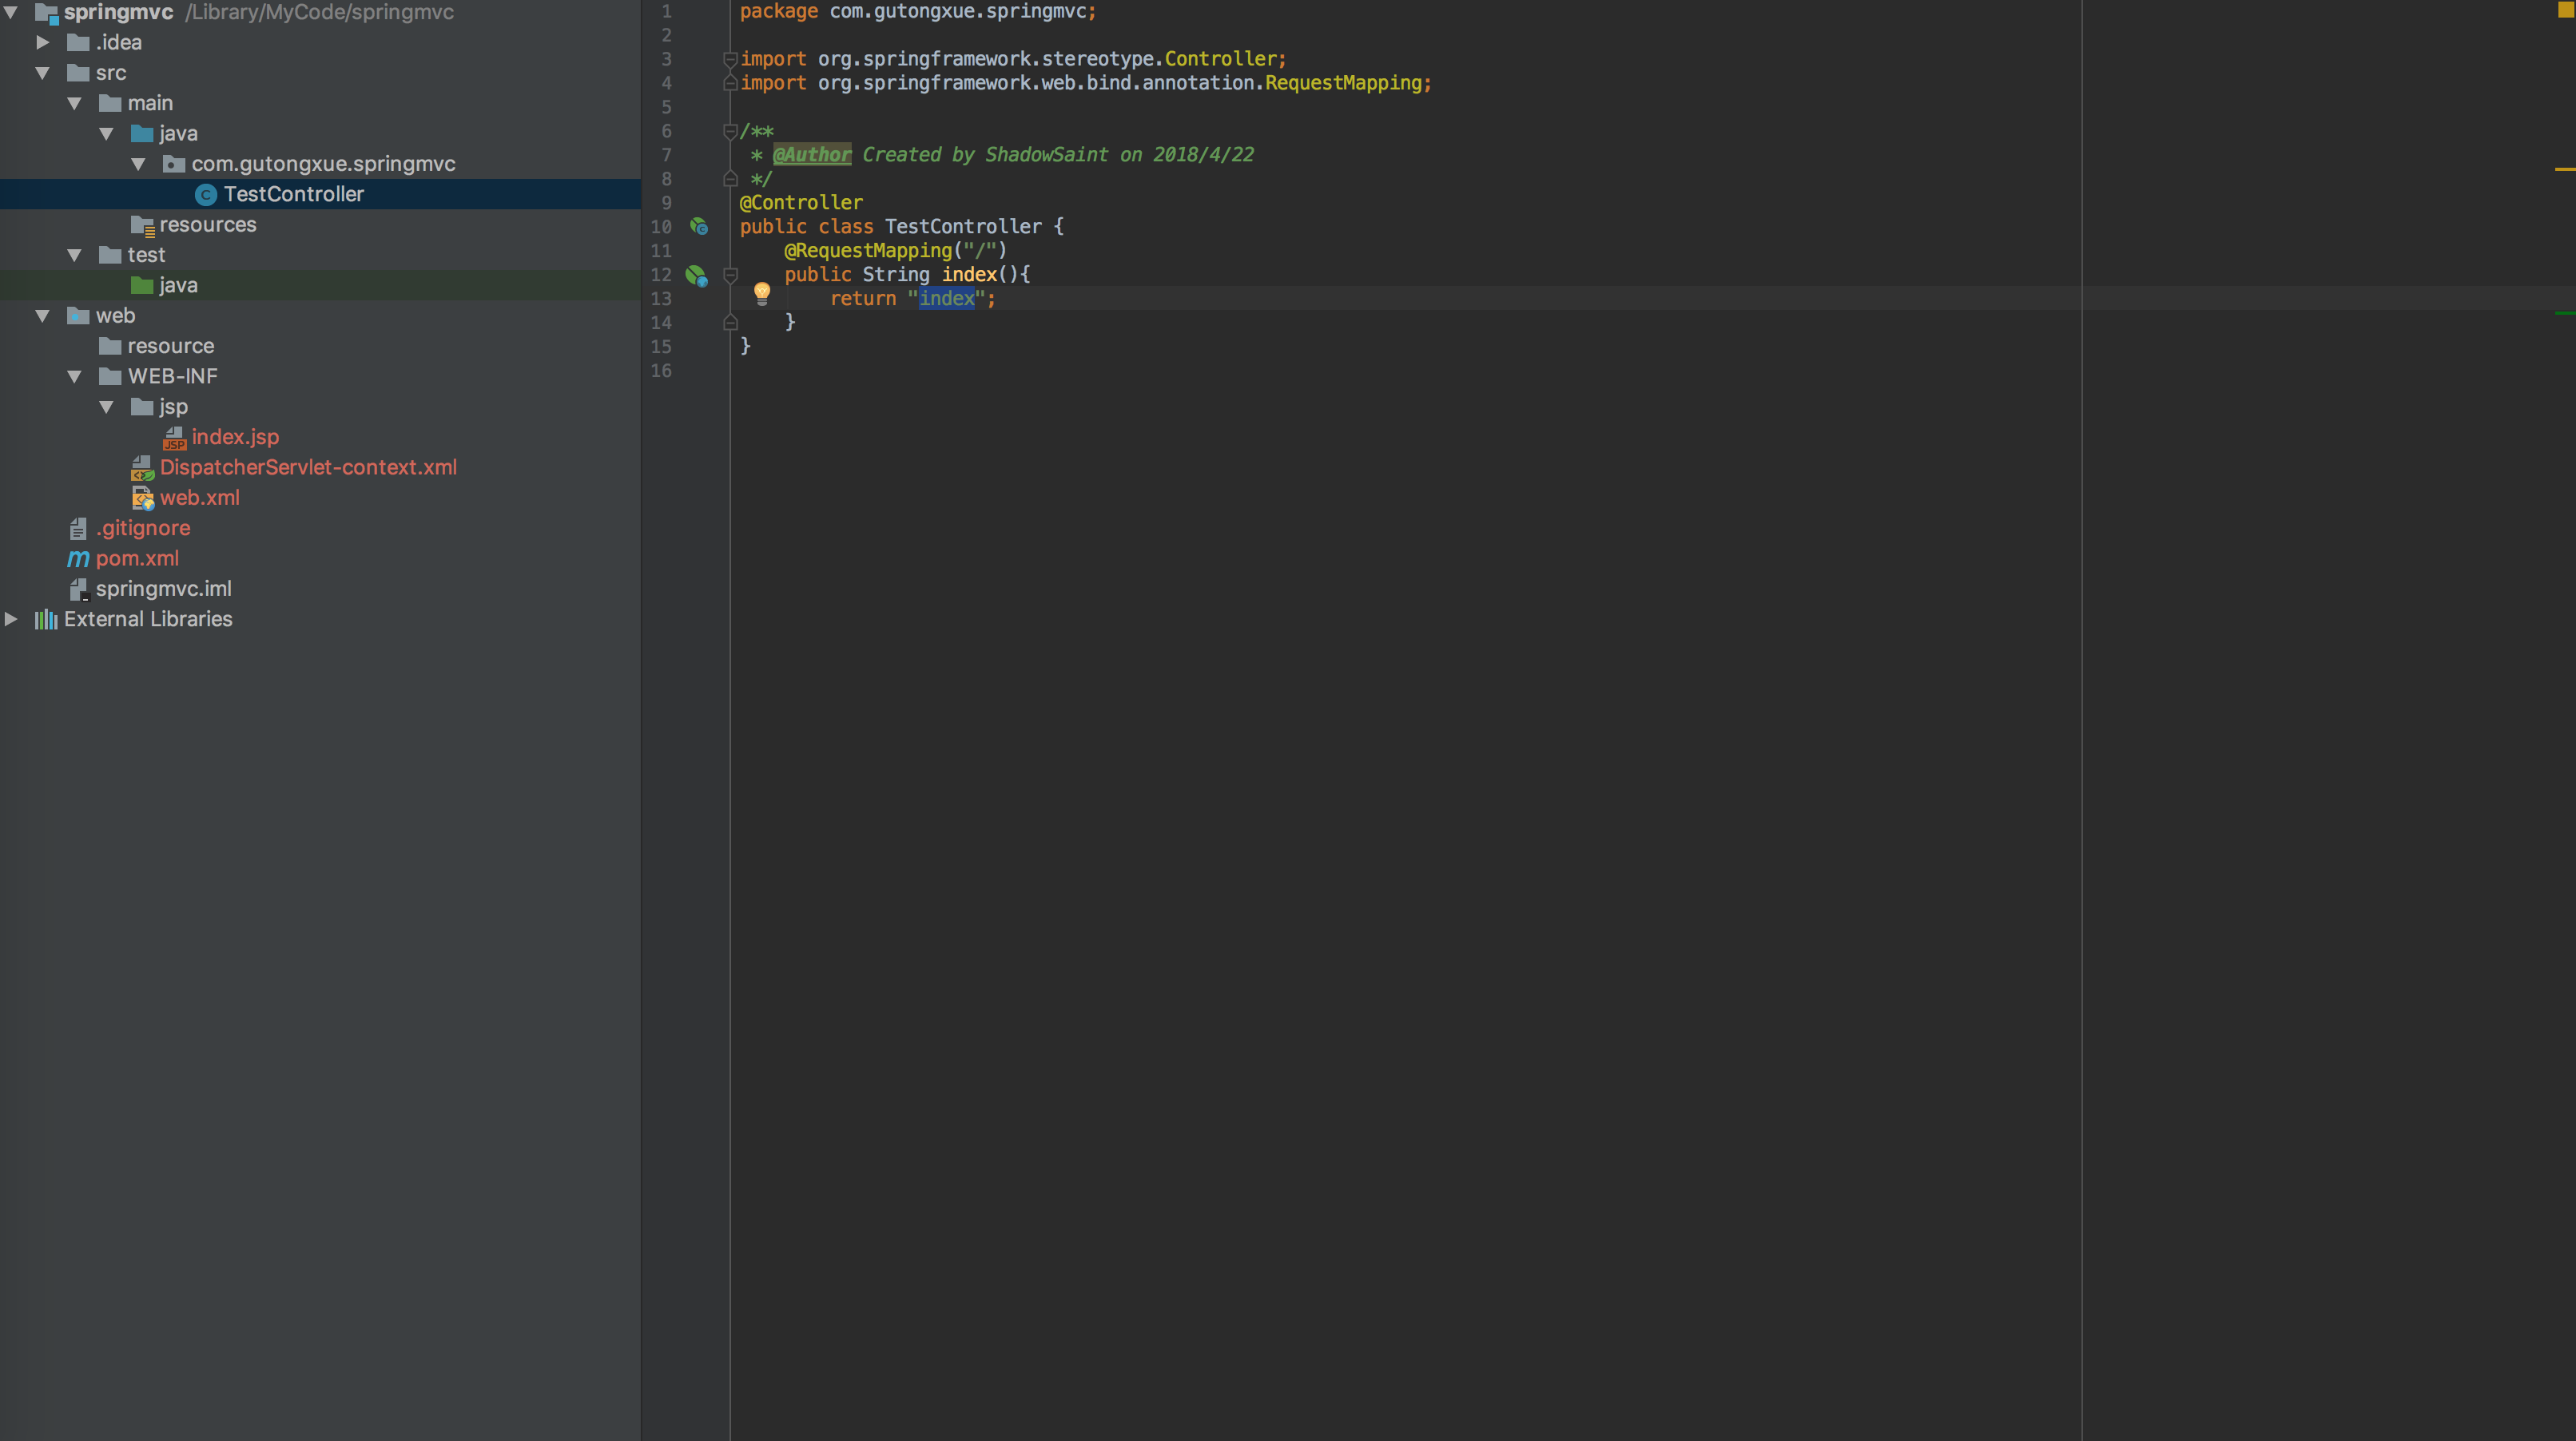
再在WEB-INF的jsp路径下,创建return出来同名的jsp
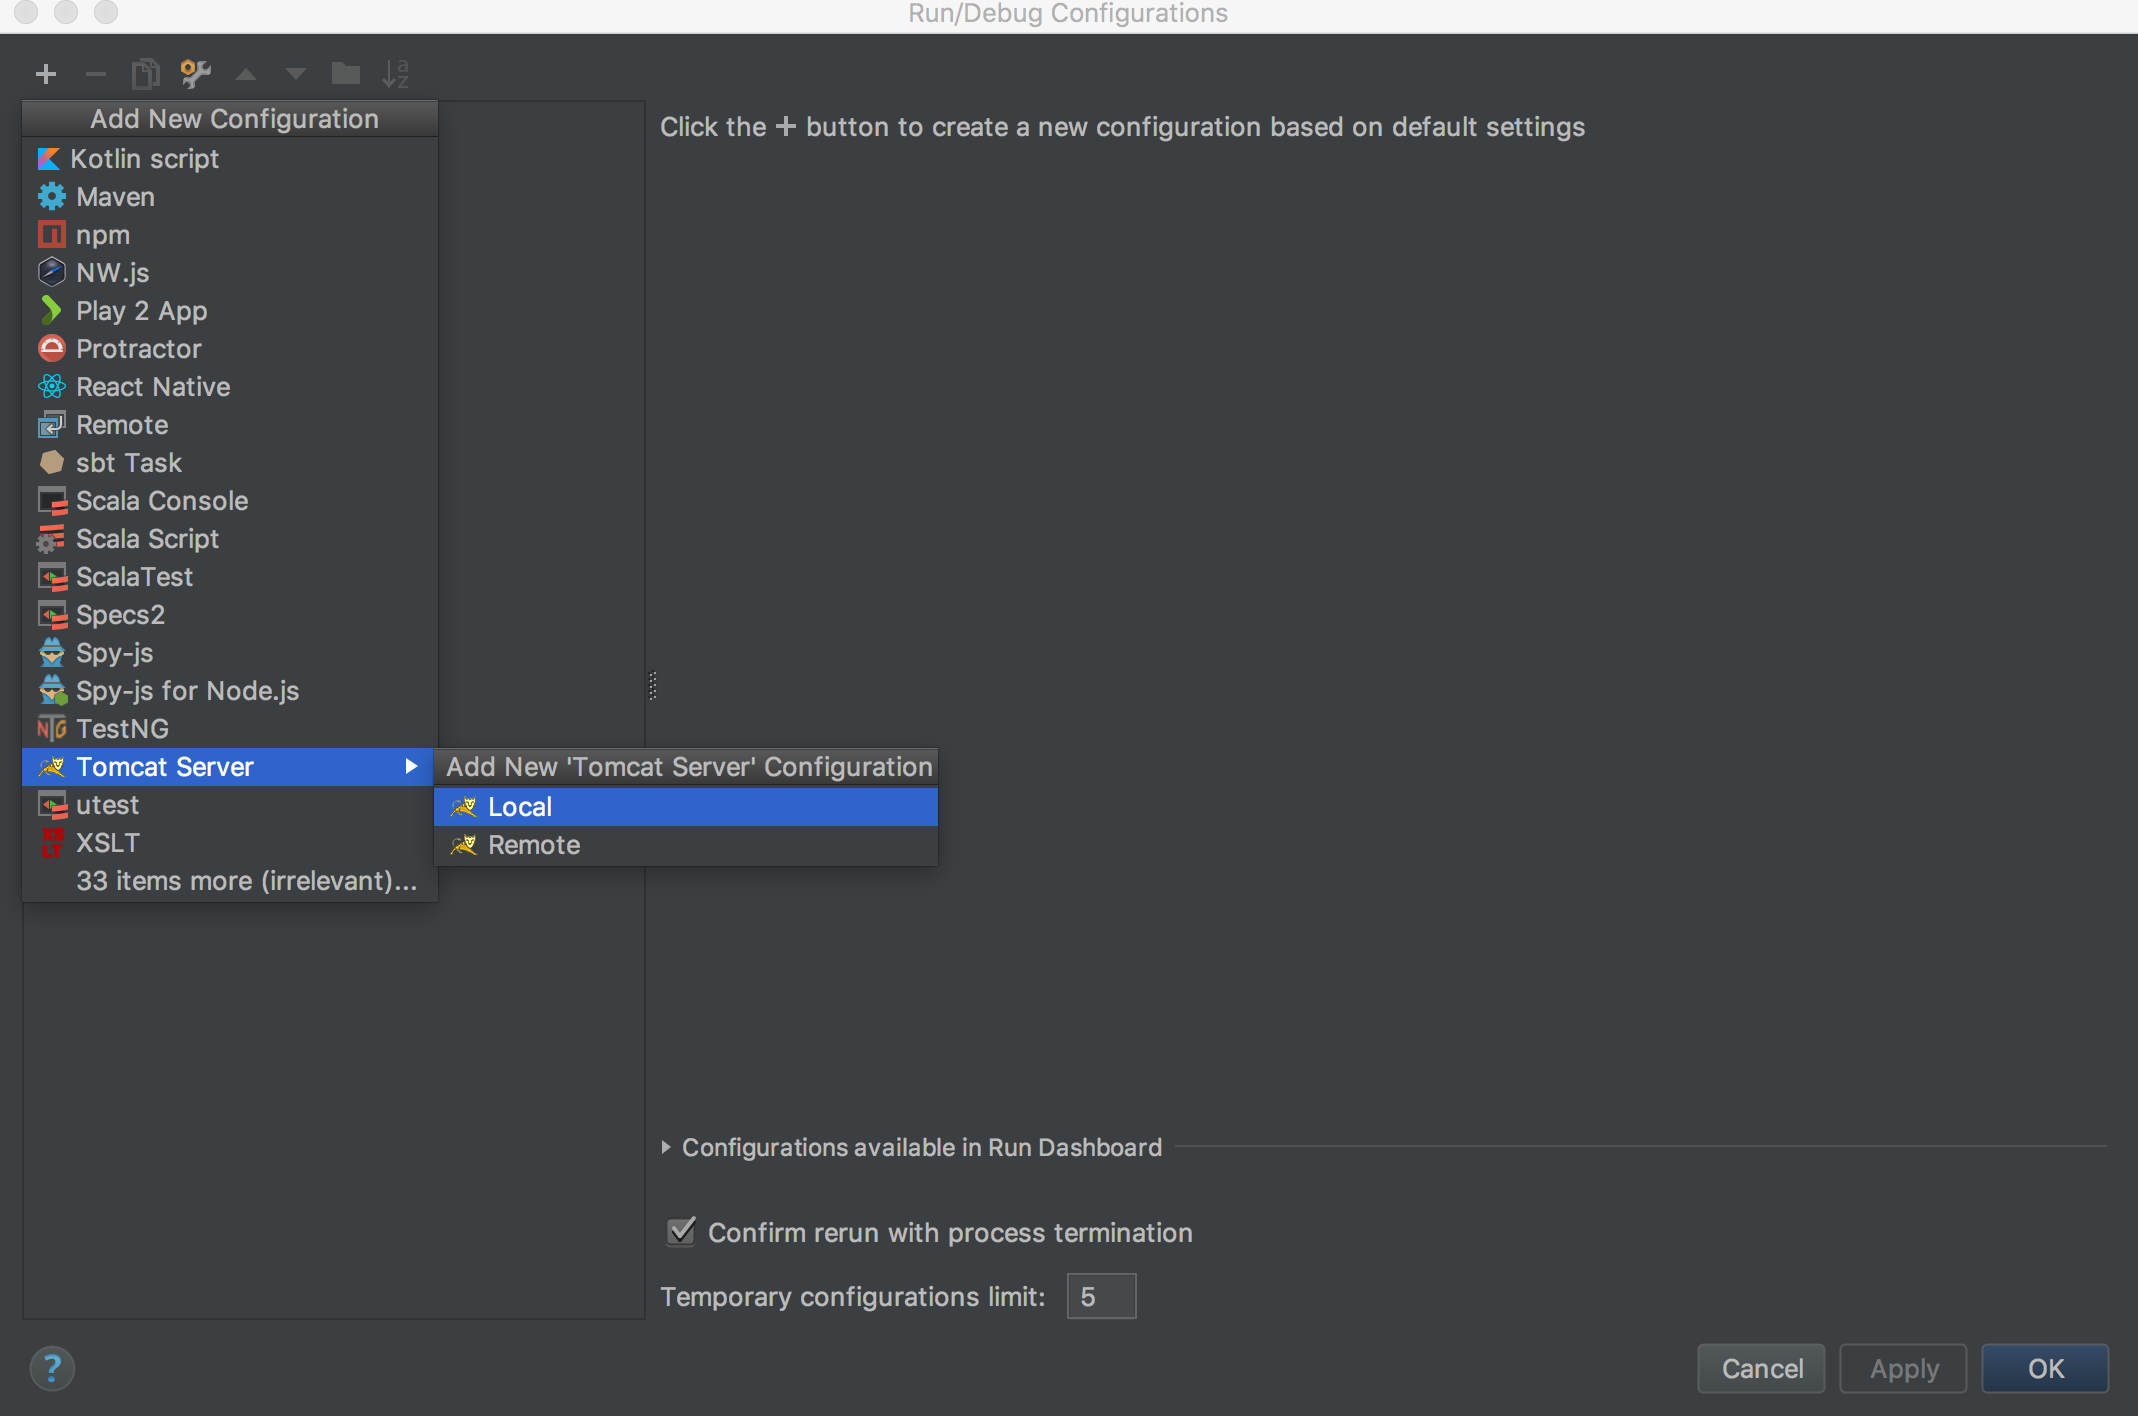
然后点这里

点+号

往下翻找到这里
起个名,在这里找到+号
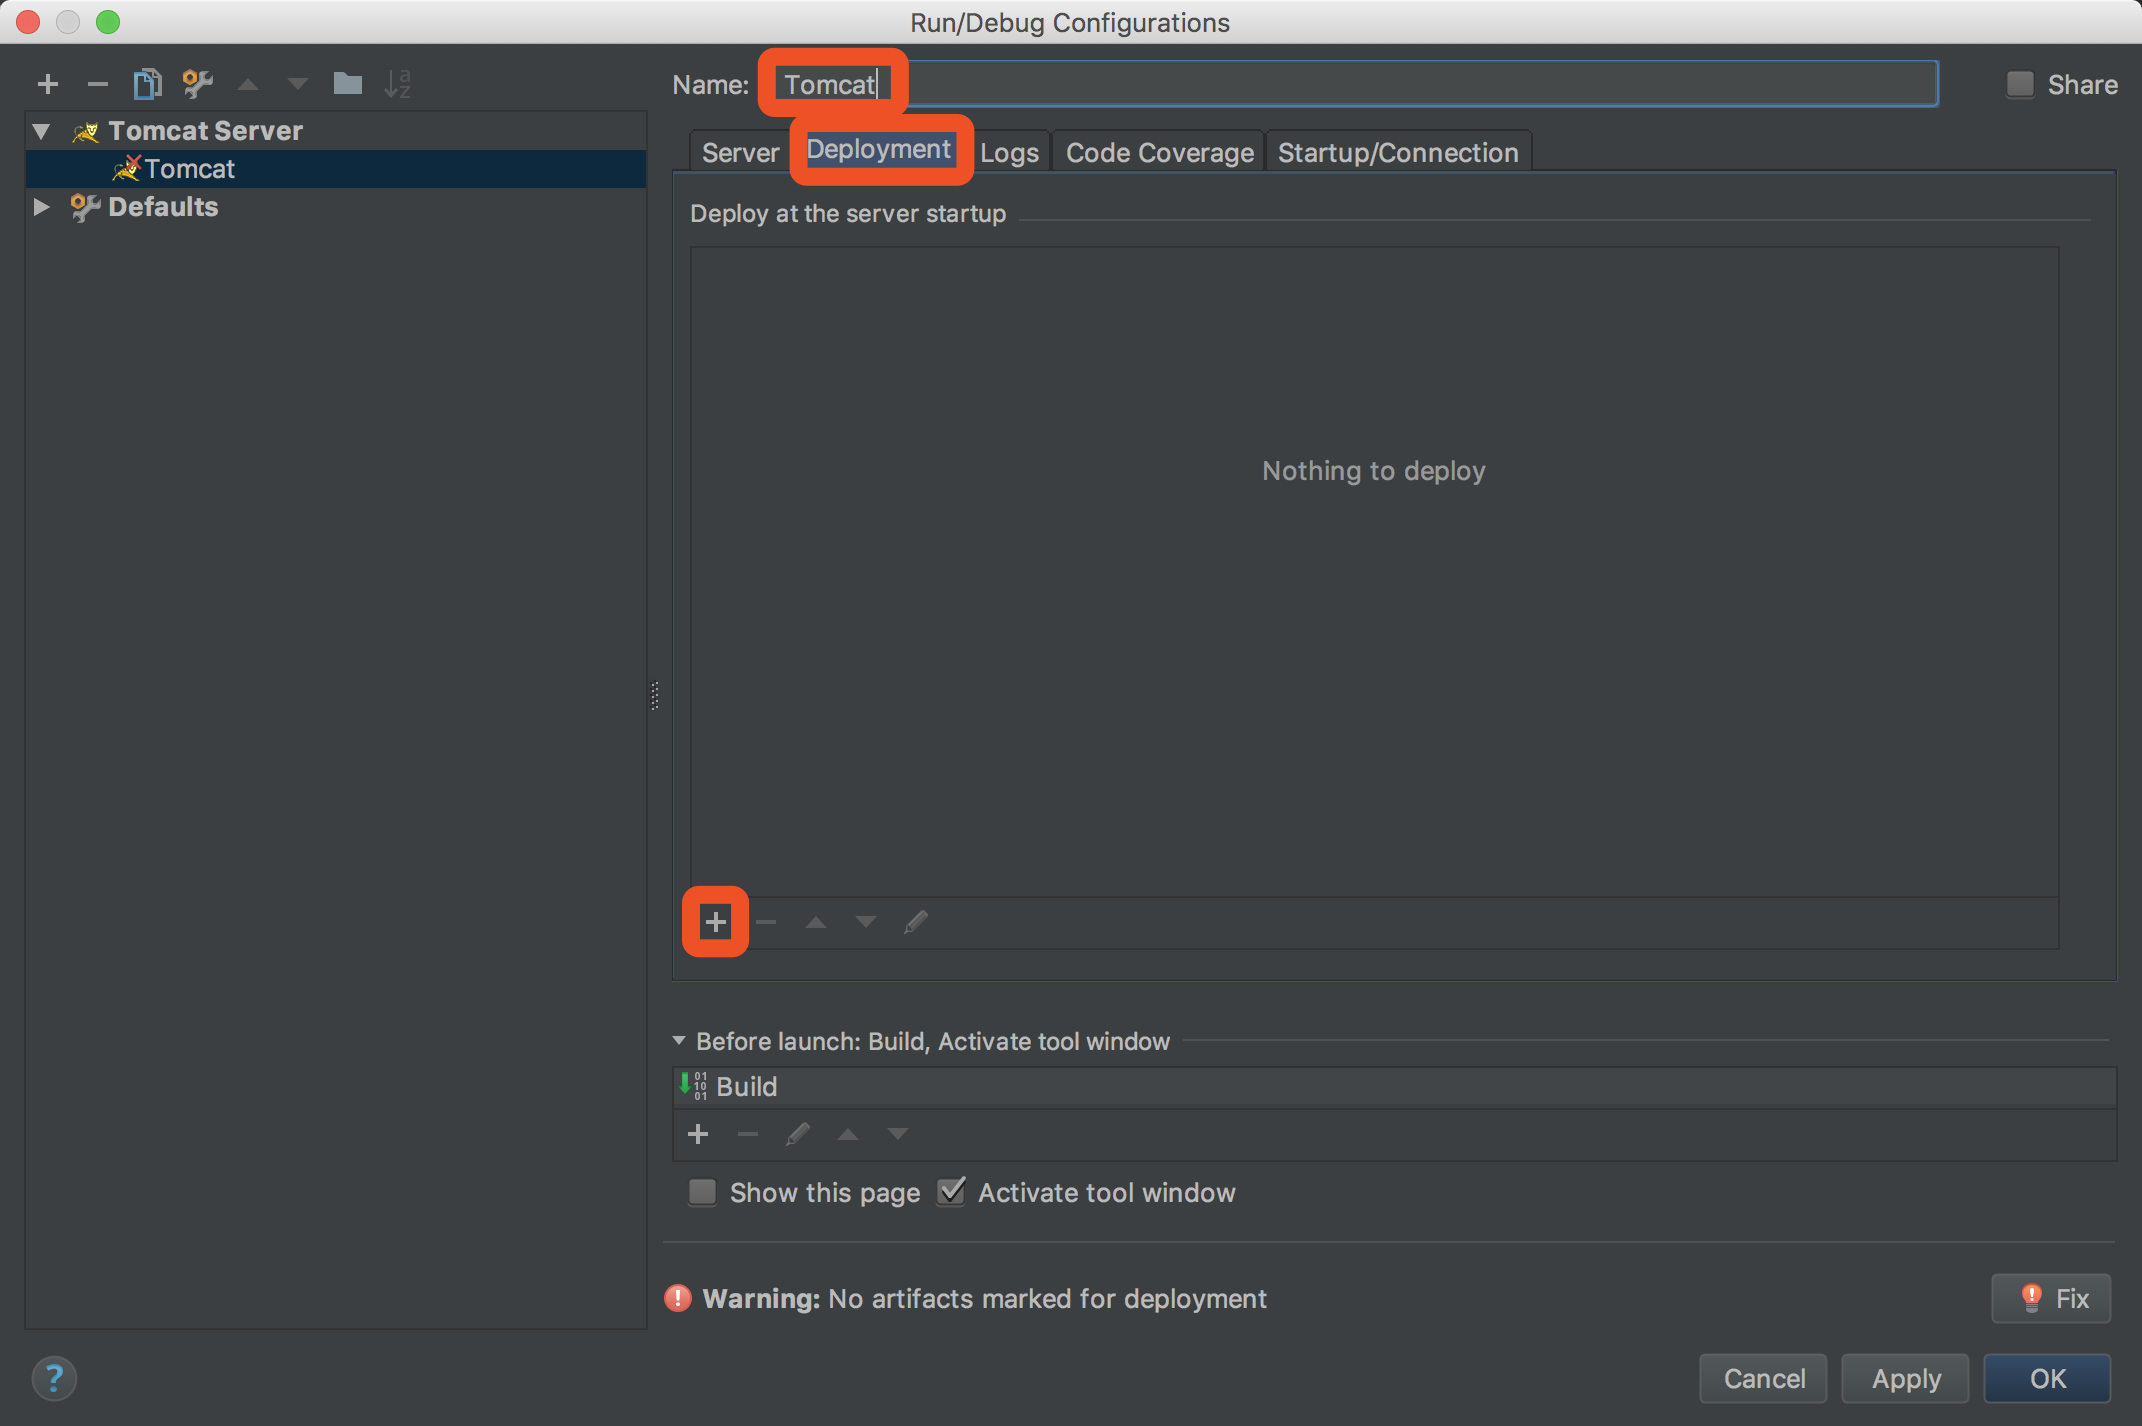
点Artifact

变成这样,OK

点启动,这俩方式任选其一
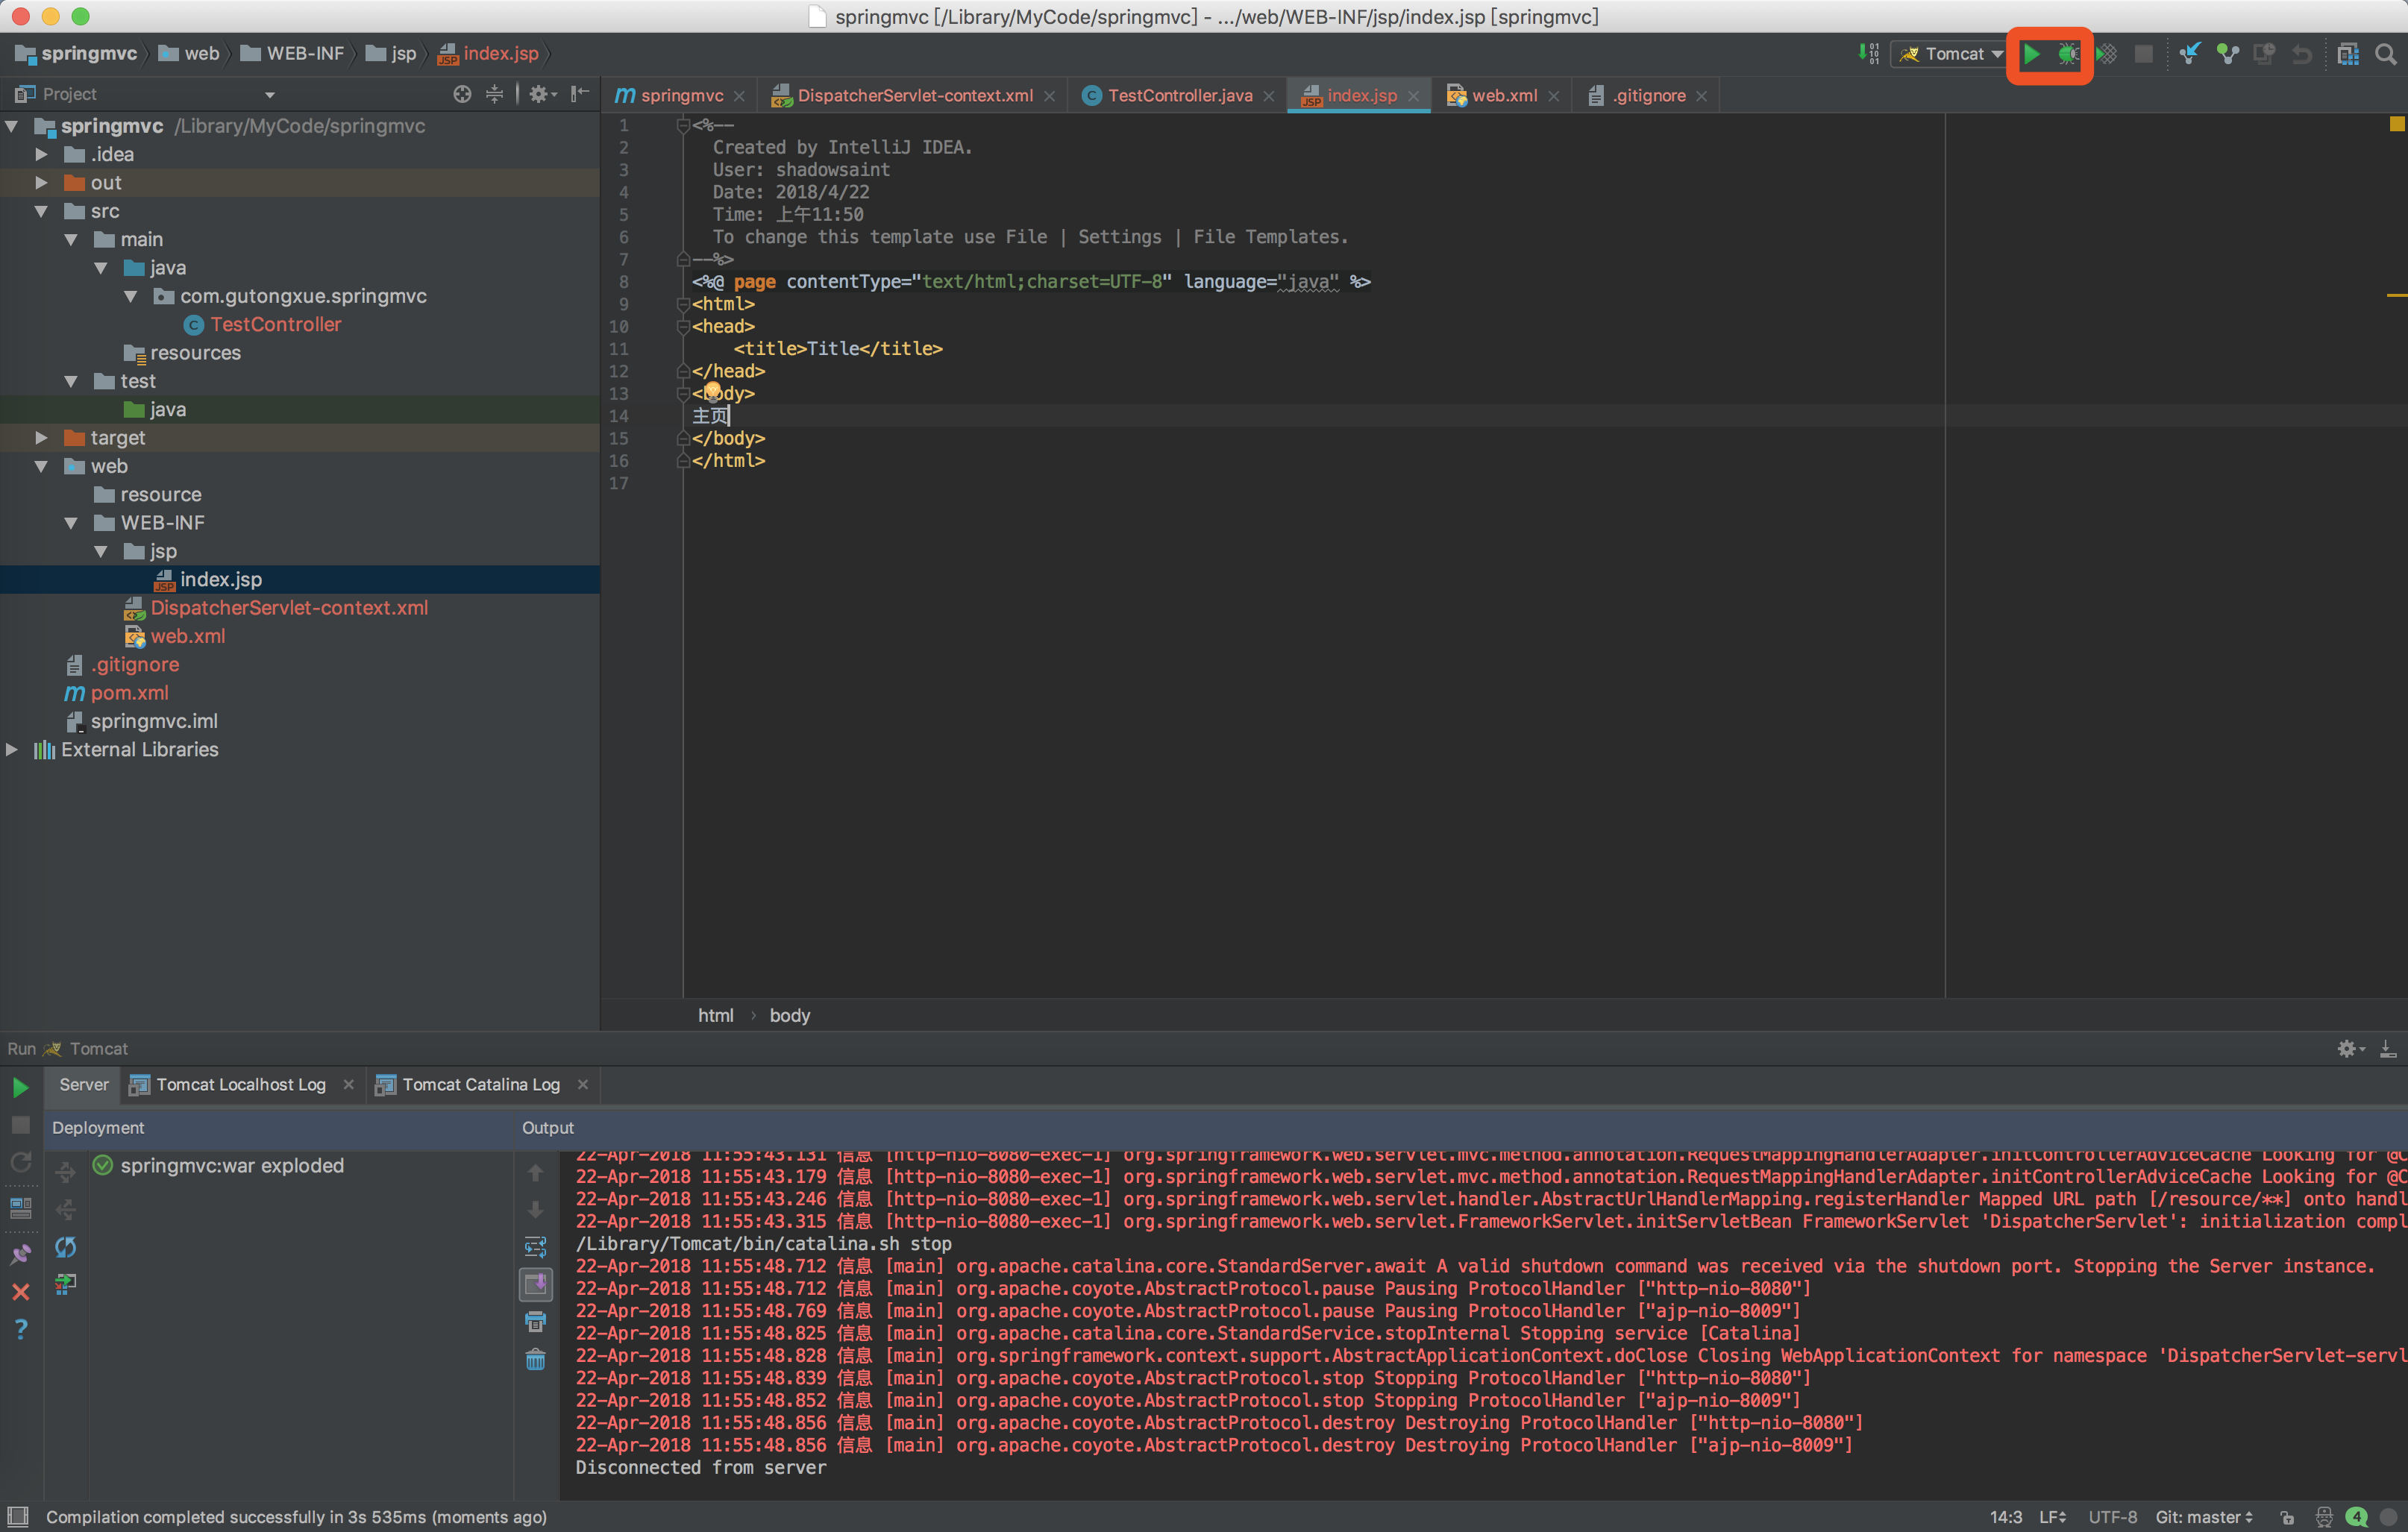
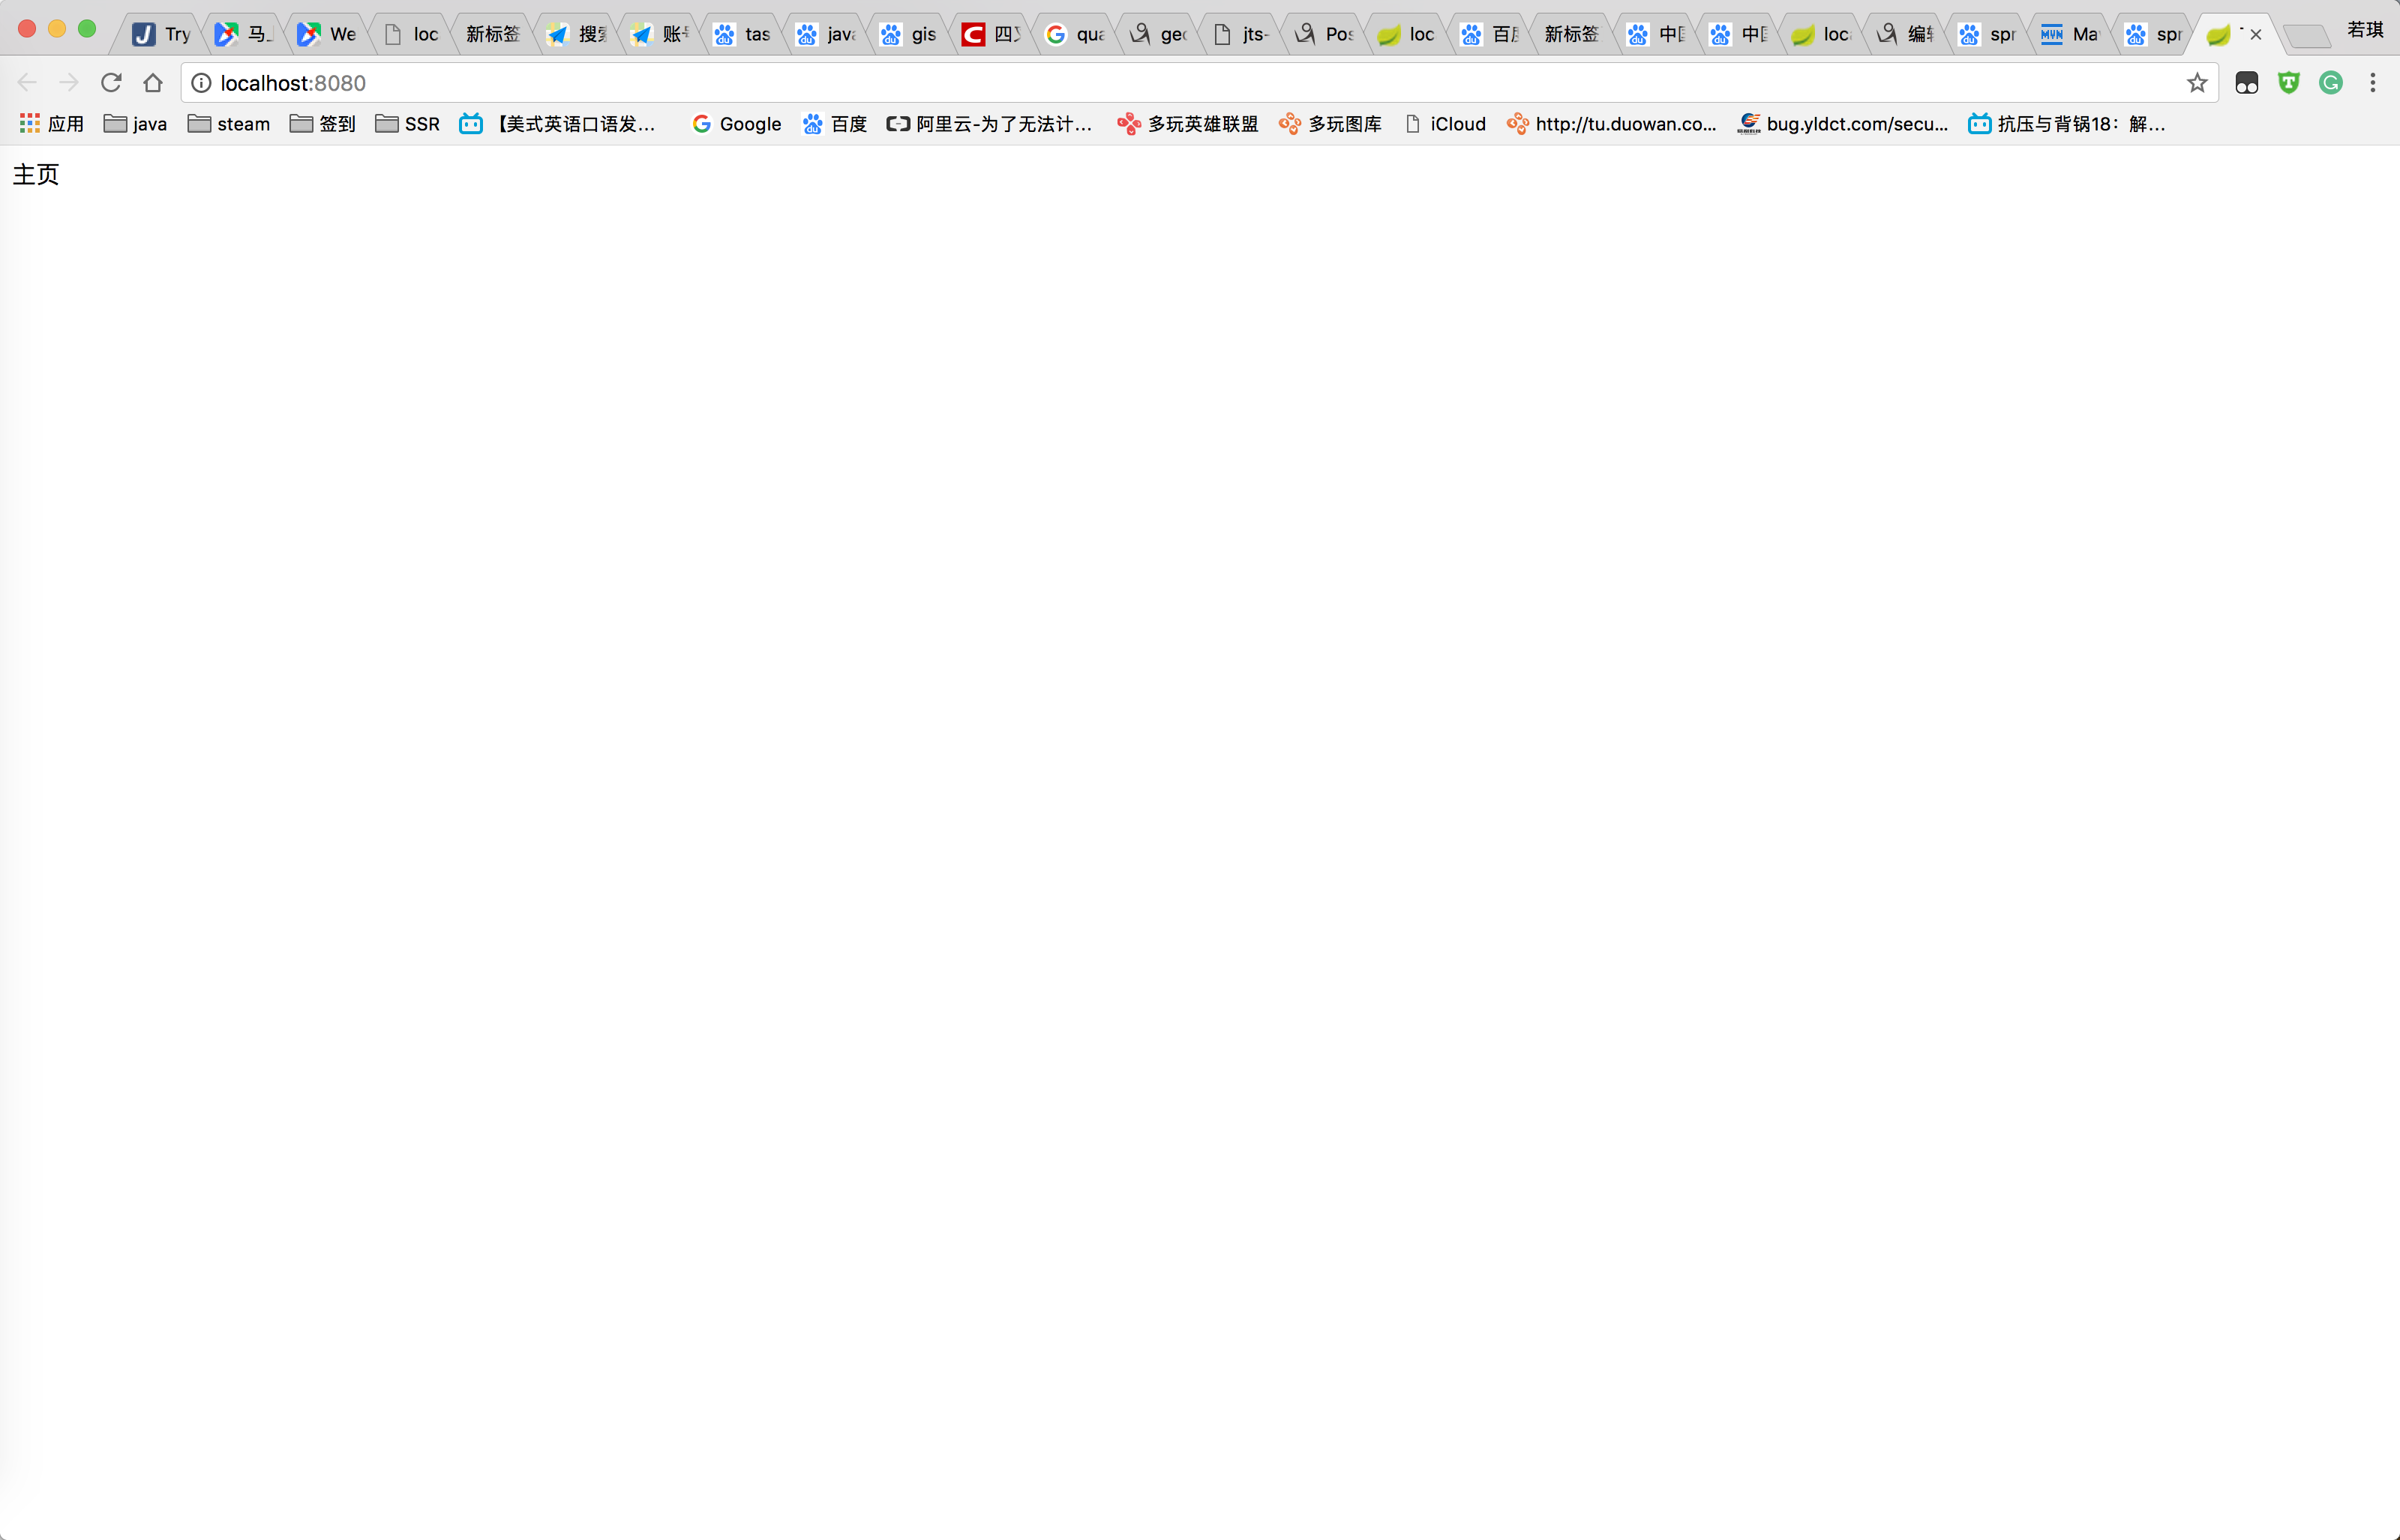
启动成功
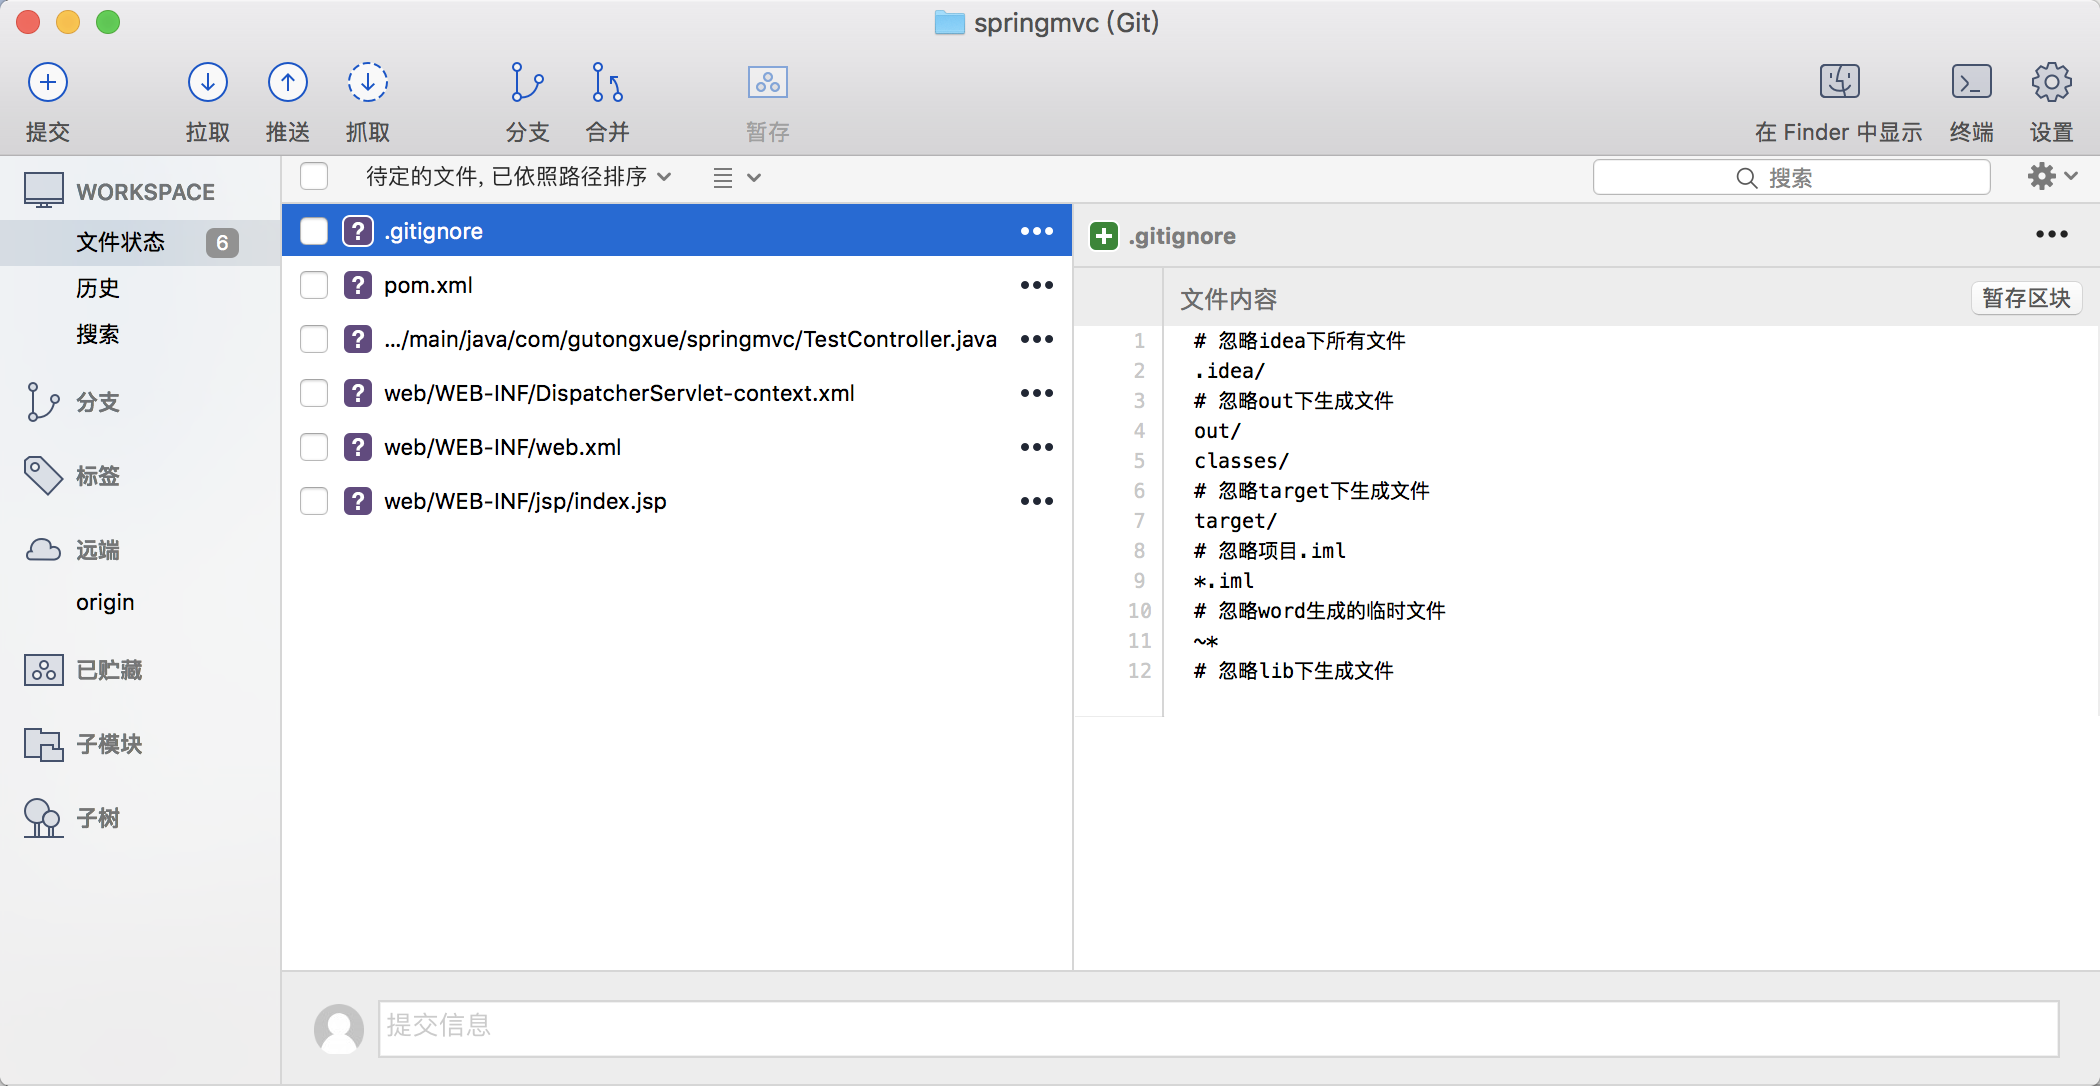
最后一步,将上述东西推送至git,打开source tree,你会发现多了一些我们建的文件
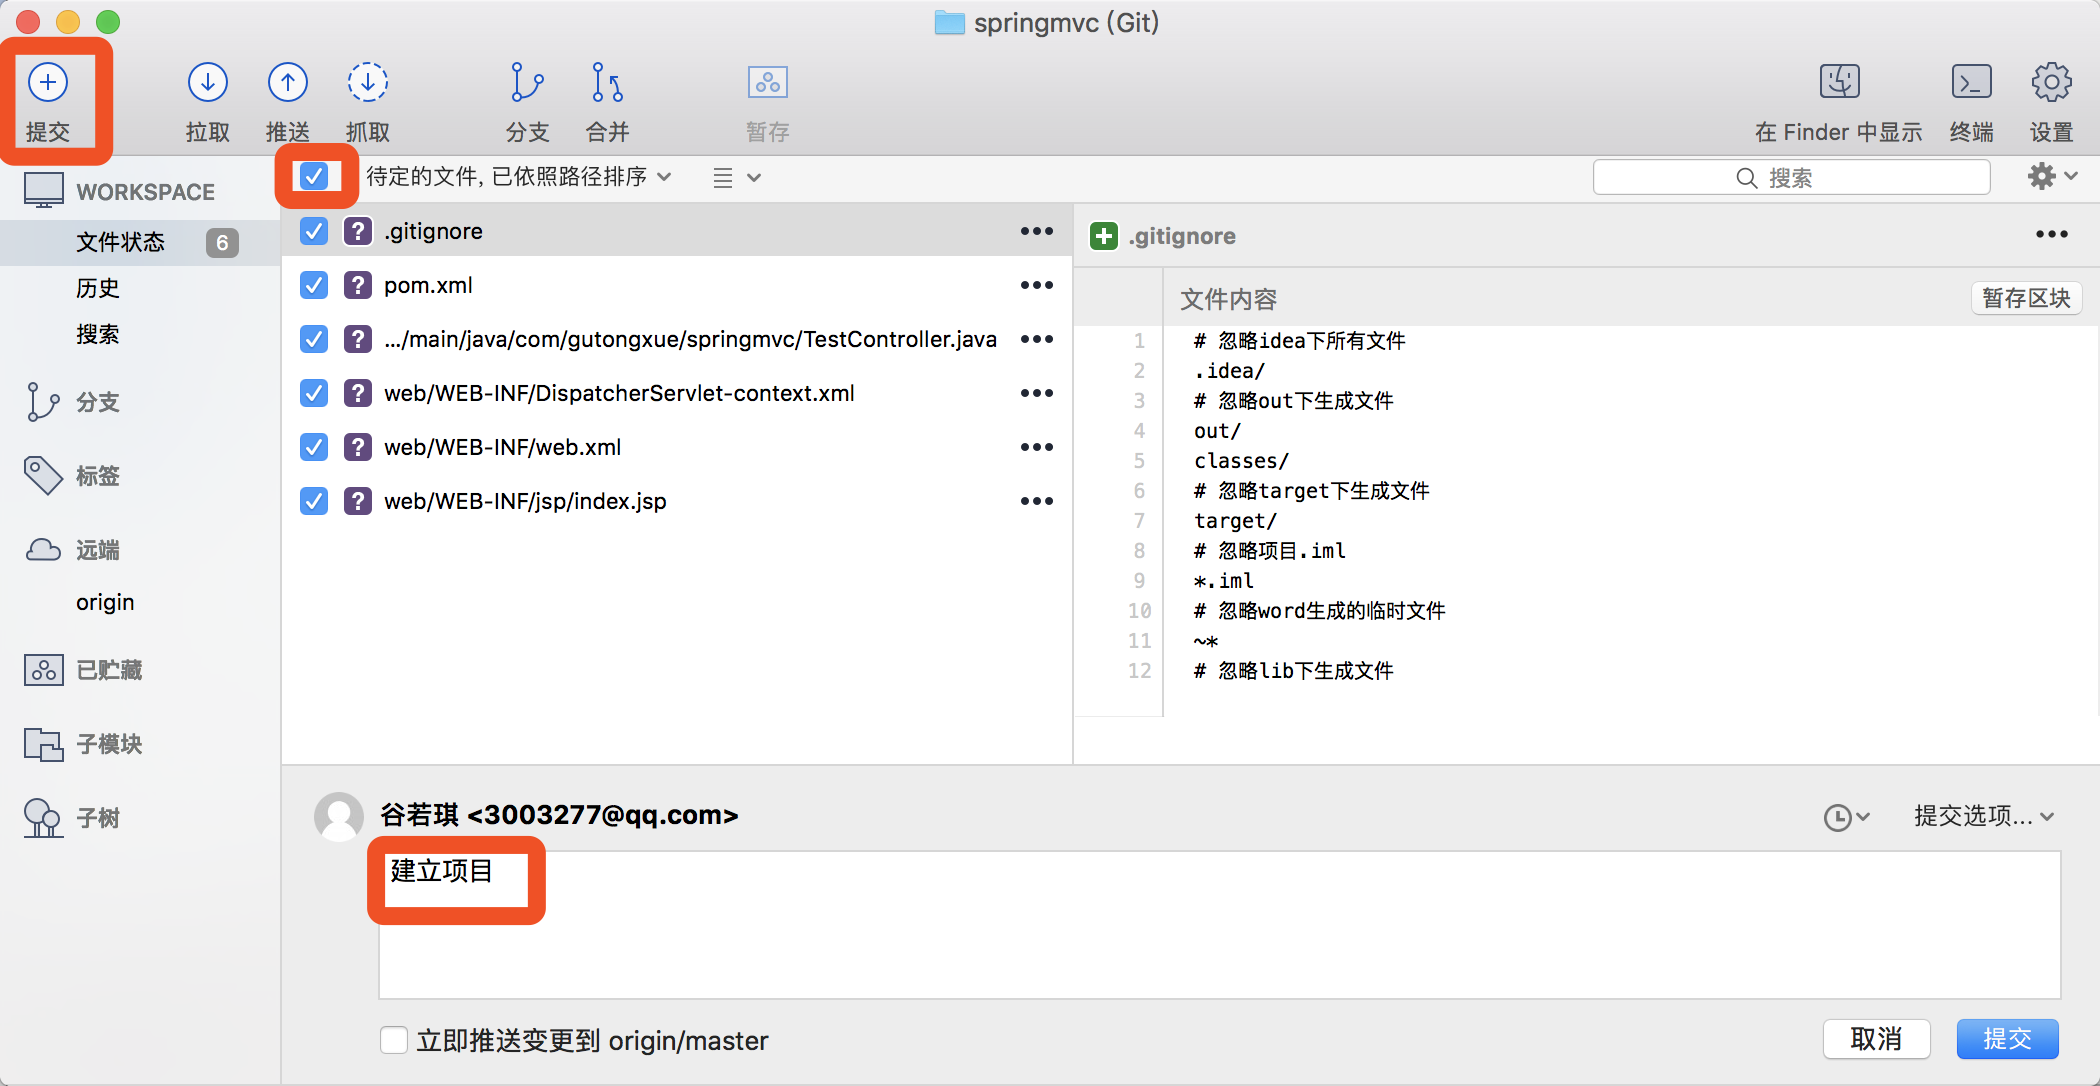
点击提交,把文件全选,填入说明,点击提交
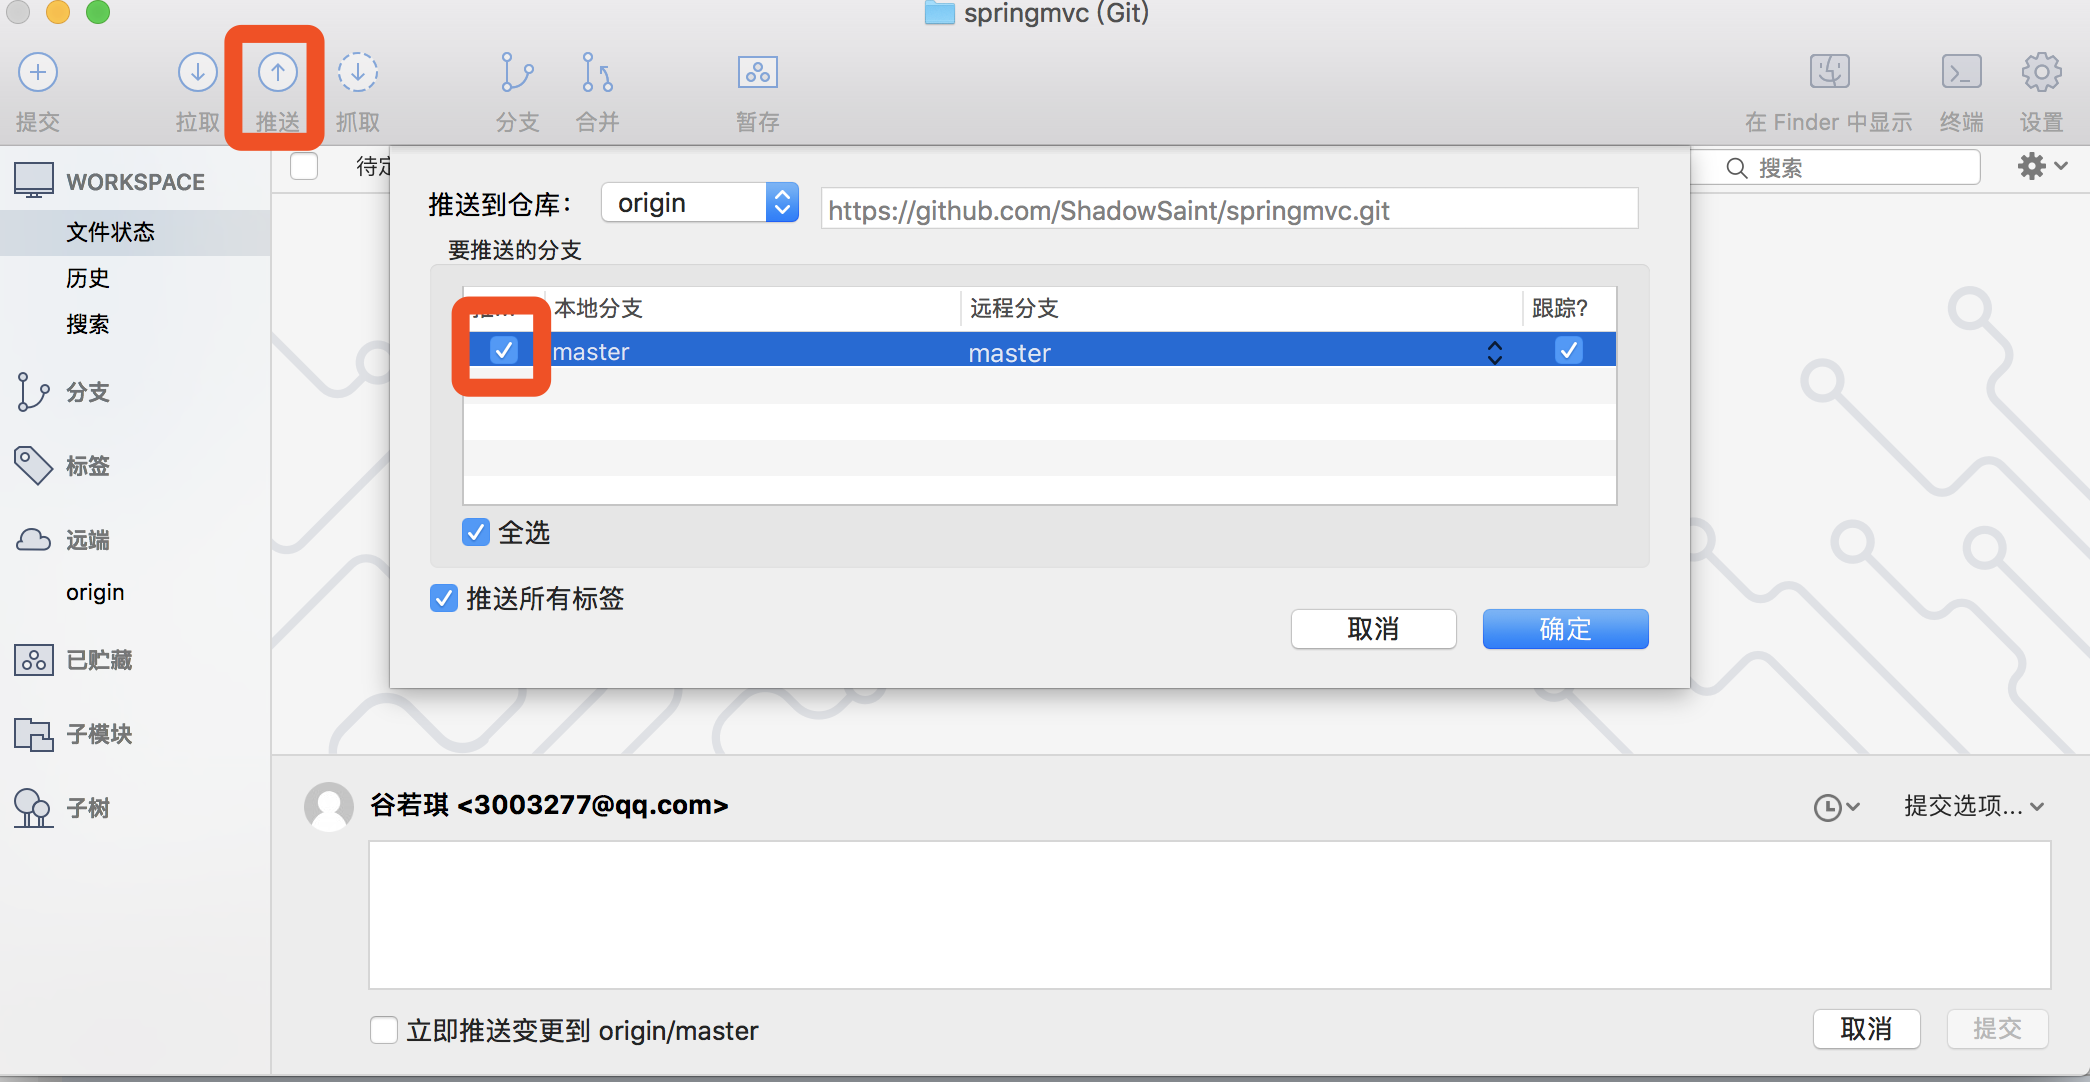
点击推送,全选,推送
稍等片刻,等推送完就可以再这里看到你的记录了,那么今天的教程到此结束