
autofac使用笔记
在之前的项目中用来解耦的使用的轻型IOC框架是unity,它的使用也是很方便的提供在之前的文章的也提到过它的使用方式,但是使用久了之后发现了它的不足之处就是需要配置xml文件来对应的接口和实现的关系。总觉这种不够灵活。因为随着项目的进行需要配置的接口和实现会越来越多。配置起来很是麻烦还容易出错。我在想有没有别的IOC框架能够一劳永逸的实现解耦而不是通过配置呢。
答案是肯定的。 那就是autofac ,这是我在Github 上找到的轻型的IOC框架。它的使用方式也特别的简单。原理呢简单来说。是通过遍历程序集来实现的(PS:当然它也是支持通过配置文件来实现的这里我就不详细说了)。详细的信息呢大家可以轻易autofac 的官网下载源码来看。网址是 http://autofac.org/ 它的最大特色呢就是约定实现。什么是约定实现。意思就是说你的接口和现实之间需要一个默认的约定。就跟创建控制器一样必须以controller来结尾一样。
下面我就直接贴代码了这个是我做的一个dome 是在在MVC5 webapi 中实现的注入
当然在是用之前你需要在安装几个包。直接nuget就行了一共需要三个包
按顺序说明下
step1 PM> Install-Package Autofac -Version 3.5.0 直接在包管理里面输入这个命令 nuget地址是https://www.nuget.org/packages/Autofac/3.5.0
step2 PM> Install-Package Autofac.Mvc5 添加这个包 nuget地址是https://www.nuget.org/packages/Autofac.Mvc5/
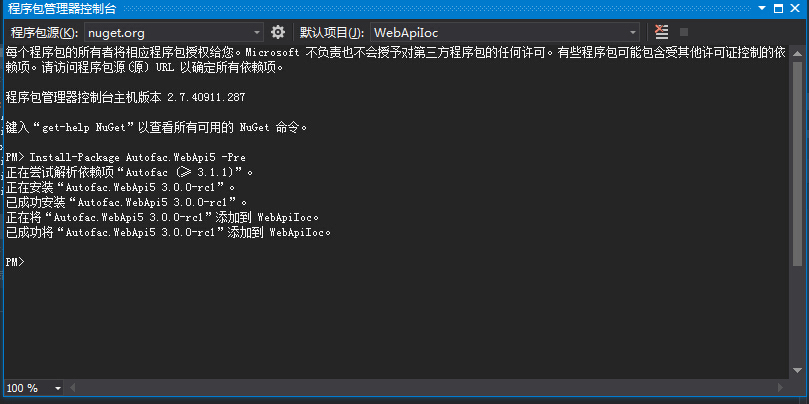
step3 PM> Install-Package Autofac.WebApi 最后是添加autofac webapi的包 https://www.nuget.org/packages/Autofac.WebApi/
using System;
using System.Collections.Generic;
using System.Linq;
using System.Reflection;
using System.Web;
using System.Web.Http;
using System.Web.Mvc;
using Autofac;
using Autofac.Integration.Mvc;
using Autofac.Integration.WebApi;

namespace WebApiIoc.App_Start
{
    public static class autofaconfig
    {
        public static void Initialize(HttpConfiguration config)
        {
            Initialize(config, RegisterServices(new ContainerBuilder()));//初始化容器
        }

        public static void Initialize(HttpConfiguration config, IContainer container)
        {
            config.DependencyResolver = new AutofacWebApiDependencyResolver(container);//注册api容器
            DependencyResolver.SetResolver(new AutofacDependencyResolver(container));//注册MVC容器
        }

        private static IContainer RegisterServices(ContainerBuilder builder)
        {
            builder.RegisterApiControllers(Assembly.GetExecutingAssembly());//注册api容器的实现

            builder.RegisterControllers(Assembly.GetExecutingAssembly());//注册mvc容器的实现


            builder.RegisterAssemblyTypes(AppDomain.CurrentDomain.GetAssemblies())//查找程序集中以services结尾的类型
                .Where(t => t.Name.EndsWith("Services"))
                .AsImplementedInterfaces();
            builder.RegisterAssemblyTypes(AppDomain.CurrentDomain.GetAssemblies())//查找程序集中以Repository结尾的类型
           .Where(t => t.Name.EndsWith("Repository"))
           .AsImplementedInterfaces();

            return builder.Build();//返回容器
        }
    }
}
这个是autofac的配置文件。
下面是webapiconfig文件
using System;
using System.Collections.Generic;
using System.Linq;
using System.Web.Http;
using WebApiIoc.App_Start;

namespace WebApiIoc
{
    public static class WebApiConfig
    {
        public static void Register(HttpConfiguration config)
        {
            // Web API configuration and services

            // Web API routes
            config.MapHttpAttributeRoutes();

            config.Routes.MapHttpRoute(
                name: "DefaultApi",
                routeTemplate: "api/{controller}/{id}",
                defaults: new { id = RouteParameter.Optional }
            );
            //注册webapi和mvc容器
            autofaconfig.Initialize(config);
        }
    }
}
最后是global文件
using System;
using System.Collections.Generic;
using System.Linq;
using System.Reflection;
using System.Web;
using System.Web.Http;
using System.Web.Mvc;
using System.Web.Optimization;
using System.Web.Routing;
using Autofac;
using Autofac.Integration.Mvc;
using Autofac.Integration.WebApi;
using WebApiIoc.App_Start;

namespace WebApiIoc
{
    public class WebApiApplication : System.Web.HttpApplication
    {
        protected void Application_Start()
        {
            AreaRegistration.RegisterAllAreas();
            GlobalConfiguration.Configure(WebApiConfig.Register);
            FilterConfig.RegisterGlobalFilters(GlobalFilters.Filters);
            RouteConfig.RegisterRoutes(RouteTable.Routes);
            BundleConfig.RegisterBundles(BundleTable.Bundles);

        }
    }
}
在apicontroller和MVCcontroller里面都是通过构造函数注入的方式实现的下面贴出来代码
这个是MVC
using System;
using System.Collections.Generic;
using System.Linq;
using System.Web;
using System.Web.Mvc;
using Iservices;
using Microsoft.Ajax.Utilities;

namespace WebApiIoc.Controllers
{
    public class HomeController : Controller
    {
        private IOneServices _oneServices;


        public HomeController(IOneServices oneServices)
        {
            _oneServices = oneServices;

        }

        public ActionResult Index()
        {
            var sum = _oneServices.sum(10, 20);


            var aa = DependencyResolver.Current.GetService<IOneServices>();

            ; ViewBag.Title = sum;

            return View();
        }
    }
}
这个是webapi
using System;
using System.Collections.Generic;
using System.Linq;
using System.Net;
using System.Net.Http;
using System.Web.Http;
using System.Web.Http.Dependencies;
using Autofac;
using Autofac.Integration.WebApi;
using Iservices;

namespace WebApiIoc.Controllers
{
    public class ValuesController : ApiController
    {

        private IOneServices _oneServices;

        public ValuesController(IOneServices oneServices)

        {
            _oneServices = oneServices;

        }


        // GET api/values
        public IEnumerable<string> Get()
        {
            var sum = _oneServices.sum(1, 2);return new string[] { "value1", "value2" };
        }

        // GET api/values/5
        public string Get(int id)
        {
            return "value";
        }

        // POST api/values
        public void Post([FromBody]string value)
        {
        }

        // PUT api/values/5
        public void Put(int id, [FromBody]string value)
        {
        }

        // DELETE api/values/5
        public void Delete(int id)
        {
        }
    }
}
最后说明下如果你没有通过构造函数注入你又想获取实例的话怎么做呢。下面分别说明
MVC
var OneServices = DependencyResolver.Current.GetService<IOneServices>();
Webapi
            IDependencyScope dependencyScope = this.Request.GetDependencyScope();
            ILifetimeScope requestLifetimeScope = dependencyScope.GetRequestLifetimeScope();
            var customerService = requestLifetimeScope.Resolve<IOneServices>();
其他的比如属性注入和方法注入就不在这写了。这里只是写的常用的简单的注册方式,后面我会把这部分注册的方式给补上.
基本到这里整个注册流程就完事了。以上写的不足之处请指出我会修正。希望和大家共同成长.

 浙公网安备 33010602011771号