Ubuntu 16.04下搭建基于携程Apollo(阿波罗)配置中心单机模式
官网:https://github.com/ctripcorp/apollo
Wiki:https://github.com/ctripcorp/apollo/wiki(一切的集成方式和使用方法都在这里)
Issues:https://github.com/ctripcorp/apollo/issues(如果期间有任何问题,请通过这里查找大部分解决方法)
说明:官方提供了分布式部署方案,但是基于本地开发和调试上一般是单机部署的比较多。且提供的Quick Start方案停留在Demo测试阶段。所以下面将针对单机搭建上做详细的实践。
注意:如果是生产环境一定要使用分布式部署方案来做高可用集群。
下载Release版本:https://github.com/ctripcorp/apollo/releases,离线版本:(链接: https://pan.baidu.com/s/1gfrMejD 密码: emsb)
部署步骤:
1、环境:
JDK:1.8.0_131
Maven:3.3.9
MySQL:5.7.18
apollo:0.8.0
2、解压
tar zxvf apollo-0.8.0.tar.gz
3、导入数据库文件
登录MySQL命令行,然后执行
source /home/jim/opt/apollo-0.8.0/scripts/sql/apolloconfigdb.sql
source /home/jim/opt/apollo-0.8.0/scripts/sql/apolloportaldb.sql
4、打包
修改/home/jim/opt/apollo-0.8.0/scripts/build.sh,把数据库账号密码修改为本机的。其余基本不用改。
然后执行
./build.sh
5、新建文件夹
在opt目录下新建如下文件夹
sudo mkdir /opt/logs
sudo chmod 777 /opt/logs
sudo mkdir /opt/data
sudo chmod 777 /opt/data
sudo mkdir /opt/settings
sudo chmod 777 /opt/settings
6、启动
apollo-configservice:
解压:
~/opt/apollo-0.8.0/apollo-configservice/target$ 7z x apollo-configservice-0.8.0-github.zip -otest
注意:上面前面是执行的路径,7z开始才是命令,并解压到test文件夹下。
运行:
~/opt/apollo-0.8.0/apollo-configservice/target/test/scripts$ ./startup.sh
apollo-adminservice:
解压:
~/opt/apollo-0.8.0/apollo-adminservice/target$ 7z x apollo-adminservice-0.8.0-github.zip -otest
运行:
~/opt/apollo-0.8.0/apollo-adminservice/target/test/scripts$ ./startup.sh
apollo-portal:
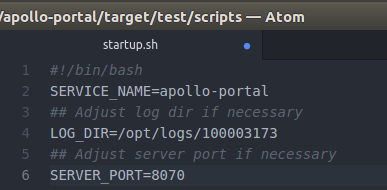
apollo-portal的默认端口是8080,和apollo-configservice一致,所以如果需要在一台机器上同时启动apollo-portal和apollo-configservice的话,需要修改apollo-portal的端口。直接修改startup.sh中的SERVER_PORT即可,如SERVER_PORT=8070。
解压:
~/opt/apollo-0.8.0/apollo-portal/target$ 7z x apollo-portal-0.8.0-github.zip -otest
修改端口:
运行:
~/opt/apollo-0.8.0/apollo-portal/target/test/scripts$ ./startup.sh
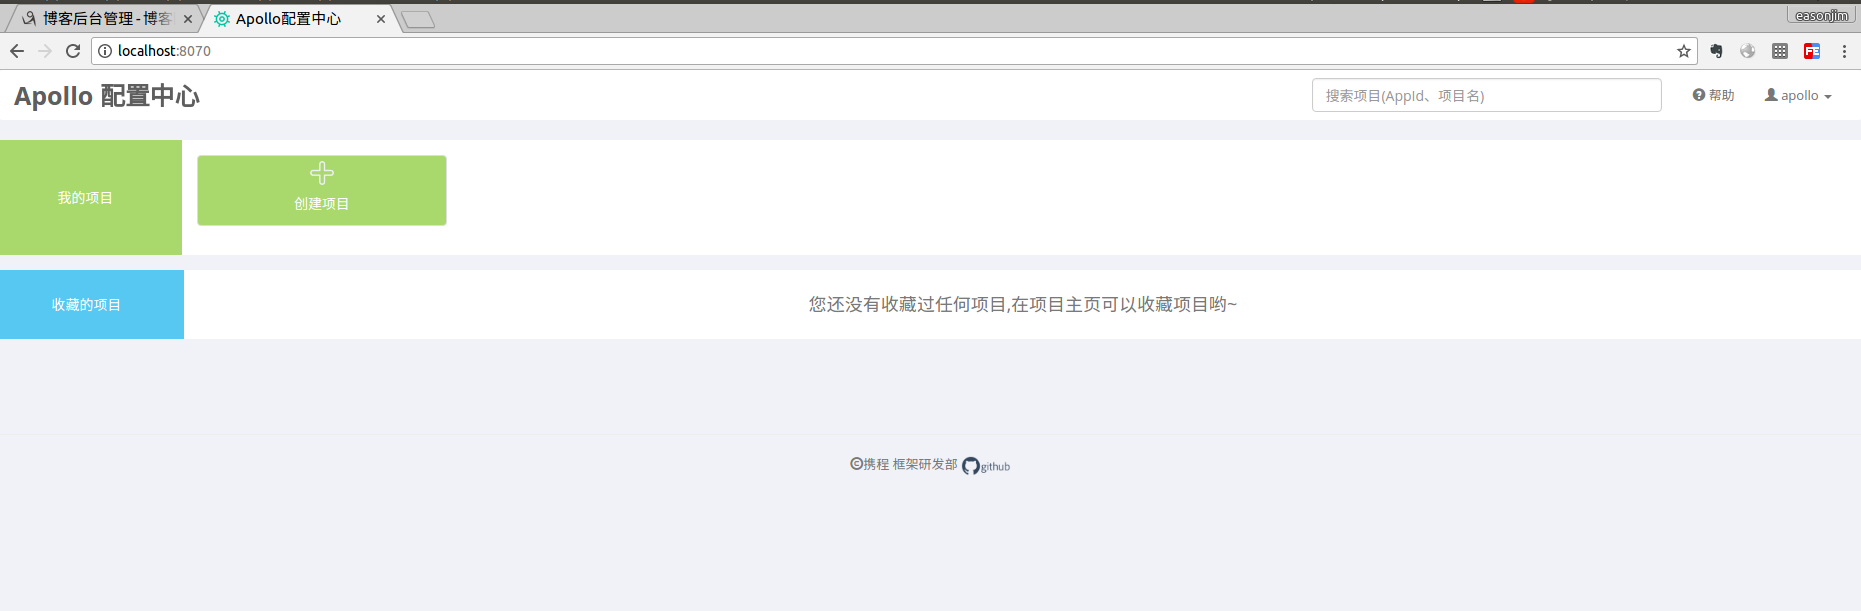
7、访问
http://localhost:8070
8、总结
在部署单机版时吭确实多,但我都记录在了Issues上,可以直接找。
尤其是部署apollo-portal时,由于单机版的端口有冲突导致起不来,最后修改为8070即可,不过在分布式部署上不用这样修改。
下面将会介绍权限管理、Demo使用及集成、环境配置等等一系列样例。

 浙公网安备 33010602011771号