Jenkins简明入门(二) -- 利用Jenkins完成Python程序的build、test、deployment
大家可能还没搞清楚,Jenkins到底能做什么?
本节内容利用Jenkins完成python程序的build、test、deployment,让大家对Jenkins能做的事情有一个直观的了解。
本节内容改写自 https://jenkins.io/doc/tutorials/build-a-python-app-with-pyinstaller/。
1. Fork,Clone Github上的sample repo
这个Github上的sample repo包含了python程序的Buid, Test , Depolyment的代码,所以我们需要先fork这个repo,然后clone到我们本地机器。
关于这段Python程序,也很简单,就是计算两个参数的和。repo中的代码包含了程序本体(计算和),还包含了unittest,build(通过Pyinstaller生成可执行文件)等一切需要的代码及工具
1.1 登录Github,如果没有的话,就去注册一个
1.2 在Github上Fork simple-python-pyinstaller-app, 如果不知道如何fork,请参考 Fork A Repo
1.3 Clone 这个 repo到本地机器,方法是:
打开Linux命令行
cd /home/<your-username>/GitHub/
git clone https://github.com/YOUR-GITHUB-ACCOUNT-NAME/simple-python-pyinstaller-app
(记得替换<your-username>和YOUR-GITHUB-ACCOUNT-NAME为你真正的路径名和用户名)
2. 在Jenkins中创建pipline project
pipline翻译过来是“管道”的意思,其实这个你把整个Build、Test、Deployment的流程想象成一个管道,你的代码在里面流动,经过不同的阶段,就好理解了。
2.1 登录Jenkins后,在初始界面的左上角点击New Item
2.2 把pipline project的名字命名为你指定的,例如simple-python-pyinstaller-app
2.3 往下拉,选择 Pipline, 点击OK
2.4 选择Pipline tab,然后往下拉看到Pipline Section:
Definition选择Pipline Scirpt from SCM,这个选项能让Jenkins能够从Source Control Management(SCM)处获得,这个SCM其实就是你clone到本地机器的repo
SCM选择Git
Repository URL填你clone到本地机器的repo的路径: /home/GitHub/simple-python-pyinstaller-app
点击Save
3. 在Pipline中创建Jenkinsfile
Jenkinsfile实际上规定了Jenkins的Pipline流程中做了哪些事情。
在你的 /home/GitHub/simple-python-pyinstaller-app路径下创建Jenkinsfile文件,然后填入以下代码:
pipeline {
    agent none
    stages {
        stage('Build') {
            agent {
                docker {
                    image 'python:2-alpine'
                }
            }
            steps {
                sh 'python -m py_compile sources/add2vals.py sources/calc.py'
            }
        }
        stage('Test') {
            agent {
                docker {
                    image 'qnib/pytest'
                }
            }
            steps {
                sh 'py.test --verbose --junit-xml test-reports/results.xml sources/test_calc.py'
            }
            post {
                always {
                    junit 'test-reports/results.xml'
                }
            }
        }
        stage('Deliver') {
            agent {
                docker {
                    image 'cdrx/pyinstaller-linux:python2'
                }
            }
            steps {
                sh 'pyinstaller --onefile sources/add2vals.py'
            }
            post {
                success {
                    archiveArtifacts 'dist/add2vals'
                }
            }
        }
    }
}
保存文件,然后运行以下命令以提交修改:
git add .
git commit -m "create the Jenkinsfile"
4. 用Blue Ocean运行Pipline然后观察
回到Jenkins初始页面,登录后,在左侧列表选择Blue Ocean,点击"Run"

在这个页面,你可以看到Pipline的运行情况

点击每个Step,可以看到具体的运行情况,在跑哪个程序,出错信息,等。
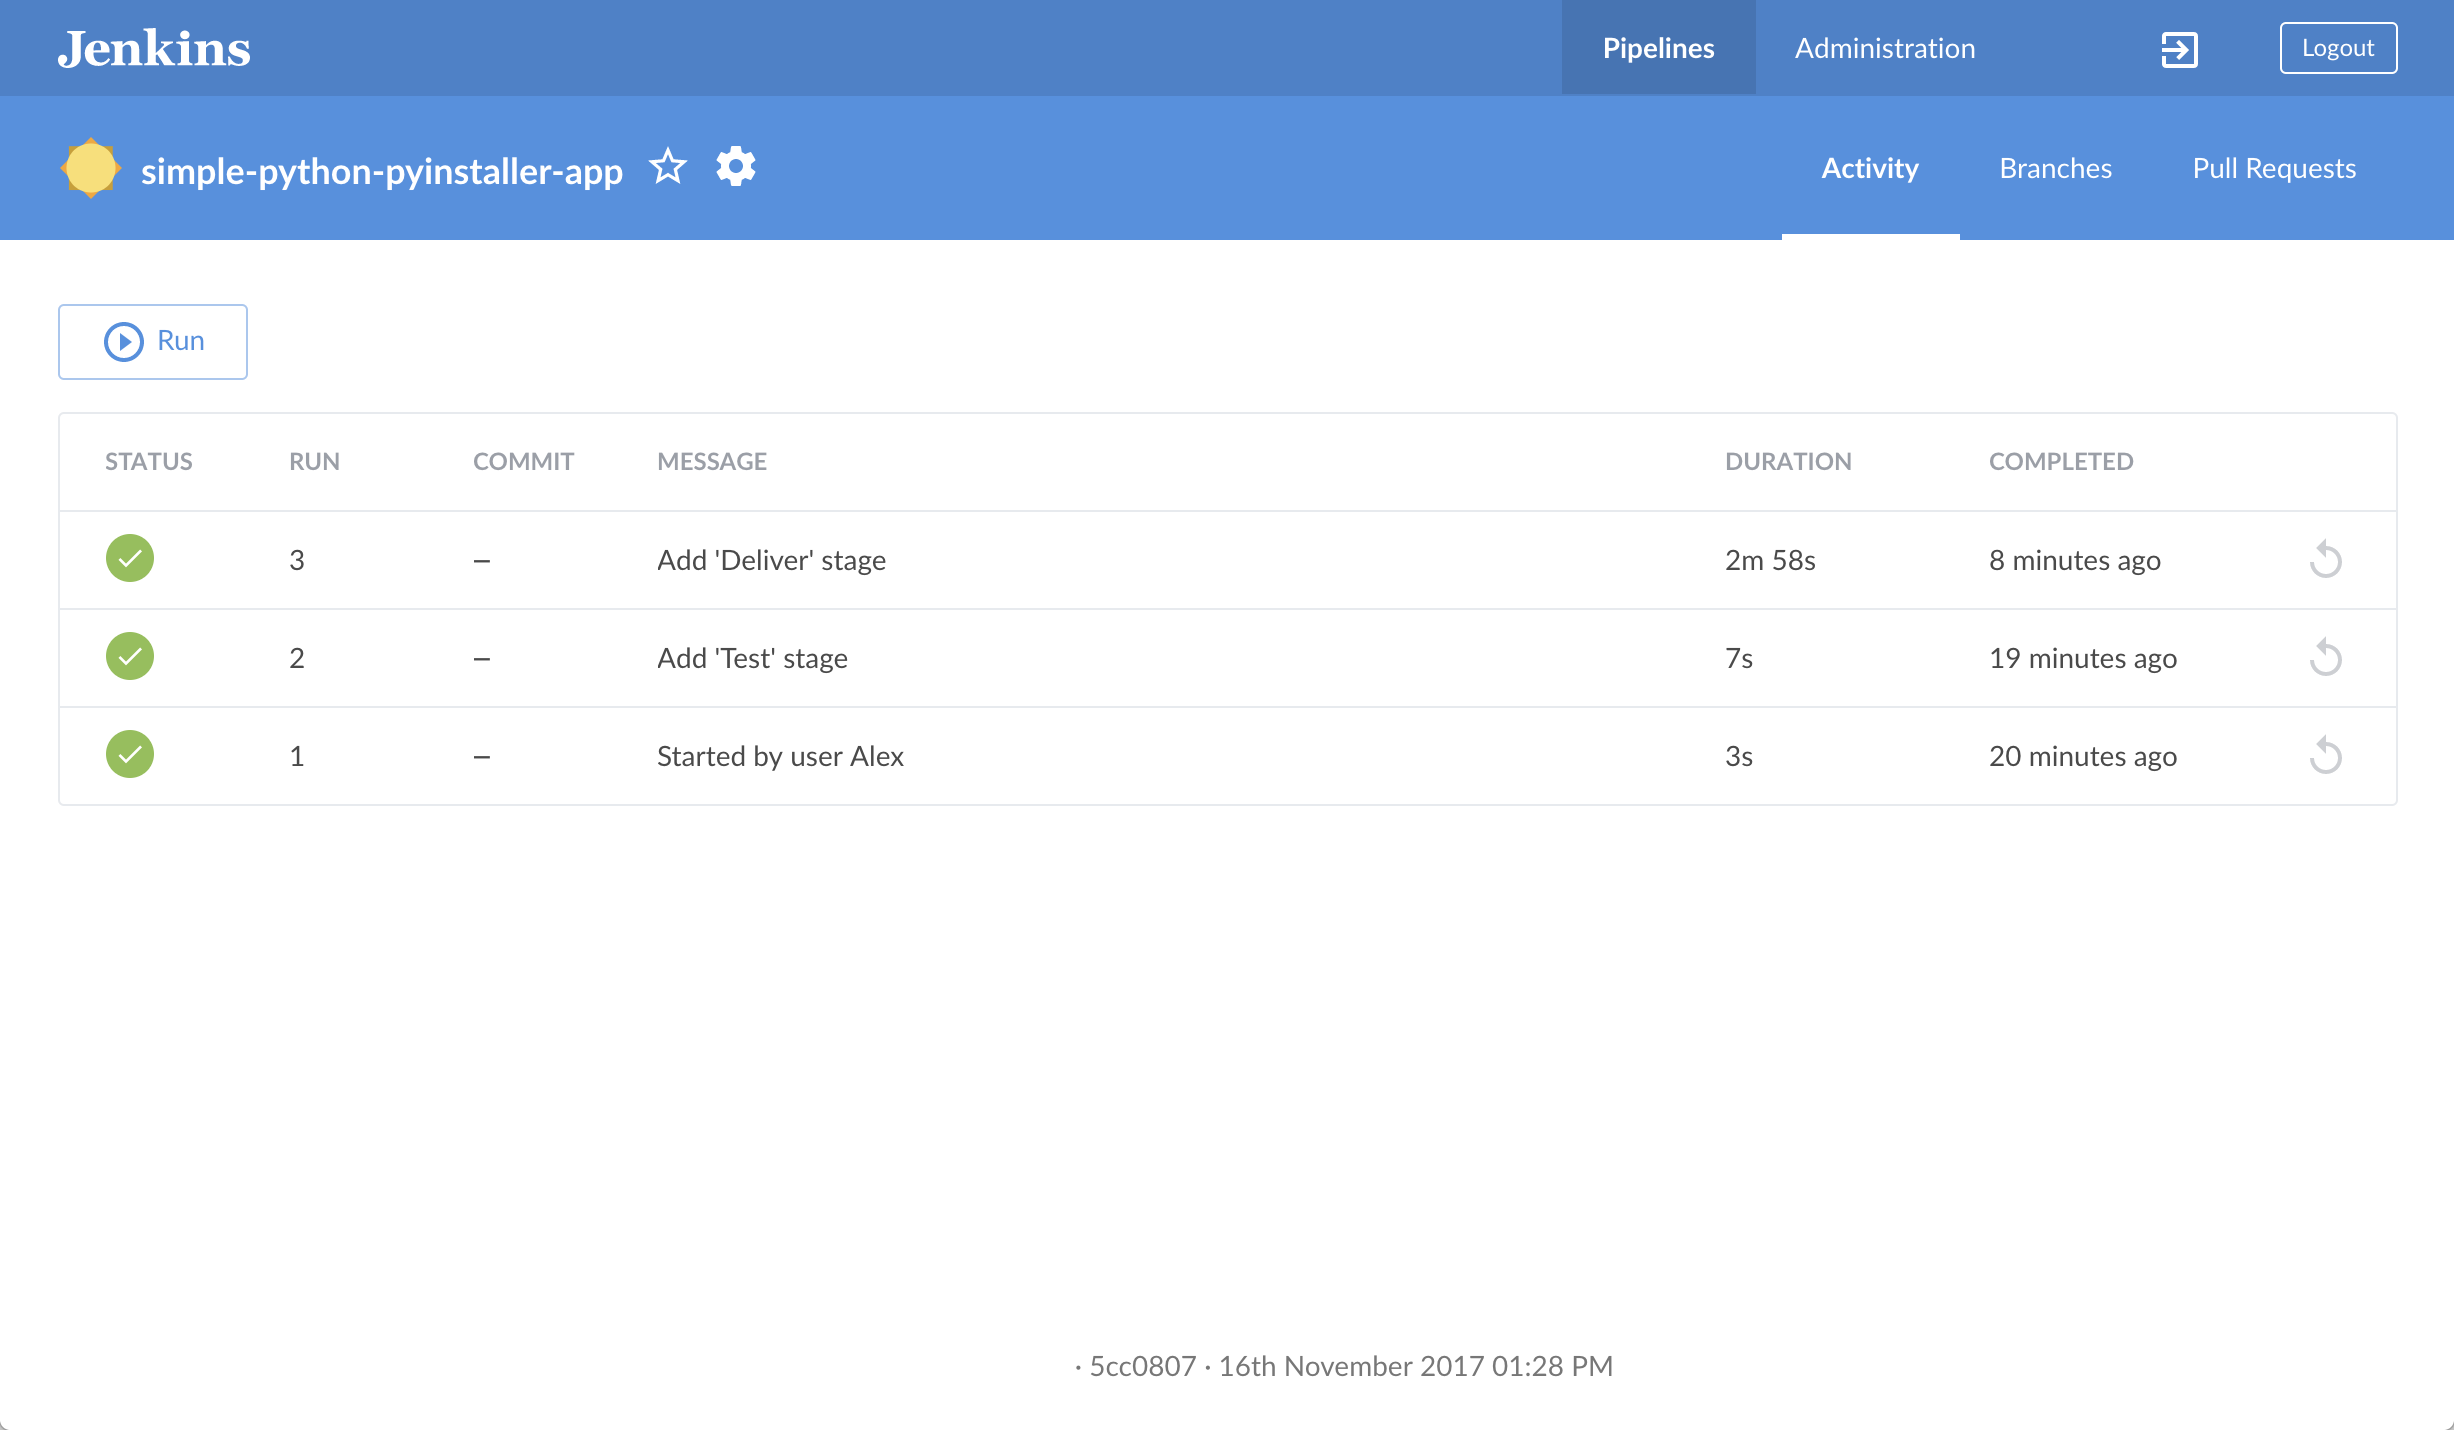
如果想要查看自己这次跑的Pipline(我们称之为Activity),那么需要先点击Blue Ocean,选中你的Project,然后点上方的Activity
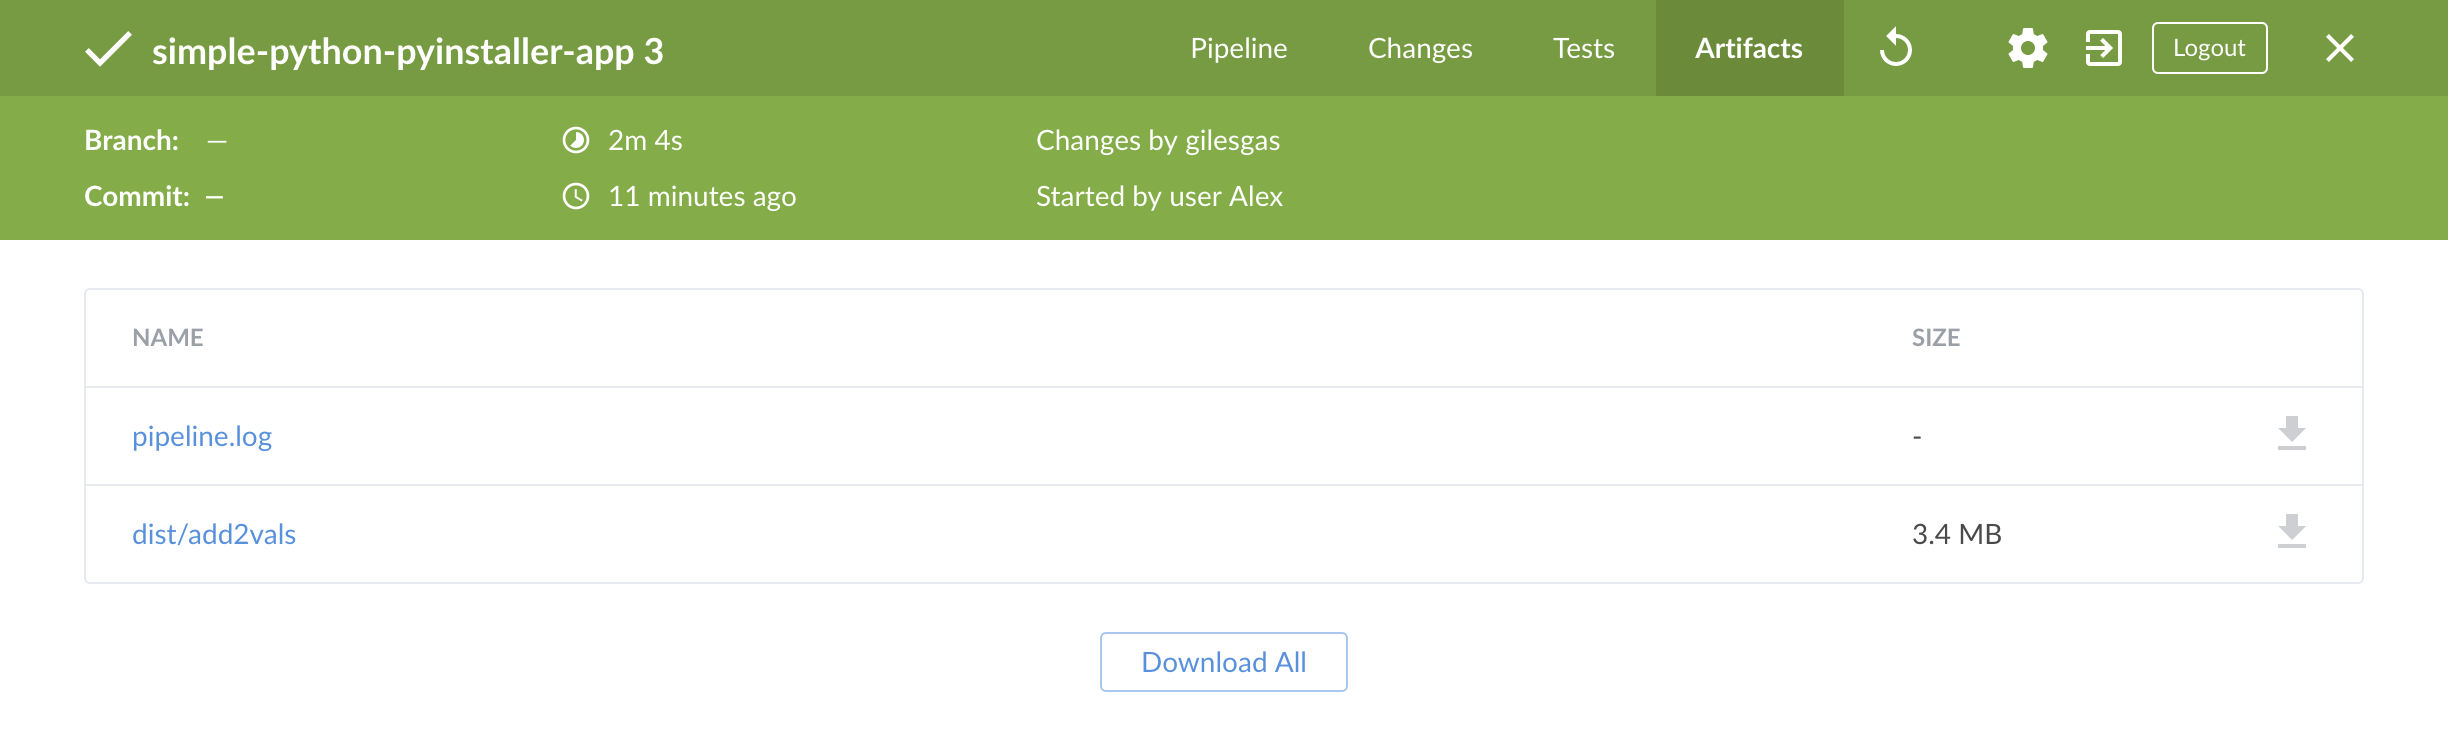
如果需要运行产生的可执行文件,可以选择你跑的这一次Pipline的Activity。找到可执行文件add2vals,下载然后执行:
chmod +x add2vals
./add2vals 1 2
本节我们大体明白了Jenkins到底能帮我们做些什么:Build,Test,Deliver,了解了Jenkins的工作流程,以及Jenkinsfile规定了Pipline是如何运行的。下一节我们将会使用Blue Ocean的便捷功能,使得我们只需要操作Web页面,指定Build 、Test、 Deliver的内容,自动为我们生成Jenkinsfile文件。
