Consul初探-服务注册和发现
 Consul 的核心功能就是服务注册和发现,Consul 客户端通过将自己注册到 Consul 服务器集群,然后等待调用方去发现服务,实现代理转发到真正的业务系统,还可以基于服务发现做负载均衡,甚至可以在客户端请求到底服务之前进行拦截,做一些基础性的工作,比如身份验证、限流、熔断等等业务系统的前瞻性工作。
前言
经过上一篇的学习,现在已经来到了服务注册发现环节;Consul 的核心功能就是服务注册和发现,Consul 客户端通过将自己注册到 Consul 服务器集群,然后等待调用方去发现服务,实现代理转发到真正的业务系统,还可以基于服务发现做负载均衡,甚至可以在客户端请求到底服务之前进行拦截,做一些基础性的工作,比如身份验证、限流、熔断等等业务系统的前瞻性工作。
服务注册
引用 Consul.net 客户端
在 .NETCore 平台下,可以使用 Consul 的客户端组件,使其嵌入到业务系统中,完成服务自动注册、健康检查等工作,为了使用这些自动化的功能,需要在项目中进行 nuget 包引用
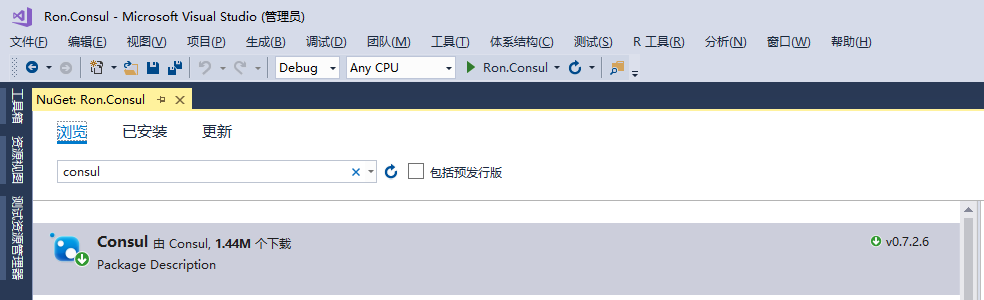
截止本文发文时,Consul 的 NETStandard 最新版本是 0.7.2.6,从版本号来看,更新的频率非常频繁,但是 Github 上的 star 数量并不多,这就表示 .NETCore 社区在 Consul 的关注度上还是非常小众的。
改造 Program.cs 程序入口
为了使用服务运行时侦听的地址和端口作为 Consul 健康检查的地址,需要对 Program.cs 进行简单的改造,代码如下:
        public static IWebHost BuildWebHost(string[] args)
        {
            var config = new ConfigurationBuilder().AddCommandLine(args).Build();
            var url = $"{config["scheme"]}://{config["ip"]}:{config["port"]}";
            return WebHost.CreateDefaultBuilder(args)
                  .UseStartup<Startup>()
                  .UseConfiguration(config)
                  .UseUrls(url)
                  .Build();
        }
上面的代码将命令行的参数编译为配置文件对象,这些参数为了方便调试,我一次性的写入了Properties\launchSettings.json 文件中,如下图

在 launchSettings.json 文件中的表现形式为:
{
  "profiles": {
    "Ron.Consul": {
      "commandName": "Project",
      "commandLineArgs": "--scheme http --ip 172.16.10.227 --port 51800"
    }
  }
}
建立 StartupExtension.cs
我们需要在服务启动后,将服务自动注册到 Consul 的代理服务器集群中,为此,需要封装一些简单的注册代码,以便复用
 public static class StartupExtension
    {
        /// <summary>
        ///  定义服务健康检查的url地址
        /// </summary>
        public const string HEALTH_CHECK_URI = "/consul/health/check";

        /// <summary>
        ///  读取 Consul 配置,注入服务
        /// </summary>
        /// <param name="service"></param>
        /// <param name="configuration"></param>
        /// <returns></returns>
        public static IServiceCollection AddConsulConfig(this IServiceCollection service,
                                                        IConfiguration configuration)
        {
            var clientConfig = configuration.GetSection("Consul").Get<ConsulConfig>();
            service.Configure<ConsulConfig>(configuration.GetSection("Consul"));

            return service;
        }


        /// <summary>
        ///  将 ConsulClient 注入管道
        /// </summary>
        /// <param name="app"></param>
        /// <param name="configuration"></param>
        /// <param name="lifetime"></param>
        /// <param name="cc"></param>
        /// <returns></returns>
        public static IApplicationBuilder UseConsul(this IApplicationBuilder app,
                                                    IConfiguration configuration,
                                                    IApplicationLifetime lifetime,
                                                    IOptions<ConsulConfig> cc)
        {
            var clientConfig = cc.Value;
            //获取服务运行侦听的地址和端口作为健康检查的地址
            var clientIP = new Uri($"{configuration["scheme"]}://{configuration["ip"]}:{configuration["port"]}");
            var serviceId = $"{clientConfig.ClientName}-{clientIP.Host}-{clientIP.Port}";
            var ipv4 = clientIP.Host;

            var consulClient = new ConsulClient(config =>
            {
                config.Address = new Uri(clientConfig.Server);
                config.Datacenter = clientConfig.DataCenter;
            });

            var healthCheck = new AgentServiceCheck()
            {
                DeregisterCriticalServiceAfter = TimeSpan.FromSeconds(7), // 服务启动 7 秒后注册服务
                Interval = TimeSpan.FromSeconds(9), // 健康检查的间隔时间为:9秒
                HTTP = $"{clientIP.Scheme}://{ipv4}:{clientIP.Port}{HEALTH_CHECK_URI}"
            };

            var regInfo = new AgentServiceRegistration()
            {
                Checks = new[] { healthCheck },
                Address = ipv4,
                ID = serviceId,
                Name = clientConfig.ClientName,
                Port = clientIP.Port
            };
            consulClient.Agent.ServiceRegister(regInfo).GetAwaiter().GetResult();

            lifetime.ApplicationStopped.Register(() =>
            {
                consulClient.Agent.ServiceRegister(regInfo);
            });
            return app;
        }

        /// <summary>
        ///  实现健康检查输出,无需另行定义 Controller
        /// </summary>
        /// <param name="app"></param>
        /// <returns></returns>
        public static IApplicationBuilder MapHealthCheck(this IApplicationBuilder app)
        {
            app.Map(HEALTH_CHECK_URI, s =>
            {
                s.Run(async context =>
                {
                    Console.ForegroundColor = ConsoleColor.Blue;
                    Console.WriteLine("Health check {0}", DateTime.Now);
                    Console.ForegroundColor = ConsoleColor.Gray;
                    await context.Response.WriteAsync("ok");
                });
            });
            return app;
        }
    }
上面的代码,实现是服务注册和健康检查的逻辑,代码比较简单,每个方法头部都有注释,应该还是比较清晰,这里就不再过多解释了,接下来开始在 Startup.cs 中启用 ConsulClient。
服务注入
        public void ConfigureServices(IServiceCollection services)
        {
            services.AddConsulConfig(this.Configuration);
            ...
        }
加入请求管道队列
        public void Configure(IApplicationBuilder app,
                              IHostingEnvironment env,
                              IApplicationLifetime lifetime,
                              IOptions<ConsulConfig> cc)
        {
            app.UseConsul(this.Configuration, lifetime, cc);
            app.MapHealthCheck();
            ...
        }
定义业务接口
下面简单的实现一个 Controller,在该 Controller 里面增加两个业务接口,方便调用就好
        [HttpGet("index")]
        public ActionResult<string> Index()
        {
            return "Hello wrold";
        }

        [HttpGet("add/{x:int}/{y:int}")]
        public ActionResult<int> Add(int x, int y)
        {
            var result = x + y;
            Console.ForegroundColor = ConsoleColor.Red;
            Console.WriteLine("x+y={0}", result);
            Console.ForegroundColor = ConsoleColor.Gray;
            return result;
        }
启动服务,执行注册
好了,到这里,服务注册的准备工作基本完成,接下来,按 F5 启动程序,程序将自动进行服务注册等工作
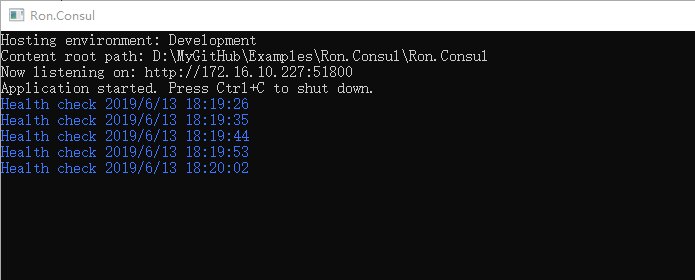
图中蓝色部分,就是 Consul 代理服务器集群对当前服务执行的健康检查,健康检查的原则只有一条,执行 http 请求,并返回 httpstatus=200 即视为健康,打开 Consul 的 Web 控制台界面,查看实际的服务状态
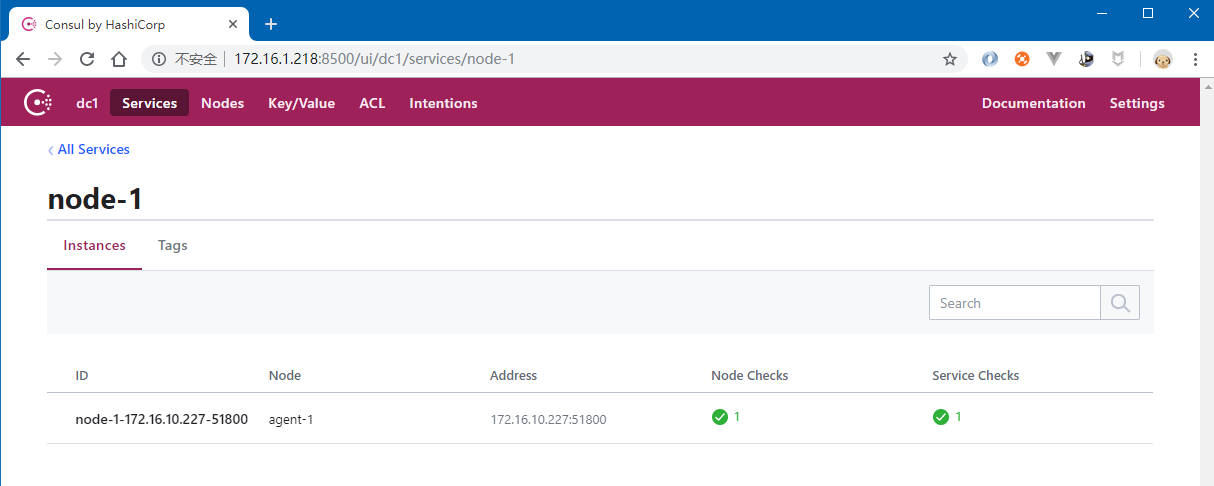
从上图中可以看到,服务状态是正常的(绿色)
服务发现
Consul 系统了许多 api 接口,供服务网关(或者代理)从 Consul 中获取已注册的健康的服务,比如下面的 api 地址
获取所有已注册的健康的服务
http://172.16.1.218:8500/v1/agent/services
获取指定的服务
http://172.16.1.218:8500/v1/agent/service/node-1-172.16.10.227-51800
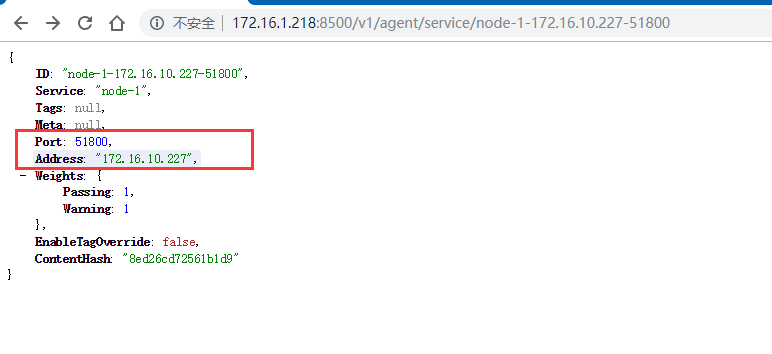
上图中的内容,就是单个服务的注册信息,图中红色部分,是真实的服务的主机地址和侦听的端口,网关代理可以将指定路由转发到该地址实现业务调用。
结束语
截止目前为止,我们实现了部署 Consul 代理服务器集群、服务注册、发现,但是目前来说,还没有完全实现业务调用,现在,还缺少关键的一环:那就是服务网关;服务网关的调用,我们放在下一篇
源代码下载
本示例所有代码都已托管到 Github,欢迎下载:https://github.com/lianggx/Examples/tree/master/Ron.Consul

欢迎关注收取阅读最新文章
好看点个推荐呗~
- 出处:http://www.cnblogs.com/viter/
- 本文版权归作者和博客园共有,欢迎个人转载,必须保留此段声明;商业转载请联系授权,且在文章页面明显位置给出原文连接,否则保留追究法律责任的权利。
- 欢迎大家关注我的微信公众号,一起学习一起进步

 浙公网安备 33010602011771号