

SpringBoot3.5.4 整合Shiro时 运行失败,检查思路及最终解决方案
1. 创建过程
- 新建一个Shiro,去github上查看simple,需要用到哪些内容;
- 根据显示的内容,在创建项目的时候导入SpringWeb,Thymeleaf
- 检查pom.xml,确定导入的内容是最新的自己想要的SpringBoot3.5.4 的最新版。
- 在themleaf创建个首页,编写一个controller,测试springboot项目正常启动
- 使用的Springboot3.x,所以在github的Shiro仓库中参照:https://github.com/apache/shiro/tree/main/samples/spring-boot-3-web
- 引入git的pom.xml的依赖
        <dependency>
            <groupId>org.apache.shiro</groupId>
            <artifactId>shiro-core</artifactId>
            <version>2.0.0-alpha-4</version>
            <classifier>jakarta</classifier>
        </dependency>
        <dependency>
            <groupId>org.apache.shiro</groupId>
            <artifactId>shiro-web</artifactId>
            <version>2.0.0-alpha-4</version>
            <classifier>jakarta</classifier>
        </dependency>

        <dependency>
            <groupId>org.apache.shiro</groupId>
            <artifactId>shiro-spring-boot-web-starter</artifactId>
            <version>2.0.0-alpha-4</version>
            <classifier>jakarta</classifier>
        </dependency>
        <dependency>
            <groupId>org.apache.shiro</groupId>
            <artifactId>shiro-spring-boot-starter</artifactId>
            <version>2.0.0-alpha-4</version>
            <classifier>jakarta</classifier>
        </dependency>
        <dependency>
            <groupId>org.apache.shiro</groupId>
            <artifactId>shiro-spring</artifactId>
            <version>2.0.0-alpha-4</version>
            <classifier>jakarta</classifier>
        </dependency>
- 编写Configuration 参照samples/spring-boot-3-web/src/main/java/org/apache/shiro/samples/WebApp.java
package com.demo.config;
import org.apache.shiro.mgt.DefaultSecurityManager;
import org.apache.shiro.realm.Realm;
import org.apache.shiro.realm.text.TextConfigurationRealm;
import org.apache.shiro.spring.web.config.DefaultShiroFilterChainDefinition;
import org.apache.shiro.spring.web.config.ShiroFilterChainDefinition;
import org.apache.shiro.web.mgt.DefaultWebSecurityManager;
import org.springframework.context.annotation.Bean;
import org.springframework.context.annotation.Configuration;
/**
* Apache Shiro 核心配置类
* 用于集成 Shiro 权限框架到 Spring Boot 3.x 应用
*/
@Configuration
public class ShiroConfig {
/**
* 创建并配置Realm Bean用于权限管理
*
* @return 配置好的TextConfigurationRealm实例
*/
@Bean
public Realm realm() {
TextConfigurationRealm realm = new TextConfigurationRealm();
// 配置用户及其对应的权限角色
// 配置用户:格式为 username = password, role1, role2, ...
realm.setUserDefinitions(
"admin=admin,admin,manager,user\n"
+ "manager=manager,manager,user\n"
+ "user=user,user");
// 配置角色及其关系 这里不是“角色继承”,而是“角色拥有的权限”
// 配置角色权限(可选):格式为 role = permission1, permission2, ...
realm.setRoleDefinitions(
"admin=*:*:*\n"
+ "manager=read:write\n"
+ "user=read"
);
return realm;
}
/**
* 配置 Shiro 过滤器链
* 定义哪些路径需要什么样的过滤器(权限控制)
*
* @return ShiroFilterChainDefinition 实例
*/
@Bean
public ShiroFilterChainDefinition shiroFilterChainDefinition() {
DefaultShiroFilterChainDefinition chainDefinition = new DefaultShiroFilterChainDefinition();
// /login 路径允许匿名访问(anon),即未登录用户也可以访问,用于登录页面或登录接口。
chainDefinition.addPathDefinition("/login", "anon");
// 访问 /logout 需要登出(logout),即用户可登出。
chainDefinition.addPathDefinition("/logout", "logout");
// 访问根路径 / 需要认证(authc),即用户必须已登录才可访问。
chainDefinition.addPathDefinition("/**", "authc");
return chainDefinition;
}
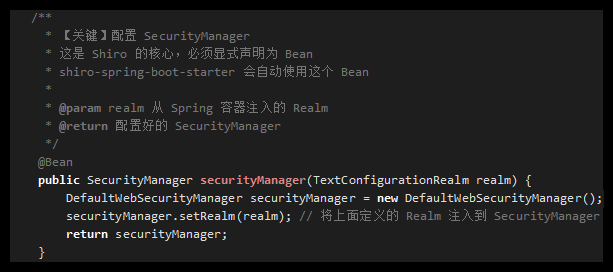
/**
* 【关键】配置 SecurityManager
* 这是 Shiro 的核心,必须显式声明为 Bean
* shiro-spring-boot-starter 会自动使用这个 Bean
*
* @param realm 从 Spring 容器注入的 Realm
* @return 配置好的 SecurityManager
*/
@Bean
public DefaultWebSecurityManager securityManager(Realm realm) {
DefaultWebSecurityManager securityManager = new DefaultWebSecurityManager ();
securityManager.setRealm(realm);
return securityManager;
}
}
问题点
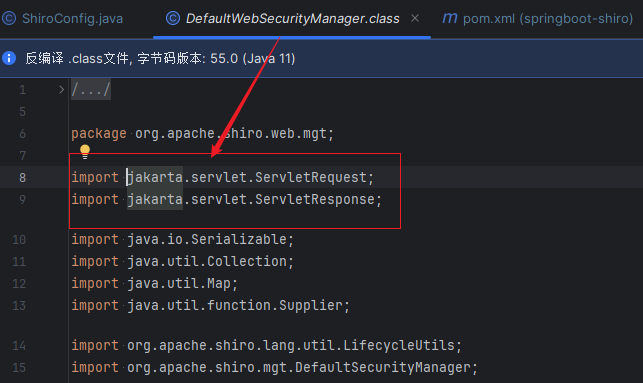
- 期间一直报错java.lang.IllegalStateException,ClassNotFoundException,多方查找资料后发现是因为 Shiro 和 Spring Boot 版本不兼容导致的。是一个典型的 Jakarta EE 9+ 迁移问题,其中 javax.servlet 包被重命名为 jakarta.servlet
解决方案直接看最后,中间都是找问题和解决问题的过程
思路及解决方案
网络上提出的解决方案有下面几种
1. 降级 Spring Boot 版本,降到SpringBoot 2.x 使用javax.servlet的那个版本,因为本身想根据视频中的思路,学习最新的知识。故而pass;
2. 升级 Shiro 版本,目前所使用的版本就是直接从github上查找所取下来的最新版的master版本,2.0.0-alpha-4,所以不存在不是最新的版的情况,先放一边;
3. 添加 Jakarta Servlet API 兼容性依赖,添加一个桥接的依赖包,使Javax和Jakarta整合,合理;
使用上述方式意义尝试后,依旧提示有问题,又去通义上让AI给写一个Shiro的整合方案,检查后发现少注入的一个SecurityManager,
因为SecurityManager是已经被废止的对象,原本想使用上级对象,但是发现其实返回的也是 DefaultWebSecurityManager securityManager = new DefaultWebSecurityManager ();,所以使用了DefaultWebSecurityManager 补充后重新测试,程序能正常加载

附加
碎碎念
思绪很多,找了各方资料,就是不行,原因就是Spring6已经迁移了一个方法,5还在用;
SpringBoot2使用的javax到Springboot3之后包统一都换了。但是Shiro,的底层的部分逻辑仍然导入使用的是javax.servlet,就导致包都是重复且混乱的,使用SpringBoot3,引用以及配置的jdk最低都是17,17根本就没有javax了,就需要导入javax.servlet包 为了适配 Shiro,,导入了又显示冲突,来来回回,还是太菜。
解决方案
反正实现这部分功能肯定需要用上这种安全框架,针对于这个就得出几种解决方案:
- 降版本,把SpringBoot从3降到2,自然就好了,网上那么多都是2的,真是,来源是不都是一个人,别的就copy copy;回归到幸福的jdk1.8;
- 等,等Shiro的官方在出一个新版本,将现在出现的bug修复掉,就绪使用Shiro;
- 换!!使用Spring Security,Spring官方这些地方都嵌合的非常好,使用新版Spring也会推出新的其他框架,都是互相适配的,全家桶的舒适感,除了难点都挺好;
- 把自动装配去了,手写配置类去实现;
手写
代码如下:
好像还不行.....
package com.demo.config;

import org.apache.shiro.mgt.DefaultSecurityManager;
import org.apache.shiro.realm.Realm;
import org.apache.shiro.realm.SimpleAccountRealm;
import org.apache.shiro.spring.boot.autoconfigure.ShiroAnnotationProcessorAutoConfiguration;
import org.apache.shiro.spring.boot.autoconfigure.ShiroBeanAutoConfiguration;
import org.apache.shiro.spring.config.web.autoconfigure.ShiroWebFilterConfiguration;
import org.apache.shiro.spring.web.ShiroFilterFactoryBean;
import org.springframework.boot.autoconfigure.SpringBootApplication;
import org.springframework.boot.web.servlet.FilterRegistrationBean;
import org.springframework.context.annotation.Bean;
import org.springframework.context.annotation.Configuration;
import org.springframework.web.filter.DelegatingFilterProxy;
import jakarta.servlet.DispatcherType;

import java.util.EnumSet;
import java.util.LinkedHashMap;
import java.util.Map;

/**
 * Apache Shiro 核心配置类
 * 用于集成 Shiro 权限框架到 Spring Boot 3.x 应用
 */
@Configuration
@SpringBootApplication(exclude = {
        ShiroBeanAutoConfiguration.class,
        ShiroAnnotationProcessorAutoConfiguration.class,
        ShiroWebFilterConfiguration.class  // 关键:禁用有问题的自动配置
})
public class ShiroConfigR{


    public FilterRegistrationBean<DelegatingFilterProxy> shiroFilterRegistration() {
        FilterRegistrationBean<DelegatingFilterProxy> registration = new FilterRegistrationBean<>();
        DelegatingFilterProxy filter = new DelegatingFilterProxy("shiroFilter");
        filter.setTargetFilterLifecycle(true);
        registration.setFilter(filter);
        registration.setEnabled(true);
        registration.addUrlPatterns("/*");
        registration.setOrder(1);

        // 使用新 API,不要用 setDispatcherTypes(...)
        // Spring Boot 3 中应使用 setDispatcherTypes 枚举集合
        registration.setDispatcherTypes(EnumSet.of(DispatcherType.REQUEST, DispatcherType.FORWARD));

        return registration;
    }

    // 使用简单内存 Realm(生产环境替换为数据库查询)
    @Bean
    public Realm realm() {
        SimpleAccountRealm realm = new SimpleAccountRealm();
        // 添加一个测试账户
        realm.addAccount("admin", "123456", "admin");
        return realm;
    }

    @Bean
    public DefaultSecurityManager securityManager() {
        DefaultSecurityManager  manager = new DefaultSecurityManager ();
        manager.setRealm(realm());
        return manager;
    }

    @Bean("shiroFilter")
    public ShiroFilterFactoryBean shiroFilterFactoryBean() {
        ShiroFilterFactoryBean filter = new ShiroFilterFactoryBean();
        filter.setSecurityManager(securityManager());

        // 设置未登录跳转登录页
        filter.setLoginUrl("/login");

        // 登录成功后跳转首页
        filter.setSuccessUrl("/index");

        // 无权限跳转页
        filter.setUnauthorizedUrl("/unauthorized");

        // 配置拦截规则
        Map<String, String> chain = new LinkedHashMap<>();
        chain.put("/login", "anon");
        chain.put("/doLogin", "anon");
        chain.put("/css/**", "anon");
        chain.put("/js/**", "anon");
        chain.put("/favicon.ico", "anon");
        chain.put("/**", "authc"); // 其他路径需要认证

        filter.setFilterChainDefinitionMap(chain);
        return filter;
    }

}
继续排查
根据成功者的项目学习排查错误寻找解决方案,Ruoyi是怎么实现的呢
前提
刷git的时候看到了ruoyi,ruoyi同时支持Spring boot2, spring boot3,而且他的权限模块也是使用的Shiro,去看一看他是怎么实现的。
参照学习: 插件集成 | RuoYi
对比项目差别点,检查自身错误
跟着若依吧他需要的包导进去:
- 没有使用
shiro-spring-boot-starter;myproject:去掉,会不会使用依赖移动器找不到导致的导入失败; - 重新定义了
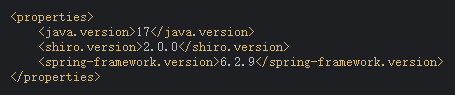
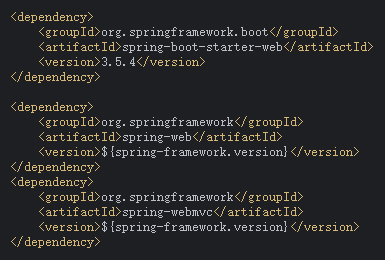
spring-web,spring-webmvc;myproject:引入并指定版本 - 引入使用了
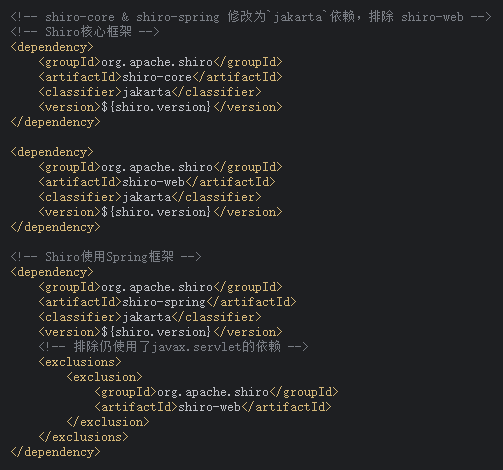
jakarta.servlet-api,没有javax.servlet-api;myproject:删掉 - 为了使用Shiro 单独引入使用了
shiro-core,shiro-spring,shiro-web,在shiro-web排除了shiro-web,并且都指定使用了jakarta的classifier; - 同一个
pom.xml中引入的依赖,同一个包下所使用的版本都是同一个version;
检查错误信息
- 发现导入 的Maven仓库里有两个spring-web,是不是这里出现的问题
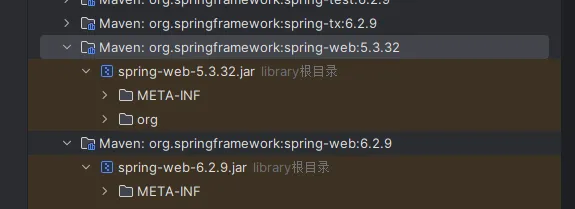
mvn clean install,清除缓存重新再引入依赖- 删除不起作用反而会产生干扰的包
    <!-- 引入Shiro BOM统一版本管理(可选但推荐) -->
    <dependencyManagement>
        <dependencies>
           <dependency>
               <groupId>org.apache.shiro</groupId>
               <artifactId>shiro-bom</artifactId>
               <!-- 使用最新兼容版本 -->
               <version>${shiro.version}</version>
               <type>pom</type>
               <scope>import</scope>
           </dependency>
           <dependency>
               <groupId>org.springframework</groupId>
               <artifactId>spring-framework-bom</artifactId>
               <version>6.2.9</version>
               <type>pom</type>
               <scope>import</scope>
           </dependency>
        </dependencies>
    </dependencyManagement>
- 重新
mvn clean install,检查依赖,没有Spring5.3.2的依赖了,可能是解决了
![]()
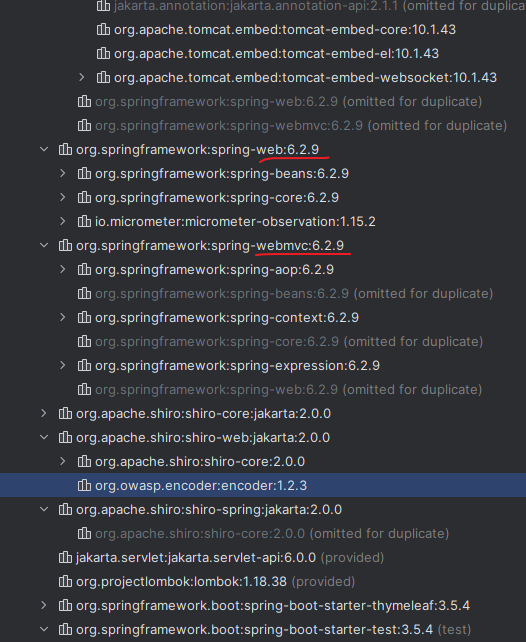
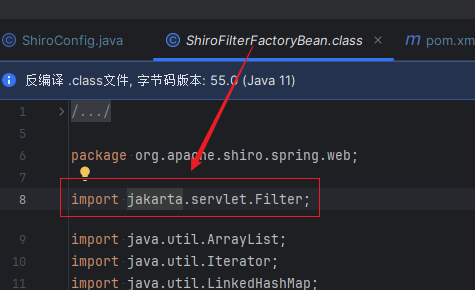
- 验证,检查各个包中主要使用的类,是否都抛弃了
javax换成了Jakarta;
![]()
![]()
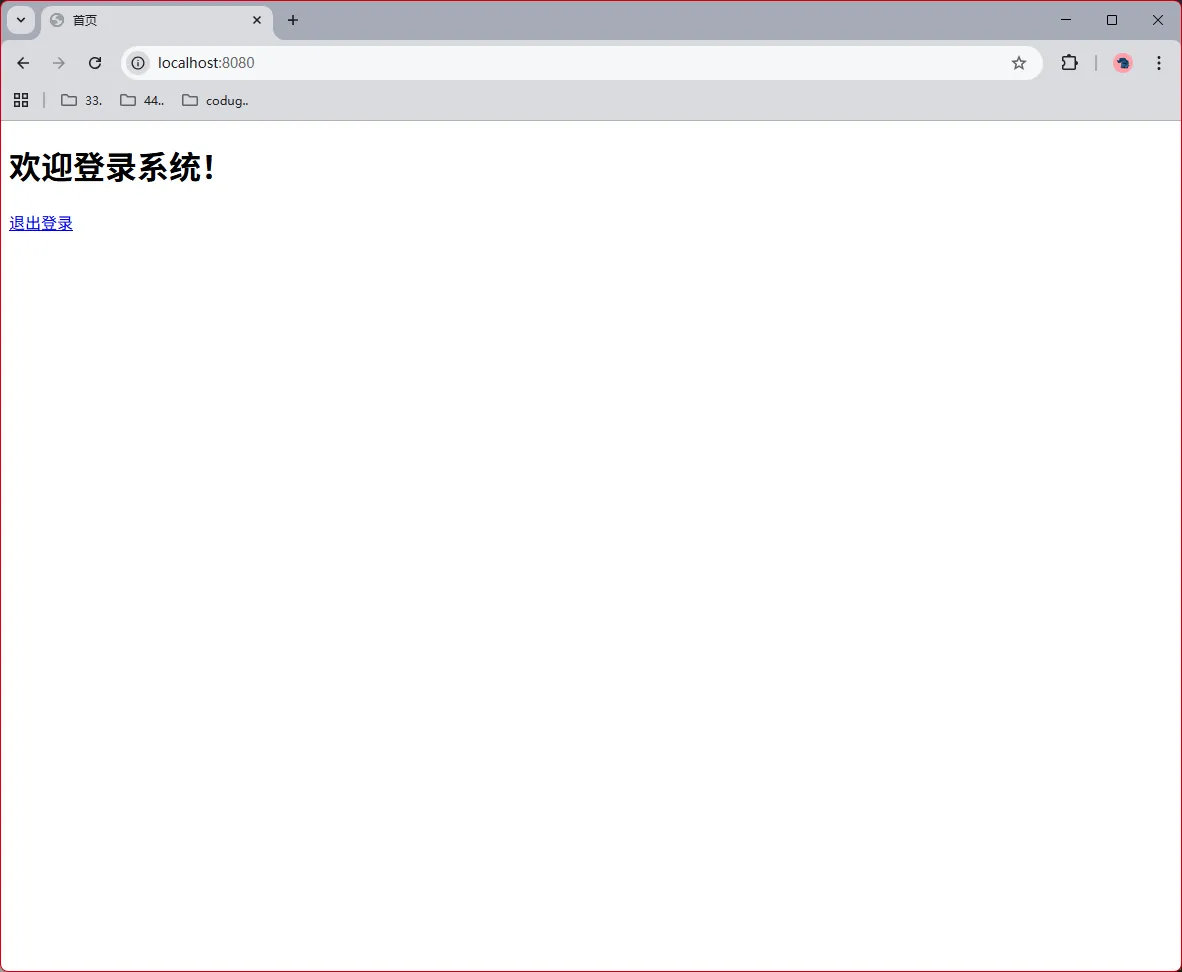
- 项目启动测试,没有问题
![]()
- 为避免同情况发送,决定统一依赖包 使用
<poperites> </poperites>管理
![]()
![]()
![]()

测试Shiro
编写认证授权的Relam
package com.demo.config;

import org.apache.shiro.authc.AuthenticationException;
import org.apache.shiro.authc.AuthenticationInfo;
import org.apache.shiro.authc.AuthenticationToken;
import org.apache.shiro.authc.SimpleAuthenticationInfo;
import org.apache.shiro.authz.AuthorizationInfo;
import org.apache.shiro.authz.SimpleAuthorizationInfo;
import org.apache.shiro.realm.AuthenticatingRealm;
import org.apache.shiro.realm.AuthorizingRealm;
import org.apache.shiro.subject.PrincipalCollection;

public class UserRealm extends AuthorizingRealm {

    /**
     * 获取授权信息 授权
     *
     * @param principals 身份凭证集合,包含用户的身份信息
     * @return AuthorizationInfo 授权信息对象,包含用户的权限信息
     */
    @Override
    protected AuthorizationInfo doGetAuthorizationInfo(PrincipalCollection principals) {
        // 创建简单的授权信息对象
        SimpleAuthorizationInfo info = new SimpleAuthorizationInfo();

        // 添加用户相关权限
        info.addStringPermission("user:add");
        info.addStringPermission("user:delete");
        info.addStringPermission("user:update");

        System.out.println("执行了授权-----》");
        return info;
    }

    /**
     * 执行身份认证信息获取操作 认证
     *
     * @param token 认证令牌,包含用户提交的认证信息
     * @return AuthenticationInfo 认证信息对象,包含正确的用户名和密码
     * @throws AuthenticationException 认证异常,当认证过程中出现错误时抛出
     */
    @Override
    protected AuthenticationInfo doGetAuthenticationInfo(AuthenticationToken token) throws AuthenticationException {

        // 创建简单的认证信息对象,使用硬编码的用户名"admin"和密码"123456"
        SimpleAuthenticationInfo info = new SimpleAuthenticationInfo("admin", "123456", getName());

        System.out.println("执行了认证----》");

        return info;
    }
}
控制器
import org.apache.shiro.authz.annotation.RequiresAuthentication;
import org.springframework.stereotype.Controller;
import org.springframework.web.bind.annotation.GetMapping;

@Controller
public class HomeController {

    @GetMapping("/index")
    @RequiresAuthentication
    public String index() {
        return "index";
    }

    @GetMapping("/unauthorized")
    public String unauthorized() {
        return "unauthorized";
    }
}
跳转的页面编写

测试

至此,可算解决了。。。。。

 浙公网安备 33010602011771号