
利用scrapy爬取腾讯的招聘信息
利用scrapy框架抓取腾讯的招聘信息,爬取地址为:https://hr.tencent.com/position.php
抓取字段包括:招聘岗位,人数,工作地点,发布时间,及具体的工作要求和工作任务
最终结果保存为两个文件,一个文件放前面的四个字段信息,一个放具体内容信息
1.网页分析
通过网页源码和F12显示的代码对比发现,该网页属于静态网页。
可以采用xpath解析网页源码,获取tr标签下的相关内容,具体见代码部分。
2.编辑items.py文件
通过scrapy startproject + 项目名称 生成项目后,来到items.py文件下,首先定义爬取的字段。
# -*- coding: utf-8 -*-

# Define here the models for your scraped items
#
# See documentation in:
# https://doc.scrapy.org/en/latest/topics/items.html

import scrapy

class TencentItem(scrapy.Item):
    # define the fields for your item here like:
    # name = scrapy.Field()

    # 职位名称
    position_name = scrapy.Field()
    # 职位类别
    position_type = scrapy.Field()
    # 招聘人数
    wanted_number = scrapy.Field()
    # 工作地点
    work_location = scrapy.Field()
    # 发布时间
    publish_time = scrapy.Field()
    # 详情信息
    position_link = scrapy.Field()

class DetailsItem(scrapy.Item):
    """
    将详情页提取到的数据另外保存到一个文件中
    """
    # 工作职责
    work_duties = scrapy.Field()
    # 工作要求
    work_skills = scrapy.Field()
3.编写爬虫部分
使用scrapy genspiders + 名称+初始url,生成爬虫后,来到spiders文件夹下的爬虫文件,编写爬虫逻辑,具体代码如下:
# -*- coding: utf-8 -*-
import scrapy

# 导入待爬取字段名
from tencent.items import TencentItem, DetailsItem

class TencentWantedSpider(scrapy.Spider):
    name = 'tencent_wanted'
    allowed_domains = ['hr.tencent.com']
    start_urls = ['https://hr.tencent.com/position.php']

    base_url = 'https://hr.tencent.com/'

    def parse(self, response):

        # 获取页面中招聘信息在网页中位置节点
        node_list = response.xpath('//tr[@class="even"] | //tr[@class="odd"]')

        # 匹配到下一页的按钮
        next_page = response.xpath('//a[@id="next"]/@href').extract_first()

        # 遍历节点,进入详情页,获取其他信息
        for node in node_list:
            # 实例化,填写数据
            item = TencentItem()

            item['position_name'] = node.xpath('./td[1]/a/text()').extract_first()
            item['position_link'] = node.xpath('./td[1]/a/@href').extract_first()
            item['position_type'] = node.xpath('./td[2]/text()').extract_first()
            item['wanted_number'] = node.xpath('./td[3]/text()').extract_first()
            item['work_location'] = node.xpath('./td[4]/text()').extract_first()
            item['publish_time' ] = node.xpath('./td[5]/text()').extract_first()

            yield item
            yield scrapy.Request(url=self.base_url + item['position_link'], callback=self.details)

        # 访问下一页信息
        yield scrapy.Request(url=self.base_url + next_page, callback=self.parse)

    def details(self, response):
        """
        对详情页信息进行抽取和解析
        :return:
        """
        item = DetailsItem()
        # 从详情页获取工作责任和工作技能两个字段名
        item['work_duties'] = ''.join(response.xpath('//ul[@class="squareli"]')[0].xpath('./li/text()').extract())
        item['work_skills'] = ''.join(response.xpath('//ul[@class="squareli"]')[1].xpath('./li/text()').extract())
        yield item
4.编写pipelines.py文件,对抓取数据进行保存。
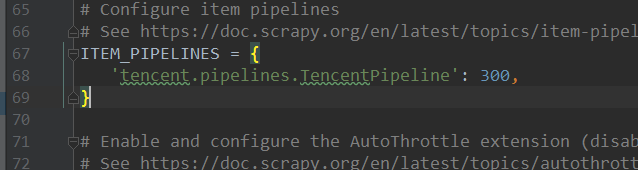
对爬取的数据进行保存,首先要在settings.py文件里,注册爬虫的管道信息,如:
具体代码如下:
# -*- coding: utf-8 -*-

# Define your item pipelines here
#
# Don't forget to add your pipeline to the ITEM_PIPELINES setting
# See: https://doc.scrapy.org/en/latest/topics/item-pipeline.html

import json
from tencent.items import TencentItem, DetailsItem
class TencentPipeline(object):
    def open_spider(self, spider):
        """
        爬虫运行时,执行的方法
        :param spider:
        :return:
        """
        self.file = open('tenc_wanted_2.json', 'w', encoding='utf-8')
        self.file_detail = open('tenc_wanted_detail.json', 'w', encoding='utf-8')

    def process_item(self, item, spider):

        content = json.dumps(dict(item), ensure_ascii=False)

        # 判断数据来源于哪里(是哪个类的实例),写入对应的文件
        if isinstance(item, TencentItem):
            self.file.write(content + '\n')

        if isinstance(item, DetailsItem):
            self.file_detail.write(content + '\n')

        return item

    def close_spider(self, spider):
        """
        爬虫运行结束后执行的方法
        :param spider:
        :return:
        """
        self.file.close()
        self.file_detail.close()
5.运行结果


 浙公网安备 33010602011771号