
Android拖拽教程
开发环境:
Eclipse 3.7(Indigo) 、Java 1.6 和 Android 4.0(Ice Cream Sandwich) 前言:
Android 4.0 开始支持视图(Views)的拖拽。你需要在视图(View)上注册一个监听器(Listener),比如 OnTouchListener 或者 LongClickListener,并且需要定义一个视图(View)作为拖拽的目标视图对象,比如 拖放区(drop zones)。下面我们通过两段代码来学习一下。
第一段代码我们定义一个视图,你可以拖拽该视图,我们在该视图上使用setOnTouchListener方法注册了一个OnTouchListener事件。

2 findViewById(R.id.myimage1).setOnTouchListener(new MyTouchListener());
3
4 // This defines your touch listener
5 private final class MyTouchListener implements OnTouchListener {
6 public boolean onTouch(View view, MotionEvent motionEvent) {
7 if (motionEvent.getAction() == MotionEvent.ACTION_DOWN) {
8 ClipData data = ClipData.newPlainText("", "");
9 DragShadowBuilder shadowBuilder = new View.DragShadowBuilder(view);
10 view.startDrag(data, shadowBuilder, view, 0);
11 view.setVisibility(View.INVISIBLE);
12 return true;
13 } else {
14 return false;
15 }
16 }
17 }
上面的第 8 行代码,我们构造了一个 ClipData 对象,可以使用该对象来存放数据,并且该对象可以被处于拖放区(drop zones)的视图接收,即 ClipData 可用于视图拖拽前后数据的传递。第 9 行代码,DragShadowBuilder 允许你指定拖拽操作的效果,通常你直接在视图上进行拖拽操作。
第二段代码我们将定义一个拖放区(drag zone),你可以将定义好的视图拖拽到该视图上,我们在该拖放区视图上通过 setOnDragListener() 方法注册了一个 OnDragListener 监听器,在 OnDragListener 监听器中你可以定义相关的事件处理方法。
2
3 class MyDragListener implements OnDragListener {
4 Drawable enterShape = getResources().getDrawable(R.drawable.shape_droptarget);
5 Drawable normalShape = getResources().getDrawable(R.drawable.shape);
6
7 @Override
8 public boolean onDrag(View v, DragEvent event) {
9 int action = event.getAction();
10 switch (event.getAction()) {
11 case DragEvent.ACTION_DRAG_STARTED:
12 // Do nothing
13 break;
14 case DragEvent.ACTION_DRAG_ENTERED:
15 v.setBackgroundDrawable(enterShape);
16 break;
17 case DragEvent.ACTION_DRAG_EXITED:
18 v.setBackgroundDrawable(normalShape);
19 break;
20 case DragEvent.ACTION_DROP:
21 // Dropped, reassign View to ViewGroup
22 View view = (View) event.getLocalState();
23 ViewGroup owner = (ViewGroup) view.getParent();
24 owner.removeView(view);
25 LinearLayout container = (LinearLayout) v;
26 container.addView(view);
27 view.setVisibility(View.VISIBLE);
28 break;
29 case DragEvent.ACTION_DRAG_ENDED:
30 v.setBackgroundDrawable(normalShape);
31 default:
32 break;
33 }
34 return true;
35 }
36 }
教程实践
1. 创建一个新的 Android Project
-> project name: "de.vogella.android.draganddrop"
-> create activity: "DragActivity"
2. 在项目的res目录下创建一个 "drawable" 文件夹,在该文件夹中创建文件 "shape.xml"
<shape xmlns:android="http://schemas.android.com/apk/res/android"
android:shape="rectangle" >
<stroke
android:width="2dp"
android:color="#FFFFFFFF" />
<gradient
android:angle="225"
android:endColor="#DD2ECCFA"
android:startColor="#DD000000" />
<corners
android:bottomLeftRadius="7dp"
android:bottomRightRadius="7dp"
android:topLeftRadius="7dp"
android:topRightRadius="7dp" />
</shape>
3. 在 "drawable" 文件夹中创建文件 "shape_droptarget.xml"
<shape xmlns:android="http://schemas.android.com/apk/res/android"
android:shape="rectangle" >
<stroke
android:width="2dp"
android:color="#FFFF0000" />
<gradient
android:angle="225"
android:endColor="#DD2ECCFA"
android:startColor="#DD000000" />
<corners
android:bottomLeftRadius="7dp"
android:bottomRightRadius="7dp"
android:topLeftRadius="7dp"
android:topRightRadius="7dp" />
</shape>
4. 按照下面代码修改"res/layout/main.xml"文件
<GridLayout xmlns:android="http://schemas.android.com/apk/res/android"
android:layout_width="match_parent"
android:layout_height="match_parent"
android:columnCount="2"
android:columnWidth="300dp"
android:orientation="vertical"
android:rowCount="2"
android:stretchMode="columnWidth" >
<LinearLayout
android:id="@+id/topleft"
android:layout_width="160dp"
android:layout_height="200dp"
android:layout_column="0"
android:layout_row="0"
android:background="@drawable/shape" >
<ImageView
android:id="@+id/myimage1"
android:layout_width="wrap_content"
android:layout_height="wrap_content"
android:layout_column="0"
android:layout_row="0"
android:src="@drawable/ic_launcher" />
</LinearLayout>
<LinearLayout
android:id="@+id/topright"
android:layout_width="160dp"
android:layout_height="200dp"
android:layout_column="1"
android:layout_row="0"
android:background="@drawable/shape" >
<ImageView
android:id="@+id/myimage2"
android:layout_width="wrap_content"
android:layout_height="wrap_content"
android:layout_column="0"
android:layout_row="0"
android:src="@drawable/ic_launcher" />
</LinearLayout>
<LinearLayout
android:id="@+id/bottomleft"
android:layout_width="160dp"
android:layout_height="200dp"
android:layout_column="0"
android:layout_row="1"
android:background="@drawable/shape" >
<ImageView
android:id="@+id/myimage3"
android:layout_width="wrap_content"
android:layout_height="wrap_content"
android:src="@drawable/ic_launcher" />
</LinearLayout>
<LinearLayout
android:id="@+id/bottomright"
android:layout_width="160dp"
android:layout_height="200dp"
android:layout_column="1"
android:layout_row="1"
android:background="@drawable/shape" >
<ImageView
android:id="@+id/myimage4"
android:layout_width="wrap_content"
android:layout_height="wrap_content"
android:layout_column="0"
android:layout_row="0"
android:src="@drawable/ic_launcher" />
</LinearLayout>
</GridLayout>
5. 修改 Activity文件
import android.app.Activity;
import android.content.ClipData;
import android.graphics.drawable.Drawable;
import android.os.Bundle;
import android.view.DragEvent;
import android.view.MotionEvent;
import android.view.View;
import android.view.View.DragShadowBuilder;
import android.view.View.OnDragListener;
import android.view.View.OnTouchListener;
import android.view.ViewGroup;
import android.widget.LinearLayout;
public class DragActivity extends Activity {
/** Called when the activity is first created. */
@Override
public void onCreate(Bundle savedInstanceState) {
super.onCreate(savedInstanceState);
setContentView(R.layout.main);
findViewById(R.id.myimage1).setOnTouchListener(new MyTouchListener());
findViewById(R.id.myimage2).setOnTouchListener(new MyTouchListener());
findViewById(R.id.myimage3).setOnTouchListener(new MyTouchListener());
findViewById(R.id.myimage4).setOnTouchListener(new MyTouchListener());
findViewById(R.id.topleft).setOnDragListener(new MyDragListener());
findViewById(R.id.topright).setOnDragListener(new MyDragListener());
findViewById(R.id.bottomleft).setOnDragListener(new MyDragListener());
findViewById(R.id.bottomright).setOnDragListener(new MyDragListener());
}
private final class MyTouchListener implements OnTouchListener {
public boolean onTouch(View view, MotionEvent motionEvent) {
if (motionEvent.getAction() == MotionEvent.ACTION_DOWN) {
ClipData data = ClipData.newPlainText("", "");
DragShadowBuilder shadowBuilder = new View.DragShadowBuilder(view);
view.startDrag(data, shadowBuilder, view, 0);
view.setVisibility(View.INVISIBLE);
return true;
} else {
return false;
}
}
}
class MyDragListener implements OnDragListener {
Drawable enterShape = getResources().getDrawable(R.drawable.shape_droptarget);
Drawable normalShape = getResources().getDrawable(R.drawable.shape);
@Override
public boolean onDrag(View v, DragEvent event) {
int action = event.getAction();
switch (event.getAction()) {
case DragEvent.ACTION_DRAG_STARTED:
// Do nothing
break;
case DragEvent.ACTION_DRAG_ENTERED:
v.setBackgroundDrawable(enterShape);
break;
case DragEvent.ACTION_DRAG_EXITED:
v.setBackgroundDrawable(normalShape);
break;
case DragEvent.ACTION_DROP:
// Dropped, reassign View to ViewGroup
View view = (View) event.getLocalState();
ViewGroup owner = (ViewGroup) view.getParent();
owner.removeView(view);
LinearLayout container = (LinearLayout) v;
container.addView(view);
view.setVisibility(View.VISIBLE);
break;
case DragEvent.ACTION_DRAG_ENDED:
v.setBackgroundDrawable(normalShape);
default:
break;
}
return true;
}
}
}
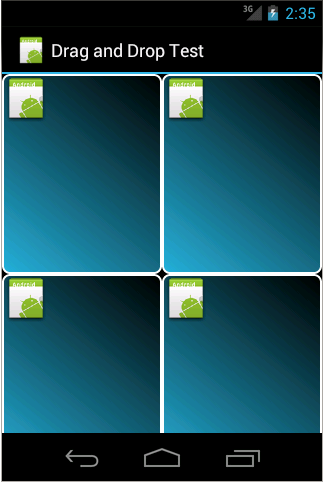
6. 启动你创建的Activity,你就可以拖拽 ImageViews 到另一个容器里面。
参考链接:
作者:Work Hard Work Smart
出处:http://www.cnblogs.com/linlf03/
欢迎任何形式的转载,未经作者同意,请保留此段声明!

 浙公网安备 33010602011771号