嘉立创地阔星STM32F103C8T6 arduino ch340串口烧录
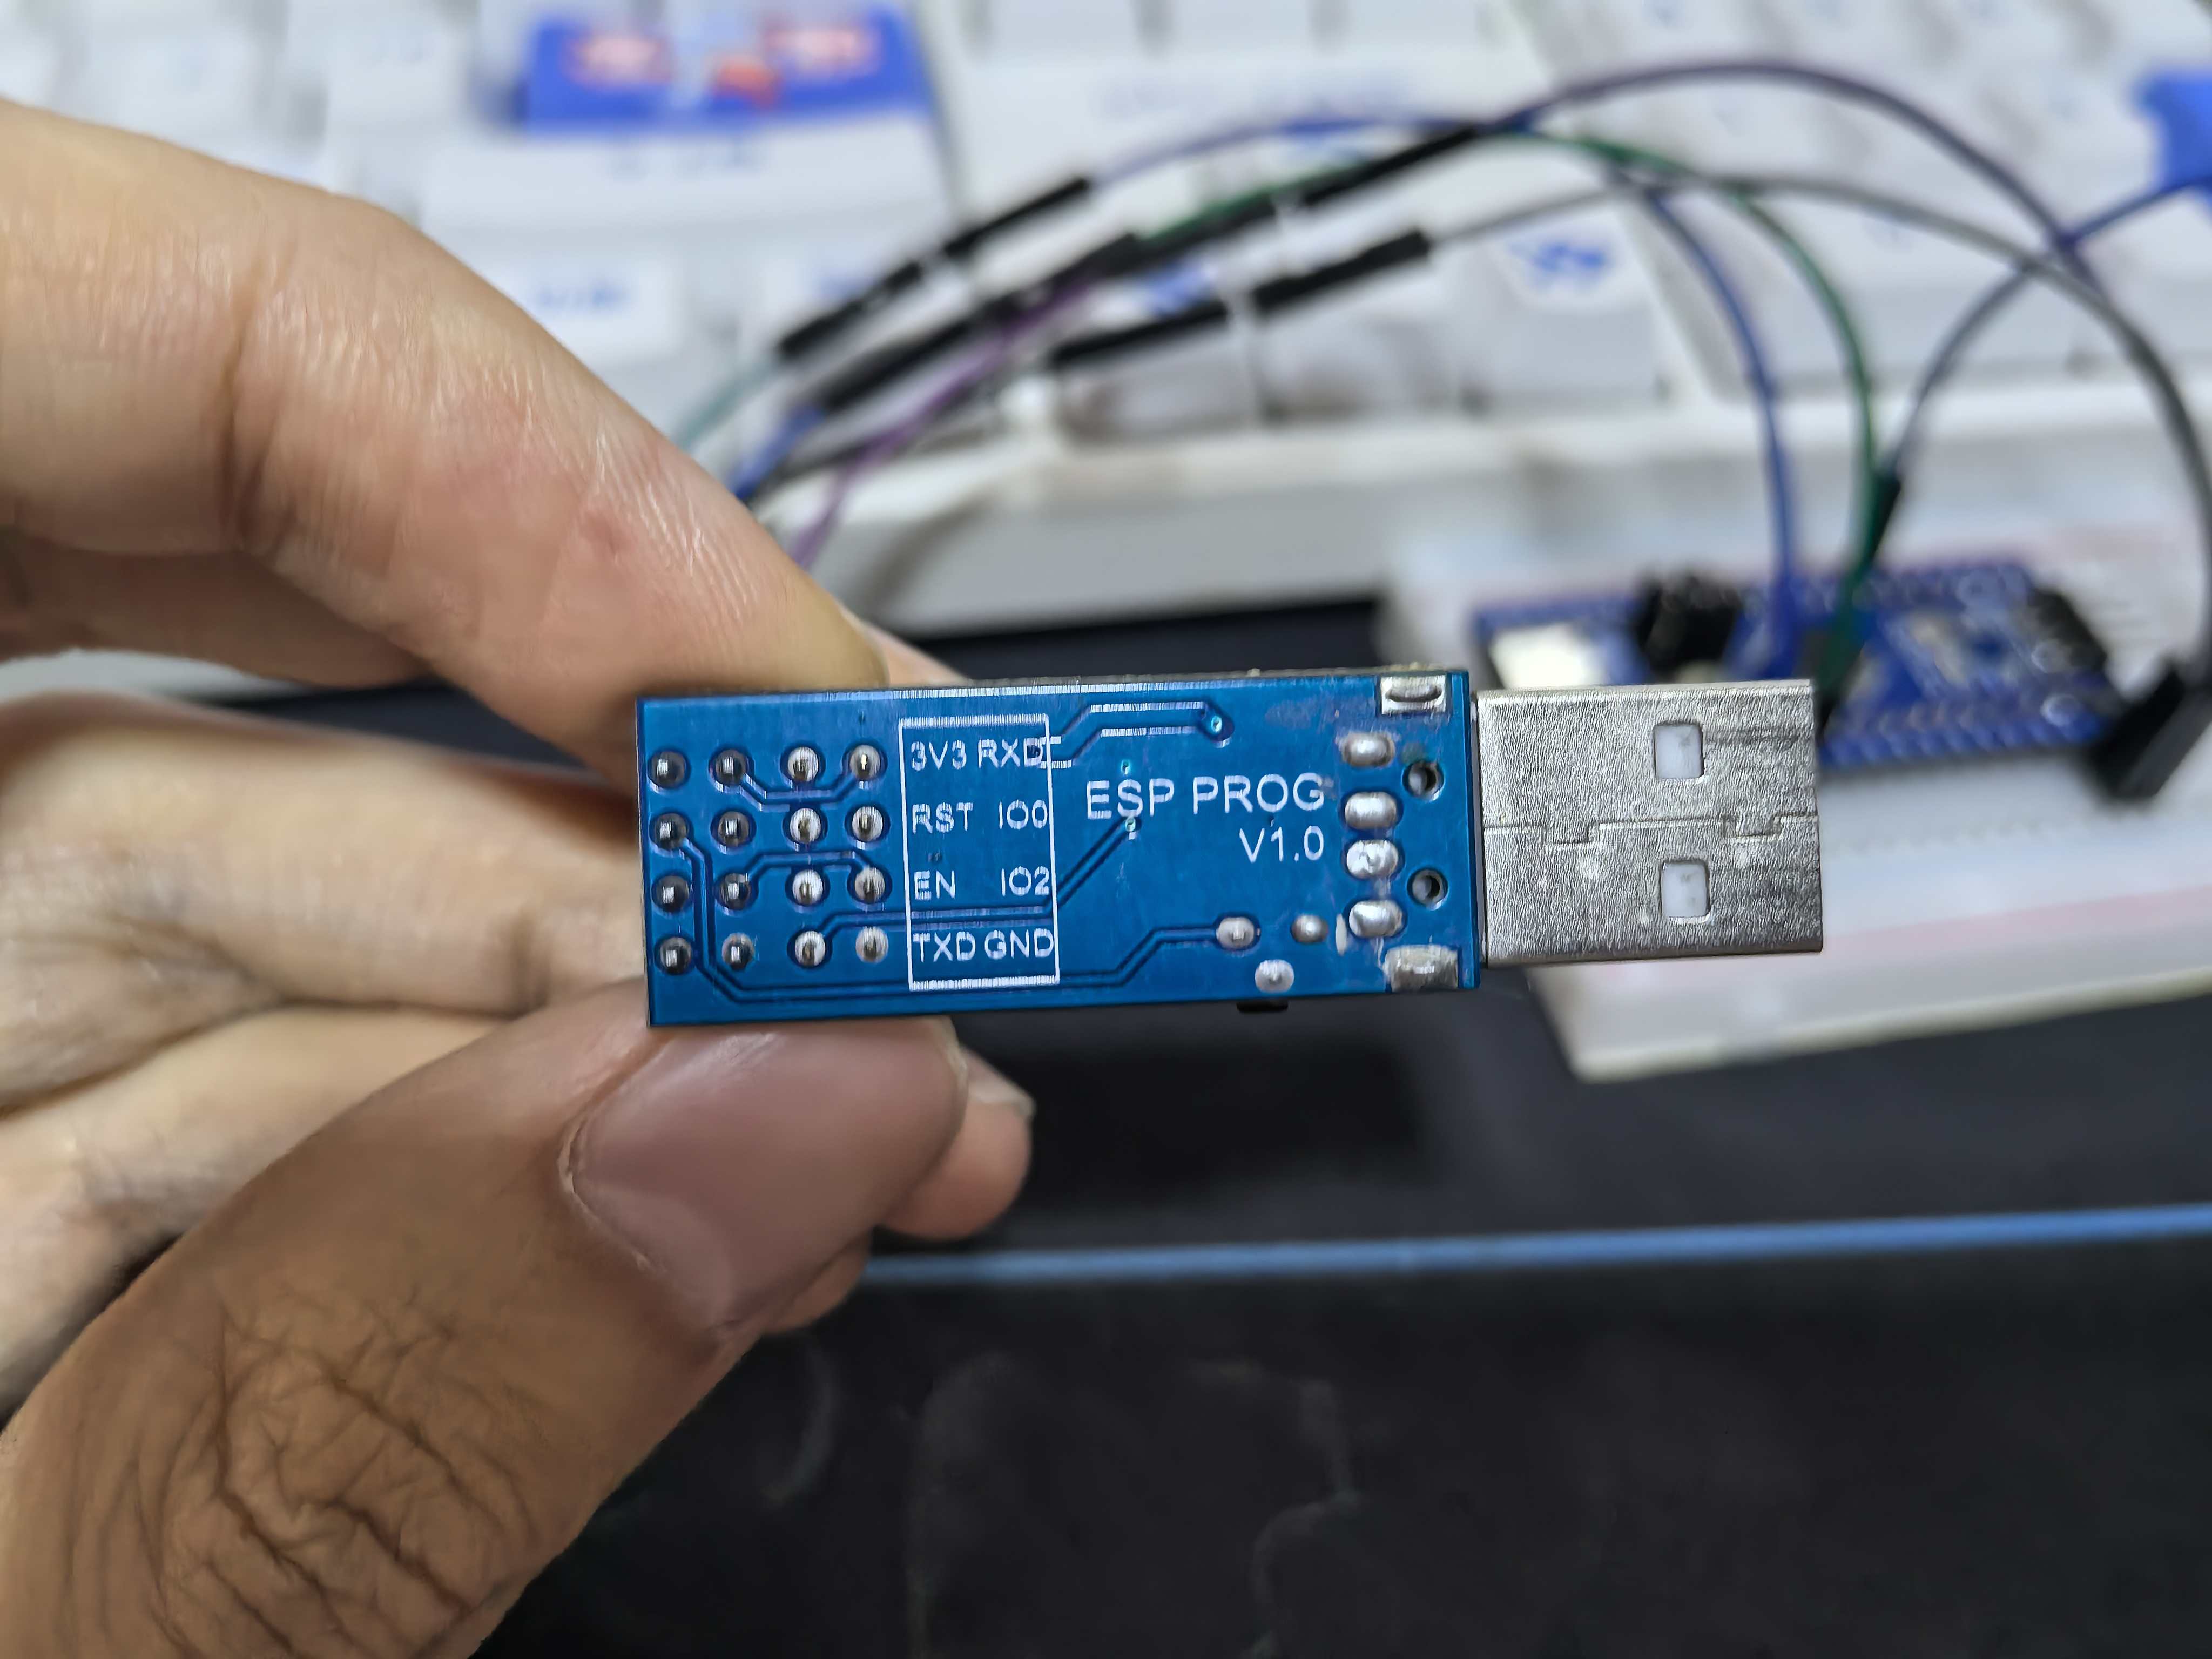
因为手里面有一个ESP-01S的下载器,芯片是CH340的,想着应该能用的话,就暂时不用买ST-LINK或USB转TTL模块了。
烧录时老是忘记细节,每次遇到报错都要排查一遍,特别麻烦,特此记录一下烧录前的检查项。
Sketch uses 14200 bytes (21%) of program storage space. Maximum is 65536 bytes.
Global variables use 2184 bytes (10%) of dynamic memory, leaving 18296 bytes for local variables. Maximum is 20480 bytes.
maple_loader v0.1
Resetting to bootloader via DTR pulse
#
# A fatal error has been detected by the Java Runtime Environment:
#
#  EXCEPTION_ACCESS_VIOLATION (0xc0000005) at pc=0x000000007110b5db, pid=38372, tid=0x0000000000008198
#
# JRE version: Java(TM) SE Runtime Environment (8.0_451) (build 1.8.0_451-b10)
# Java VM: Java HotSpot(TM) 64-Bit Server VM (25.451-b10 mixed mode windows-amd64 compressed oops)
# Problematic frame:
# C  [jSSC-2.8_x86_64.dll+0xb5db]
#
# Failed to write core dump. Minidumps are not enabled by default on client versions of Windows
#
# An error report file with more information is saved as:
# C:\Users\alpha\AppData\Local\Arduino15\packages\stm32duino\tools\stm32tools\2022.9.26\win\hs_err_pid38372.log
#
# If you would like to submit a bug report, please visit:
#   http://bugreport.java.com/bugreport/crash.jsp
# The crash happened outside the Java Virtual Machine in native code.
# See problematic frame for where to report the bug.
#
物料清单
嘉立创地阔星开发板STM32F103C8T6
CH340烧录(我这里用的是ESP-01S的下载器)

检查项一
连线
| STM32F103C8T6 | CH340 |
| 3V3 | 3V3 |
| GND | GND |
| A09 (TX) | TXD |
| A10 (RX) | RXD |
引脚图

检查项二
跳线帽如下
| BT1 | 0 |
| BT0 | 1 |

检查项三
打开STM32CubeProgrammer测试连接。
先选UART;再选Port;最后点connect。如果连接成功,可以关掉STM32CubeProgrammer,防止端口占用。
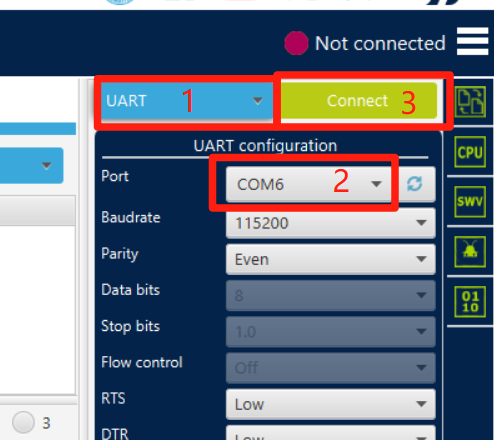
连接成功如图所示:

检查项四
打开Arduino,检查开发板烧录配置,upload method修改为"Serial"。

烧录成功

附上测试代码
/*
 * Test program for the STM32F103C8T6
 */
#include "Arduino.h"

int counter = 0;
// const int PA1 = 11;
// const int PA3 = 13;

void setup() {
  Serial.begin(9600);
  Serial.println("Hello, World!");
  pinMode(PA3, OUTPUT);
  pinMode(PA1, OUTPUT);
}

void loop() {
  Serial.println("Hello, World!!!" + String(counter));
  counter++;
  delay(1000);
  digitalWrite(PA3, HIGH);
  digitalWrite(PA1, HIGH);
  delay(1000);
  digitalWrite(PA3, LOW);
  digitalWrite(PA1, LOW);
  delay(1000);
}

 浙公网安备 33010602011771号