
google支付回调验证
原文链接: https://my.oschina.net/lemonzone2010/blog/398736
Google支付问题
20150218,挂机的日本服务器出现google支付被刷单现象,虽然目前进行的修补,但是这个问题并没有完全从根源上解决。并且公司以前的GooglePlay支付也有不完善的地方,在SDK端给支付回调发送支付信息后,支付回调程序没有调用Google API进行订单验证。因此Google支付流程需要进行完善。
Google支付解决方案
上面的支付问题,Google有自己的解决方案,就是根据订单号去向Google API发送验证申请,Google API会返回订单相关信息。可以根据这个信息和SDK返回的信息进行对比验证。
对于申请Google账号之类的流程,相信运营已经很清楚了,但是使用Google API还需要使用Google Developer Console创建Web Application账户,而后获取到client_id、client_secret、refresh_token。具体流程见下面:
1. 登陆 Google Developer Console ,地址:https://code.google.com/apis/console/
2. 在APIs & auth 项中找到 Credentials ,点击创建一个auth2.0 的web 应用
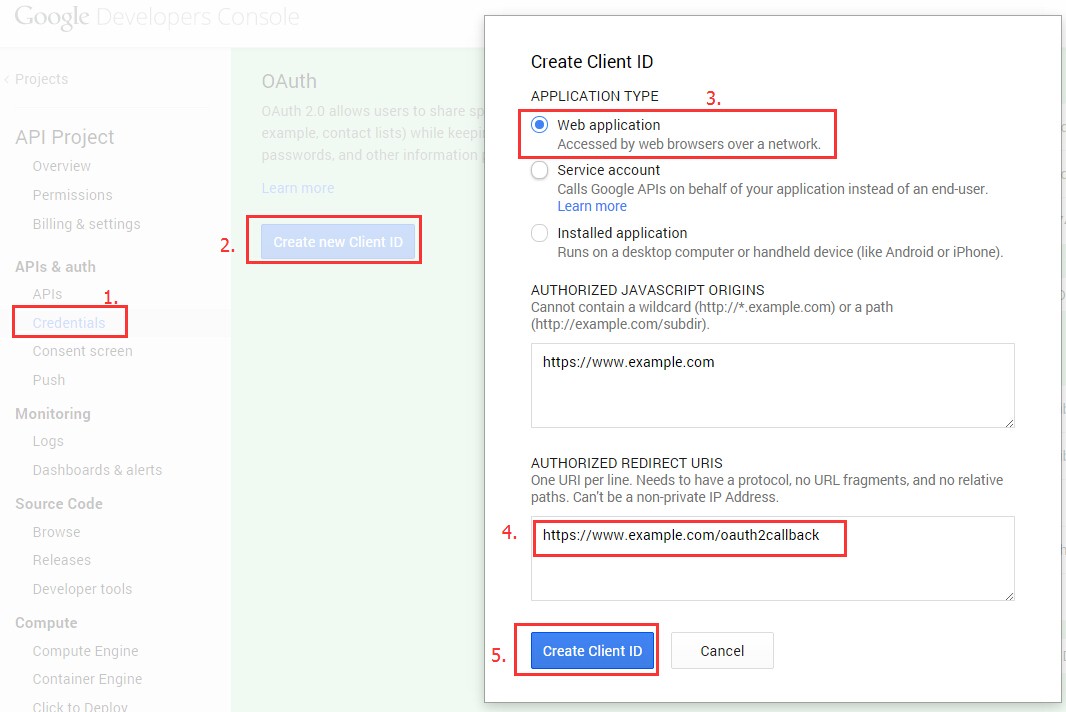
其中4的地址一定是 可用域名 + /oauth2callback
创建完后,可以获得,client_id, client_secret, redirect_url
3. 获取Authorization code
google中心在登陆状态,打开新页面输入如下地址:
https://accounts.google.com/o/oauth2/auth?scope=https://www.googleapis.com/auth/androidpublisher&response_type=code&access_type=offline&redirect_uri={REDIRECT_URIS}&client_id={CLIENT_ID}
将蓝色部分根据相应的值进行替换;
这时会提示你是否要授权,点击授权,url地址栏会自动跳转,之后会获得code例如:https://www.example.com/oauth2callback?code=4/CpVOd8CljO_gxTRE1M5jtwEFwf8gRD44vrmKNDi4GSS.kr-GHuseD-oZEnp6UADFXm0E0MD3FlAI
4. 利用code获取refresh_token, 这里需要post请求
请求地址:https://accounts.google.com/o/oauth2/token
请求参数:code, client_id, client_secret, redirect_uri, grant_type
其中 grant_type 值为 authorization_code
第一次发起请求得到的JSON字符串如下所示,以后再请求将不再出现refresh_token(长令牌,一般不会失效),需要保存好refresh_token,可以存放到配置文件(或者写到数据库),以备后用。
expires_in是指access_token的时效,为3600秒
{
"access_token": "ya29.3gC2jw5vm77YPkylq0H5sPJeJJDHX93Kq8qZHRJaMlknwJ85595eMogL300XKDOEI7zIsdeFEPY6zg",
"token_type": "Bearer",
"expires_in": 3600,
"refresh_token": "1/FbQD448CdDPfDEDpCy4gj_m3WDr_M0U5WupquXL_o"
}
在获取到client_id、client_secret、refresh_token后,我们的支付回调程序就可以使用订单号去请求Google Api进行验证。
Google支付回调验证流程
通过上一步获取到client_id、client_secret、refresh_token之后,支付回调程序就可以调用google api进行支付验证。具体流程如下:
1. 获取access_token。
请求地址:https://accounts.google.com/o/oauth2/token请求方式:post请求参数:client_id, client_secret, refresh_toke, grant_typegrant_type 值固定为 refresh_token返回:json
Using the refresh token
Each access token is only valid for a short time. Once the current access token expires, the server will need to use the refresh token to get a new one. To do this, send a POST request to https://accounts.google.com/o/oauth2/tokenwith the following fields set:
grant_type=refresh_token
client_id=<the client ID token created in the APIs Console>
client_secret=<the client secret corresponding to the client ID>
refresh_token=<the refresh token from the previous step>
A successful response will contain another access token:
{
  "access_token" : "ya29.AHES3ZQ_MbZCwac9TBWIbjW5ilJkXvLTeSl530Na2",
  "token_type" : "Bearer",
  "expires_in" : 3600,
}
The refresh token thus allows a web server continual access to the API without requiring an active login to a Google account.
2. 通过获得access_token 就可以请求谷歌的 API 接口,获得订单状态
在这里我所需要获取的是我在应用内给GooglePlay支付的购买信息,此类信息包含以下几个属性:(可参考Google Play Developer API下的Purchases.products)
A ProductPurchase resource indicates the status of a user's inapp product purchase.
请求接口:https://www.googleapis.com/androidpublisher/v2/applications/packageName/purchases/products/productId/tokens/purchaseToken?access_token=access_token
| packageName | The package name of the application the inapp product was sold in (for example, 'com.some.thing'). | |
| productId |
The inapp product SKU (for example, 'com.some.thing.inapp1'). |
|
| purchaseToken | The token provided to the user's device when the inapp product was purchased. 就是订单中purchaseToken |
返回数据
{
  "kind": "androidpublisher#productPurchase",
  "purchaseTimeMillis": long,
  "purchaseState": integer,
  "consumptionState": integer,
  "developerPayload": string
}
| consumptionState | integer | The consumption state of the inapp product. Possible values are:
|
|
| developerPayload | string | A developer-specified string that contains supplemental information about an order. | |
| kind | string | This kind represents an inappPurchase object in the androidpublisher service. | |
| purchaseState | integer | The purchase state of the order. Possible values are:
|
|
| purchaseTimeMillis | long | The time the product was purchased, in milliseconds since the epoch (Jan 1, 1970). |
到此支付验证完成!
参考文档:
http://blog.csdn.net/hjun01/article/details/42032841
调用接口遇到的几个问题:
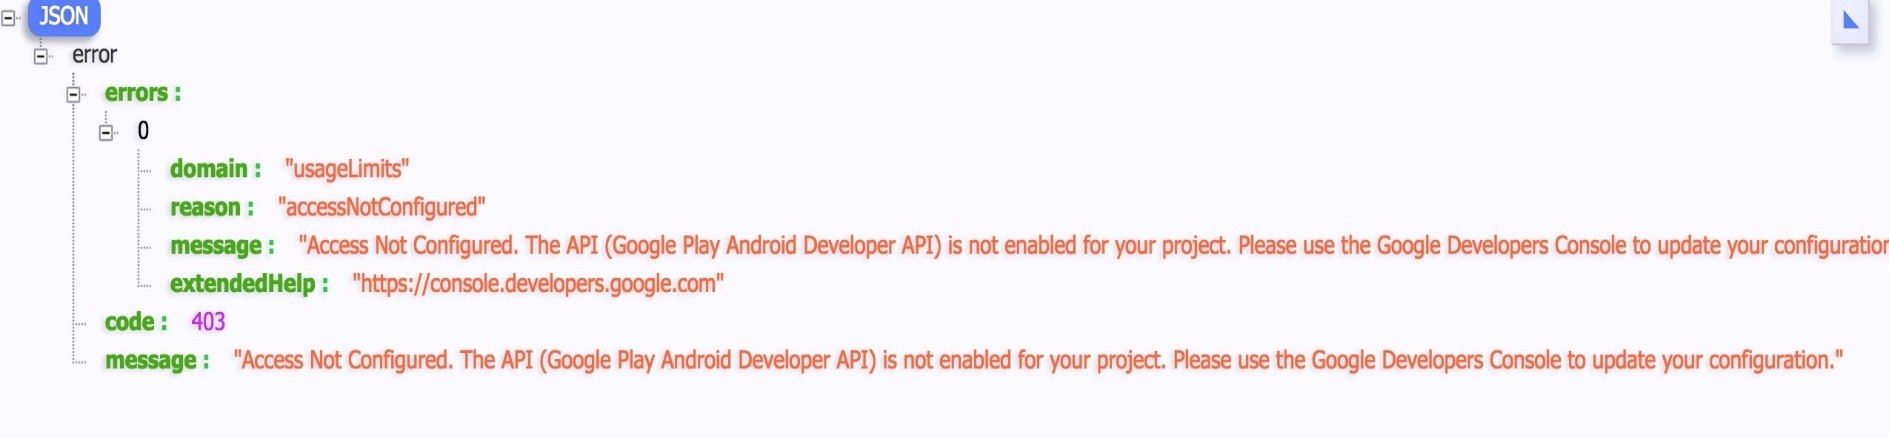
1. Access Not Configured.
{
"error": {
"errors": [
{
"domain": "usageLimits",
"reason": "accessNotConfigured",
"message": "Access Not Configured. The API(Google Play Android Developer API)is not enabled for you project.Please use Google Developers Console to update your configuration."
}
],
"code": 403,
"message": "Access Not Configured. The API(Google Play Android Developer API)is not enabled for you project.Please use Google Developers Console to update your configuration."
}
}
在这个页面: https://console.developers.google.com
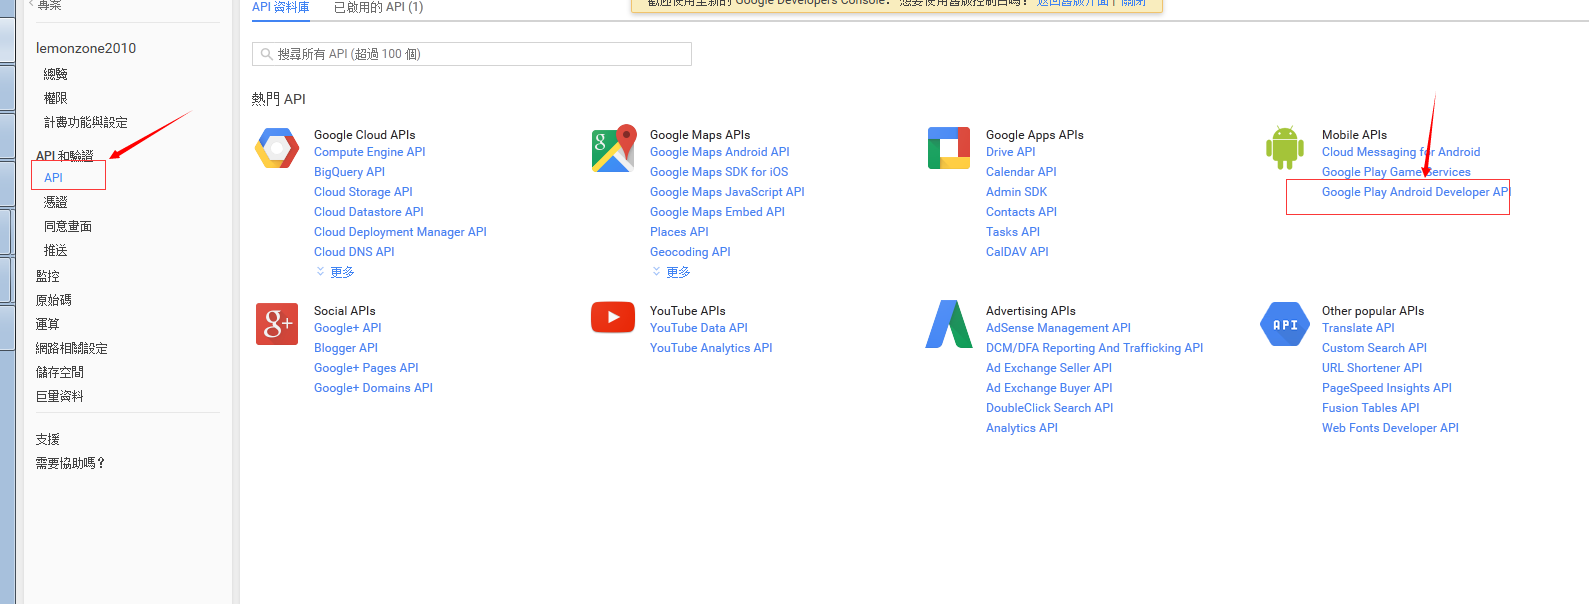
Google Developer Console
1. "Google Developer Console" > "APIs & Auth" subcategory "APIs" > (api list) "Google Play Android Developer API". Set "STATUS" to "ON".
2. "APIs & auth" subcategory "Credentials" > "Create new Client ID". Choose "Service account" and create the id.
3. You should get a P12 key from the browser.
问题2: projectNotLinked
{
"error": {
"errors": [
{
"domain": "androidpublisher",
"reason": "projectNotLinked",
"message": "The project id used to call the Google Play Developer API has not been linked in the Google Play Developer Console."
}
],
"code": 403,
"message": "The project id used to call the Google Play Developer API has not been linked in the Google Play Developer Console."
}
}
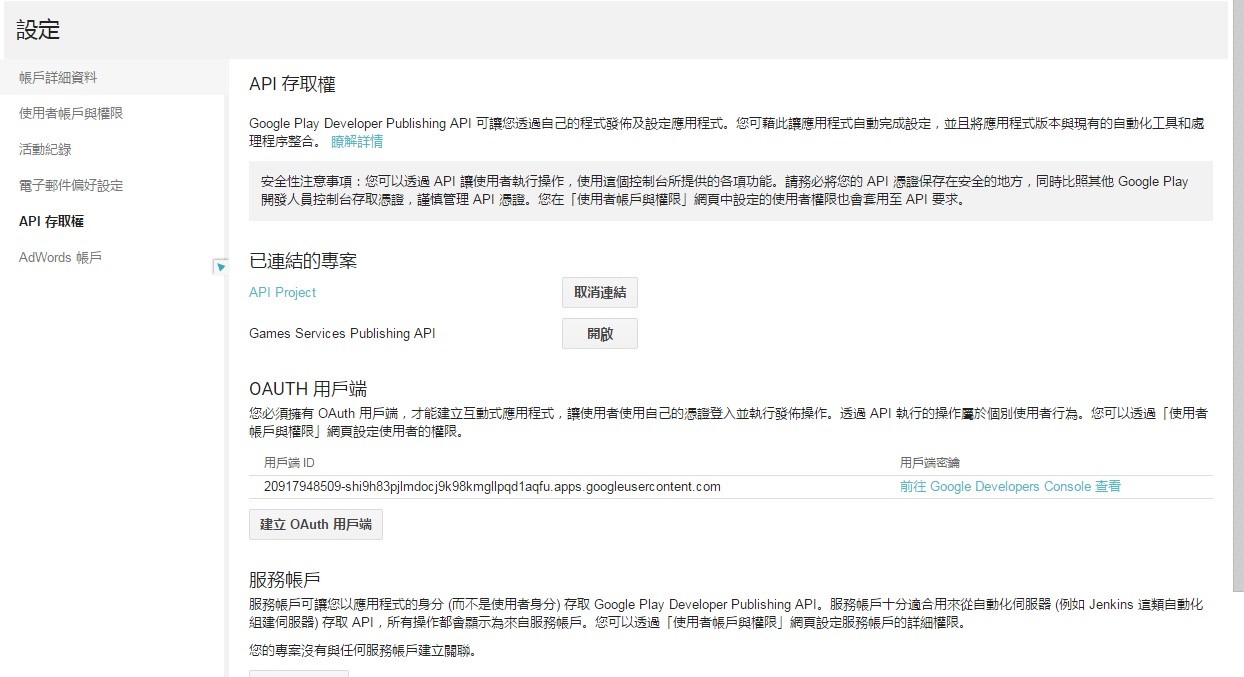
在这个页设置关联:https://play.google.com/apps/publish/
Google Play Developer Console
1. "Google Play Developer Console" > "Settings" > subcategory "API access".
2. Make a link to your "Linked Project".
3. "Service Account" place maybe already showing ur "Service account" CLIENT ID which made "google developer console".
posted on 2017-02-09 10:02 Sun‘刺眼的博客 阅读(12129) 评论(1) 编辑 收藏 举报


