
Win10上使用Linux Subsystem配置cuckoo sandbox
Cuckoo是一款监控函数调用,监控文件读写,监控注册表读写等的自动化恶意分析软件。
包括apk、exe、pdf等多种文件的分析,将任务提交给数据库,host从数据库中读取任务,将样本放入虚拟机中运行,返回报告文件..
目前我只完成对于exe部分的源码阅读、调试和使用,推荐一下。
感谢这个作者的文章,真的就很方便快捷去配置环境了。这里来记录一下配置和使用的方法:
一、部署Windows Subsystem for Linux
跟着官方文档的步骤进行安装 https://msdn.microsoft.com/en-us/commandline/wsl/install_guide
1.打开PowerShell,输入下面命令启用该功能,重启
Enable-WindowsOptionalFeature -Online -FeatureName Microsoft-Windows-Subsystem-Linux2.在应用商店中安装一个linux应用,我装的是ubuntu
3.在ubuntu的命令窗口中进行安装下面的模块,win7系统中我直接安装的mongodb,但是目前实验的还不能正确使用网页模式(https://www.cnblogs.com/xuanmanstein/p/7991589.html)
# Get latest updates
$ sudo apt-get update
$ sudo apt-get upgrade
# Install LAMP server
$ sudo apt-get install lamp-server^
# Install MongoDB
$ sudo apt-get install mongodb
# Run Apache, MySQL and MongoDB
$ sudo service apache2 start
$ sudo service mysql start
$ sudo service mongodb start
我安装的时候在apache2和mysql开启的时候报错,但不影响主要功能。
二、安装cuckoo
我是用的python版本是2.7.12
1.cmd输入命令 pip install cuckoo, 开始安装cuckoo(在windows7上也可以安装),这个命令会安装cuckoo的必须库,如果某一个失败了,可以继续执行pip install cuckoo
2.cmd输入命令cuckoo init,然后在%USERPROFILE%\.cuckoo (C:\Users\<username>\.cuckoo)路径下就会生成一个.cuckoo文件夹,我们可以在这个里面进行虚拟机配置和查看分析后的文件。
3.cmd输入命令 cuckoo community,下载特征库文件
4.cmd输入命令 cuckoo -d 开始分析,这种方式的结果只有json比较详细,生成的html很简略,安装了mongodb的情况下可以使用 cuckoo web runserver命令,使用网页进行提交和查看详细的分析结果。
5.cmd输入命令cuckoo submit path,可以提交样本。安装了mongodb的情况下可以在网页中直接提交。
6.Yaya:http://yara.readthedocs.io/en/v3.4.0/gettingstarted.html#installing-on-windows
7.Volatility:
C:\> pip install distorm3
C:\> pip install pycrypto
C:\> pip install volatility
8.MySQL
C:\> easy_install mysql-python
三、主机配置
1.%USERPROFILE%\.cuckoo (C:\Users\<username>\.cuckoo)路径下找到conf文件,修改里面的配置文件
cuckoo.conf
[database]
connection = mysql://cuckoo:cuckoo@127.0.0.1/cuckoo
# NOTE: I created a MySQL user 'cuckoo' with 'cuckoo' as the password and a database name of 'cuckoo'
# 我暂时没使用这个功能


auxillary.conf
[sniffer]
enabled = yes
tcpdump = c:\tools\tcpdump\tcpdump.exe
# NOTE: the location path depends on where you installed windump.exe. And I renamed windump.exe to tcpdump.exe

vmware.conf
[vmware]
# Specify which Vmware Workstation mode you want to run your machines on.
# Can be "gui" or "nogui". Refer to VMware's official
# documentation to understand the differences.
mode = gui

# Path to the local installation of the vmrun utility.
path = D:\VMware\vmrun.exe

# Specify a comma-separated list of available machines to be used. For each
# specified ID you have to define a dedicated section containing the details
# on the respective machine. (E.g. cuckoo1,cuckoo2,cuckoo3)
machines = cuckoo1

[cuckoo1]
# Specify the path to vmx file of this virtual machine.
vmx_path = C:\VM\Windows 7 x64\Windows 7 x64.vmx

# Specify the snapshot name to use.
snapshot = cuckoo

# Specify the operating system platform used by current machine
# [windows/darwin/linux].
platform = windows

# Specify the IP address of the current virtual machine. Make sure that the
# IP address is valid and that the host machine is able to reach it. If not,
# the analysis will fail.
ip = 192.168.56.128


reporting.conf
[mongodb]
enabled = yes
2.windump: https://www.winpcap.org/windump/install/default.htm,cuckoo中的C:⧵Python27⧵Lib⧵site-packages⧵cuckoo⧵auxiliary⧵sniffer.py文件使用windump分析结果,这个文件可以稍作一下修改适配windows
下面增加了一个 '\r'和tcpdump.exe的路径
for line in err.split("\r\n"):
if not line continue or line.startswith(err_whitelist_start):
continue
err_whitelist_start = (
"tcpdump: listening on ",
"c:\\tools\\tcpdump\\tcpdump.exe: listening on ",
)
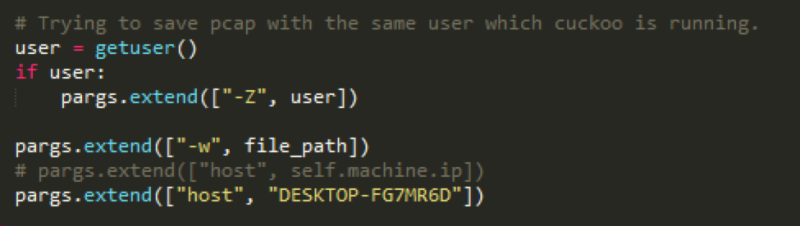
3.cuckoo的配置是仅主机模式,可以修改下面的host,使用主机名来进行通信,使用NAT网络,来抓捕网络事件。
四、客户机
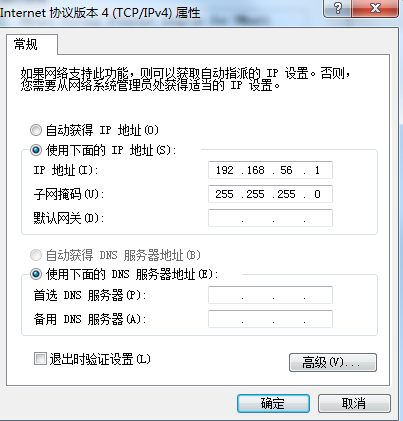
1.我使用的vmware,还是仅主机模式,首先配置host的Ip,在主机中将VMnet1配置位192.168.56.1

2.虚拟机中安装python,安装pillow库(使用NAT模式)
pip install pillow
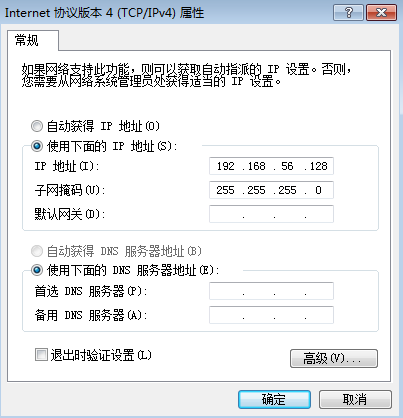
3.虚拟机中配置静态Ip:192.168.56.128(选择自定义的VMnet1网络,配置静态IP)
4.将%USERPROFILE%\.cuckoo (C:\Users\<username>\.cuckoo)路径下的agent文件拷贝到虚拟机中,运行,保存镜像
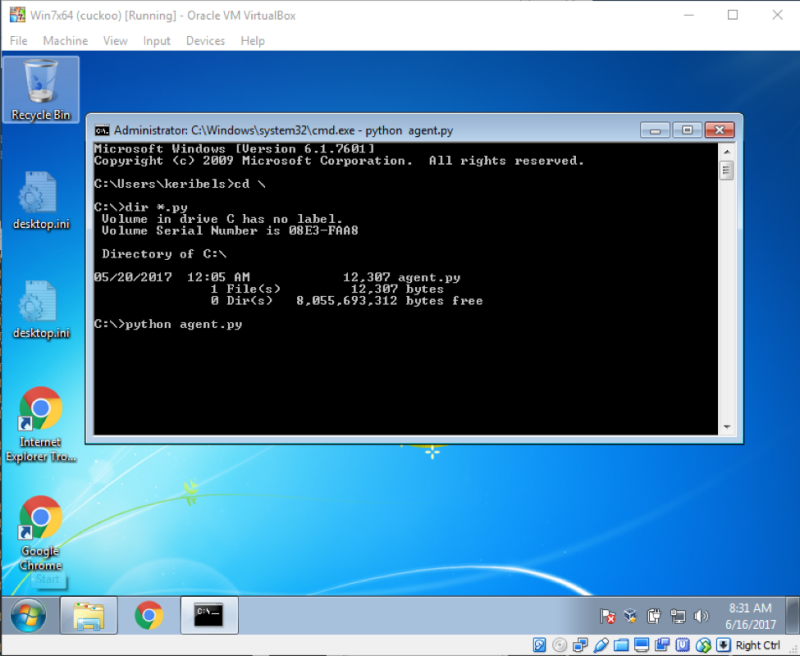
现在就可以用第二步中的cuckoo -d 或 cuckoo web runserver来等待任务进行分析了。
五、遇到的问题
1.在reporting.conf中开启HTML和PDF保存,PDF需要weasyprint库,这个库需要依赖其他文件
This was solved for me by installing the following dependencies on Ubuntu:
sudo apt-get install libpango1.0-0
sudo apt-get install libcairo2
sudo apt-get install libpq-dev
Check out the dependencies at the link:
http://weasyprint.readthedocs.io/en/latest/install.html
2.虚拟机需要关闭防火墙,关闭自动升级,关闭UAC,否则可能遇到问题
六、测试
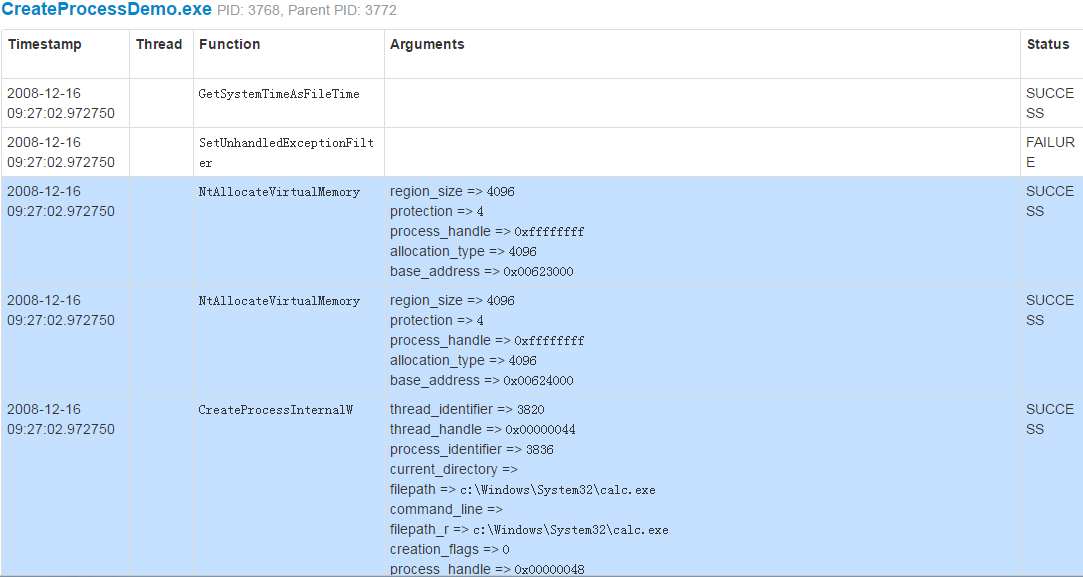
自己造了一个程序,createprocess 函数 启动calc
分析结果可以设置为json、html等,我设置为html,比较方便查看
分析结果包括静态文件:
包括文件的基本信息、导入表信息、节表信息

注册表操作
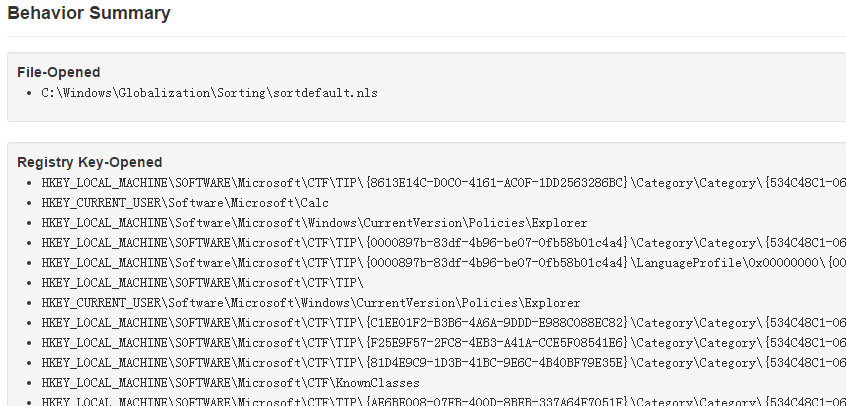
最后是函数的调用行为: 很清楚的记录了函数调用
在使用和研究中也遇到一系列问题,希望大家能共同学习,一起探讨。

 浙公网安备 33010602011771号