Web Services Software Factory tutorial (2 of 5)
If you have missed part one of this tutorial, you can find it here. You will need to have completed the first part of the tutorial in order to complete this one. In this part you will create the data contracts for this service, the business entities, and the translators to go between them. Just like with classic web services, your data contracts and business entities are essentially different objects as far as .Net is concerned, so you have to create something to map their properties to one another. To get started, you need to have the project loaded up.
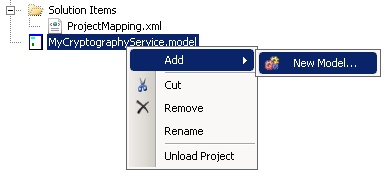
Right click on the MyCryptographyService.model project and select Add –> New Model
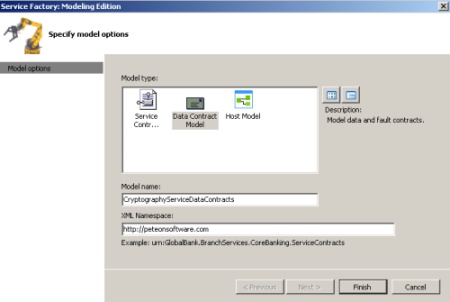
Opt to create a new “Data Contract Model”. Fill in the Mode name as CryptographyService.DataContracts and the XML Namespace as http://peteonsoftware.com (or whatever you’d like).
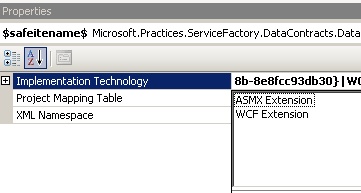
You should now have a blank visual designer canvas. Click on the canvas and then view your Properties window (you can’t right click and get properties). Click in the “Implementation Technology” property and choose “WCF Extension”.
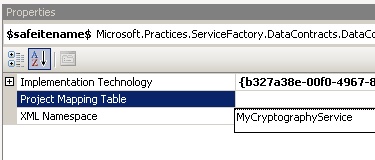
You also need to choose the Project Mapping table for the contracts. This is the XML document (found by default in ProjectMapping.xml) that tells the WSSF which role each project will play and where to auto generate the code. This file can be edited and changes are not overwritten. Set the Project Mapping Table property to MyCryptographyService.
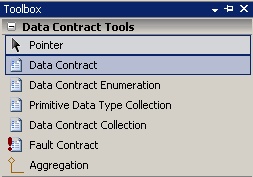
Your toolbox will give you context sensitive tools depending on what part of the project that you are working on. While building data contracts, you will see the tools shown below. A Data Contract represents your serializable objects. The Data Contract Enumeration represents your serializable enumerations. Primitive Data Type Collections and Data Contract Collections represent collections of .Net Data Types and your own custom contracts respectively. You can choose what form these collections take, but most often, I could recommend List
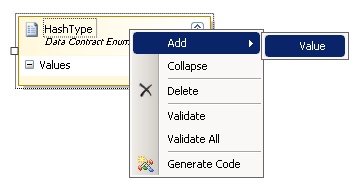
Next you need to drag a “Data Contract Enumeration” out of your toolbox and onto the visual designer. Click the name on the top (most likely DataContractEnum1) and change its name to HashType. Right click on the contract and choose Add–>Value. Add values of MD5 and SHA256 to the enumeration.
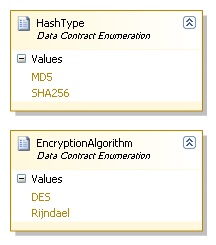
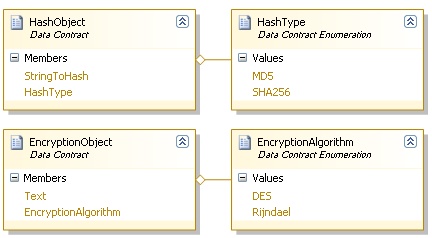
Drag another Data Contract Enumeration onto the surface and name it EncryptionAlgorithm. Add two values, called DES and Rijndael to the enumeration. When you are finished, your surface should look something like this.
Now, drag a “Data Contract” from the toolbox onto the designer. Change its name to HashObject in the same way that you renamed the enumeration. Right click on the contract and select Add–>Primitive Data Type. Name this property “StringToHash”.

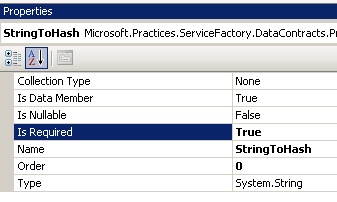
Let’s now take a look at the properties of this Primitive Data Type that you just added. It has a type of System.String and an order of 0. For any future Primitive Data Types you add, you may need to change the data type here. You also need to set the order here, as well. For now, we can accept the defaults.
Now, select the Aggregation tool from the toolbox and click on the HashType enumeration, hold down your mouse button, and drag the connection over to the HashObject. This will create a new member on the contract. Set its order to 1.
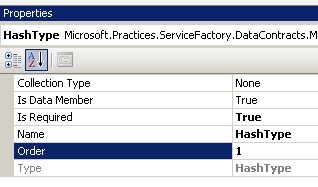
Your HashObject and HashType should look like this on the designer.

You should also create an EncryptionObject by dragging another “Data Contract” onto the designer and setting a Text member and an EncryptionType member in the exact same manner as you did with the Hash Object. When you are finished, you should have these four entities on your designer.
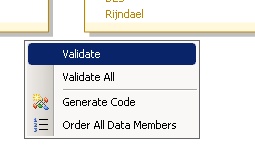
Right click on any area of whitespace on the designer and click “Validate”. You should have no errors. If you do, make sure that you properly followed all of the steps in this tutorial.
Next, right click on some whitespace again and click “Generate Code”.
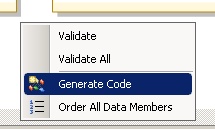
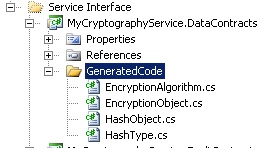
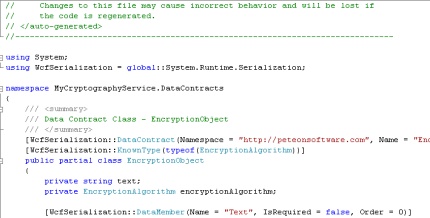
If you inspect your MyCryptographyService.DataContracts project’s “Generated Code” folder you will find that some classes have been generated for you. Keep in mind that whenever you make changes to your data contracts, you must regenerate the code and these classes will be overwritten. Fortunately, these classes are created as partial classes, so you can make another .cs file and extend these contracts if you really need to.
Right click on the project MyCryptographyService.BusinessEntities and choose Add–>Class. Name the .cs file CryptographicEntities.cs. Inside this file, we will define all of our business entities that the data contracts model so that they can be used elsewhere in our solution. Normally, you would define each of these in their own file, or group them in some other way, but for the purposes of this tutorial we will put all of the code in this file. Replace all of the contents of CryptographicEntities.cs (except the using statements) with the following code.
namespace MyCryptographyService.BusinessEntities
{
public enum EncryptionAlgorithm
{
DES = 0,
Rijndael = 1
}
public enum HashType
{
MD5 = 0,
SHA256 = 1
}
public class EncryptionObject
{
public string Text { get; set; }
public EncryptionAlgorithm EncryptionAlgorithm { get; set; }
}
public class HashObject
{
public string StringToHash { get; set; }
public HashType HashType { get; set; }
}
}
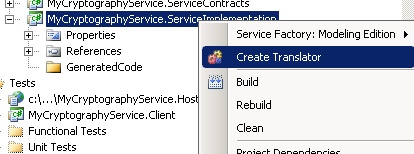
Now, right click on the MyCryptographyService.ServiceImplemenation project and choose “Create Translator”.
In the First Class to map, choose the DataContracts.EncryptionObject. For the Second Class to map, choose the BusinessEntities.EncryptionObject. Name the mapping class “EncryptionObjectTranslator” and set the namespace to MyCryptographyService.ServiceImplementation.
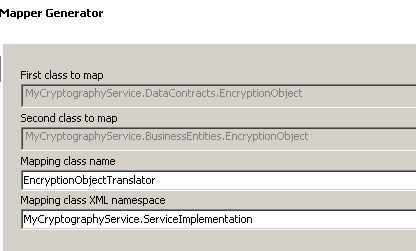
Choose the Text Property in each of the boxes and click map. Then click finish. You can’t map the enumerations from this dialog and will have to edit the code manually. As long as you don’t regenerate this translator, you don’t have to worry about overwriting the manual changes. In fact, I recommend doing this once to get your guidelines and maintaining it manually anyway.
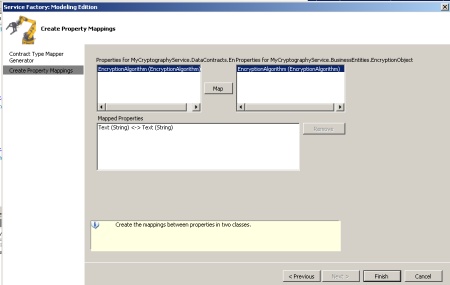
Repeat this process for our HashObjects. Name the translator HashObjectTranslator and only use the wizard to map the StringToHash properties. Next, open up the translators and make the code look like the following: (Note, I aliased the namespaces to make them shorter and easier to work with).
HashObjectTranslator:
using System;
using MyCryptographyService.DataContracts;
using MyCryptographyService.BusinessEntities;
using Contract = MyCryptographyService.DataContracts;
using Entity = MyCryptographyService.BusinessEntities;
namespace MyCryptographyService.ServiceImplementation
{
public static class HashObjectTranslator
{
public static Contract.HashObject TranslateHashObjectToHashObject(
Entity.HashObject from)
{
Contract.HashObject to =
new Contract.HashObject();
to.StringToHash = from.StringToHash;
to.HashType =
(Contract.HashType)from.HashType;
return to;
}
public static Entity.HashObject TranslateHashObjectToHashObject(
Contract.HashObject from)
{
Entity.HashObject to = new Entity.HashObject();
to.StringToHash = from.StringToHash;
to.HashType = (Entity.HashType)from.HashType;
return to;
}
}
}
EncryptionObjectTranslator:
using System;
using MyCryptographyService.DataContracts;
using MyCryptographyService.BusinessEntities;
using Contract = MyCryptographyService.DataContracts;
using Entity = MyCryptographyService.BusinessEntities;
namespace MyCryptographyService.ServiceImplementation
{
public static class EncryptionObjectTranslator
{
public static Contract.EncryptionObject TranslateEncryptionObjectToEncryptionObject(
Entity.EncryptionObject from)
{
Contract.EncryptionObject to =
new Contract.EncryptionObject();
to.Text = from.Text;
to.EncryptionAlgorithm =
(Contract.EncryptionAlgorithm)from.EncryptionAlgorithm;
return to;
}
public static Entity.EncryptionObject TranslateEncryptionObjectToEncryptionObject(
Contract.EncryptionObject from)
{
Entity.EncryptionObject to =
new Entity.EncryptionObject();
to.Text = from.Text;
to.EncryptionAlgorithm =
(Entity.EncryptionAlgorithm)from.EncryptionAlgorithm;
return to;
}
}
}
That’s it. You should be able to successfully build your project now and you are now ready for Part 3. If you have any problems, please feel free to leave them in the comments and I will try to get back to you as quickly as I can. Next time, we will create and implement our service contracts. Until then.
reprint [Pete on Software]


 浙公网安备 33010602011771号