对于OpenCV的访问Mat元素的探究
对于OpenCV的访问Mat元素的探究
指针操作访问元素
void Mat2Array(float3 * &dst,  Mat & src, const int W, const int H)
{
	for (int row = 0; row < H; row++) {
		float* data = src.ptr<float>(row);//获取行首指针
		for (int col = 0; col < W; col++) {
			int index = row*W + col;
			float b = data[col* 3],g=data[col *3+1],r=data[col *3+2];//Mat中BGR三通道顺序排列
			dst[index].x =b;
			dst[index].y =g;
			dst[index].z =r;
		}
	}
}
void Mat2Array2(Mat src, float * dst)
{
	const int W = src.cols, H = src.rows;
	float *data =(float *) src.data;//注意类型转换,data是一维数组!
	for (int i = 0; i < H; i++) {
		for (int j = 0; j < W*3; j++) {
			int index = i*W*3 + j;
			dst[index] = data[index];
			dst[index] = data[index];
			dst[index] = data[index];
		}
	}
}
图像裁剪的误区
//错误写法
Rect area(10, 10, 1000, 500);
Mat image = src(area);
图像裁剪后的data指针与原来指针为同一个,即Mat image和Mat src共用一个data指针。这样会出现一个问题,裁剪后的图像每行的步长没变,这样在后续利用指针操作图像时会导致问题,访问到了错误的位置。
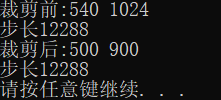
cout <<"裁剪前:" <<src.rows << " " << src.cols << endl;
cout << "步长" << src.step << endl;
Rect area(0, 0, 900, 500);
Mat image = src(area);
cout << "裁剪后:"<< image.rows << " " << image.cols << endl;
cout <<"步长" <<image.step << endl;
我们看看CV如何实现区域裁剪
Mat Mat::operator()( const Rect& roi ) const
{
    return Mat(*this, roi);
}

/** @overload
    @param m Array that (as a whole or partly) is assigned to the constructed matrix. No data is copied
    by these constructors. Instead, the header pointing to m data or its sub-array is constructed and
    associated with it. The reference counter, if any, is incremented. So, when you modify the matrix
    formed using such a constructor, you also modify the corresponding elements of m . If you want to
    have an independent copy of the sub-array, use Mat::clone() .
    @param roi Region of interest.
*/
Mat(const Mat& m, const Rect& roi);
Mat::Mat(const Mat& m, const Rect& roi)
    : flags(m.flags), dims(2), rows(roi.height), cols(roi.width),
    data(m.data + roi.y*m.step[0]),
    datastart(m.datastart), dataend(m.dataend), datalimit(m.datalimit),
    allocator(m.allocator), u(m.u), size(&rows)
{
    CV_Assert( m.dims <= 2 );

    size_t esz = CV_ELEM_SIZE(flags);
    data += roi.x*esz;
    CV_Assert( 0 <= roi.x && 0 <= roi.width && roi.x + roi.width <= m.cols &&
              0 <= roi.y && 0 <= roi.height && roi.y + roi.height <= m.rows );
    if( u )
        CV_XADD(&u->refcount, 1);
    if( roi.width < m.cols || roi.height < m.rows )
        flags |= SUBMATRIX_FLAG;

    step[0] = m.step[0]; step[1] = esz;
    updateContinuityFlag();

    if( rows <= 0 || cols <= 0 )
    {
        release();
        rows = cols = 0;
    }
}
我们发现裁剪的过程中,CV将目标 Mat的宽高进行了修改,但目标Mat的data指针的步长并未修改,仍然设置为了源Mat的步长。当使用clone()函数后,步长将会被修改为正确的值。
//正确写法
Rect area(10, 10, 1000, 500);
Mat image = src(area).clone();

 浙公网安备 33010602011771号