
Elasticsearch-2.4.3的单节点安装(多种方式图文详解)
前提:
Elasticsearch-2.4.3的下载(图文详解)
1、新建es安装目录
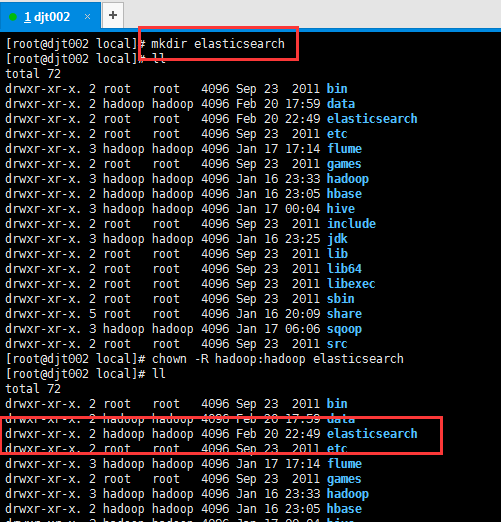
[root@djt002 local]# mkdir elasticsearch
[root@djt002 local]# ll
total 72
drwxr-xr-x. 2 root root 4096 Sep 23 2011 bin
drwxr-xr-x. 2 hadoop hadoop 4096 Feb 20 17:59 data
drwxr-xr-x. 2 root root 4096 Feb 20 22:49 elasticsearch
drwxr-xr-x. 2 root root 4096 Sep 23 2011 etc
drwxr-xr-x. 3 hadoop hadoop 4096 Jan 17 17:14 flume
drwxr-xr-x. 2 root root 4096 Sep 23 2011 games
drwxr-xr-x. 3 hadoop hadoop 4096 Jan 16 23:33 hadoop
drwxr-xr-x. 2 hadoop hadoop 4096 Jan 16 23:05 hbase
drwxr-xr-x. 3 hadoop hadoop 4096 Jan 17 00:04 hive
drwxr-xr-x. 2 root root 4096 Sep 23 2011 include
drwxr-xr-x. 3 hadoop hadoop 4096 Jan 16 23:25 jdk
drwxr-xr-x. 2 root root 4096 Sep 23 2011 lib
drwxr-xr-x. 2 root root 4096 Sep 23 2011 lib64
drwxr-xr-x. 2 root root 4096 Sep 23 2011 libexec
drwxr-xr-x. 2 root root 4096 Sep 23 2011 sbin
drwxr-xr-x. 5 root root 4096 Jan 16 20:09 share
drwxr-xr-x. 3 hadoop hadoop 4096 Jan 17 06:06 sqoop
drwxr-xr-x. 2 root root 4096 Sep 23 2011 src
[root@djt002 local]# chown -R hadoop:hadoop elasticsearch
[root@djt002 local]# ll
total 72
drwxr-xr-x. 2 root root 4096 Sep 23 2011 bin
drwxr-xr-x. 2 hadoop hadoop 4096 Feb 20 17:59 data
drwxr-xr-x. 2 hadoop hadoop 4096 Feb 20 22:49 elasticsearch
drwxr-xr-x. 2 root root 4096 Sep 23 2011 etc
drwxr-xr-x. 3 hadoop hadoop 4096 Jan 17 17:14 flume
drwxr-xr-x. 2 root root 4096 Sep 23 2011 games
drwxr-xr-x. 3 hadoop hadoop 4096 Jan 16 23:33 hadoop
drwxr-xr-x. 2 hadoop hadoop 4096 Jan 16 23:05 hbase
drwxr-xr-x. 3 hadoop hadoop 4096 Jan 17 00:04 hive

drwxr-xr-x. 2 root root 4096 Sep 23 2011 include
drwxr-xr-x. 3 hadoop hadoop 4096 Jan 16 23:25 jdk
drwxr-xr-x. 2 root root 4096 Sep 23 2011 lib
drwxr-xr-x. 2 root root 4096 Sep 23 2011 lib64
drwxr-xr-x. 2 root root 4096 Sep 23 2011 libexec
drwxr-xr-x. 2 root root 4096 Sep 23 2011 sbin
drwxr-xr-x. 5 root root 4096 Jan 16 20:09 share
drwxr-xr-x. 3 hadoop hadoop 4096 Jan 17 06:06 sqoop
drwxr-xr-x. 2 root root 4096 Sep 23 2011 src
2、上传elasticsearch-2.4.3.tar.gz
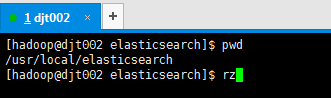
[hadoop@djt002 elasticsearch]$ pwd
/usr/local/elasticsearch
[hadoop@djt002 elasticsearch]$ rz


3、解压

[hadoop@djt002 elasticsearch]$ ls
elasticsearch-2.4.3.tar.gz
[hadoop@djt002 elasticsearch]$ tar -zxvf elasticsearch-2.4.3.tar.gz
4、删除压缩包
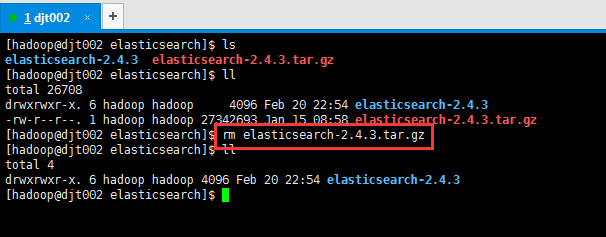
[hadoop@djt002 elasticsearch]$ rm elasticsearch-2.4.3.tar.gz
5、熟悉下es目录结构
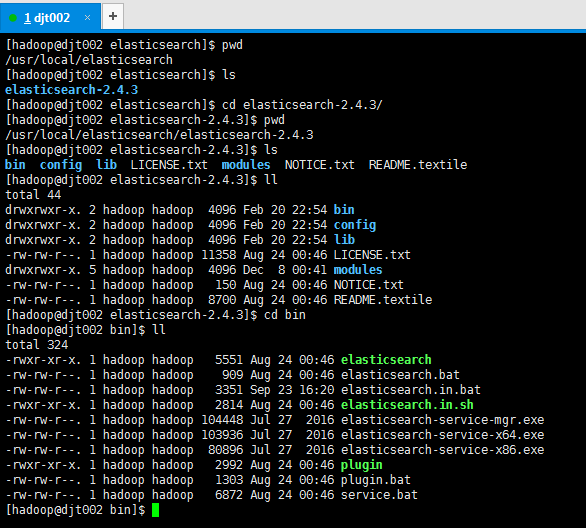
[hadoop@djt002 elasticsearch]$ pwd
/usr/local/elasticsearch
[hadoop@djt002 elasticsearch]$ ls
elasticsearch-2.4.3
[hadoop@djt002 elasticsearch]$ cd elasticsearch-2.4.3/
[hadoop@djt002 elasticsearch-2.4.3]$ pwd
/usr/local/elasticsearch/elasticsearch-2.4.3
[hadoop@djt002 elasticsearch-2.4.3]$ ls
bin config lib LICENSE.txt modules NOTICE.txt README.textile
[hadoop@djt002 elasticsearch-2.4.3]$ ll
total 44
drwxrwxr-x. 2 hadoop hadoop 4096 Feb 20 22:54 bin
drwxrwxr-x. 2 hadoop hadoop 4096 Feb 20 22:54 config
drwxrwxr-x. 2 hadoop hadoop 4096 Feb 20 22:54 lib
-rw-rw-r--. 1 hadoop hadoop 11358 Aug 24 00:46 LICENSE.txt
drwxrwxr-x. 5 hadoop hadoop 4096 Dec 8 00:41 modules
-rw-rw-r--. 1 hadoop hadoop 150 Aug 24 00:46 NOTICE.txt
-rw-rw-r--. 1 hadoop hadoop 8700 Aug 24 00:46 README.textile
[hadoop@djt002 elasticsearch-2.4.3]$ cd bin
[hadoop@djt002 bin]$ ll
total 324
-rwxr-xr-x. 1 hadoop hadoop 5551 Aug 24 00:46 elasticsearch
-rw-rw-r--. 1 hadoop hadoop 909 Aug 24 00:46 elasticsearch.bat
-rw-rw-r--. 1 hadoop hadoop 3351 Sep 23 16:20 elasticsearch.in.bat
-rwxr-xr-x. 1 hadoop hadoop 2814 Aug 24 00:46 elasticsearch.in.sh
-rw-rw-r--. 1 hadoop hadoop 104448 Jul 27 2016 elasticsearch-service-mgr.exe
-rw-rw-r--. 1 hadoop hadoop 103936 Jul 27 2016 elasticsearch-service-x64.exe
-rw-rw-r--. 1 hadoop hadoop 80896 Jul 27 2016 elasticsearch-service-x86.exe
-rwxr-xr-x. 1 hadoop hadoop 2992 Aug 24 00:46 plugin
-rw-rw-r--. 1 hadoop hadoop 1303 Aug 24 00:46 plugin.bat
-rw-rw-r--. 1 hadoop hadoop 6872 Aug 24 00:46 service.bat
[hadoop@djt002 bin]$
6、启动es
方式一(不建议,只能在本机访问)

注意:es启动之后啊,会绑定两个端口,9200和9300.
bin/elasticsearch 注意: 这样启动只能通过 127.0.0.1:9200 访问
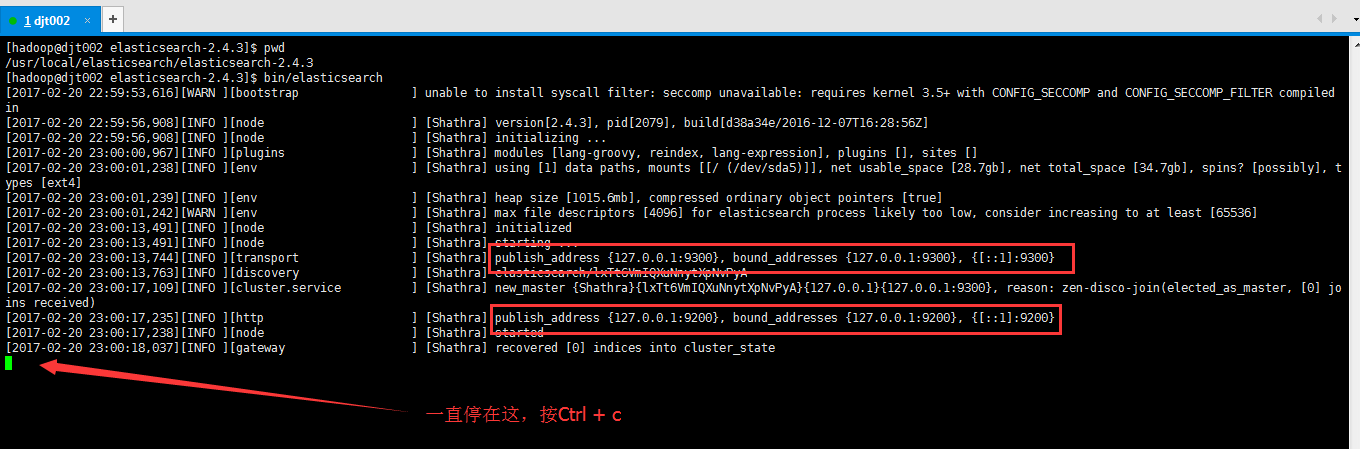
[hadoop@djt002 elasticsearch-2.4.3]$ pwd
/usr/local/elasticsearch/elasticsearch-2.4.3
[hadoop@djt002 elasticsearch-2.4.3]$ bin/elasticsearch
[2017-02-20 22:59:53,616][WARN ][bootstrap ] unable to install syscall filter: seccomp unavailable: requires kernel 3.5+ with CONFIG_SECCOMP and CONFIG_SECCOMP_FILTER compiled in
[2017-02-20 22:59:56,908][INFO ][node ] [Shathra] version[2.4.3], pid[2079], build[d38a34e/2016-12-07T16:28:56Z]
[2017-02-20 22:59:56,908][INFO ][node ] [Shathra] initializing ...
[2017-02-20 23:00:00,967][INFO ][plugins ] [Shathra] modules [lang-groovy, reindex, lang-expression], plugins [], sites []
[2017-02-20 23:00:01,238][INFO ][env ] [Shathra] using [1] data paths, mounts [[/ (/dev/sda5)]], net usable_space [28.7gb], net total_space [34.7gb], spins? [possibly], types [ext4]
[2017-02-20 23:00:01,239][INFO ][env ] [Shathra] heap size [1015.6mb], compressed ordinary object pointers [true]
[2017-02-20 23:00:01,242][WARN ][env ] [Shathra] max file descriptors [4096] for elasticsearch process likely too low, consider increasing to at least [65536]
[2017-02-20 23:00:13,491][INFO ][node ] [Shathra] initialized
[2017-02-20 23:00:13,491][INFO ][node ] [Shathra] starting ...
[2017-02-20 23:00:13,744][INFO ][transport ] [Shathra] publish_address {127.0.0.1:9300}, bound_addresses {127.0.0.1:9300}, {[::1]:9300}
[2017-02-20 23:00:13,763][INFO ][discovery ] [Shathra] elasticsearch/lxTt6VmIQXuNnytXpNvPyA
[2017-02-20 23:00:17,109][INFO ][cluster.service ] [Shathra] new_master {Shathra}{lxTt6VmIQXuNnytXpNvPyA}{127.0.0.1}{127.0.0.1:9300}, reason: zen-disco-join(elected_as_master, [0] joins received)
[2017-02-20 23:00:17,235][INFO ][http ] [Shathra] publish_address {127.0.0.1:9200}, bound_addresses {127.0.0.1:9200}, {[::1]:9200}
[2017-02-20 23:00:17,238][INFO ][node ] [Shathra] started
[2017-02-20 23:00:18,037][INFO ][gateway ] [Shathra] recovered [0] indices into cluster_state
^C[2017-02-20 23:03:35,376][INFO ][node ] [Shathra] stopping ...
[2017-02-20 23:03:35,458][INFO ][node ] [Shathra] stopped
[2017-02-20 23:03:35,470][INFO ][node ] [Shathra] closing ...
[2017-02-20 23:03:35,531][INFO ][node ] [Shathra] closed
[hadoop@djt002 elasticsearch-2.4.3]$
方式二(建议,既能在本机访问,也能在内网访问)

建议修改 es 的配置文件 (一般建议这种)
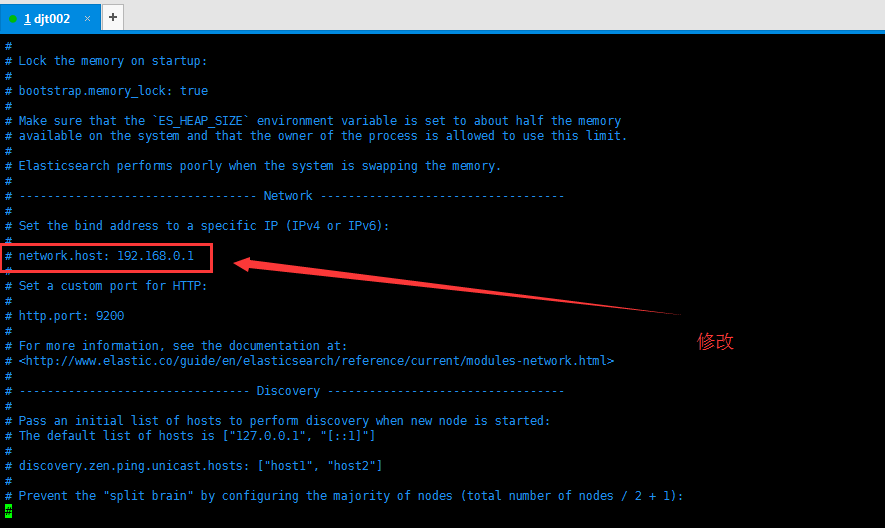
vi config/elasticsearch.yml
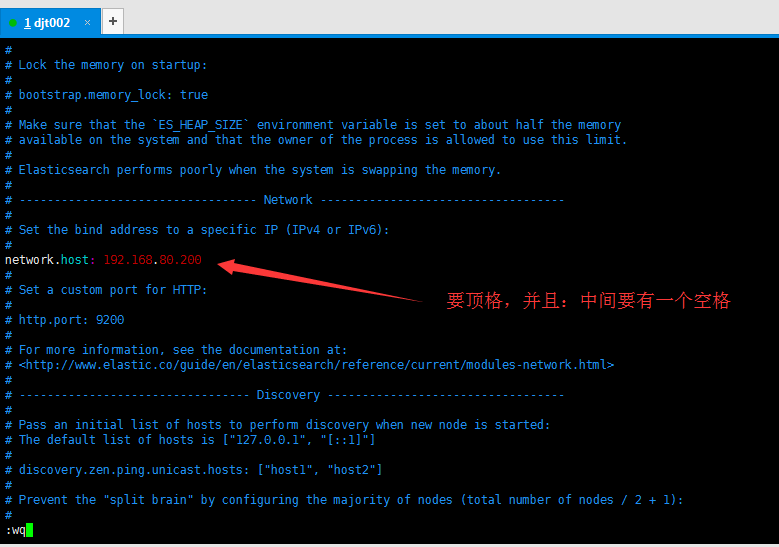
network.host: 192.168.80.200
这个属性要顶格写, 并且冒号和值之间要有一个空格
bin/elasticsearch
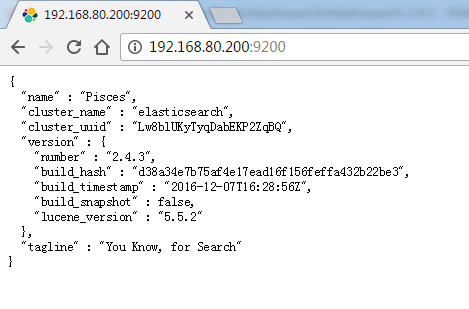
这样再启动, 就可以通过 192.168.80.200:9200 访问
或者可以这样设置
vi config/elasticsearch.yml
network.host: 0.0.0.0
这样再启动, 可以通过 127.0.0.1:9200 和 192.168.80.200:9200 访问
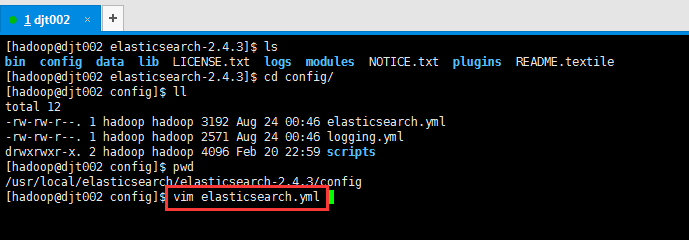
[hadoop@djt002 elasticsearch-2.4.3]$ ls
bin config data lib LICENSE.txt logs modules NOTICE.txt plugins README.textile
[hadoop@djt002 elasticsearch-2.4.3]$ cd config/
[hadoop@djt002 config]$ ll
total 12
-rw-rw-r--. 1 hadoop hadoop 3192 Aug 24 00:46 elasticsearch.yml
-rw-rw-r--. 1 hadoop hadoop 2571 Aug 24 00:46 logging.yml
drwxrwxr-x. 2 hadoop hadoop 4096 Feb 20 22:59 scripts
[hadoop@djt002 config]$ pwd
/usr/local/elasticsearch/elasticsearch-2.4.3/config
[hadoop@djt002 config]$ vim elasticsearch.yml


[hadoop@djt002 elasticsearch-2.4.3]$ pwd
/usr/local/elasticsearch/elasticsearch-2.4.3
[hadoop@djt002 elasticsearch-2.4.3]$ bin/elasticsearch 或者 bin/elasticsearch -d (后台运行)
[2017-02-20 23:10:43,674][WARN ][bootstrap ] unable to install syscall filter: seccomp unavailable: requires kernel 3.5+ with CONFIG_SECCOMP and CONFIG_SECCOMP_FILTER compiled in
[2017-02-20 23:10:45,361][INFO ][node ] [Pisces] version[2.4.3], pid[2182], build[d38a34e/2016-12-07T16:28:56Z]
[2017-02-20 23:10:45,372][INFO ][node ] [Pisces] initializing ...
[2017-02-20 23:10:48,431][INFO ][plugins ] [Pisces] modules [lang-groovy, reindex, lang-expression], plugins [], sites []
[2017-02-20 23:10:48,629][INFO ][env ] [Pisces] using [1] data paths, mounts [[/ (/dev/sda5)]], net usable_space [28.7gb], net total_space [34.7gb], spins? [possibly], types [ext4]
[2017-02-20 23:10:48,629][INFO ][env ] [Pisces] heap size [1015.6mb], compressed ordinary object pointers [true]
[2017-02-20 23:10:48,631][WARN ][env ] [Pisces] max file descriptors [4096] for elasticsearch process likely too low, consider increasing to at least [65536]
[2017-02-20 23:10:54,940][INFO ][node ] [Pisces] initialized
[2017-02-20 23:10:54,940][INFO ][node ] [Pisces] starting ...
[2017-02-20 23:10:55,046][INFO ][transport ] [Pisces] publish_address {192.168.80.200:9300}, bound_addresses {192.168.80.200:9300}
[2017-02-20 23:10:55,057][INFO ][discovery ] [Pisces] elasticsearch/EEZfZRE4S6GceAe-paQJPQ
[2017-02-20 23:10:58,360][INFO ][cluster.service ] [Pisces] new_master {Pisces}{EEZfZRE4S6GceAe-paQJPQ}{192.168.80.200}{192.168.80.200:9300}, reason: zen-disco-join(elected_as_master, [0] joins received)
[2017-02-20 23:10:58,536][INFO ][http ] [Pisces] publish_address {192.168.80.200:9200}, bound_addresses {192.168.80.200:9200}
[2017-02-20 23:10:58,542][INFO ][node ] [Pisces] started
[2017-02-20 23:10:59,072][INFO ][gateway ] [Pisces] recovered [0] indices into cluster_state
7、es的验证

修改方式的总结:
1、修改config/elasticsearch.yml
2、或者在启动es的时候指定参数 (也可以是0.0.0.0,即任何主机)
如bin/elasticsearch -Dnetwork.host=192.168.80.200 (但这样,每次很麻烦!)
3、es 安装注意事项, 以及容易出现问题的地方
(1): 关闭服务器防火墙
service iptables stop
chkconfig iptables off
(2): network.host 属性需要设置【 如果不设置的话只能通过 127.0.0.1 来进行访问】
network.host: 192.168.80.200 【注 意 : 冒 号 后 面 必 须 要 有 空 格 , 这 样 只 能 通 过192.168.80.200 访问 es】
或者 network.host: 0.0.0.0 【 这样可以通过此服务器的所有 ip 访问 es, 包括 127.0.0.1】
(3): es 的访问端口问题
默认 es 会监听 9200 端口, 可以通过 http 请求进行访问。
但是要注意: 如果在一个节点上连续启动多个 es 实例的话, es 监听的端口号会递增,
9201,9202.....
(4): 如果发现 es 启动之后在浏览器无法正常访问
建议查看 es 的启动日志, 确认 es 启动的时候是否报错, 以及绑定的 ip 和端口是多少。
前台方式启动 es 的话, 可以直接在控制台查看 es 的启动日志、
后台方式启动 es 的话, 可以到 ES_HOME/logs/elasticsearch.log 文件中查看日志
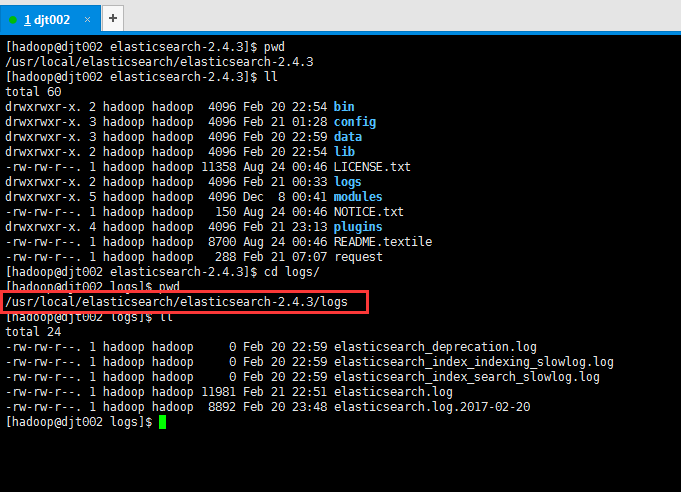
[hadoop@djt002 logs]$ pwd
/usr/local/elasticsearch/elasticsearch-2.4.3/logs
[hadoop@djt002 logs]$ ll
total 24
-rw-rw-r--. 1 hadoop hadoop 0 Feb 20 22:59 elasticsearch_deprecation.log
-rw-rw-r--. 1 hadoop hadoop 0 Feb 20 22:59 elasticsearch_index_indexing_slowlog.log
-rw-rw-r--. 1 hadoop hadoop 0 Feb 20 22:59 elasticsearch_index_search_slowlog.log
-rw-rw-r--. 1 hadoop hadoop 11981 Feb 21 22:51 elasticsearch.log
-rw-rw-r--. 1 hadoop hadoop 8892 Feb 20 23:48 elasticsearch.log.2017-02-20
[hadoop@djt002 logs]$
推荐
作者:大数据和人工智能躺过的坑
出处:http://www.cnblogs.com/zlslch/
本文版权归作者和博客园共有,欢迎转载,但未经作者同意必须保留此段声明,且在文章页面明显位置给出原文链接,否则保留追究法律责任的权利。
如果您认为这篇文章还不错或者有所收获,您可以通过右边的“打赏”功能 打赏我一杯咖啡【物质支持】,也可以点击右下角的【好文要顶】按钮【精神支持】,因为这两种支持都是我继续写作,分享的最大动力!

 浙公网安备 33010602011771号