android mvvm初探
目前google的databinding library还处在rc版,其中编译器发挥了主要作用。目前也只是在android studio开发环境中支持。
mvvm能够大大降低模块间的耦合度,在开发过程中更容易控制数据传递,性能方面也有所长,传统findViewById要遍历整个树的children。
它的编译过程:
1. 首先会去检查layout下的视图文件,将其中所有关于databinding的元素全部删除、替换(这一过程全部由编译器来完成,可以搜索下build文件夹视图文件),因为这些标签根本无法识别。
2. 第二步解析表达式语法,如三目运算。
3. 第三步解析绑定值,对应java code中的含义。
4. 第四步会生产databinding class文件,这些文件由编译器自动生成。
由于它是预编译的,没有了运行时的反射提高了性能,但并不能真正体现view层和behind层的分离,当我们在view层指定了一个java code中不存在的属性,这时候编译将不会通过。
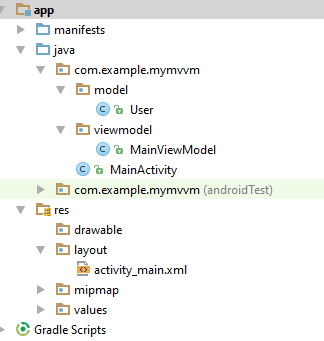
新建project
引入类库
通过android sdk manager下载android support respository。build.gradle(Moudle:app)加入定义:
android {
    ....
    dataBinding {
        enabled = true
    }
}
添加viewmodel
这里提供视图数据,相当于shh中service层吧,主要放置属性、集合和事件方法。
 1 package com.example.mymvvm.viewmodel;
 2
 3 import android.databinding.BaseObservable;
 4
 5 import com.example.mymvvm.model.*;
 6
 7 public class MainViewModel extends BaseObservable {
 8
 9     public MainViewModel() {
10         this.Init();
11     }
12
13     // attribute
14     private User user;
15
16     public User getUser() {
17         return user;
18     }
19
20     public void setUser(User user) {
21         this.user = user;
22     }
23
24     // method
25     public void Init() {
26         this.user = new User();
27         this.user.setName("who are u");
28     }
29
30     // command
31     public void SubmitCommand(android.view.View view) {
32         this.user.setName("hello world");
33     }
34 }
user类
@Bindable注解,编译时会在BR中生产BR.name,BR作用就是相当于一个观察者,而不会去监视整个project资源。
添加notifyPropertyChanged,当name值改变,能够及时通知到UI界面。
 1 package com.example.mymvvm.model;
 2
 3 import android.databinding.BaseObservable;
 4 import android.databinding.Bindable;
 5
 6 public class User extends BaseObservable {
 7
 8     @Bindable
 9     private String name;
10
11     public void setName(String name) {
12         this.name = name;
13         notifyPropertyChanged(com.example.mymvvm.BR.name);
14     }
15
16     public String getName() {
17         return name;
18     }
19 }
注册viewmodel
这里建立和view试图对应关系,编译时会自动检测binding元素。
ActivityMainBinding会自动根据active_main.xml视图生产,注意名称对应。
 1 package com.example.mymvvm;
 2
 3 import android.databinding.DataBindingUtil;
 4 import android.support.v7.app.AppCompatActivity;
 5 import android.os.Bundle;
 6
 7 import com.example.mymvvm.viewmodel.*;
 8 import com.example.mymvvm.databinding.ActivityMainBinding;
 9
10 public class MainActivity extends AppCompatActivity {
11
12     @Override
13     protected void onCreate(Bundle savedInstanceState) {
14         super.onCreate(savedInstanceState);
15         ActivityMainBinding binding = DataBindingUtil.setContentView(this, R.layout.activity_main);
16         binding.setMainViewModel(new MainViewModel());
17     }
18 }
添加view
 1 <?xml version="1.0" encoding="utf-8"?>
 2 <layout xmlns:android="http://schemas.android.com/apk/res/android">
 3     <data>
 4         <variable name="mainViewModel" type="com.example.mymvvm.viewmodel.MainViewModel" />
 5     </data>
 6
 7     <LinearLayout android:orientation="vertical"
 8         android:layout_width="match_parent"
 9         android:layout_height="match_parent">
10         <TextView android:layout_width="wrap_content"
11             android:layout_height="wrap_content"
12             android:text="@{mainViewModel.User.name}" />
13         <Button android:layout_width="wrap_content"
14             android:layout_height="wrap_content"
15             android:text="submit"
16             android:onClick="@{mainViewModel.SubmitCommand}"/>
17     </LinearLayout>
18 </layout>
结果
当点击submit按钮,触发command事件。

android studio编译器最大程度降低了代码的复杂性,编译器做了很多幕后工作,可以看下build后的文件。
得益于INotifyPropertyChanged,INotifyPropertyChanging接口,微软反而在mvvm这块显得更加简洁有力。
