

linux 后台进程管理利器supervisor
2014-12-05 19:41 youxin 阅读(16233) 评论(1) 收藏 举报; supervisor config file [unix_http_server] file=/var/run/supervisor.sock ; (the path to the socket file) chmod=0700 ; sockef file mode (default 0700) [supervisord] logfile=/var/log/supervisor/supervisord.log ; (main log file;default $CWD/supervisord.log) pidfile=/var/run/supervisord.pid ; (supervisord pidfile;default supervisord.pid) childlogdir=/var/log/supervisor ; ('AUTO' child log dir, default $TEMP) ; the below section must remain in the config file for RPC ; (supervisorctl/web interface) to work, additional interfaces may be ; added by defining them in separate rpcinterface: sections [rpcinterface:supervisor] supervisor.rpcinterface_factory = supervisor.rpcinterface:make_main_rpcinterface [supervisorctl] serverurl=unix:///var/run/supervisor.sock ; use a unix:// URL for a unix socket ; The [include] section can just contain the "files" setting. This ; setting can list multiple files (separated by whitespace or ; newlines). It can also contain wildcards. The filenames are ; interpreted as relative to this file. Included files *cannot* ; include files themselves. [include] files = /etc/supervisor/conf.d/*.conf
supervisorctl status 查看进程运行状态
先弄懂两个命令:
supervisord : supervisor的服务器端部分,启动supervisor就是运行这个命令
supervisorctl:启动supervisor的命令行窗口。
参考:http://www.2cto.com/os/201308/238166.html
一篇文章:使用supervisor监控进程:
在linux下监控进程,可以使用inittab,最近找到了supervisor,也很好用,记录一下:
1、系统要安装python,并安装与之对应的setuptools,下载地址在此
2、安装:
# sh setuptoolsxxxx.egg
3、安装supervisor,下载地址在此,解压缩后
# python setup.py install
这就ok了,然后执行
# echo_supervisord_conf > /etc/supervisord.conf
修改/etc/supervisord.conf文件,加入你要监控的进程,里面的注释很详细,举个简单的例子:
这是一段要监控的进程的描述信息,添加到这个文件的末尾就好了:
[program:meta.txn.recover.on.error]
command=/cas/bin/meta.txn.recover.on.error ; 被监控的进程路径
numprocs=1 ; 启动几个进程
directory=/cas/bin ; 执行前要不要先cd到目录去,一般不用
autostart=true ; 随着supervisord的启动而启动
autorestart=true ; 自动重启。。当然要选上了
startretries=10 ; 启动失败时的最多重试次数
exitcodes=0 ; 正常退出代码(是说退出代码是这个时就不再重启了吗?待确定)
stopsignal=KILL ; 用来杀死进程的信号
stopwaitsecs=10 ; 发送SIGKILL前的等待时间
redirect_stderr=true ; 重定向stderr到stdout
为了节省空间,注释的内容就不贴出来了。
执行
# supervisord -n
能在控制台看到监控进程的输出:
2010-08-17 10:26:07,467 INFO supervisord started with pid 943
2010-08-17 10:26:08,469 INFO spawned: 'meta.txn.recover.on.error' with pid 1009
2010-08-17 10:26:09,876 INFO success: meta.txn.recover.on.error entered RUNNING state, process has stayed up for > than 1 seconds (startsecs)
2010-08-17 10:26:48,442 INFO exited: meta.txn.recover.on.error (terminated by SIGKILL; not expected)
2010-08-17 10:26:49,444 INFO spawned: 'meta.txn.recover.on.error' with pid 2427
2010-08-17 10:26:50,487 INFO success: meta.txn.recover.on.error entered RUNNING state, process has stayed up for > than 1 seconds (startsecs)
黑体的地方是我用kill -9杀掉进程后出来的,看到supervisor检测到进程退出后又再次启动了进程。
不带参数运行supervisord是以daemon方式运行。
把supervisord加入到开机启动项里就可以完成监控进程的功能了。
【注意】:当supervisord以非daemon方式运行时,杀掉supervisord后,被监控的进程也退出了。
而以daemon方式运行,杀掉supervisord对被监控进程无影响。
python安装:
easy_install supervisor
测试是否安装成功:
echo_supervisord_conf
会显示以下内容,其实是一个配置模版:
; Sample supervisor config file.
;
; For more information on the config file, please see:
; http://supervisord.org/configuration.html
;
; Note: shell expansion ("~" or "$HOME") is not supported. Environment
; variables can be expanded using this syntax: "%(ENV_HOME)s".
[unix_http_server]
file=/tmp/supervisor.sock ; (the path to the socket file)
;chmod=0700 ; socket file mode (default 0700)
;chown=nobody:nogroup ; socket file uid:gid owner
;username=user ; (default is no username (open server))
;password=123 ; (default is no password (open server))
;[inet_http_server] ; inet (TCP) server disabled by default
;port=127.0.0.1:9001 ; (ip_address:port specifier, *:port for all iface)
;username=user ; (default is no username (open server))
;password=123 ; (default is no password (open server))
[supervisord]
logfile=/tmp/supervisord.log ; (main log file;default $CWD/supervisord.log)
logfile_maxbytes=50MB ; (max main logfile bytes b4 rotation;default 50MB)
logfile_backups=10 ; (num of main logfile rotation backups;default 10)
loglevel=info ; (log level;default info; others: debug,warn,trace)
pidfile=/tmp/supervisord.pid ; (supervisord pidfile;default supervisord.pid)
……
; the below section must remain in the config file for RPC
; (supervisorctl/web interface) to work, additional interfaces may be
; added by defining them in separate rpcinterface: sections
[rpcinterface:supervisor]
supervisor.rpcinterface_factory = supervisor.rpcinterface:make_main_rpcinterface
[supervisorctl]
serverurl=unix:///tmp/supervisor.sock ; use a unix:// URL for a unix socket
;serverurl=http://127.0.0.1:9001 ; use an http:// url to specify an inet socket
;username=chris ; should be same as http_username if set
;password=123 ; should be same as http_password if set
;prompt=mysupervisor ; cmd line prompt (default "supervisor")
;history_file=~/.sc_history ; use readline history if available
; The below sample program section shows all possible program subsection values,
; create one or more ‘real’ program: sections to be able to control them under
; supervisor.
;[program:theprogramname]
;command=/bin/cat ; the program (relative uses PATH, can take args)
;process_name=%(program_name)s ; process_name expr (default %(program_name)s)
;numprocs=1 ; number of processes copies to start (def 1)
;directory=/tmp ; directory to cwd to before exec (def no cwd)
;umask=022 ; umask for process (default None)
;priority=999 ; the relative start priority (default 999)
;autostart=true ; start at supervisord start (default: true)
;autorestart=unexpected ; whether/when to restart (default: unexpected)
;startsecs=1 ; number of secs prog must stay running (def. 1)
;startretries=3 ; max # of serial start failures (default 3)
;exitcodes=0,2 ; ‘expected’ exit codes for process (default 0,2)
;stopsignal=QUIT ; signal used to kill process (default TERM)
;stopwaitsecs=10 ; max num secs to wait b4 SIGKILL (default 10)
……
; The [include] section can just contain the "files" setting. This
; setting can list multiple files (separated by whitespace or
; newlines). It can also contain wildcards. The filenames are
; interpreted as relative to this file. Included files *cannot*
; include files themselves.
;[include]
;files = relative/directory/*.ini
创建配置文件:
echo_supervisord_conf > /etc/supervisord.conf
(easy_install安装的方式好像没有/etc/supervisord.conf,所以这里我们手动创建)
修改配置文件:
在supervisord.conf最后增加(分号后边的表示注释,可以不写):
[program:open_search]
command=/home/s/www/fukun/gopath/src/open_search/open_search ;需要执行的命令
directory=/home/s/www/fukun/gopath/src/open_search/ ; directory to cwd to before exec (def no cwd)
autostart=true ; start at supervisord start (default: true)
autorestart=true ; whether/when to restart (default: unexpected)
startsecs=3 ; number of secs prog must stay running (def. 1)
redirect_stderr=true ; redirect proc stderr to stdout (default false) 错误输出重定向
stdout_logfile=/tmp/open_search_gorun.log ; stdout log path, NONE for none; default AUTO, log输出
(更多配置说明请参考:http://supervisord.org/configuration.html)
supervisor管理gearman
参考官方文档:
http://supervisord.org/running.html
Running supervisord automatically on startup
If you are using a distribution-packaged version of Supervisor, it should already be integrated into the service management infrastructure of your distribution.
There are user-contributed scripts for various operating systems at:https://github.com/Supervisor/initscripts
There are some answers at Serverfault in case you get stuck: How to automatically start supervisord on Linux (Ubuntu)
github的脚本下载下来:
#!/bin/bash
#
# supervisord   This scripts turns supervisord on
#
# Author:       Mike McGrath <mmcgrath@redhat.com> (based off yumupdatesd)
#               Jason Koppe <jkoppe@indeed.com> adjusted to read sysconfig,
#                   use supervisord tools to start/stop, conditionally wait
#                   for child processes to shutdown, and startup later
#               Mikhail Mingalev <mingalevme@gmail.com> Merged
#                   redhat-init-jkoppe and redhat-sysconfig-jkoppe, and
#                   made the script "simple customizable".
#               Brendan Maguire <maguire.brendan@gmail.com> Added OPTIONS to
#                   SUPERVISORCTL status call
#
# chkconfig:    345 83 04
#
# description:  supervisor is a process control utility.  It has a web based
#               xmlrpc interface as well as a few other nifty features.
#               Script was originally written by Jason Koppe <jkoppe@indeed.com>.
#

# source function library
. /etc/rc.d/init.d/functions

set -a

PREFIX=/usr

SUPERVISORD=$PREFIX/bin/supervisord
SUPERVISORCTL=$PREFIX/bin/supervisorctl

PIDFILE=/var/run/supervisord.pid
LOCKFILE=/var/lock/subsys/supervisord

OPTIONS="-c /etc/supervisord.conf"

# unset this variable if you don't care to wait for child processes to shutdown before removing the $LOCKFILE-lock
WAIT_FOR_SUBPROCESSES=yes

# remove this if you manage number of open files in some other fashion
ulimit -n 96000

RETVAL=0


running_pid()
{
    # Check if a given process pid's cmdline matches a given name
    pid=$1
    name=$2
    [ -z "$pid" ] && return 1
    [ ! -d /proc/$pid ] && return 1
    (cat /proc/$pid/cmdline | tr "\000" "\n"|grep -q $name) || return 1
    return 0
}

running()
{
# Check if the process is running looking at /proc
# (works for all users)

    # No pidfile, probably no daemon present
    [ ! -f "$PIDFILE" ] && return 1
    # Obtain the pid and check it against the binary name
    pid=`cat $PIDFILE`
    running_pid $pid $SUPERVISORD || return 1
    return 0
}

start() {
        echo "Starting supervisord: "

        if [ -e $PIDFILE ]; then
        echo "ALREADY STARTED"
        return 1
    fi

    # start supervisord with options from sysconfig (stuff like -c)
        $SUPERVISORD $OPTIONS

    # show initial startup status
    $SUPERVISORCTL $OPTIONS status

    # only create the subsyslock if we created the PIDFILE
        [ -e $PIDFILE ] && touch $LOCKFILE
}

stop() {
        echo -n "Stopping supervisord: "
        $SUPERVISORCTL $OPTIONS shutdown
    if [ -n "$WAIT_FOR_SUBPROCESSES" ]; then
            echo "Waiting roughly 60 seconds for $PIDFILE to be removed after child processes exit"
            for sleep in  2 2 2 2 4 4 4 4 8 8 8 8 last; do
                if [ ! -e $PIDFILE ] ; then
                    echo "Supervisord exited as expected in under $total_sleep seconds"
                    break
                else
                    if [[ $sleep -eq "last" ]] ; then
                        echo "Supervisord still working on shutting down. We've waited roughly 60 seconds, we'll let it do its thing from here"
                        return 1
                    else
                        sleep $sleep
                        total_sleep=$(( $total_sleep + $sleep ))
                    fi

                fi
            done
        fi

        # always remove the subsys. We might have waited a while, but just remove it at this point.
        rm -f $LOCKFILE
}

restart() {
        stop
        start
}

case "$1" in
    start)
        start
        RETVAL=$?
        ;;
    stop)
        stop
        RETVAL=$?
        ;;
    restart|force-reload)
        restart
        RETVAL=$?
        ;;
    reload)
        $SUPERVISORCTL $OPTIONS reload
        RETVAL=$?
        ;;
    condrestart)
        [ -f $LOCKFILE ] && restart
        RETVAL=$?
        ;;
    status)
        $SUPERVISORCTL $OPTIONS status
        if running ; then
            RETVAL=0
        else
            RETVAL=1
        fi
        ;;
    *)
        echo $"Usage: $0 {start|stop|status|restart|reload|force-reload|condrestart}"
        exit 1
esac

exit $RETVAL
vim /etc/init.d/supervisord , 修改文件属性为可执行chmod 777 /etc/init.d/supervisordmy
vim /etc/supervisord.d/tomcat.conf
[program:tomcat]                                        #程序唯一名称
directory=/usr/local/tomcat                             #程序路径
command=/usr/local/tomcat/bin/catalina.sh run           #运行程序的命令
autostart=true                                          #是否在supervisord启动后tomcat也启动
startsecs=10                                            #启动10秒后没有异常退出,就表示进程正常启动了,默认为1秒
autorestart=true                                        #程序退出后自动重启,可选值:[unexpected,true,false],默认为unexpected,表示进程意外杀死后才重启;意思为如果不是supervisord来关闭的该进程则认为不正当关闭,supervisord会再次把该进程给启动起来,只能使用该supervisorctl来进行关闭、启动、重启操作
startretries=3                                          #启动失败自动重试次数,默认是3
user=root                                               #用哪个用户启动进程,默认是root
priority=999                                            #进程启动优先级,默认999,假如Supervisord需要管理多个进程,那么值小的优先启动
stopsignal=INT
redirect_stderr=true                                    #把stderr重定向到stdout标准输出,默认false
stdout_logfile_maxbytes=200MB                           #stdout标准输出日志文件大小,日志文件大小到200M后则进行切割,切割后的日志文件会标示为catalina.out1,catalina.out2,catalina.out3...,默认50MB
stdout_logfile_backups = 100                            #stdout标准输出日志文件备份数,保存100个200MB的日志文件,超过100个后老的将被删除,默认为10保存10个
stdout_logfile=/usr/local/tomcat/logs/catalina.out      #标准日志输出位置,如果输出位置不存在则会启动失败
stopasgroup=false                                       #默认为false,进程被杀死时,是否向这个进程组发送stop信号,包括子进程
killasgroup=false                                       #默认为false,向进程组发送kill信号,包括子进程
加入gearman的任务,下面是百度云推送的任务
[eventlistener:theeventlistenername]
command=/bin/eventlistener
process_name=%(program_name)s_%(process_num)02d
numprocs=5
events=PROCESS_STATE
buffer_size=10
directory=/tmp
umask=022
priority=-1
autostart=true
autorestart=unexpected
startsecs=1
startretries=3
exitcodes=0
stopsignal=QUIT
stopwaitsecs=10
stopasgroup=false
killasgroup=false
user=chrism
redirect_stderr=false
stdout_logfile=/a/path
stdout_logfile_maxbytes=1MB
stdout_logfile_backups=10
stdout_events_enabled=false
stderr_logfile=/a/path
stderr_logfile_maxbytes=1MB
stderr_logfile_backups=10
stderr_events_enabled=false
environment=A="1",B="2"
serverurl=AUTO
vim /etc/supervisord.conf
[program:APNS_PUSH]
command=/usr/bin/php /data2/www/web/apns/worker_origin.php
process_name=APNS_PUSH_%(process_num)s
numprocs=2
autostart=true
autorestart=true
user=nginx
stdout_logfile=/data2/log/push/push_%(process_num)s.log
stderr_logfile=/data2/log/push/push.error.log
[program:web]
#运行程序的命令
command=/opt/datanet/datanet-supervisor.sh 2
#服务运行依赖环境变量,多个环境变量用逗号隔开
environment=ICV_ROOT="/home/icv_root",JAVA_HOME="/opt/jdk/jdk1.8.0_211"
#命令执行的目录
directory=/opt/datanet
#stdout日志文件,需要注意当指定目录不存在时无法正常启动,所以需要手动创建目录(supervisord 会自动创建日志文件)
stdout_logfile=/opt/datanet/datanet-web.out
#stdout 日志文件备份数,默认是10
stdout_logfile_backups = 20
#stdout 日志文件大小,默认50MB
stdout_logfile_maxbytes=50MB
#是否自动启动,随着supervisord的启动而启动
autostart=true
#程序意外退出是否自动重启
autorestart=true
#启动失败自动重试次数,默认是3
startretries=3
#自动重启间隔
startsecs=5
#进程启动优先级,默认999,值小的优先启动
priority=3


#默认为false,进程被杀死时,是否向这个进程组发送stop信号,包括子进程
stopsignal = TERM
stopasgroup=true
stopwaitsecs = 20
stopasgroup = true
#默认为false,向进程组发送kill信号,包括子进程
killasgroup=true
#进程执行的用户身份
user=root
注意: 程序员如果用预定义的,一定要是下面的形式:
%(program_name)s
不要漏掉s,也不要把%换成$.我就是这个问题导致浪费了3个多小时。
下面先启动gearman,启动supervisord,ps -ef |grep xxx 查看一下任务有没有执行
参考:http://www.cnblogs.com/trying/p/4038285.html
Supervisord是用Python实现的一款非常实用的进程管理工具,在批量服务化管理时特别有效。
1、安装
安装环境 centos python2.4
安装 wget http://pypi.python.org/packages/source/s/supervisor/supervisor-3.0a10.tar.gz#md5=99c6fbd45bade87301296b7a597fb68e
tar zxvf supervisor-3.0a10.tar.gz
cd supervisor-3.0a10
python setup.py install
如果上述遇到问题,请按如下操作。
依赖setuptools安装 wget http://pypi.python.org/packages/2.4/s/setuptools/setuptools-0.6c11-py2.4.egg#md5=bd639f9b0eac4c42497034dec2ec0c2b
sh setuptools-0.6c11-py2.4.egg
2、配置
产生基础配置文件 echo_supervisord_conf > /etc/supervisord.conf
配置 [inet_http_server]前面的分号去掉; 定义port=192.168.1.1:8888 启动 supervisord -c /etc/supervisord.conf 查看 浏览器打开 http://192.168.10.129:9001
深入配置 [program:service]
command=sh /opt/soft/service/run.sh
目前我们用supervisord 监控 memcached 进程
[program:memcached] ###定义服务
command=memcached -m 2000 -u nobody -l 0.0.0.0 -c 10240 -p 11211 ###服务运行时的显示的command
numprocs=1 ###控制memcached启动的进程数
user=root ###程序运行的用户
autostart=true ###supervisord启动memcached启动
autorestart=true ###supervisord重启memcache自动重启
stdout_logfile=/var/log/memcached.stdout.log ###监控memcached日志文件
redirect_stderr=true ###将stderr重定向到stdout(或者创建个err.log)
stopsignal=QUIT
这个程序最好不能是daemon后台守护程序。supervisord会作为这个程序的父来启动它
3、启动
supervisord (以daemon方式启动)
或 supervisord -c /etc/supervisord.conf (非daemon)
supervisord,初始启动Supervisord,启动、管理配置中设置的进程。
supervisorctl 简单的后台进程控制工具
supervisorctl stop programxxx,停止某一个进程(programxxx),programxxx为[program:chatdemon]里配置的值
supervisorctl start programxxx,启动某个进程
supervisorctl restart programxxx,重启某个进程
supervisorctl stop all,停止全部进程,注:start、restart、stop都不会载入最新的配置文件。
supervisorctl reload,载入最新的配置文件,并按新的配置启动、管理所有进程。
supervisorctl reread,当一个服务由自动启动修改为手动启动时执行一下就ok
不带参数运行supervisord是以daemon方式运行
当supervisord以非daemon方式运行时,杀掉supervisord后,被监控的进程也退出了。
而以daemon方式运行,杀掉supervisord对被监控进程无影响
注意点:
supervisor在管理进程的时候需要将服务的daemon模式关闭(如redis,nginx,haproxy等等,都可以加配置项,放到前台运行)
不能再使用服务原本的启动方式,如果被管理了,就要一直使用此supervisor自带的命令来对服务进行启停等操作
蓝信自己的服务需要修改启动脚本
在启动命令前面需要调用exec,因为supervisor在管理进程的时候,始终监视第一个主进程,所以此处最好不能fock新的子进程出来,虽然上面配置中可以通过进程组的方式来管理,但是也不建议这么做
不能加nohup和&来启动服务,输出也不要重定向到指定文件,让其输出到终端,由supervisor来管理日志,此时就可以根据相关策略进行日志的切割操作
yum等安装的服务,不能使用systemctl start 方式来启动服务,还是上面说的command配置项后面需要使用程序完整路径来执行
————————————————
原文链接:https://blog.csdn.net/yujia_666/article/details/107328609
supervosrd配置文件:
command 字段设置的是后台守护应用的启动命令, 注意: 该命令必须是在前台执行的, 即会独占控制台, 否则会导致 supervisor 无法获得标准输出, 并失去进程的控制权.
更多:
http://digdeeply.org/archives/07102224.html
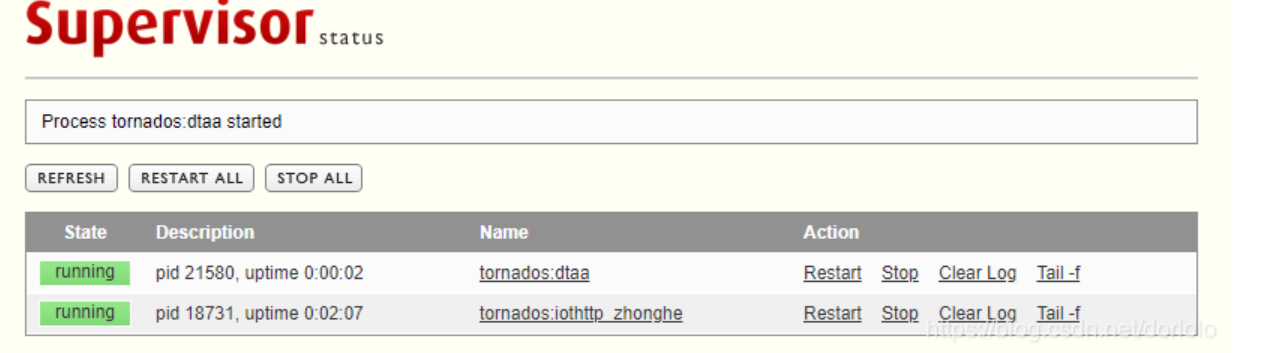
访问网页版管理页面
尝试访问配置文件中的9001端口,这样管理起来就很方便了。
配置文件:
http://supervisord.org/configuration.html?highlight=stopsignal
supervisord守护java
[program:web]
#运行程序的命令
command=/opt/datanet/datanet-supervisor.sh 2
#服务运行依赖环境变量,多个环境变量用逗号隔开
environment=ICV_ROOT="/home/icv_root",JAVA_HOME="/opt/jdk/jdk1.8.0_211"
#命令执行的目录
directory=/opt/datanet
#stdout日志文件,需要注意当指定目录不存在时无法正常启动,所以需要手动创建目录(supervisord 会自动创建日志文件)
stdout_logfile=/opt/datanet/datanet-web.out
#stdout 日志文件备份数,默认是10
stdout_logfile_backups = 20
#stdout 日志文件大小,默认50MB
stdout_logfile_maxbytes=50MB
#是否自动启动,随着supervisord的启动而启动
autostart=true
#程序意外退出是否自动重启
autorestart=true
#启动失败自动重试次数,默认是3
startretries=3
#自动重启间隔
startsecs=5
#进程启动优先级,默认999,值小的优先启动
priority=3
stopsignal = TERM
stopwaitsecs = 20
#默认为false,进程被杀死时,是否向这个进程组发送stop信号,包括子进程
stopasgroup=true
#默认为false,向进程组发送kill信号,包括子进程
killasgroup=true
#进程执行的用户身份
user=root
stdout_logfile: 进程标准输出内容写入文件,如果没有设置stdout_logfile或者使用默认值AUTO,supervisor会自动选择一个本地文件,如果设置为NONE,就不创建log文件了;同样,
stdout_logfile的值可以用python的表达式19.
stdout_logfile_maxbytes: stdout_logfile文件做log滚动时,单个stdout_logfile文件的最大字节数,默认50M,设置为0则认为不做log滚动方式20.
stdout_logfile_backups: stdout_logfile备份文件个数,默认为10注意:服务运行依赖环境变量,多个环境变量用逗号隔开。
java启动脚本:monitor.sh
#!/bin/bash
echo "****************************"
echo "*** 启动应用软件开始 ****"
echo "****************************"
# 进入目录
cd "/opt/datanet"
# 引入脚本start.sh
currentpath=$(pwd)
. $currentpath/func
#传参序号
index=''
if [ ! -n "$1" ]
then
echo "参数为空"
exit 1
else
echo "第1个参数为:$1";
index=$1
fi
# 安装对应服务
case $index in
1)
echo "*启动datanet-sip3"
exec java -Xms512m -Xmx2048m -jar -Dservice_gateway.hostname=${local_server_ip} -Dspring.redis.host=${redis_ip} -Dspring.cloud.consul.host=${consul_ip} /opt/datanet/system-application-services.jar
;;
2)
echo "*启动datanet-web"
java -Xms512m -Xmx2048m -jar /opt/datanet/datanet-web-0.0.1.jar --spring.cloud.consul.discovery.ip-address=${consul_ip} --server.port=2000 --sip3_ip=${consul_ip} --sip3_port=10002 --spring.datasource.url=jdbc:postgresql://${postgresql_ip}:5432/dnps --spring.datasource.username=dnps --spring.datasource.password=dnps --spring.cloud.consul.host=${consul_ip} --spring.cloud.consul.port=8500 --es.cluster.clusterUrls=http://${es_ip}:9200/ --es.cluster.connect.pool.validate.url=http://${es_ip}:9200/_cat/health?v --spring.elasticsearch.jest.uris=http://${es_ip}:9200/
;;
3)
echo "*启动datanet-gateway"
# 使用了exec之后,当前的shell的pid就没有了,被exec的命令所替代
exec java -Xms128m -jar /opt/datanet/datanet-gateway-0.0.1.jar --spring.cloud.consul.discovery.ip-address=${consul_ip} --server.port=8080 --sip3_ip=${consul_ip} --sip3_port=10002 --spring.cloud.consul.host=${consul_ip} --spring.cloud.consul.port=8500
;;
*)
echo "*传参无效,无法启动"
esac
echo "****************************"
echo "*** 启动应用软件完成 ****"
echo "****************************"
supervisor支持的信号:TERM,HUP,INT,QUIT,KILL,USR1或USR2中的任何一个,分别对应内核级信号:SIGTERM,SIGHUP,SIGINT,SIGQUIT,SIGKILL,SIGUSR1,SIGUSR2
其中,USR1信号将导致以下步骤的发生:
- 停止接受新的连接
- 等待当前连接停止
- 重新载入配置文件,重新打开日志文件,重启服务器,从而实现相对平滑的不关机的更改。
注:首先要与研发沟通,确保所启动的服务支持捕获内核级Kill信号(比如是支持HUP还是支持INT),研发若有捕获,则会在捕获前落地内存中缓存的数据,确保数据不丢失。之后修改supervisor的xxx服务启动配置文件
1
|
|
stopsignal含义:
1
|
使用SIGUSR1信号来stop
|
stopwaitsecs含义:
1
|
在向程序发送停止信号后,等待操作系统将SIGCHLD返回给supervisor的秒数。如果超过了这个时间仍未收到SIGCHLD,最终将会使用SIGKILL来杀掉进程。默认值:10秒
|
; 在程序发送stopignal后,等待操作系统将SIGCHLD返回给supervisord的秒数。
; 如果在supervisord从进程接收到SIGCHLD之前经过了这个秒数,
; supervisord将尝试用最终的SIGKILL杀死它
stopwaitsecs=1
stopasgroup含义:
1
|
将停止信号发送到整个过程组,使程序将停止信号成为孤立状态
|
redis增加supervisor.
注意redis.conf中daemonize要改为no.
[program:redis-server]
command=/usr/bin/redis-server /etc/redis/6379.conf
priority=999                ; 优先级(越小越优先)
autostart=true              ; supervisord启动时,该程序也启动
autorestart=true            ; 异常退出时,自动启动
startsecs=10                ; 启动后持续10s后未发生异常,才表示启动成功
startretries=3              ; 异常后,自动重启次数
exitcodes=0,2               ; exit异常抛出的是0、2时才认为是异常
stopsignal=QUIT             ; 杀进程的信号

; 在程序发送stopignal后,等待操作系统将SIGCHLD返回给supervisord的秒数。
; 如果在supervisord从进程接收到SIGCHLD之前经过了这个秒数,
; supervisord将尝试用最终的SIGKILL杀死它
stopwaitsecs=1
user=root                   ; 设置启动该程序的用户
log_stdout=true             ; 如果为True,则记录程序日志
log_stderr=false            ; 如果为True,则记录程序错误日志
logfile=/var/log/redis-server.log    ; 程序日志路径
logfile_maxbytes=1MB        ; 日志文件最大大小
logfile_backups=10          ; 日志文件最大数量
参考:
https://zhuanlan.zhihu.com/p/147305277
priority=888 ; 优先级越高表示程序最后启动并首先关闭
priority=999 ; 进程启动优先级,默认999,值小的优先启动
stopasgroup
If true, the flag causes supervisor to send the stop signal to the whole process group and implies
killasgroupis true. This is useful for programs, such as Flask in debug mode, that do not propagate stop signals to their children, leaving them orphaned.Default: false
Required: No.
Introduced: 3.0b1
killasgroup
If true, when resorting to send SIGKILL to the program to terminate it send it to its whole process group instead, taking care of its children as well, useful e.g with Python programs using
multiprocessing.Default: false
Required: No.
Introduced: 3.0a11
nginx配置:
[program: nginx]
command=/opt/nginx/sbin/nginx  -g 'daemon off;'
directory=/opt/nginx/sbin
autorestart=true ;
autostart=true ;
stderr_logfile=/opt/nginx/logs/nginx_error.log ;
stdout_logfile=/opt/nginx/logs/nginx_stdout.log ;
user=root ;
stopsignal=INT
startsecs=10 ;
startretries=5 ;
stopasgroup=true
killasgroup=true
下面是配置Tomcat进程的一个例子:
[program:tomcat]

command=/usr/local/tomcat/bin/catalina.sh run

stdout_logfile=/usr/local/tomcat/logs/catalina.out

autostart=true

autorestart=true

startsecs=5

priority=1

stopasgroup=true

killasgroup=true
[program:theprogramname]
command=/bin/cat              ; 程序运行命令,建议使用绝对路径。
process_name=%(program_name)s ; 程序名称,可用的变量有 `group_name`, `host_node_name`, `process_num`, `program_name`, `here`(配置文件目录)。 一般程序需要运行多个副本的情况会使用。后面会有例子。
numprocs=1                    ; 程序运行的副本个数,默认为1,如果值大于1,则`process_name` 必须包含 `%(process_num)s`
numprocs_start=0              ; `%(process_num)s`起始数字,默认为0
00=/tmp                ; 程序运行的所在目录,相当于先cd到指定目录,然后运行程序。
umask=022                     ; umask for process (default None)
priority=999                  ; 程序操作的的优先级,例如在start all/stop all,高优先级的程序会先关闭和重启。
autostart=true                ; 在supervisord启动时自动启动,默认为true
startsecs=1                   ; 程序启动前等待时间等待时间。默认为1。
startretries=3                ; 尝试重启最大次数。默认为3。
autorestart=unexpected        ; 是否自动重启,可选参数为 false, unexpected, true。如果为false则不自动重启,如果为unexpected表示如果程序退出信号不在 `exitcodes` 中,则自动重启。默认为unexpected
exitcodes=0,2                 ; 程序退出码。配合`autorestart`使用。默认为 0,2
stopsignal=QUIT               ; 杀死进程是发送的信号,默认为TREM。
stopwaitsecs=10               ; 发送SIGKILL信号前最大等待时间。默认为10。
user                          ; 以指定用户身份启动程序。默认为当前用户。
stopasgroup=false             ; 是否向子进程发送停止信号,这对于Flask的debug模式很有用处,如果设置为true,则不向子进程发送停止信号。默认为false
killasgroup=false             ; 是否向子进程发送kill信号,默认为false
redirect_stderr=false         ; 将错误输出定向到标准输出,默认为false
stdout_logfile=/a/path        ; 标准输出日志路径,可选参数为 `自定义` `AUTO` `NONE`,`自定义`将日志写到自定义路径,可用的变量有`group_name`, `host_node_name`, `process_num`, `program_name`, `here`(配置文件目录);`NONE`不创建日志;`AUTO` 又supervisord自动选择路径,并且当supervisord服务重新启动时原来自动创建的日志以及日志的备份文件会被删除。默认为AUTO
stdout_logfile_maxbytes=1MB   ; 标准输出日志单个文件最大大小,如果超过指定大小会将日志文件备份,可用的单位 KB MB GB。如果设置为0则表示不限制文件大小。默认为50MB
stdout_logfile_backups=10     ; 标准输出日志文件最大备份数。默认为10
stdout_capture_maxbytes=1MB   ; 当进程处于“stdout capture mode”模式下写入到FIFO队列最大字节数,可用单位 KB MB GB。默认为0,详细说明见[capture-mode](http://supervisord.org/logging.html#capture-mode)
stdout_events_enabled=false   ;
                              ;以下配置项配置错误输出的日志参数。和上面标准输出配置相同。
stderr_logfile=/a/path        ;
stderr_logfile_maxbytes=1MB   ;
stderr_logfile_backups=10     ;
stderr_capture_maxbytes=1MB   ;
stderr_events_enabled=false   ;
environment=A="1",B="2"       ; 环境变量设置,可用的变量有 `group_name`, `host_node_name`, `process_num`, `program_name`, `here`。 默认为空。
serverurl=AUTO                ; override serverurl computation (childutils)
程序分组
;[group:thegroupname]  ;就是给programs(子进程)分组,划分到组里面的program。我们就不用一个一个去操作了,我们可以对组名进行统一的操作。 注意:program被划分到组里面之后,就相当于原来的配置从supervisor的配置文件里消失了。supervisor只会对组进行管理,而不再会对组里面的单个program进行管理了
;programs=progname1,progname2 ;组成员,用逗号分开。
;priority=999                  ;优先级,相对于组和组之间说的。默认999。
https://www.cnblogs.com/mldsh/p/14592264.html
停止组(需要带上冒号):
supervisor> stop gameserver_data_group:
也可以具体到某个进程:
supervisor> stop gameserver_data_group:gameserver_data_consume_all
也可以使用*号:
supervisor> restart gameserver_data_group: *
supervisorctl reload
supervisorctl reread # 重新读取配置
supervisorctl update # 更新配置
Supervisor 管理进程服务重启报警(Event & Listener 监控进程并报警)
一、需求:
服务、进程等都被 Supervisor 管理,想实现 被管理的程序异常退出后,或者程序尝试重启多次失败后,Supervisor可以告警通知。
二、实现思路
Event 是在 Supervisor 3.0 引入的一个高级特性,如果只简单使用 Supervisor 管理进程,则不需要了解 Event。
但如果希望监控 Supervisor 管理的进程的各种状态(如: 启动、退出、失败、退出状态码 …)并支持告警,才需要了解Event。
利用 Supervisor 的 Event & Listener 功能进行订阅异常退出事件,并进行报警处理。
Supervisor 官方对其 Event 机制的描述是:一个进程的监控/通知框架。
该机制主要通过一个 event listener 订阅 event 通知实现。当被 Supervisor 管理的进程有特定行为的时候,supervisor 就会自动发出对应类型的 event。即使没有配置 listener,这些 event 也是会发的;如果配置了 listener 并监听该类型的 event,那么这个 listener 就会接收到该 event。 event listener 需要自己实现,并像 program 一样,作为 superviosr 的子进程运行。
三、具体配置实现
1、配置事件监听器
主管事件侦听器是通过 配置文件中的[eventlistener:x]指定的。关于Supervisor [eventlistener:x] 在配置中允许的键方面,几乎与supervisor [program:x]完全一样,只是Supervisor不遵循事件侦听器进程的“捕获模式”输出(即事件侦听器不能是 PROCESS_COMMUNICATIONS_EVENT事件生成器)。因此,在事件``侦听器的配置中指定stdout_capture_maxbytes或 stderr_capture_maxbytes是错误的。可以放入配置文件的事件侦听器部分的数量没有人为限制。
vim /etc/supervisord.d/eventlistener.ini
[eventlistener:mylistener]
command=/opt/my_custom_listener.py ; 自定义的监控程序
events=PROCESS_STATE_EXITED,PROCESS_STATE_FATAL,TICK_60 ; 监控事件
; 下面的配置和`[program:x]`完全一样
autostart=true
autorestart=true
log_stdout=true
log_stderr=true
stdout_logfile=/opt/supervisor_event_exited-stdout.log
stdout_logfile_maxbytes=50MB
stdout_logfile_backups=3
buffer_size=10
stderr_logfile=/opt/supervisor_event_exited-stderr.log
stderr_logfile_maxbytes=50MB
stderr_logfile_backups=3
#!/usr/bin/env python
# -*- coding: utf-8 -*-
import sys
from supervisor import childutils


def write_stdout(s):
    # only eventlistener protocol messages may be sent to stdout
    sys.stdout.write(s)
    sys.stdout.flush()

def write_stderr(s):
    sys.stderr.write(s)
    sys.stderr.flush()

def main():
    while 1:
        # transition from ACKNOWLEDGED to READY
        write_stdout('READY\n')

        # read header line and print it to stderr
        line = sys.stdin.readline()
        write_stderr(line)

        # read event payload and print it to stderr
        headers = dict([ x.split(':') for x in line.split() ])
        data = sys.stdin.read(int(headers['len']))
        write_stderr(data)

        # transition from READY to ACKNOWLEDGED
        write_stdout('RESULT 2\nOK')


        # 使用supervisor的childutils解析
        headers, payload = childutils.listener.wait(sys.stdin, sys.stdout)
        pheaders, pdata = childutils.eventdata(payload + '\n')
        # 当 program 的退出码为对应配置中的 exitcodes 值时, expected=1; 否则为0
        if int(pheaders.get('expected', 1)):
            childutils.listener.ok(sys.stdout)
            continue
        else:  # 0, 异常退出,根据 pheaders 的值发送报警处理
            ############################
            pass  # 你的自定制发送报警逻辑 #
            with open('/opt/sup.log', 'a') as f:  # 这里写入文件作为报警简单模拟
                f.write(str(pheaders))
                f.write(str(pdata))
                f.write('\n')
            ############################

            # 向 stdout 写入"RESULT\nOK",并进入下一次循环
            childutils.listener.ok(sys.stdout)

if __name__ == '__main__':
    main()
2、配置监听器脚本
vim /opt/my_custom_listener.py
#!/usr/bin/env python
# -*- coding: utf-8 -*-
import sys
from supervisor import childutils


def write_stdout(s):
    # only eventlistener protocol messages may be sent to stdout
    sys.stdout.write(s)
    sys.stdout.flush()

def write_stderr(s):
    sys.stderr.write(s)
    sys.stderr.flush()

def main():
    while 1:
        # transition from ACKNOWLEDGED to READY
        write_stdout('READY\n')

        # read header line and print it to stderr
        line = sys.stdin.readline()
        write_stderr(line)

        # read event payload and print it to stderr
        headers = dict([ x.split(':') for x in line.split() ])
        data = sys.stdin.read(int(headers['len']))
        write_stderr(data)

        # transition from READY to ACKNOWLEDGED
        write_stdout('RESULT 2\nOK')


        # 使用supervisor的childutils解析
        headers, payload = childutils.listener.wait(sys.stdin, sys.stdout)
        pheaders, pdata = childutils.eventdata(payload + '\n')
        # 当 program 的退出码为对应配置中的 exitcodes 值时, expected=1; 否则为0
        if int(pheaders.get('expected', 1)):
            childutils.listener.ok(sys.stdout)
            continue
        else:  # 0, 异常退出,根据 pheaders 的值发送报警处理
            ############################
            pass  # 你的自定制发送报警逻辑 #
            with open('/opt/sup.log', 'a') as f:  # 这里写入文件作为报警简单模拟
                f.write(str(pheaders))
                f.write(str(pdata))
                f.write('\n')
            ############################

            # 向 stdout 写入"RESULT\nOK",并进入下一次循环
            childutils.listener.ok(sys.stdout)

if __name__ == '__main__':
    main()
原文链接:https://blog.csdn.net/fgf00/article/details/104579788
https://blog.51cto.com/tchuairen/2432698

 浙公网安备 33010602011771号