05: 使用axios/vue-resource发送HTTP请求
1.1 axios 简介与安装
1、axios简介
1. vue本身不支持发送AJAX请求,需要使用vue-resource、axios等插件实现
2. axios是一个基于Promise的HTTP请求客户端,用来发送请求,也是vue2.0官方推荐的,同时不再对vue-resource进行更新和维护
3. 参考:GitHub上搜索axios,查看API文档:https://github.com/axios/axios
2、安装axios
1. npm install axios -S # 也可直接下载axios.min.js文件
2. 下载后即到 C:\Users\tom\node_modules\axios\dist 路径下找到 axios.min.js 文件
1.2 axios 基本用法
1、 axios最基本使用


<!DOCTYPE html>
<html lang="en">
<head>
  <meta charset="UTF-8">
  <title>发送AJAX请求</title>
</head>
<body>
<div id="itany">
  <button @click="sendGet">GET方式发送AJAX请求</button>
</div>

<script src="js/vue.js"></script>
<script src="js/axios.min.js"></script>
<script src="js/qs.js"></script>
<script>
  window.onload=function(){
    new Vue({
      el:'#itany',
      data:{
        uid:''
      },
      methods:{
        sendGet(){
          // 1、发送get请求
          axios({
            url: 'http://127.0.0.1:8000/data/',                 //1、请求地址
            method: 'get',                                        //2、请求方法
            params: {ids: [1,2,3],type: 'admin'},                //3、get请求参数
          })
          // 2、回调函数
          .then(resp => {
            console.log(resp.data);
          })
          // 3、捕获异常
          .catch(err => {
            console.log('请求失败:'+err.status+','+err.statusText);
          });
        }

      }
    });
  }
</script>
</body>
</html>
<!DOCTYPE html>
<html lang="en">
<head>
  <meta charset="UTF-8">
  <title>发送AJAX请求</title>
</head>
<body>
<div id="itany">
  <button @click="sendPost">POST方式发送AJAX请求</button>
</div>

<script src="js/vue.js"></script>
<script src="js/axios.min.js"></script>
<script src="js/qs.js"></script>
<script>
  window.onload=function(){
    new Vue({
      el:'#itany',
      data:{
        uid:''
      },
      methods:{
        sendPost(){
          // 1、发送post请求
          axios({
            url: 'http://127.0.0.1:8000/data/',             //1、请求地址
            method: 'post',                                  // 2、请求方法
            data: {ids: [1,2,3],type: 'admin'},              //3、提交数据
            transformRequest:[                               //4、在发送请求前可以改变要传的数据
              function(data){
                let params='';
                for(let index in data){
                  params+=index+'='+data[index]+'&';         //5、拼接成:name=alice&age=20& 的字符串
                }
                return params;
              }
            ]
        })
        // 2、回调函数
        .then(resp => {
          console.log(resp.data);
        })
        // 3、捕获异常
        .catch(err => {
          console.log('请求失败:'+err.status+','+err.statusText);
        });
        }
      }
    });
  }
</script>
</body>
</html>
2、axios借助Qs对提交数据进行序列化
axios参考博客:https://www.jianshu.com/p/68d81da4e1ad
https://www.cnblogs.com/yiyi17/p/9409249.html
<!DOCTYPE html>
<html lang="en">
<head>
  <meta charset="UTF-8">
  <title>发送AJAX请求</title>
</head>
<body>
<div id="itany">
  <button @click="sendGet">GET方式发送AJAX请求</button>
</div>

<script src="js/vue.js"></script>
<script src="js/axios.min.js"></script>
<script src="js/qs.js"></script>
<script>
  window.onload=function(){
    new Vue({
      el:'#itany',
      data:{
        uid:''
      },
      methods:{
        sendGet(){
          // 1、发送get请求
          axios({
            url: 'http://127.0.0.1:8000/data/',                 //1、请求地址
            method: 'get',                                        //2、请求方法
            params: {ids: [1,2,3],type: 'admin'},                //3、get请求参数

            paramsSerializer: params => {                          //4、可选函数、序列化`params`
              return Qs.stringify(params, { indices: false })
            },
            responseType: 'json',                                //5、返回默认格式json
            headers: {'authorization': 'xxxtokenidxxxxx'},     //6、认证token
          })
          // 2、回调函数
          .then(resp => {
            console.log(resp.data);
          })
          // 3、捕获异常
          .catch(err => {
            console.log('请求失败:'+err.status+','+err.statusText);
          });
        }

      }
    });
  }
</script>
</body>
</html>
<!DOCTYPE html>
<html lang="en">
<head>
  <meta charset="UTF-8">
  <title>发送AJAX请求</title>
</head>
<body>
<div id="itany">
  <button @click="sendPost">POST方式发送AJAX请求</button>
</div>

<script src="js/vue.js"></script>
<script src="js/axios.min.js"></script>
<script src="js/qs.js"></script>
<script>
  window.onload=function(){
    new Vue({
      el:'#itany',
      data:{
        uid:''
      },
      methods:{
        sendPost(){
          // 1、发送post请求
          axios({
            url: 'http://127.0.0.1:8000/data/',             //1、请求地址
            method: 'post',                                  // 2、请求方法
            data: Qs.stringify(                               //3、可选函数、序列化`data`
              {ids: [1,2,3],type: 'admin'},                  //4、提交数据
              { indices: false }                             // indices: false
            ),
            responseType: 'json',                           //5、返回默认格式json
            headers: {'authorization': 'xxxtokenidxxxxx'},//6、身份验证token
        })
        // 2、回调函数
        .then(resp => {
          console.log(resp.data);
        })
        // 3、捕获异常
        .catch(err => {
          console.log('请求失败:'+err.status+','+err.statusText);
        });
        }
      }
    });
  }
</script>
</body>
</html>
def data(request):
    if request.method == 'GET':
        token_id = request.META.get('HTTP_AUTHORIZATION')  # header中的tokenid
        print(request.GET.getlist('ids'))                   # 获取get请求中列表
        data = {
            'id':1,
            'name': 'zhangsan'
        }
        return HttpResponse(json.dumps(data))
    elif request.method == 'POST':
        token_id = request.META.get('HTTP_AUTHORIZATION')  # header中的tokenid
        print(request.POST.getlist('ids'))                  # 获取post请求中的列表
        data = {
            'id':1,
            'name': 'zhangsan',
            'method': 'POST'
        }
        return HttpResponse(json.dumps(data))
#1、qs用途:  在 axios中,利用QS包装data数据
#2、安 装:    npm install qs -S
#3、常见用法:
'''
import Qs from 'qs';
Qs.stringify(data);
Qs.parse(data)
'''
3、vuejs借助axios发送ajax请求(同级目录下创建以下两个文件)
{
    "id":1001,
    "name":"秋香",
    "age":18
}
<!DOCTYPE html>
<html lang="en">
<head>
    <meta charset="UTF-8">
    <title>发送AJAX请求</title>
</head>
<body>
    <div id="itany">
        <button @click="send">发送AJAX请求</button>
    </div>

    <script src="js/vue.js"></script>
    <script src="js/axios.min.js"></script>
    <script>
        window.onload=function(){
            new Vue({
                el:'#itany',
                data:{
                    user:{
                        // name:'alice',
                        // age:19
                    },
                    uid:''
                },
                methods:{
                    send(){
                        axios({
                            method:'get',
                            url:'user.json'
                        }).then(function(resp){        // 请求成功调用此函数
                            console.log(resp.data);    // {id: 1001, name: "秋香", age: 18}
                        }).catch(resp => {              // 请求失败调用此函数
                            console.log('请求失败:'+resp.status+','+resp.statusText);
                        })
                    }
                }
            });
        }
    </script>
</body>
</html>
<!DOCTYPE html>
<html lang="en">
<head>
    <meta charset="UTF-8">
    <title>发送AJAX请求</title>
</head>
<body>
    <div id="itany">
        GitHub ID: <input type="text" v-model="uid">
        <button @click="getUserById(uid)">获取指定GitHub账户信息并显示</button>
        <br>
        姓名:{{user.name}} <br>
        头像:<img :src="user.avatar_url" alt="">

        <hr>
    </div>

    <script src="js/vue.js"></script>
    <script src="js/axios.min.js"></script>
    <script>
        window.onload=function(){
            new Vue({
                el:'#itany',
                data:{
                    user:{
                        name:'alice',
                        age:19
                    },
                    uid:''
                },
                methods:{
                    getUserById(uid){
                        axios.get(`https://api.github.com/users/${uid}`)
                        .then(resp => {
                            // console.log(resp.data);
                            this.user=resp.data;
                        });
                    },
                }
            });
        }
    </script>
</body>
</html>
4、vuejs借助axios发送get请求
<?php
    //获取参数
    $name=$_POST['name'];
    $age=$_POST['age'];

    //响应数据
    echo '姓名:',$name,',年龄:',$age;
?>
<!DOCTYPE html>
<html lang="en">
<head>
    <meta charset="UTF-8">
    <title>发送AJAX请求</title>
</head>
<body>
    <div id="itany">
        <button @click="sendGet">GET方式发送AJAX请求</button>
    </div>

    <script src="js/vue.js"></script>
    <script src="js/axios.min.js"></script>
    <script>
        window.onload=function(){
            new Vue({
                el:'#itany',
                data:{
                    user:{
                        // name:'alice',
                        // age:19
                    },
                    uid:''
                },
                methods:{
                    sendGet(){                        // axios.get('server.php?name=tom&age=23')
                        axios.get('server.php',{
                            params:{
                                name:'alice',
                                age:19
                            }
                        })
                        .then(resp => {
                            console.log(resp.data);
                        }).catch(err => {
                            console.log('请求失败:'+err.status+','+err.statusText);
                        });
                    },
                }
            });
        }
    </script>
</body>
</html>
5、vuejs借助axios发送post请求
1. axios默认发送数据时,数据格式是Request Payload,并非我们常用的Form Data格式,
2. 所以参数必须要以键值对形式传递,不能以json形式传参
3. 传参方式:
1. 自己拼接为键值对
2. 使用transformRequest,在请求发送前将请求数据进行转换
3. 如果使用模块化开发,可以使用qs模块进行转换
<?php
    //获取参数
    $name=$_POST['name'];
    $age=$_POST['age'];

    //响应数据
    echo '姓名:',$name,',年龄:',$age;
?>
<!DOCTYPE html>
<html lang="en">
<head>
    <meta charset="UTF-8">
    <title>发送AJAX请求</title>
</head>
<body>
    <div id="itany">
        <button @click="sendPost">POST方式发送AJAX请求</button>
    </div>

    <script src="js/vue.js"></script>
    <script src="js/axios.min.js"></script>
    <script>
        window.onload=function(){
            new Vue({
                el:'#itany',
                data:{
                    user:{
                        name:'alice',
                        age:19
                    },
                    uid:''
                },
                methods:{
                    sendPost(){
                        // axios.post('server.php',{     // 这个是官方给出的post请求,但是后天无法收到
                        //         name:'alice',
                        //         age:19
                        // })
                        // axios.post('server.php','name=alice&age=20&') //方式1
                        axios.post('server.php',this.user,{
                            transformRequest:[                 // 在发送请求前可以改变要传的数据
                                function(data){
                                    let params='';
                                    for(let index in data){
                                        params+=index+'='+data[index]+'&';   // 拼接成:name=alice&age=20& 的字符串
                                    }
                                    return params;
                                }
                            ]
                        })
                        .then(resp => {
                            console.log(resp.data);
                        })
                        .catch(err => {
                            console.log('请求失败:'+err.status+','+err.statusText);
                        });
                    },
                }
            });
        }
    </script>
</body>
</html>
1.3 使用vue-resource发送跨域请求
1、安装vue-resource并引入
1. cnpm install vue-resource -S
2. 参考:GitHub上搜索 vue-resource ,查看API文档:https://github.com/pagekit/vue-resource
2、基本用法
使用this.$http发送请求
this.$http.get(url, [options])
this.$http.head(url, [options])
this.$http.delete(url, [options])
this.$http.jsonp(url, [options])
this.$http.post(url, [body], [options])
this.$http.put(url, [body], [options])
this.$http.patch(url, [body], [options])
3、使用
<!DOCTYPE html>
<html lang="en">
<head>
    <meta charset="UTF-8">
    <title>发送AJAX请求</title>
</head>
<body>
    <div id="itany">
        <button @click="sendJSONP">向360搜索发送JSONP请求</button>
    </div>

    <script src="js/vue.js"></script>
    <script src="js/vue-resource.min.js"></script>
    <script>
        window.onload=function(){
            new Vue({
                el:'#itany',
                data:{
                    user:{
                        name:'alice',
                        age:19
                    },
                    uid:''
                },
                methods:{
                    sendJSONP(){
                        //https://sug.so.360.cn/suggest?callback=suggest_so&encodein=utf-8&encodeout=utf-8&format=json&fields=word&word=a
                        this.$http.jsonp('https://sug.so.360.cn/suggest',{
                            params:{
                                word:'python'            // 要查询的内容
                            }
                        }).then(resp => {
                            console.log(resp.data.s);    // 返回的查询结果
                            // ["python官网", "python视频教程", "python 培训", "python基础教程", "python下载", ]
                        });
                    },
                }
            });
        }
    </script>
</body>
</html>
<!DOCTYPE html>
<html lang="en">
<head>
    <meta charset="UTF-8">
    <title>发送AJAX请求</title>
</head>
<body>
    <div id="itany">
        <button @click="sendJSONP2">向百度搜索发送JSONP请求</button>
    </div>

    <script src="js/vue.js"></script>
    <script src="js/vue-resource.min.js"></script>
    <script>
        window.onload=function(){
            new Vue({
                el:'#itany',
                data:{
                    user:{
                        name:'alice',
                        age:19
                    },
                    uid:''
                },
                methods:{
                    sendJSONP2(){
                        //https://sp0.baidu.com/5a1Fazu8AA54nxGko9WTAnF6hhy/su?wd=a&json=1&p=3&sid=1420_21118_17001_21931_23632_22072&req=2&csor=1&cb=jQuery110208075694879886905_1498805938134&_=1498805938138
                        this.$http.jsonp('https://sp0.baidu.com/5a1Fazu8AA54nxGko9WTAnF6hhy/su',{
                            params:{
                                wd:'a'
                            },
                            jsonp:'cb' //百度使用的jsonp参数名为cb,所以需要修改
                        }).then(resp => {
                            console.log(resp.data.s);
                            // ["爱奇艺", "阿黛尔", "艾力绅", "阿里云", "阿里巴巴", "安居客", ]
                        });
                    }
                }
            });
        }
    </script>
</body>
</html>
4、发送get请求,并将请求内容添加到插件中
get(url, option)
Url :表示请求地址
Option :表示请求配置
Params :定义query数据
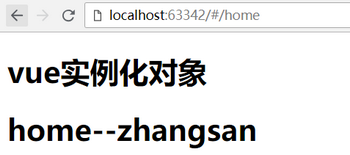
<!DOCTYPE html>
<html lang="en">
<head>
    <meta charset="UTF-8">
    <meta http-equiv="x-ua-compatible" content="IE=edge">
    <meta name="viewport" content="width=device-width, initial-scale=1">
    <title>Title</title>
</head>
<body>
    <div id="app">
        <h1>vue实例化对象</h1>
        <router-view></router-view>        <!--定义渲染容器-->
    </div>

    <script type="text/javascript" src="vue.js"></script>
    <script type="text/javascript" src="vue-router.js"></script>
    <script type="text/javascript" src="vue-resource.min.js"></script>
    <script>
        var Home = {
            template:'<h1>home--{{data}}</h1>',
            data:function () {
                return {
                    data:''
                }
            },
            created:function () {
                this.$http.get('demo.json?123',{
                    params:{
                        color:'red'
                    }
                })
                    .then(function (res) {
                        this.data = res.data.name  //  res.data 是请求获取的内容
                    })
            }
        };

        // 第一步:定义路由规则
        var routes = [
            {
                path:'/home',
                name:'home',
                component:Home
            },
        ];

        // 第二步:实例化路由对象
        var router = new VueRouter({
            routes:routes
        });

        // 第三步:在vue实例化对象中注册路由
        var app = new Vue({
            el:'#app',
            router:router
        })
    </script>
</body>
</html>
5、发送post请求
post(url, data, option)
Url :表示请求地址
Data :表示请求的数据
Option :表示请求的配置
Params :定义query数据
<!DOCTYPE html>
<html lang="en">
<head>
    <meta charset="UTF-8">
    <meta http-equiv="x-ua-compatible" content="IE=edge">
    <meta name="viewport" content="width=device-width, initial-scale=1">
    <title>Title</title>
</head>
<body>
    <div id="app">
        <h1>vue实例化对象</h1>
        <router-view></router-view>        <!--定义渲染容器-->
    </div>

    <script type="text/javascript" src="vue.js"></script>
    <script type="text/javascript" src="vue-router.js"></script>
    <script type="text/javascript" src="vue-resource.min.js"></script>
    <script>
        var Home = {
            template:'<h1>home--{{data}}</h1>',
            data:function () {
                return {
                    data:''
                }
            },
            created:function () {
                this.$http.post('demo.json?123',{'arg1':'price'},{
                    params:{
                        b:200
                    }
                })
                    .then(function (res) {
                        this.data = res.data.name  //  res.data 是请求获取的内容
                    })
            }
        };

        // 第一步:定义路由规则
        var routes = [
            {
                path:'/home',
                name:'home',
                component:Home
            },
        ];

        // 第二步:实例化路由对象
        var router = new VueRouter({
            routes:routes
        });

        // 第三步:在vue实例化对象中注册路由
        var app = new Vue({
            el:'#app',
            router:router
        })
    </script>
</body>
</html>
1.4 封装axios请求
1、初始化环境
vue init webpack deaxios
npm install axios –S
cnpm install vuex -S
2、封装axios(创建 src/api 文件夹)
export default {
  // api请求地址
  // API_URL: 'http://mup.dev.yiducloud.cn/'
  API_URL: 'http://1.1.1.3:8888'
}
import Axios from 'axios'
import URLS from '../../config/urls'

//1、使用自定义配置新建一个 axios 实例
const instance = Axios.create({
  baseURL: URLS.API_URL,
  headers: {
    'Content-Type': 'application/json'
  }
});

//2、添加请求拦截器
instance.interceptors.request.use(
  config => {
    //发送请求前添加认证token
    config.headers.Authorization = sessionStorage.getItem('token')
    // console.log(sessionStorage.getItem('token'),11223344)
    return config
  },
  err => {
    return Promise.reject(err)
  });

//3、添加响应拦截器
instance.interceptors.response.use(function (response) {
  // 对响应数据处理
  if (response.status === 200 || response.status === 201 || response.status === 400) {
    const data = response.data
    if (data.code === 200 || data.code === 201) {
      return data
    }
  }
  return Promise.reject(response)
}, function (error) {
  if (error.response) {
    switch (error.response.status) {
      case 400:
        return Promise.reject(error.response.data)
      case 401:
        window.location.href = '/login'
    }
  }
  // const errorData = error.response.data
  // if (errorData.code === 400) {
  //   return Promise.reject(errorData.desc)
  // }
  // return Promise.reject(errorData)
})

// export const getNodegroups = params => { return instance.get(`${base}/nodegroup/v1/nodegroups/list/`, params).then(res => res.data) }
// export const getNodegroups = params => { return instance.get(`/nodegroup/v1/nodegroups/list/`, params).then(res => res) }
export default instance
import URLS from '../../config/urls'
import ajax from './ajax'
let base = URLS.API_URL

// 用户相关
export const requestLogin = params => { return ajax.post(`${base}/users/v1/user/login/`, params).then(res => res) }
import * as api from './api'

export default api
3、使用vuex
import Vue from 'vue'
import Vuex from 'vuex'
import login from './modules/login/login'

Vue.use(Vuex);

export default new Vuex.Store({
  modules:{
    login
  }
});
import {
  requestLogin,
} from '../../../api/api'  // 导入封装后的axios请求

const state = {}

const getters = {}

const actions = {
  async loginMethod ({commit}, params) {
    return requestLogin(params).then(response => response)
  },
};

const mutations = {}

export default {
  state,
  getters,
  actions,
  mutations
}
4、入口
// The Vue build version to load with the `import` command
// (runtime-only or standalone) has been set in webpack.base.conf with an alias.
import Vue from 'vue'
import App from './App'
import router from './router'
import store from './store/index'

Vue.config.productionTip = false

/* eslint-disable no-new */
new Vue({
  el: '#app',
  router,
  store,
  components: { App },
  template: '<App/>'
})
<template>
  <div id="app">
    <p @click="handleLogin">点击发送axiso请求</p>
    <router-view/>
  </div>
</template>

<script>
  import { mapActions } from 'vuex'
export default {
  name: 'App',
  methods: {
    ...mapActions(['loginMethod']),
    handleLogin () {
          var loginParams = { username: 'zhangsan', password: '123456' }
          this.loginMethod(loginParams).then(response => {
            // this.logining = false
            sessionStorage.setItem('token', response.data)
            // this.$router.push({ path: '/' })
          }).catch(error => {
            this.loading = false
            this.error(error.desc ? error.desc : '服务器异常')
          })
        }
    },
}
</script>

<style>
#app {
  font-family: 'Avenir', Helvetica, Arial, sans-serif;
  -webkit-font-smoothing: antialiased;
  -moz-osx-font-smoothing: grayscale;
  text-align: center;
  color: #2c3e50;
  margin-top: 60px;
}
</style>

5、封装axios作用
1. 我们在此将此项目所用到的所有接口调用方法都做了定义,这样既方便查看也利于管理。在
2. 我们需要调用接口方法的时候,我们只需要在对应vue文件中的标签里直接import想用的接口方法就行了
例如:import { getOptList,branchList,addOperator } from "../../api/index";
6、使用vuex发送get请求
import Vue from 'vue'
import Vuex from 'vuex'
import meeting from './modules/meeting/meeting'

Vue.use(Vuex)

export default new Vuex.Store({
  strict: process.env.NODE_ENV !== 'production',
  modules: {
    meeting
  }
})
import {
  getMeetingList
} from '../../../api/api'
import {getUrl} from "../../../utils/global/geturl";  // 导入封装后的axios请求

const state = {};

const getters = {};

const actions = {
  async getMeetingListMethod ({commit}, params) {
    return getMeetingList(getUrl(params)).then(response => response)
  },
};

const mutations = {};

export default {
  state,
  getters,
  actions,
  mutations
}
<template>

</template>

<script>
  import { mapActions } from 'vuex'
  export default {
    data() {
      return {};
    },
    methods: {
      ...mapActions(['getMeetingListMethod']),

      // 获取会议室信息
      requestMeetingListMethod () {
        var parms = {};
        this.getMeetingListMethod(parms).then(response => {
          console.log(123456)
          console.log(response)
          // this.tableData = response.data.data_list
          // this.listQuery.total = response.data.total
          this.loading = false
        }).catch(error => {
          this.loading = false;
          this.error(error.desc ? error.desc : '服务器异常')
        })
      },
    },

    created(){
      this.requestMeetingListMethod();  // 获取会议室信息
    },
  };
</script>

<style scoped>


</style>
作者:学无止境
出处:https://www.cnblogs.com/xiaonq
生活不只是眼前的苟且,还有诗和远方。
