django-应用中和amdin使用富文本编辑器kindeditor
文章描述、新闻详情和产品介绍等,都需要大量的文字描述信息或图片、视频、文字的编辑等,这个时候我们就需要介绍第三方富文本编辑器。
今天介绍的是django中绑定和应用kindeditor编辑器:
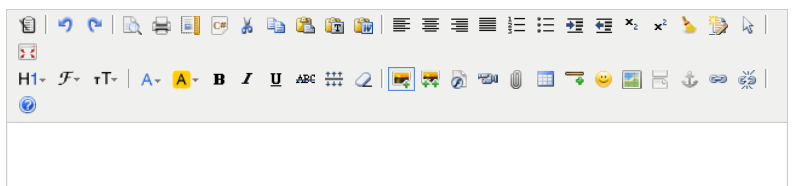
效果如图:

一。应用中使用
第一步:到官网下载 kindeditor
下载好后删除这些没有的文件asp,asp.net,jsp,php.在django中这些都没用。

第二步:将删除后的文件引入自己的项目中。根目录下的static/js/kindeditor/

第三步:
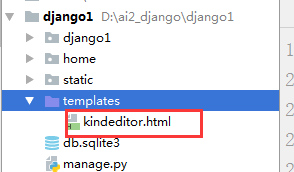
1.创建前端测试展示页kindeditor.html
 1 <!DOCTYPE html>
 2 <html lang="en">
 3 <head>
 4     <meta charset="UTF-8">
 5     <title>Title</title>
 6     <!--载入kindeditor的js-->
 7      <script src="/static/js/kindeditor/kindeditor-all-min.js"></script>
 8     <script src="/static/js/kindeditor/lang/zh-CN.js"></script>
 9     <script src="/static/js/kindeditor/themes/default/default.css"></script>
10     <!--载入kindeditor配置-->
11      <script>
12         KindEditor.ready(function (k) {
13             window.editor = k.create('#editor_id',{
14                 resizeType:1,
15                 allowPreviewEmoticons : false,
16                 allowImageRemote : false,
17                 {#处理url#}
18                 uploadJson : '/upload/kindeditor',
19             });
20         })
21     </script>
22 </head>
23 <body>
24 <!--kindeditor绑定内容:在thml的textarea 中加入一个id=editor_id ,这个就是富文本编辑框。这个id在上一步的js中有用到,这个需要注意下。-->
25 <textarea id="editor_id" name="content" style="height: 400px" ></textarea>
26
27 </body>
28 </html>
注意:载入js路径根据自己保存的kindeditor的js路径
2.配置路由urls.py和views.py


1 from django.conf.urls import url,include
2 from django.contrib import admin
3 from home import views
4 urlpatterns = [
5     url(r'^kindeditor/',views.kindeditor),
6
7 ]
def kindeditor(request):
    return render(request,'kindeditor.html')
以上正确配置后,就可以访问http://localhost:8000/kindeditor/
第四步:接下来做django中的配置。(对于文件上传功能的设置)
1. setting.py 文件中配置静态文件上传目录,编辑器中上传的文件将保存在这里。
MEDIA_URL = '/static/media/'
MEDIA_ROOT = os.path.join(BASE_DIR, "static/media")
2. 在自己的应用中创建一个文件名为uploads.py 的模块,
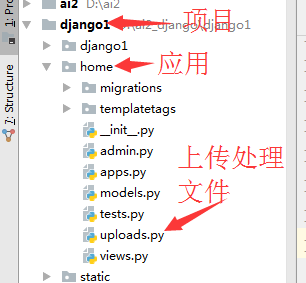
uploads.py代码如下
这里是在我的blog应用中,创建好后将下面这段代码复制到文件中
 1 #__author__ = 'wuchao'
 2 from django.http import HttpResponse
 3 from django.conf import settings
 4 from django.views.decorators.csrf import csrf_exempt
 5 import os
 6 #uuid.uuid1()基于MAC地址,时间戳,随机数来生成唯一的uuid,可以保证全球范围内的唯一性
 7 import uuid
 8 import json
 9 import datetime as dt
10
11 @csrf_exempt
12 def upload_image(request, dir_name):
13     result = {"error": 1, "message": "上传出错"}
14     files = request.FILES.get("imgFile", None)
15     if files:
16         result = image_upload(files, dir_name)
17     return HttpResponse(json.dumps(result), content_type="application/json")
18 # 目录创建
19
20 def upload_generation_dir(dir_name):
21     today = dt.datetime.today()
22     dir_name = dir_name + '/%d/%d/' % (today.year, today.month)
23     if not os.path.exists(settings.MEDIA_ROOT + dir_name):
24         os.makedirs(settings.MEDIA_ROOT + dir_name)
25     return dir_name
26
27 # 图片上传
28 def image_upload(files, dir_name):
29     # 允许上传文件类型
30     allow_suffix = ['jpg', 'png', 'jpeg', 'gif',
31                     'bmp', 'zip', "swf", "flv",
32                     "mp3", "wav", "wma", "wmv",
33                     "mid", "avi", "mpg", "asf",
34                     "rm", "rmvb", "doc", "docx",
35                     "xls", "xlsx", "ppt", "htm",
36                     "html", "txt", "zip", "rar",
37                     "gz", "bz2"]
38     file_suffix = files.name.split(".")[-1]
39     if file_suffix not in allow_suffix:
40         return {"error": 1, "message": "图片格式不正确"}
41     relative_path_file = upload_generation_dir(dir_name)
42     path = os.path.join(settings.MEDIA_ROOT, relative_path_file)
43     if not os.path.exists(path):  # 如果目录不存在创建目录
44         os.makedirs(path)
45     file_name = str(uuid.uuid1()) + "." + file_suffix
46     path_file = os.path.join(path, file_name)
47     file_url = settings.MEDIA_URL + relative_path_file + file_name
48     open(path_file, 'wb').write(files.file.read())
49     return {"error": 0, "url": file_url}
第五步:配置应用中文件上传的url
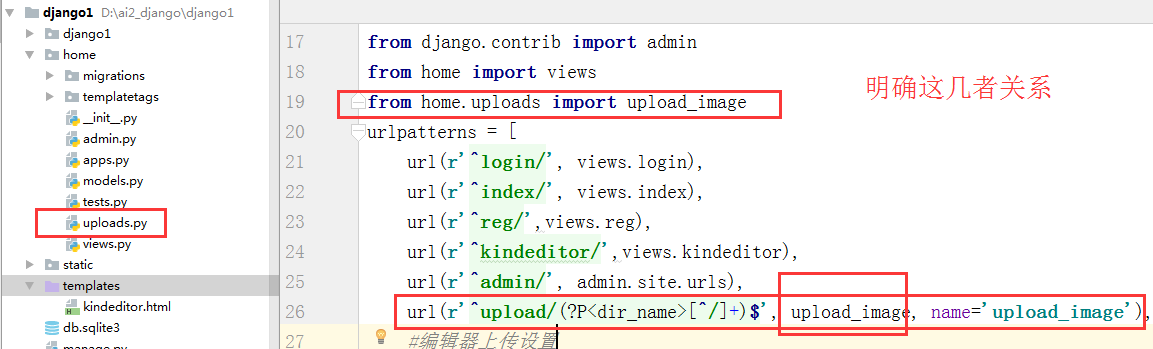
from home.uploads import upload_image
url(r'^upload/(?P<dir_name>[^/]+)$', upload_image, name='upload_image'),
 1 from django.conf.urls import url,include
 2 from django.contrib import admin
 3 from home import views
 4 from home.uploads import upload_image
 5 urlpatterns = [
 6     url(r'^kindeditor/',views.kindeditor),
 7     #上传的url配置
 8     url(r'^upload/(?P<dir_name>[^/]+)$', upload_image, name='upload_image'),
 9     url(r'^admin/', admin.site.urls),
10 ]
上面这些步骤富文本编辑器应该可以正常使用了,包括上传图片,视频。
上传文件保存在: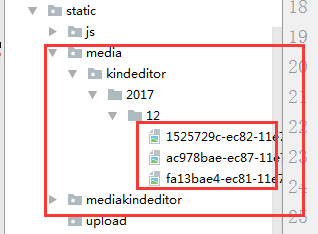
下面我们来看下在admin后台管理中使用
1.首先在我们之前下载的kindeditor 目录下新建一个config.js文件写入这段代码跟之前在应用中使用的是一样的
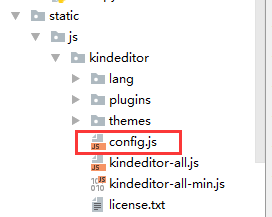
 1 KindEditor.ready(function (k) {
 2      //这个地方需要注意;模型类中使用 text = models.TextField()的话id就是id_text。
 3     // 如果是提前字段类型可以到浏览器中检查,获取到需要使用富文本编辑器的元素的id
 4     window.editor = k.create('#id_content',{
 5         resizeType:1,
 6         allowPreviewEmoticons : false,
 7         allowImageRemote : false,
 8         uploadJson : '/upload/kindeditor', //这个是上传图片后台处理的url
 9         width:'800px',
10         height:'400px',
11     });
12 })
2.在应用的模型层models.py的类中添加 content=TextField()
个人代码如下:
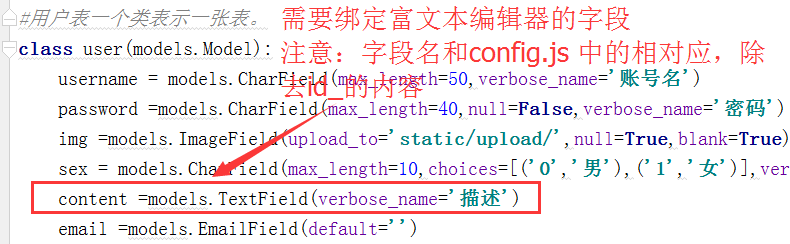
3.接下来就需要去admin.py中注册模型类,将其kindeditor的js文件引入到admin中
class userAdmin(admin.ModelAdmin):
    list_display = ('id','username','email','sex','img_data')
    class Media:
            # 在管理后台的HTML文件中加入js文件, 每一个路径都会追加STATIC_URL/
        js = (
                '/static/js/kindeditor/kindeditor-all-min.js',
                '/static/js/kindeditor/zh_CN.js',
                '/static/js/kindeditor/config.js',
            )
#使用admin.site.register
admin.site.register(models.user,userAdmin)
