
Python的Web编程[1] -> Web服务器[0] -> Web 服务器与 CGI / WSGI
Web服务器 / Web Server
对于Web来说,需要建立一个Web服务器,必须建立一个基本的服务器和一个处理程序,
基本服务器的主要作用是,在客户端和服务器端完成必要的HTTP交互,
处理程序的主要作用是,处理客户端的请求,并返回适当的文件,包括静态/动态文件。
1 建立服务器 / Setup Server
在Python中,有一个内置http包,包含了server和client模块,其中server模块包含了几个类,分别为基本服务器类HTTPServer(基类为socketserver.TCPServer),和三个处理程序类,BaseHTTPRequestHandler类(基类为socketserver.StreamRequestHandler),SimpleHTTP-RequestHandler类(基类为BaseHTTPRequestHandler)以及CGIHTTPRequestHandler类(基类为SimpleHTTPRequestHandler),以及一个常用的test函数。
Note: 在Python3之前,这三个类在三个独立模块中,分别为BaseHTTPServer(包含HTTPServer类),SimpleHTTPServer,CGIHTTPServer。对于基本处理程序的类来说,可以通过重定义以下几个方法: do_GET/do_POST/do_HEAD等来实现相应处理功能。
1.1 基本服务器
利用http.server提供的HTTPServer和BaseHTTPRequestHandler两个类建立一个简单的服务器及处理程序。
完整代码


 1 from http.server import BaseHTTPRequestHandler, HTTPServer
 2
 3 # http://localhost:80/first_html.html to GET file
 4 class MyHandler(BaseHTTPRequestHandler):
 5     def do_GET(self):
 6         try:
 7             f = open(self.path[1:], 'r')
 8             self.send_response(200)
 9             self.send_header('Content-type', 'text/html'.encode())
10             self.end_headers()
11             self.wfile.write(f.read().encode())
12             f.close()
13         except IOError:
14             self.send_error(404,
15                     'File NOt Found: %s' % self.path)
16
17 def main():
18     try:
19         server = HTTPServer(('', 80), MyHandler)
20         print('Welcome to the machine... Press ^C once or twice to quit.')
21         server.serve_forever()
22     except:
23         print('^C received, shutting down server')
24         server.socket.close()
25
26 if __name__ == '__main__':
27     main()
分段解释
首先导入所需的模块,通过继承基本处理程序类,并重载do_GET方法来实现对GET的处理。其中send_response()发送http状态码,send_header()发送http头部信息,end_headers()添加头部结束表示符,通过wfile的write函数将指定路径读取的内容传给用户。
 1 from http.server import BaseHTTPRequestHandler, HTTPServer
 2
 3 # http://localhost:80/first_html.html to GET file
 4 class MyHandler(BaseHTTPRequestHandler):
 5     def do_GET(self):
 6         try:
 7             f = open(self.path[1:], 'r')
 8             self.send_response(200)
 9             self.send_header('Content-type', 'text/html'.encode())
10             self.end_headers()
11             self.wfile.write(f.read().encode())
12             f.close()
13         except IOError:
14             self.send_error(404,
15                     'File NOt Found: %s' % self.path)
定义一个主函数用于启动服务器,其中ip为localhost,端口为80,传入自定义的处理程序。启动服务器后,可以使用Web客户端(各种浏览器),输入相应的url(确保GET的文件与url指定的文件匹配),如http://localhost:80/first_html.html来获取网页文件信息。
 1 def main():
 2     try:
 3         server = HTTPServer(('', 80), MyHandler)
 4         print('Welcome to the machine... Press ^C once or twice to quit.')
 5         server.serve_forever()
 6     except:
 7         print('^C received, shutting down server')
 8         server.socket.close()
 9
10 if __name__ == '__main__':
11     main()
通过上面的简单示例可以对服务器进行进一步的扩展,从而实现更多的功能。
接下来介绍利用http.server中的CGIHTTPRequestHandler配合HTTPServer来建立一个CGI服务器,
1 # e.g.:
2 # Connect following link to GET HTML
3 # http://localhost:8000/static_screen.html
4 from http.server import CGIHTTPRequestHandler, test
5 test(CGIHTTPRequestHandler)
利用http的CGI服务器的建立十分简单,只需要导入处理模块和test函数,再运行即可。
Note: 此处值得注意的有以下两点,
- 在CGIHTTPRequestHandler中,设置了默认的cgi目录为/cgi-bin(以及/htbin),因此需要在脚本所在目录下建立相应的cgi-bin文件夹,并存放相应cgi文件,这样才会运行cgi脚本,否则只会当做普通的文本文件返回;
- test函数中,默认使用HTTPServer作为基本服务器,使用localhost以及端口8000作为连接参数,协议为HTTP/1.0,处理程序默认为BaseHTTPRequest-Handler。
2 通用网关接口CGI / Common Gateway Interface
2.1 CGI简介
Common Gateway Interface(CGI)是一种定义的标准接口,用于在外部应用程序(CGI程序)和Web服务器之间的信息传递,CGI的规范允许Web服务器执行外部程序,并将这些外部程序的输出发送给Web浏览器。其主要工作流程如下,
- 浏览器通过HTML表单或超链接请求指向一个CGI应用程序的URL;
- 服务器收到请求;
- 服务器执行指定CGI应用程序;
- CGI应用程序执行所需要的操作,通常是基于浏览者输入的内容;
- CGI应用程序把结果格式化为网络服务器和浏览器能够理解的文档(通常是HTML网页);
- 网络服务器把结果返回到浏览器中。
值得注意的是,CGI应用程序时运行在服务器系统上的,执行时会消耗服务器的CPU和内存。同时不完善的CGI应用程序还有可能成为非法进入服务器的通道。目前,一般的生产环境都已不再使用CGI。
2.2 启动CGI服务器
首先,需要打开CGI的服务器,可以选择直接运行前面的CGI服务器脚本或在命令行中通过下列命令直接启动服务器,
python -c "from http.server import CGIHTTPRequestHandler, test;test(CGIHTTPRequestHandler)"
2.3 CGI应用程序
接下来介绍在服务器运行的前提下,使用CGI程序实现客户端与服务器之间的交互功能。
2.3.1 静态表单与CGI结果页面
利用静态的html页面来生成表单,同时在html中定义按钮触发cgi程序运行,生成返回的结果表单。
具体效果如下,
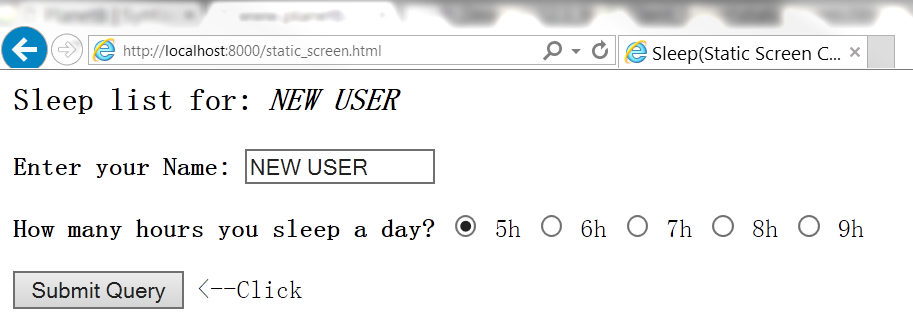
在浏览器中输入url: http://localhost:8000/static_screen.html,将会显示基本页面如下,
通过填好名字后单击submit按钮得到返回页面如下,

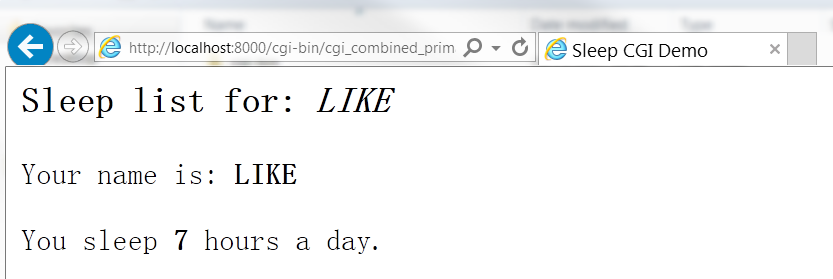
返回页面的url为,http://localhost:8000/cgi-bin/cgi_sleep.py?person=LIKE&howmany=7,通过该url可以看到,cgi应用程序的位置,以及请求表单提供的信息(person=LIKE,howmany=7)。
实现上述功能,首先需要定义静态的表单页面,首先定义头部标题,随后显示h3,定义表单的action指向cgi-bin中的cgi应用程序,再创建几个表单(radio类型)输入以及一个提交按钮(submit类型),html代码如下,
 1 <html>
 2     <head>
 3         <title>
 4             Sleep(Static Screen CGI demo)
 5         </title>
 6     </head>
 7     <body>
 8         <h3>
 9             Sleep list for: <i>NEW USER</i>
10         </h3>
11         <form action="/cgi-bin/cgi_sleep.py">
12             <b>Enter your Name:</b>
13             <input type=text name=person value="NEW USER" size=15>
14             <p>
15                 <b>How many hours you sleep a day?</b>
16                 <input type=radio name=howmany value='5' checked> 5h
17                 <input type=radio name=howmany value='6'> 6h
18                 <input type=radio name=howmany value='7'> 7h
19                 <input type=radio name=howmany value='8'> 8h
20                 <input type=radio name=howmany value='9'> 9h
21             <p><input type=submit> <--Click
22         </form>
23     </body>
24 </html>
定义好表单之后,还需要定义表单中指向的cgi程序,
代码如下
import cgi

reshtml = '''Content-Type: text/html\n
<html><head><title>
Sleep(Dynamic Screen CGI demo)
</title></head>
<body><h3>sleep list for: <i>%s</i></h3>
Your name is: <b>%s</b><p>
You sleep <b>%s</b> hours a day.
</body></html>'''

# cgi.FieldStorage will catch the form from web client
form = cgi.FieldStorage()

# Get the value
who = form['person'].value
howmany = form['howmany'].value

# print should be html format, and will be return back to web client
print(reshtml % (who, who, howmany))
首先导入cgi模块,同时定义返回的html页面,其中包括返回的头部类型,text/html
cgi模块的FiledStorage类实现了CGI的数据交互功能,首先对其进行实例化,得到的实例中包含client提交的表单信息内容,可以直接通过键值取值获取,而cgi应用程序最终输出(print)的结果将会被返回给客户端。
2.3.2 CGI表单和结果页面
2.3.2.1 基本版本
除了静态表单外,还可以利用CGI程序动态生成表单和最终的结果页面,将下面的cgi程序放在cgi-bin目录下,通过浏览器的url指向该脚本,由于CGIServer中进行了判断会对py(以及pyc)文件进行运行,因此可以直接调用cgi程序。否则将返回文本信息。
完整代码
 1 """
 2 Run Server first
 3 Connect address: Http://localhost:8000/cgi-bin/cgi_combined_primary.py
 4 """
 5 import cgi
 6
 7 # Http header
 8 header = 'Content-Type: text/html\n\n'
 9
10 # Html form
11 formhtml = '''<html><head><title>
12 Sleep CGI Demo</title></head>
13 <body><h3>Sleep list for: <i>NEW USER</i></h3>
14 <form action='/cgi-bin/cgi_combined_primary.py'>
15 <b>Enter your Name: </b>
16 <input type=hidden name=action value=edit>
17 <input type=text name=person value='NEW USER' SIZE=15>
18 <p><b>How many hours you sleep a day?</b>
19 %s
20 <p><input type=submit></form></body></html>'''
21
22 fradio = '<input type=radio name=howmany value="%s" %s> %s\n'
23
24 def showForm():
25     sleep = []
26     for i in range(5, 10):
27         checked = ''
28         if i == 5:
29             checked = 'CHECKED'
30         sleep.append(fradio % (str(i), checked, str(i)))
31     print('%s%s' % (header, formhtml % ''.join(sleep)))
32
33 reshtml = '''<html><head><title>
34 Sleep CGI Demo</title></head>
35 <body><h3>Sleep list for: <i>%s</i></h3>
36 Your name is: <b>%s</b><p>
37 You sleep <b>%s</b> hours a day.
38 </body></html>'''
39
40 def doResults(who, howmany):
41     print(header + reshtml % (who, who, howmany))
42
43 def process():
44     form = cgi.FieldStorage()
45     if 'person' in form:
46         who = form['person'].value  # resp
47     else:
48         who = 'NEW USER'    # show
49
50     if 'howmany' in form:
51         howmany = form['howmany'].value # resp
52
53     else:
54         howmany = 0     # show
55
56     # Use action label to judge show or response
57     if 'action' in form:
58         doResults(who, howmany) # resp
59     else:
60         showForm()  # show
61
62 if __name__ == '__main__':
63     process()
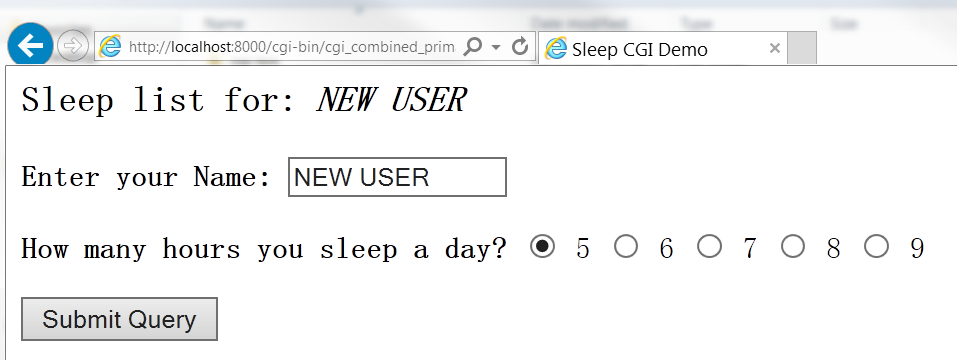
最终页面的显示结果如下
输入用户名点击提交后显示如下界面,
分段解释
导入模块后,定义http的头部,以及表单页面的html代码,其中需要注意的是,15行中的一个表单类型为hidden,即为不可见的,并且起名为action,值为edit,其目的在于用作一个判断标志,用于判断是一个新提交表单还是一个返回结果的表单,从而执行相应的函数进行处理。
 1 """
 2 Run Server first
 3 Connect address: Http://localhost:8000/cgi-bin/cgi_combined_primary.py
 4 """
 5 import cgi
 6
 7 # Http header
 8 header = 'Content-Type: text/html\n\n'
 9
10 # Html form
11 formhtml = '''<html><head><title>
12 Sleep CGI Demo</title></head>
13 <body><h3>Sleep list for: <i>NEW USER</i></h3>
14 <form action='/cgi-bin/cgi_combined_primary.py'>
15 <b>Enter your Name: </b>
16 <input type=hidden name=action value=edit>
17 <input type=text name=person value='NEW USER' SIZE=15>
18 <p><b>How many hours you sleep a day?</b>
19 %s
20 <p><input type=submit></form></body></html>'''
21
22 fradio = '<input type=radio name=howmany value="%s" %s> %s\n'
showForm()函数用于添加表单输入框,
1 def showForm():
2     sleep = []
3     for i in range(5, 10):
4         checked = ''
5         if i == 5:
6             checked = 'CHECKED'
7         sleep.append(fradio % (str(i), checked, str(i)))
8     print('%s%s' % (header, formhtml % ''.join(sleep)))
接着定义返回的html,以及返回处理函数,用于将返回的结果添加到返回html中。
1 reshtml = '''<html><head><title>
2 Sleep CGI Demo</title></head>
3 <body><h3>Sleep list for: <i>%s</i></h3>
4 Your name is: <b>%s</b><p>
5 You sleep <b>%s</b> hours a day.
6 </body></html>'''
7
8 def doResults(who, howmany):
9     print(header + reshtml % (who, who, howmany))
最后定义过程函数,首先实例化cgi生成表单实例,此时,判断表单中是否有person和howmany项,若有则说明是提交的表单页,则获取表单信息,没有则说明是初次提供的表单页,设置默认值。接着利用action标志判断是哪一种表单,执行相应处理程序。此处也可以依靠person和howmany字段来判断,但使用action字段更清晰明了。
 1 def process():
 2     form = cgi.FieldStorage()
 3     if 'person' in form:
 4         who = form['person'].value  # resp
 5     else:
 6         who = 'NEW USER'    # show
 7
 8     if 'howmany' in form:
 9         howmany = form['howmany'].value # resp
10
11     else:
12         howmany = 0     # show
13
14     # Use action label to judge show or response
15     if 'action' in form:
16         doResults(who, howmany) # resp
17     else:
18         showForm()  # show
19
20 if __name__ == '__main__':
21     process()
2.3.2.2 升级版本
对上面生成表单和结果页面的CGI程序进行升级,添加或改变了以下几个功能,
- 不设置默认勾选选项,当未选择选项时,返回报错页面提示错误;
- 设置返回锚,输入信息后单击返回锚会返回原页面,并自动填入之前输入的信息。
完整代码
 1 """
 2 Run Server first
 3 Connect address: Http://localhost:8000/cgi-bin/cgi_combined_advanced.py
 4 """
 5 import cgi
 6 from urllib.parse import quote_plus
 7
 8 # Http header
 9 header = 'Content-Type: text/html\n\n'
10 url = '/cgi-bin/cgi_combined_advanced.py'
11
12 errhtml = '''<html><head><title>
13 Sleep CGI Demo</title></head>
14 <body><h3>ERROR</h3>
15 <b>%s</b><p>
16 <form><input Type=button value=Back onclick="window.history.back()"</form>
17 </body></html>'''
18
19 def showError(error_str):
20     print(header + errhtml % error_str)
21
22 formhtml = '''<html><head><title>
23 Sleep CGI Demo</title></head>
24 <body><h3>Sleep list for: <i>%s</i></h3>
25 <form action="%s">
26 <b>Enter your Name: </b>
27 <input type=hidden name=action value=edit>
28 <input type=text name=person value="%s" SIZE=15>
29 <p><b>How many hours you sleep a day?</b>
30 %s
31 <p><input type=submit></form></body></html>'''
32
33 fradio = '<input type=radio name=howmany value="%s" %s> %s\n'
34
35 def showForm(who, howmany):
36     sleep = []
37     for i in range(5, 10):
38         checked = ''
39         if str(i) == howmany:
40             checked = 'CHECKED'
41         sleep.append(fradio % (str(i), checked, str(i)))
42     print('%s%s' % (header, formhtml % (who, url, who, ''.join(sleep))))
43
44 reshtml = '''<html><head><title>
45 Sleep CGI Demo</title></head>
46 <body><h3>Sleep list for: <i>%s</i></h3>
47 Your name is: <b>%s</b><p>
48 You sleep <b>%s</b> hours a day.
49 <p>Click <a href="%s">here</a> to edit your data again.
50 </body></html>'''
51
52 def doResults(who, howmany):
53     newurl = url + '?action=reedit&person=%s&howmany=%s' % (quote_plus(who), howmany)
54     print(header + reshtml % (who, who, howmany, newurl))
55
56 def process():
57     error = ''
58     form = cgi.FieldStorage()
59
60     if 'person' in form:
61         who = form['person'].value.title()  # Resp
62     else:
63         who = 'NEW USER'    # Show
64
65     if 'howmany' in form:
66         howmany = form['howmany'].value # Resp
67     else:
68         if 'action' in form and form['action'].value == 'edit':
69             error = 'Please select hours of sleep.' # Error
70         else:
71             howmany = 0     # Show
72
73     if not error:
74         if 'action' in form and form['action'].value != 'reedit':
75             doResults(who, howmany) # Resp
76         else:
77             showForm(who, howmany)  # Show
78     else:
79         showError(error)    # Error
80
81 if __name__ == '__main__':
82     process()
运行服务器并输入指定的URL后,可以看到如下页面,与基本版本的页面相近,但是没有勾选默认选项。
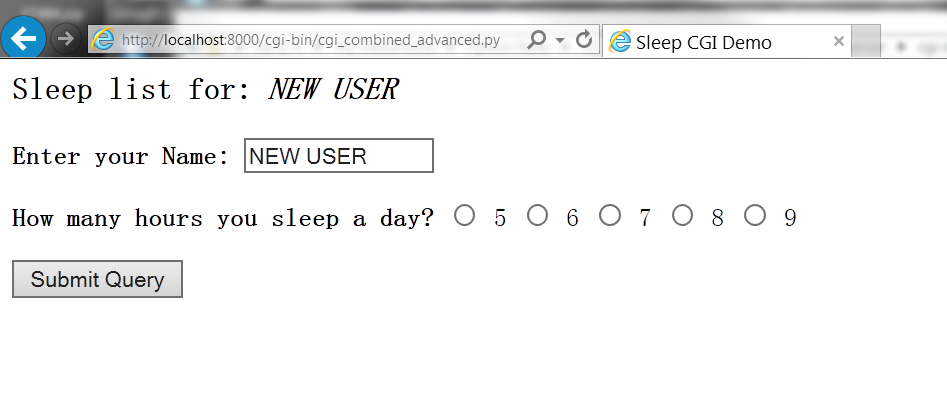
若此时不选择任何选项,直接单击提交按钮,则CGI程序会返回如下的错误提示页面,此时单击返回按钮则会返回之前的页面。

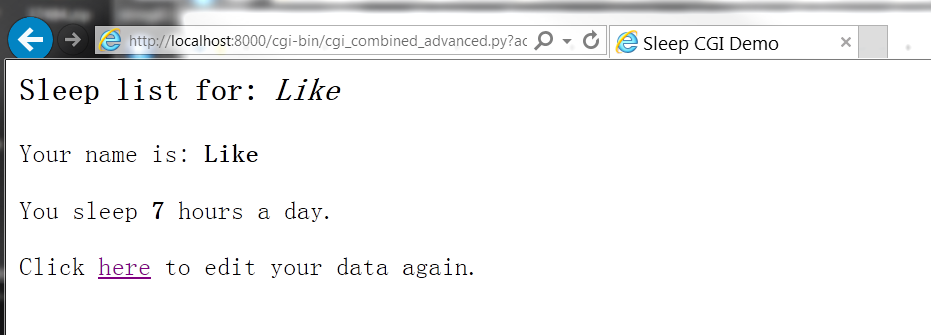
返回之前页面填入名字勾选选项后,会显示结果页面如下,此时可以通过点击here锚链接返回之前选择的页面。
分段解释
首先导入模块,定义通用的http头部以及url的path信息,
 1 """
 2 Run Server first
 3 Connect address: Http://localhost:8000/cgi-bin/cgi_combined_advanced.py
 4 """
 5 import cgi
 6 from urllib.parse import quote_plus
 7
 8 # Http header
 9 header = 'Content-Type: text/html\n\n'
10 url = '/cgi-bin/cgi_combined_advanced.py'
定义错误提示页面的html,设置一个表单后退按钮(JavaScript),单击后返回前页面,由于按钮是输入型,因此需要一个表单。
再定义显示错误函数,返回html头部以及错误提示页面html以及错误信息。
1 errhtml = '''<html><head><title>
2 Sleep CGI Demo</title></head>
3 <body><h3>ERROR</h3>
4 <b>%s</b><p>
5 <form><input Type=button value=Back onclick="window.history.back()"</form>
6 </body></html>'''
7
8 def showError(error_str):
9     print(header + errhtml % error_str)
接着定义显示页面,以及显示函数,与前面基本版本的类似。
 1 formhtml = '''<html><head><title>
 2 Sleep CGI Demo</title></head>
 3 <body><h3>Sleep list for: <i>%s</i></h3>
 4 <form action="%s">
 5 <b>Enter your Name: </b>
 6 <input type=hidden name=action value=edit>
 7 <input type=text name=person value="%s" SIZE=15>
 8 <p><b>How many hours you sleep a day?</b>
 9 %s
10 <p><input type=submit></form></body></html>'''
11
12 fradio = '<input type=radio name=howmany value="%s" %s> %s\n'
13
14 def showForm(who, howmany):
15     sleep = []
16     for i in range(5, 10):
17         checked = ''
18         if str(i) == howmany:
19             checked = 'CHECKED'
20         sleep.append(fradio % (str(i), checked, str(i)))
21     print('%s%s' % (header, formhtml % (who, url, who, ''.join(sleep))))
再定义结果返回页面,此处一个明显的区别在于多了一个锚,以here显示,链接锚指向新的url(在原url中接入了新的表单提交信息,设置action为reedit,person和howmany为之前表单提交值)。
 1 reshtml = '''<html><head><title>
 2 Sleep CGI Demo</title></head>
 3 <body><h3>Sleep list for: <i>%s</i></h3>
 4 Your name is: <b>%s</b><p>
 5 You sleep <b>%s</b> hours a day.
 6 <p>Click <a href="%s">here</a> to edit your data again.
 7 </body></html>'''
 8
 9 def doResults(who, howmany):
10     newurl = url + '?action=reedit&person=%s&howmany=%s' % (quote_plus(who), howmany)
11     print(header + reshtml % (who, who, howmany, newurl))
最后定义过程函数,首先是error信息为空,实例化表单类,对表单实例进行判断,如果person是返回表单,则将表单人名大写,再判断howmany字段,当存在时,说明是返回结果表单,若不存在,判断action是新表单还是错误表单。最后根据error和action字段进行执行相应函数。
 1 def process():
 2     error = ''
 3     form = cgi.FieldStorage()
 4
 5     if 'person' in form:
 6         who = form['person'].value.title()  # Resp
 7     else:
 8         who = 'NEW USER'    # Show
 9
10     if 'howmany' in form:
11         howmany = form['howmany'].value # Resp
12     else:
13         if 'action' in form and form['action'].value == 'edit':
14             error = 'Please select hours of sleep.' # Error
15         else:
16             howmany = 0     # Show
17
18     if not error:
19         if 'action' in form and form['action'].value != 'reedit':
20             doResults(who, howmany) # Resp
21         else:
22             showForm(who, howmany)  # Show
23     else:
24         showError(error)    # Error
25
26 if __name__ == '__main__':
27     process()
2.3.3 进阶功能CGI
利用CGI程序完成一个包含以下几个特性的服务器交互功能,包括,
- Cookie的使用;
- 同一个CGI字段的多个值;
- 利用multipart表单提交方式实现文件上传。
multipart
目前CGI中特别指出只允许存在两种表单编码,分别为“application/x-www-form-urlencoded”和“multipart/form-data”两种,在提交一个表单时,可以对表单的编码方式encode-type进行声明,默认编码方式为第一种,因此下面的声明是可以省略的,
<form enctype="application/x-www-form-urlencoded" ...>
而当需要用到multipart表单时,则需要声明multipart编码方式,声明方式如下,
<form enctype=" multipart/form-data" ...>
在提交表单时可以使用上述的任意一种,而上传文件时只能使用multipart编码方式,接着通过输入文件类型完成文件上传,
<input type=file name=...>
这段指令可以显示一个空的文本框,同时旁边有个按钮,可以通过按钮浏览文件找到上传文件。
多值字段
多值字段的常见情况为有一系列的复选框允许用户进行多选,每个复选框都有相同的字段名,但为了区分这些复选框,会使用不同的值与特定的复选框关联。
当复选框多选时,一个键将会对应多个值,在这种情况下cgi模块会建立一个包含这些类实例的列表,可以通过遍历获取所有的值。
Cookie
由于HTTP是一个无状态信息的协议,因此为了保持在多个页面之间浏览的连续性,则需要使用cookie,服务器会向客户端发送一个请求来保存cookie,从而让用户的信息数据等保存在客户端处,而不需要占用服务器存储或利用服务器页面嵌入数据的方式来保持数据。
在客户端获得请求文件之前,Web服务器会向客户端发送“Set-Cookie”头文件来要求客户端存储cookie。一旦客户端建立起了cookie,HTTP_COOKIE环境变量会将那些cookie自动放到请求中发送给服务器。cookie是以分号分隔的键值对存在的,即以分号‘;’分隔各个键值对,每个键值对中间都由等号‘=’分开。为此需要进行手动拆分解析。
功能实现
为实现上述几个功能,需要一个稍微复杂一点的CGI程序,具体代码如下,
完整代码
  1 from cgi import FieldStorage
  2 from os import environ
  3 from io import StringIO
  4 from urllib.parse import quote, unquote
  5
  6 class AdvCGI(object):
  7     header = 'Content-Type: text/html\n\n'
  8     url = '/cgi-bin/cgi_advanced.py'
  9
 10     formhtml = '''<html><head><title>
 11 Advanced CGI Demo</title></head>
 12 <body><h2>Advanced CGI Demo Form</h2>
 13 <form method=post action="%s" enctype="multipart/form-data">
 14 <h3>My Cookie Setting</h3>
 15 <li><code><b>CPPuser = %s</b></code>
 16 <h3>Enter cookie value<br>
 17 <input name=cookie value="%s"> (<i>optional</i>)</h3>
 18 <h3>Enter your name<br>
 19 <input name=person value="%s"> (<i>required</i>)</h3>
 20 <h3>What languages can you program in?
 21 (<i>at least one required<i>)</h3>
 22 %s
 23 <h3>Enter file to upload <small>(max size 4K)</small></h3>
 24 <input type=file name=upfile value="%s" size=45>
 25 <p><input type=submit>
 26 </form></body></html>'''
 27
 28     langSet = ('Python', 'Ruby', 'Java', 'C++', 'PHP', 'C', 'JavaScript')
 29     # Set checkbox for language items,
 30     # First %s for real value, second one for CHECKED or not, third one for presented value
 31     langItem = '<input type=checkbox name=lang value="%s"%s> %s\n'
 32
 33     # Read cookies from client
 34     def getCPPCookies(self):
 35         # environ contains the environment info, similar to dict usage
 36         # Check whether cookie exists
 37         if 'HTTP_COOKIE' in environ:
 38             # environ['HTTP_COOKIE'] could be like: 'CPPinfo=Like%3APython%2CJava%3AC%3A\path...; CPPuser=Self'
 39             # %3A -> :
 40             # %2C -> ,
 41             cookies = [x.strip() for x in environ['HTTP_COOKIE'].split(';')]
 42             # cookies = ['CPPinfo=Like%3APython%2CJava%3AC%3A\path...', 'CPPuser=Self']
 43             for eachCookie in cookies:
 44                 if len(eachCookie) > 6 and eachCookie[:3]=='CPP':
 45                     # tag -> info / user
 46                     tag = eachCookie[3:7]
 47                     try:
 48                         self.cookies[tag] = eval(unquote(eachCookie[8:]))
 49                     except (NameError, SyntaxError):
 50                         self.cookies[tag] = unquote(eachCookie[8:])
 51             if 'info' not in self.cookies:
 52                 self.cookies['info'] = ''
 53             if 'user' not in self.cookies:
 54                 self.cookies['user'] = ''
 55         else:
 56             self.cookies['info'] = self.cookies['user'] = ''
 57
 58         if self.cookies['info'] != '':
 59             print(self.cookies['info'])
 60             try:
 61                 self.who, langStr, self.fn = self.cookies['info'].split(' : ')
 62             except:
 63                 self.who = self.fn = self.cookies['info']
 64                 langStr = ' '
 65             self.langs = langStr.split(',')
 66         else:
 67             self.who = self.fn = ' '
 68             self.langs = ['Python']
 69
 70     def showForm(self):
 71         self.getCPPCookies()
 72
 73         # Put together language checkboxes
 74         langStr = []
 75         for eachLang in AdvCGI.langSet:
 76             # Add CHECKED if language name exists in cookies
 77             langStr.append(AdvCGI.langItem % (eachLang, 'CHECKED' if eachLang in self.langs else '', eachLang))
 78
 79         # See if user cookie set up yet
 80         if not ('user' in self.cookies and self.cookies['user']):
 81             cookStatus = '<i>(cookies has not been set yet)</i>'
 82             userCook = ''
 83         else:
 84             userCook = cookStatus = self.cookies['user']
 85
 86         print('%s%s' % (AdvCGI.header, AdvCGI.formhtml % (AdvCGI.url, cookStatus,
 87                         userCook, self.who, ''.join(langStr), self.fn)))
 88
 89     errhtml = '''<html><head><title>
 90 Advanced CGI Demo</title></head>
 91 <body><h3>Error</h3>
 92 <b>%s</b><p>
 93 <form><input type=button value=back onclick='window.history.back()'></form>
 94 </body></html>'''
 95
 96     def showError(self):
 97         print(AdvCGI.header + AdvCGI.errhtml % (self.error))
 98
 99     # Some html tags:
100     #   <li>: for list
101     #   <ol>: odered list
102     #   <ul>: unodered list
103     #   <br>: newline
104     reshtml = '''<html><head><title>
105 Advanced CGI Demo</title></head>
106 <body><h2>Your Uploaded Data</h2>
107 <h3>Your cookie value is: <b>%s</b></h3>
108 <h3>Your name is: <b>%s</b></h3>
109 <h3>You can program in the following languages:</h3>
110 <ul>%s</ul>
111 <h3>Your uploaded file...<br>
112 Name: <i>%s</i><br>
113 Contents:</h3>
114 <pre>%s</pre>
115 Click <a href="%s"><b>here</b></a> to return to form.
116 </body></html>'''
117
118     # Tell client to store cookies
119     def setCPPCookies(self):
120         for eachCookie in self.cookies.keys():
121             print('Set-cookie: CPP%s=%s; path=/' % (eachCookie, quote(self.cookies[eachCookie])))
122
123     # Display results page
124     def doResults(self):
125         MAXBYTES = 4096
126         langList = ''.join('<li>%s<br>' % eachLang for eachLang in self.langs)
127         filedata = self.fp.read(MAXBYTES)
128         # Check file size
129         if len(filedata) == MAXBYTES and self.fp.read():
130             filedata = '%s%s' % (filedata,
131                 '...<b><i>(file truncated due to size)</i></b>')
132         self.fp.close()
133         if filedata == '':
134             filedata = '<b><i>(file not given or upload error)</i></b>'
135         filename = self.fn
136
137         # See if user cookie set up yet
138         if not ('user in self.cookies and self.cookies["user"]'):
139             cookStatus = '<i>(cookie has not been set yet)</i>'
140             userCook = ''
141         else:
142             userCook = cookStatus = self.cookies['user']
143
144         # Set cookies
145         # Use ' : ' rather than ':' to join, because filename may contains ':' like 'c:\windows\...'
146         self.cookies['info'] = ' : '.join((self.who, ','.join(self.langs), filename))
147         self.setCPPCookies()
148
149         print('%s%s' % (AdvCGI.header, AdvCGI.reshtml % (cookStatus, self.who, langList,
150                             filename, filedata, AdvCGI.url)))
151
152     # Determine which page to return
153     def go(self):
154         self.cookies = {}
155         self.error = ''
156         form = FieldStorage()
157         # No form received
158         if not form.keys():
159             self.showForm()
160             return
161
162         if 'person' in form:
163             self.who = form['person'].value.strip().title()
164             if self.who == '':
165                 self.error = 'Your name is required. (blank)'
166         else:
167             self.error = 'Your name is required. (missing)'
168
169         self.cookies['user'] = unquote(form['cookie'].value.strip()) if 'cookie' in form else ''
170         if 'lang' in form:
171             langData = form['lang']
172             if isinstance(langData, list):
173                 self.langs = [eachLang.value for eachLang in langData]
174             else:
175                 self.langs = [langData.value]
176         else:
177             self.error = 'At least one language required.'
178
179         if 'upfile' in form:
180             upfile = form['upfile']
181             # form['upfile'] ->.filename for file name, .file for file data
182             self.fn = upfile.filename or ''
183             if upfile.file:
184                 self.fp = upfile.file
185             else:
186                 self.fp = StringIO('(no data)')
187         else:
188             # StringIO as data container
189             self.fp = StringIO('(no file)')
190             self.fn = ''
191
192         if not self.error:
193             self.doResults()
194         else:
195             self.showError()
196
197 if __name__ == '__main__':
198     page = AdvCGI()
199     page.go()
首先连接到服务器打开页面可以看到下图所示界面,
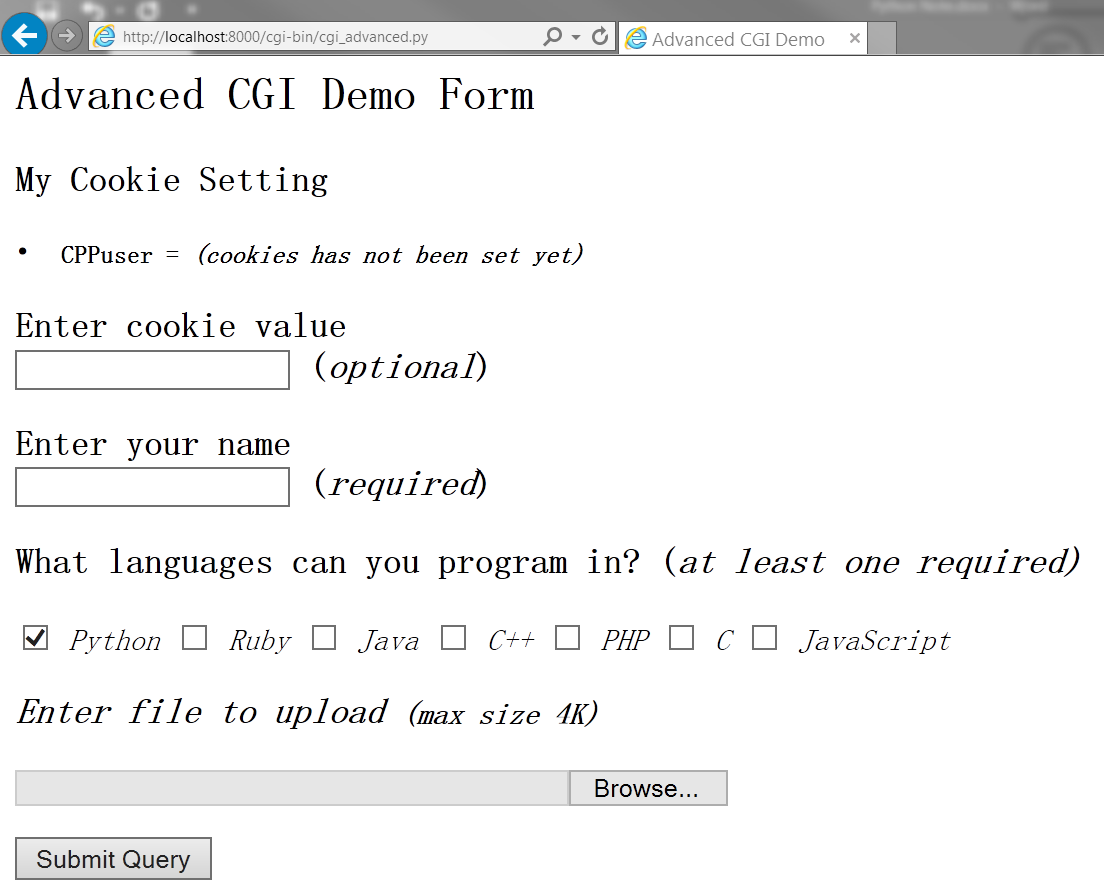
图中可以看出,页面包括一个cooike信息,用户名可选填项,你的名字必选项,多语言复选项以及需要上传的文件选择。
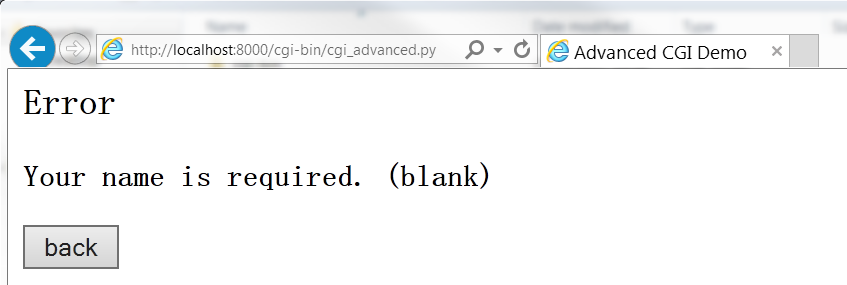
当不填写名字或未勾选内容时,会返回如下的错误信息页面。

填好信息后可以看到结果页面显示了选填的信息,并且显示了上传文件的内容。
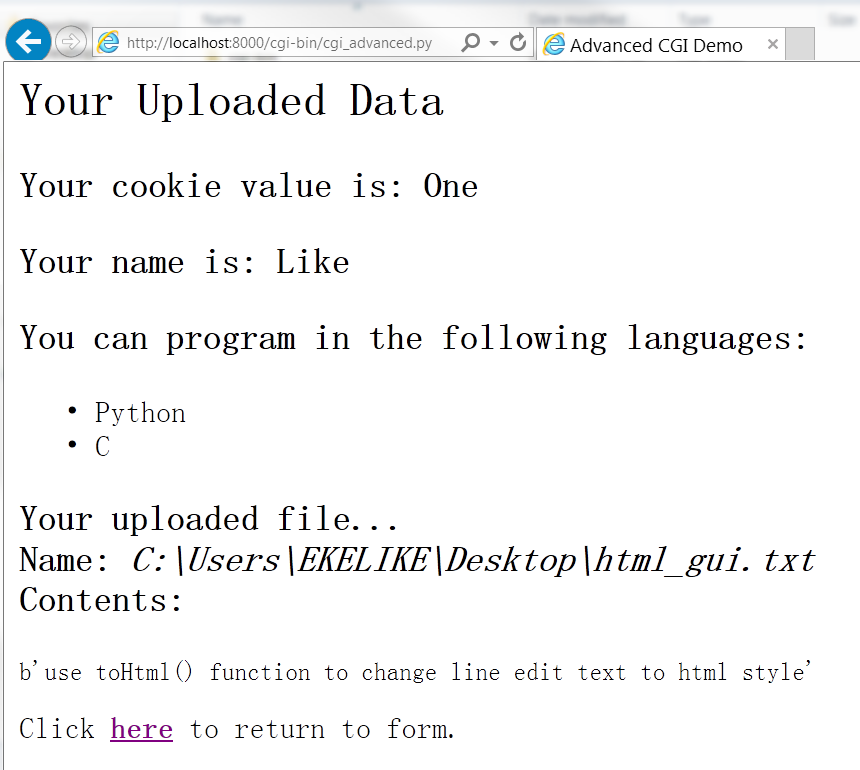
点击here按钮会返回之前的页面,同时由于cookie的存在,之前填入的信息都被保存了下来。

分段解析
首先导入所需的模块,cgi用于处理cgi交互,environ用于查看当前环境变量,主要用于查看HTTP_COOKIE使用,StringIO可作为字符串容器,最后的quote和unquote函数用于转换特定字符。
1 from cgi import FieldStorage
2 from os import environ
3 from io import StringIO
4 from urllib.parse import quote, unquote
接着定义一个AdvCGI类,设置通用的头部参数和url,以及表单页面(其中表单中定义了multipart编码方式以便于文件上传),表单语言输入项,checkbox的html片段。
 1 class AdvCGI(object):
 2     header = 'Content-Type: text/html\n\n'
 3     url = '/cgi-bin/cgi_advanced.py'
 4
 5     formhtml = '''<html><head><title>
 6 Advanced CGI Demo</title></head>
 7 <body><h2>Advanced CGI Demo Form</h2>
 8 <form method=post action="%s" enctype="multipart/form-data">
 9 <h3>My Cookie Setting</h3>
10 <li><code><b>CPPuser = %s</b></code>
11 <h3>Enter cookie value<br>
12 <input name=cookie value="%s"> (<i>optional</i>)</h3>
13 <h3>Enter your name<br>
14 <input name=person value="%s"> (<i>required</i>)</h3>
15 <h3>What languages can you program in?
16 (<i>at least one required<i>)</h3>
17 %s
18 <h3>Enter file to upload <small>(max size 4K)</small></h3>
19 <input type=file name=upfile value="%s" size=45>
20 <p><input type=submit>
21 </form></body></html>'''
22
23     langSet = ('Python', 'Ruby', 'Java', 'C++', 'PHP', 'C', 'JavaScript')
24     # Set checkbox for language items,
25     # First %s for real value, second one for CHECKED or not, third one for presented value
26     langItem = '<input type=checkbox name=lang value="%s"%s> %s\n'
在类中定义一个从客户端获取cookie的方法,首先利用os.environ类查看是否含有HTTP_COOKIE参数,如果有则说明包含cookie信息,通过os.environ[‘HTTP_COOKIE’]可以获取到cookie的信息,这个类的使用方式类似于字典,也具有*.keys()方法。当前示例中获取到的cookie大致为如下格式‘CPPinfo=Like%3APython%2CJava%3AC%3A\path...; CPPuser=Self’,其中%3A为冒号‘:’,%2C分号为‘;’。
Note: 浏览器发送给客户端设置cookie的头部格式为Set-Cookie,浏览器响应头部为Cookie。
在获取cookie的方法中主要对cookie作了如下的处理,
- 判断是否有cookie的存在,有则执行cookie操作;
- 根据分号对cookie进行split操作,分开cookie的每一对属性键值,并进行遍历;
- 在遍历中,检测CPP开头,获取CPP后4(3:7)位作为标签,获取8位之后为属性值;
- 没有cookie则设置为空;
- 判断cookie中的info字段是否为空,不为空则利用‘ : ’进行分割,此处由于有路径信息,可能存在多余冒号,因此在切分特征的冒号前后加入空格进行区别;
- 将信息切分得到用户名,使用语言,上传文件路径3个信息,再对其中的使用语言按逗号进行分割,从而获取所有信息。
 1 # Read cookies from client
 2     def getCPPCookies(self):
 3         # environ contains the environment info, similar to dict usage
 4         # Check whether cookie exists
 5         if 'HTTP_COOKIE' in environ:
 6             # environ['HTTP_COOKIE'] could be like: 'CPPinfo=Like%3APython%2CJava%3AC%3A\path...; CPPuser=Self'
 7             # %3A -> :
 8             # %2C -> ,
 9             cookies = [x.strip() for x in environ['HTTP_COOKIE'].split(';')]
10             # cookies = ['CPPinfo=Like%3APython%2CJava%3AC%3A\path...', 'CPPuser=Self']
11             for eachCookie in cookies:
12                 if len(eachCookie) > 6 and eachCookie[:3]=='CPP':
13                     # tag -> info / user
14                     tag = eachCookie[3:7]
15                     try:
16                         self.cookies[tag] = eval(unquote(eachCookie[8:]))
17                     except (NameError, SyntaxError):
18                         self.cookies[tag] = unquote(eachCookie[8:])
19             if 'info' not in self.cookies:
20                 self.cookies['info'] = ''
21             if 'user' not in self.cookies:
22                 self.cookies['user'] = ''
23         else:
24             self.cookies['info'] = self.cookies['user'] = ''
25
26         if self.cookies['info'] != '':
27             print(self.cookies['info'])
28             try:
29                 self.who, langStr, self.fn = self.cookies['info'].split(' : ')
30             except:
31                 self.who = self.fn = self.cookies['info']
32                 langStr = ' '
33             self.langs = langStr.split(',')
34         else:
35             self.who = self.fn = ' '
36             self.langs = ['Python']
定义一个显示表单的方法,用于初次页面的显示使用,首先获取服务器cookie信息,设置语言表单,再检测cookie是否加载,最后返回整个显示表单页面。
 1     def showForm(self):
 2         self.getCPPCookies()
 3
 4         # Put together language checkboxes
 5         langStr = []
 6         for eachLang in AdvCGI.langSet:
 7             # Add CHECKED if language name exists in cookies
 8             langStr.append(AdvCGI.langItem % (eachLang, 'CHECKED' if eachLang in self.langs else '', eachLang))
 9
10         # See if user cookie set up yet
11         if not ('user' in self.cookies and self.cookies['user']):
12             cookStatus = '<i>(cookies has not been set yet)</i>'
13             userCook = ''
14         else:
15             userCook = cookStatus = self.cookies['user']
16
17         print('%s%s' % (AdvCGI.header, AdvCGI.formhtml % (AdvCGI.url, cookStatus,
18                         userCook, self.who, ''.join(langStr), self.fn)))
设置错误提示页面的html代码,并定义显示错误页面的函数,
1     errhtml = '''<html><head><title>
2 Advanced CGI Demo</title></head>
3 <body><h3>Error</h3>
4 <b>%s</b><p>
5 <form><input type=button value=back onclick='window.history.back()'></form>
6 </body></html>'''
7
8     def showError(self):
9         print(AdvCGI.header + AdvCGI.errhtml % (self.error))
设置返回页面的html,其中html标签<li>设置列表元素,<ol>为有序列表,<ul>为无序列表,<br>换行显示。
 1     # Some html tags:
 2     #   <li>: for list
 3     #   <ol>: odered list
 4     #   <ul>: unodered list
 5     #   <br>: newline
 6     reshtml = '''<html><head><title>
 7 Advanced CGI Demo</title></head>
 8 <body><h2>Your Uploaded Data</h2>
 9 <h3>Your cookie value is: <b>%s</b></h3>
10 <h3>Your name is: <b>%s</b></h3>
11 <h3>You can program in the following languages:</h3>
12 <ul>%s</ul>
13 <h3>Your uploaded file...<br>
14 Name: <i>%s</i><br>
15 Contents:</h3>
16 <pre>%s</pre>
17 Click <a href="%s"><b>here</b></a> to return to form.
18 </body></html>'''
定义一个设置cookie的方法,用于将set cookie头部发送给客户端来保存cookie,
1     # Tell client to store cookies
2     def setCPPCookies(self):
3         for eachCookie in self.cookies.keys():
4             print('Set-cookie: CPP%s=%s; path=/' % (eachCookie, quote(self.cookies[eachCookie])))
定义一个返回显示页面的方法,主要过程如下,
- 首先设置上传文件的最大限制为4k,对文件进行读取,只显示文件的前4k长度;
- 文件不存在则显示无上传文件;
- 检测用户cookie信息是否存在,返回相应的显示;
 1     # Display results page
 2     def doResults(self):
 3         MAXBYTES = 4096
 4         langList = ''.join('<li>%s<br>' % eachLang for eachLang in self.langs)
 5         filedata = self.fp.read(MAXBYTES)
 6         # Check file size
 7         if len(filedata) == MAXBYTES and self.fp.read():
 8             filedata = '%s%s' % (filedata,
 9                 '...<b><i>(file truncated due to size)</i></b>')
10         self.fp.close()
11         if filedata == '':
12             filedata = '<b><i>(file not given or upload error)</i></b>'
13         filename = self.fn
14
15         # See if user cookie set up yet
16         if not ('user in self.cookies and self.cookies["user"]'):
17             cookStatus = '<i>(cookie has not been set yet)</i>'
18             userCook = ''
19         else:
20             userCook = cookStatus = self.cookies['user']
21
22         # Set cookies
23         # Use ' : ' rather than ':' to join, because filename may contains ':' like 'c:\windows\...'
24         self.cookies['info'] = ' : '.join((self.who, ','.join(self.langs), filename))
25         self.setCPPCookies()
26
27         print('%s%s' % (AdvCGI.header, AdvCGI.reshtml % (cookStatus, self.who, langList,
28                             filename, filedata, AdvCGI.url)))
最后定义一个go方法,包含了整个执行流程的控制,
- 生成表单实例,初始化cookie和错误信息为空;
- 检测form中是否有关键字,如果没有则说明表单form为空,是第一次请求,调用显示界面方法;
- 如果表单中有请求字段,则获取字段,进行处理,若person字段值为空则设置错误信息;
- 设置user的值,如果没有则填入空字符串;
- 检测勾选的语言项,如果没有勾选则设置错误信息。此处用到了多值字段,即多选时则对form[‘lang’]进行遍历后再取值;
- 查看文件信息,根据文件进行操作;
- 最后根据是否有错误信息决定返回结果页面或错误提示页面。
 1     # Determine which page to return
 2     def go(self):
 3         self.cookies = {}
 4         self.error = ''
 5         form = FieldStorage()
 6         # No form received
 7         if not form.keys():
 8             self.showForm()
 9             return
10
11         if 'person' in form:
12             self.who = form['person'].value.strip().title()
13             if self.who == '':
14                 self.error = 'Your name is required. (blank)'
15         else:
16             self.error = 'Your name is required. (missing)'
17
18         self.cookies['user'] = unquote(form['cookie'].value.strip()) if 'cookie' in form else ''
19         if 'lang' in form:
20             langData = form['lang']
21             if isinstance(langData, list):
22                 self.langs = [eachLang.value for eachLang in langData]
23             else:
24                 self.langs = [langData.value]
25         else:
26             self.error = 'At least one language required.'
27
28         if 'upfile' in form:
29             upfile = form['upfile']
30             # form['upfile'] ->.filename for file name, .file for file data
31             self.fn = upfile.filename or ''
32             if upfile.file:
33                 self.fp = upfile.file
34             else:
35                 self.fp = StringIO('(no data)')
36         else:
37             # StringIO as data container
38             self.fp = StringIO('(no file)')
39             self.fn = ''
40
41         if not self.error:
42             self.doResults()
43         else:
44             self.showError()
45
46 if __name__ == '__main__':
47     page = AdvCGI()
48     page.go()
3 服务器网关接口WSGI / Web Server Gateway Interface
3.1 WSGI简介
PythonWeb服务器网关接口(Web Server Gateway Interface)是Python应用程序或框架和Web服务器之间的一种接口,目前被广泛接受,但是WSGI并没有官方的实现,因为WSGI更像是一个协议,遵照协议的规定,WSGI的应用程序即可以在任何服务器上运行,WSGI的是基于现存的CGI标准而设计的。
WSGI标准在PEP333中进行了定义,目前许多框架已实现,包括django框架。
3.2 WSGI使用示例
在此对WSGI的使用进行简单的介绍,主要包括两部分,app和服务器,代码如下,
App
 1 """
 2 Run server
 3 Connect to http://localhost:8000/
 4 """
 5
 6 def simple_wsgi_app(environ, start_response):
 7     status = '200 OK'
 8     headers = [('Content-type', 'text/plain')]
 9     # This function pass status code and header, status code/header decided inside wsgi app
10     start_response(status, headers)
11     return [b'Hello world']
上面的代码中首先定义一个简单的WSGI的app程序,对于这个app程序,需要将其传入给服务器,因此WSGI规定这个传入的app程序需要接受两个参数,
第一个参数是environ,为包含环境变量的字典,
第二个参数start_response为一个可调用对象,这个对象需要能够将HTTP的状态码(40x/50x)以及头部信息等返回给浏览器。
最后函数还应该返回一个可迭代对象,其中包含了返回给浏览器客户端的信息(HTML等)。
服务器
在完成上面的简单app后,接下来分析简单服务器的基本运行过程,这个服务器会接收两个参数,即之前提到的environ,和app参数,在其内部定义了start_response()函数,接收状态码和头部信息,最后返回一个write的可执行对象。
在服务器内会将start_response函数和environ参数传给app进行执行,最终利用write对象把信息返回给客户端。
 1 from io import StringIO
 2 import sys
 3
 4 def simple_wsgi_server(app, environ=None):
 5     sio = StringIO()
 6
 7     def start_response(status, headers):
 8         sio.write('Status: %s\r\n' % status)
 9         for header in headers:
10             sio.write('%s: %s\r\n' % header)
11         return sio.write
12
13     iterable = app(environ, start_response)
14     try:
15         if not sio.getvalue():
16             raise RuntimeError("start_response() not called by app!")
17         sio.write('\r\n%s\r\n' % '\r\n'.join(str(line) for line in iterable))
18     finally:
19         if hasattr(iterable, 'close') and callable(iterable.close):
20             iterable.close()
21
22     sys.stdout.write(sio.getvalue())
23     sys.stdout.flush()
这里还提供了一个简单的WSGI的服务器和示例app,直接导入模块即可以进行使用。当然在app程序的选择上可以使用提供的demo_app也可以使用自定义的app。自定义的app最终返回hello world,而示例的demo_app还会返回参数信息。
 1 from wsgiref.simple_server import make_server, demo_app
 2 def wsgi_server(app):
 3     httpd = make_server('', 8000, app)
 4     print('Started app serving on port 8000...')
 5     httpd.serve_forever()
 6
 7 em_app = False
 8 em_server = True
 9 wsgi_app = demo_app if em_app else simple_wsgi_app
10 wsgi_server = wsgi_server if em_server else simple_wsgi_server
运行服务器后,输入url链接: http://localhost:8000/,可以得到返回的界面如下,

参考链接
《Python 核心编程 第3版》

 浙公网安备 33010602011771号