从零开始山寨Caffe·玖:BlobFlow
听说Google出了TensorFlow,那么Caffe应该叫什么?
——BlobFlow
神经网络时代的传播数据结构
我的代码
我最早手写神经网络的时候,Flow结构是这样的:
struct Data
{
    vector<double> feature;
    int y;
    Data(vector<double> feature,int y):feature(feature),y(y) {}
};
vector<double> u_i,v_i,u_j,v_j;
很简陋的结构,主要功能就是利用vector存一下每层正向传播的值。
Word2Vec
后来我看了Google的Mikolov大神的Word2Vec的源码,它的Flow结构是这样的:
real *neu1 = (real *)calloc(doc->layer1_size, sizeof(real));
然后我吐槽了一下,这功能不是比我还弱么,vector起码还能提供STL的基础功能。
(注:Word2Vec源码是以CPU多线程和内存操作快而著称的,简陋但速度快)
Theano
再后来,我学习了Theano,它的Flow结构是这样的:
input=theano.tensor.matrix('x')
class DataLayer(object):
    def __init__(self,input,batch_size,size):
        self.batch_size=batch_size
        self.size=size
        self.input=input
        self.params=None
    def get_output(self):
        output=self.input
        if type(self.size) is tuple: #Mode: 2D
            output=output.reshape((self.batch_size,self.size[2],self.size[1],self.size[0]))
        else: #Mode: 1D
            output=output.reshape((self.batch_size,self.size))
        return output
Bengio组模仿物理学的张量(Tensor)的概念,创建了Theano的Tensor系统。
Dim为0的叫常量,Dim为1的叫向量,Dim=2的叫矩阵,Dim>2就没名字了,且Dim可以无限扩大。
Tensor的出现,很好地规避了机器学习研究者不会写代码的问题(比如上节出现的简陋结构)。
同时,随着mini-batch、conv等方法在深度学习中的大规模使用,我们的Flow结构显然需要多维化。
由于是操作多维空间,经常需要维度切换,reshape函数自然成了Tensor的核心函数。
(reshape的概念最早应该来自Python的科学计算库numpy,Theano的Tensor系统,很大程度上在重写numpy)
TensorFlow
再后来,Google把Andrew Ng开发的一代深度学习框架DistBelief给换掉了,第二代叫TensorFlow。
按照官方的说法,取名TensorFlow(2015)的原因是因为系统里主要是Tensor在Flow。
推测一下DistBelief(2011)和Theano(NIPS2012)的公布时间,我们大概推测,DistBelief的Flow结构估计相当Low。
按照Caffe(2013)作者贾大神的说法,他参与了TensorFlow的主体开发。
所以,TensorFlow里的Tensor结构,不难看出来,是借鉴了Theano(2012)和Caffe(2013)的综合体。
符号系统
尽管Caffe(2013)具有类似Tensor的Blob结构,但是和Theano(2012)、TensorFlow(2015)的Tensor相比,
还是比较弱的。核心原因是,Tensor的出发点是建立在符号系统上的,而Caffe(2013)只是最暴力的执行代码。
按照MXNet的陈天奇大神在MS研究院内部的讲座说法:
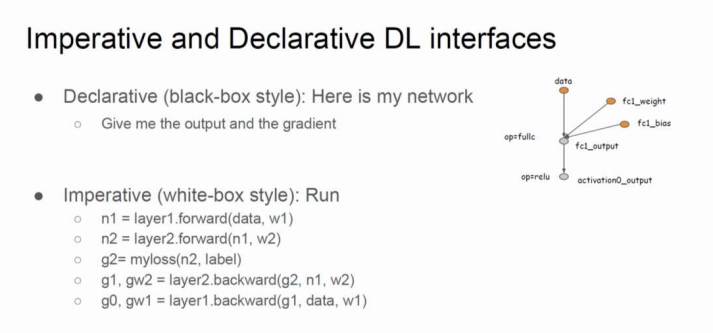
Caffe(2013)属于Imperative Programme(命令程序)
Theano(2012)、TensorFlow(2015)、MXNet(2015)属于Declaretive Programme(声明程序)
符号系统需要内建一套数学式语法解析结构,针对原始的命令语句做一个深度的Wrapper,从白盒变成黑盒。
其难度和代码量还是有的。与之相比,Blob读起来,还是要比Tensor要简单地多的。
浅析Blob设计原理
存储性质
无论是正向传播的输出,还是反向传播的残差,还是神经元参数,这些都需要不同的结构去存储。
Blob广义上极力规避设计多种结构的问题,这点上是参考Tensor的。
你可以自由规划1D、2D、3D、4D甚至nD的多维数组存储空间,这种存储具有相当不错的灵活性。
功能性质
不幸的是,操作多维数组在编程中是件麻烦事。
朴素C语言提供的多维数组,功能很弱,比如你想获知大小(size)就是一件难事。
使用STL是一个不错的注意,嵌套STL,从数据结构角度就变成了广义表。
尽管广义表的功能较朴素C语言多维数组要多,不过看起来也不尽如人意。
——————————————————————————————————————————————————
另外,最恼人的是CUDA不推荐GPU操作多维数组,最多可以申请到3维数组的显存优化。
如果不使用CUDA提供的多维数组内存对齐优化,那么IO指令取址将会非常频繁,导致IO速度严重退化。
从内存角度理解,显然线性内存空间访问便捷,nD内存空间就十分糟糕了。
——————————————————————————————————————————————————
从SyncedMemory的设计中,几乎就可以推测,Caffe为了速度,完全使用线性内存/显存。
因而,为使线性内存模拟出nD内存,就需要在内存访问上做点偏移(Offset)计算。
Blob的大部分功能,便是扩展线性SyncedMemory的逻辑功能,使其变成逻辑上的多维数组。
张量·轴设计
在早期神经网络编程中,通常采用的是1D空间,每个样本拥有一个输入向量。
上个世纪末,LeCun等人倡导在SGD中,替代单样本为mini-batch,才使得轴设计得以派上用场。
axis=0用于batch_size,batch中每个样本的向量移到axis=1。
这种空间在今天的神经网络NLP(NNNLP)任务中,仍然是主要采用的。
上个世纪90年代初,LeCun将Fukushima的神经机结合导师Hinton的BP算法,演化成可以训练的CNN,使得轴进一步扩展。
CNN所扩展的轴,称之为空间轴(spatial axes),放置于axis=2,....之后。
原神经网络的axis=1轴,结合图像文件的通道(channels)概念、CNN的特征图概念,被替换成channels axis。
这样,在Blob中,就构成了使用最频繁的4轴空间(batch_size,channels,height,width)。
在Caffe中,batch_size用num替代,这个名字理解起来更泛性一点。
各轴都具有一定的轴长,描述轴空间需要shape功能,轴空间变形则需要reshape功能。
代码实战
从Blob开始,为了便于阅读,代码将在不同章逐步扩展,以下仅提供适用于本章的精简代码。
完整代码见本章最后的Github链接。
建立blob.hpp
数据结构
template <typename Dtype>
class Blob{
public:
    Blob():data_(),diff_(),count_(0), capacity_(0) {}
    Blob(const vector<int>& shape) :count_(0),capacity_(0) { reshape(shape); }
    void reshape(int num, int channels, int height, int width);
    void reshape(vector<int> shape);
    void reshape(const BlobShape& blob_shape);
    void reshapeLike(const Blob& blob);
    const Dtype* cpu_data() const;
    const Dtype *gpu_data() const;
    const Dtype* cpu_diff() const;
    const Dtype* gpu_diff() const;
    Dtype *mutable_cpu_data();
    Dtype *mutable_gpu_data();
    Dtype *mutable_cpu_diff();
    Dtype *mutable_gpu_diff();
    int num() const { return shape(0); }
    int channels() const { return shape(1); }
    int height() const { return shape(2); }
    int width() const { return shape(3); }
    int count() const{ return count_; }
    int count(int start_axis, int end_axis) const {
        CHECK_GE(start_axis, 0);
        CHECK_LE(start_axis, end_axis);
        CHECK_LE(start_axis, num_axes());
        CHECK_LE(end_axis, num_axes());
        int cnt = 1;
        for (int i = start_axis; i < end_axis; i++) cnt *= shape(i);
        return cnt;
    }
    int count(int start_axis) const{ return count(start_axis, num_axes()); }
    const vector<int> &shape() const{ return shape_; }
    int shape(int axis) const{ return shape_[canonicalAxisIndex(axis)]; }
    int offset(const int n, const int c = 0, const int h = 0,
        const int w = 0){
        CHECK_GE(n, 0);
        CHECK_LE(n, num());
        CHECK_GE(channels(), 0);
        CHECK_LE(c, channels());
        CHECK_GE(height(), 0);
        CHECK_LE(h, height());
        CHECK_GE(width(), 0);
        CHECK_LE(w, width());
        return ((n * channels() + c) * height() + h) * width() + w;
    }
    int num_axes() const { return shape_.size(); }
    // idx ranges [-axes,axes)
    // idx(-1) means the last axis
    int canonicalAxisIndex(int axis) const{
        CHECK_GE(axis, -num_axes());
        CHECK_LT(axis, num_axes());
        if (axis < 0) return axis + num_axes();
        else return axis;
    }
    const boost::shared_ptr<SyncedMemory>& data() const { return data_; }
    const boost::shared_ptr<SyncedMemory>& diff() const { return diff_; }
    //    change the shared_ptr object and will recycle the memory if need
    void shareData(const Blob& blob) {
        CHECK_EQ(count(), blob.count());
        data_ = blob.data();
    }
    void shareDiff(const Blob& blob) {
        CHECK_EQ(count(), blob.count());
        diff_ = blob.diff();
    }void FromProto(const BlobProto& proto, bool need_reshape = true);
    void ToProto(BlobProto* proto, bool write_diff = false);
protected:
    boost::shared_ptr<SyncedMemory> data_, diff_;
    vector<int> shape_;
    int count_, capacity_;
};
先说说几个成员变量:
count、capacity用于reshape中的计算,前者是新reshape的大小,后者是历史reshape大小。
Blob的任何构造函数中,一定要将这个两个值置0,否则reshape会失败。
线性内存空间以shared_ptr绑定,因此Blob不需要析构函数,Blob销毁后,指针空间会被自动回收。
默认有2个线性内存空间,data、diff,分别用于存储数据/残差。
vector<int> shape用于存各个轴的轴长。
——————————————————————————————————————————————————
然后看轴相关函数:
num、channels、height、width、count、shape都是简单的封装,注意设成常成员函数。
由于Blob会作为const引用的参数,比如sharedData/shareDiff,这些访问接口必须保证this指针一致。
这点在第壹章时,略微提醒过。
count和shape都是重载函数,提供不同的访问方式。
轴访问canonicalAxisIndex函数上,借鉴了Python的负轴访问方式,如果你没有Python的习惯,可以写简单点。
——————————————————————————————————————————————————
对SyncedMemory的封装,主要目的是将void*型内存转换为计算类型的内存。
void*型内存以数组下标方式访问时,每个单元占用8Bit(1字节),这种单元内存是不能直接使用的。
因为一个int/float单元占用32Bit(4字节),一个double单元占用64Bit(8字节)。
C/C++通过对数组首元素指针的强制转换,可以改变下标索引的单元访问模式。
——————————————————————————————————————————————————
reshape函数看起来重载了很多,实际上主体设在 void reshape(vector<int> shape)里。
其它都是简单的封装。
——————————————————————————————————————————————————
offset函数是非常重要的,它目的是计算相对偏移量,形成逻辑上的多维空间结构。
在DataLayer中,由Datum组织Blob一个例子如下:
for (int i = 0; i < batch_size; i++){
    // must refer use '&' to keep data vaild(!!!important)
    Datum &datum = *(reader.full().pop("Waiting for Datum data"));
    int offset = batch->data.offset(i);
    //    share a part of a blob memory
    transformed_data.set_cpu_data(base_data + offset);
    //    transform datum and copy its value to the part of blob memory
    if (has_labels) base_label[i] = datum.label();
    ptr_transformer->transform(datum, &transformed_data);
    //let the reader to read new datum
    reader.free().push(&datum);
}
在这里,对batch里的每一个样本,每次偏移channels*height*width个单位,立刻跳转到下一张图的首元素。
更一般的,令base_data+=data.offset(0,1),就跳转到了下一个channel的首元素。
由于线性空间是连续的,这种偏移仅仅需要加法器一次运算,就能模拟出多维空间,十分廉价。
——————————————————————————————————————————————————
两个share函数用于直接替换掉data_,diff_,由于使用了shared_ptr,SyncedMemory会自动释放。
当神经网络需要交叉验证时,从训练网络copy参数到测试网络是没有必要的。
此时,只要将训练网络的全部参数Blob,一一对应share给测试网络即可。
——————————————————————————————————————————————————
FromProto和ToProto用于反序列化/序列化至protobuff格式。
唯一用处是对神经网络的参数Blob进行snapshot(截图),以便继续训练或者离线测试。
实现
给出几个比较重要的实现。
template<typename Dtype>
void Blob<Dtype>::reshape(vector<int> shape){
    count_ = 1;
    shape_.resize(shape.size());
    for (int i = 0; i < shape.size(); ++i) {
        count_ *= shape[i];
        shape_[i] = shape[i];
    }
    if (count_ > capacity_) {
        capacity_ = count_;
        data_.reset(new SyncedMemory(capacity_ * sizeof(Dtype)));
        diff_.reset(new SyncedMemory(capacity_ * sizeof(Dtype)));
    }
}
可以看到,reshape为SyncedMemory准备了capacity*sizeof(Dtype)个字节单元。
同时,你需要回忆一下,SyncedMemory(size)并不会立刻启动状态转移自动机申请内存/显存。
只有执行Blob:: cpu_data/gpu_data/mutable_cpu_data/mutable_gpu_data,才会申请。
这有点像函数式编程里的Lazy思想,胡乱写Blob其实问题不大,只要该Blob没有使用,就不会有内存空间损耗。
template<typename Dtype>
void Blob<Dtype>::ToProto(BlobProto* proto, bool write_diff){
    proto->clear_shape();
    proto->clear_data();
    proto->clear_diff();
    //do not use proto->shape() cause it is a const method
    for (int i = 0; i < shape_.size(); i++)  proto->mutable_shape()->add_dim(shape_[i]);
    const Dtype *data = cpu_data();
    const Dtype *diff = cpu_diff();
    for (int i = 0; i < count_; i++)  proto->add_data(data[i]);
    if (write_diff)
        for (int i = 0; i < count_; i++)  proto->add_diff(diff[i]);
}
ToProto里,首次出现了如何向protobuff结构写数据的例子。
以proto->mutable_shape()为例,切记不要写成proto->shape(),因为proto->shape()是常成员函数。
其内部不能修改,这点上,同Blob::cpu_data/mutable_cpu_data的原理是一致的。
对于message的repeated类型,使用add_name函数可以填充数组数据。
针对Caffe的精简
- 移除SyncedMemory形式的shape_data,与vector<int> shape_作用重复
- 移除基本没什么用的CopyFrom函数
完整代码
注:关于Blob中的update等在底层计算的函数会在后期补充讲解。
blob.hpp
https://github.com/neopenx/Dragon/blob/master/Dragon/include/blob.hpp
https://github.com/neopenx/Dragon/blob/master/Dragon/src/blob.cpp

 浙公网安备 33010602011771号