


介绍几个python的音频处理库
一、eyeD3
直接在google上搜索python mp3 process ,推荐比较多的就是这个第三方库了。先来看看官方介绍吧。
About
eyeD3 is a Python tool for working with audio files, specifically mp3 files containing ID3 metadata (i.e. song info).
It provides a command-line tool (eyeD3) and a Python library (import eyed3) that can be used to write your own applications or plugins that are callable from the command-line tool.
For example, to set some song information in an mp3 file called song.mp3:
$ eyeD3 -a Nobunny -A "Love Visions" -t "I Am a Girlfriend" -n 4 song.mp3
简单来说,eyeD3 这个库只要是用来处理MP3文件的,特别是带ID3 metadata的文件(一般MP3文件都会带有一些额外信息,比如说歌手、专辑之类的,后面会说怎么提取这些信息)。eyeD3 提供了两种使用方法,一种是使用command line 直接在命令行中执行 eyeD3 --...就可以对MP3进行处理,还有一种是在python中使用 import eyed3 导入。
上面的例子就是官方提供的一个使用eyeD3 命令行执行的语句,-a 是 --artist 的简写,即添加歌手信息,-A 是 --album的简写,即添加专辑信息,-t 是 --title的简写,即添加歌曲名字,-n 是 --track-num 的简写,即添加磁道数。这些一般都是 MP3文件ID3 tag 的默认属性。我们如果直接输入 eyeD3 song.mp3 就会直接显示歌曲的基本信息,大概长下面这个样子:
$ eyeD3 song.mp3
song.mp3      [ 3.06 MB ]
-------------------------------------------------------------------------
ID3 v2.4:
title: I Am a Girlfriend
artist: Nobunny
album: Love Visions
album artist: Various Artists
track: 4
-------------------------------------------------------------------------
如果你在windows下使用eyeD3,也许你会发现直接在cmd中输入eyeD3 会提示找不到这个命令,我就遇到了这个问题。
因为我是直接pip安装的,去site-packages目录下,没有找到名为 eyeD3.exe的可执行文件,全部是.py文件,官网对此没有说明,
去google上找了半天也没有找到相应的解决办法。没办法,只好转到linux下试一下了。linux下pip install eyeD3 之后,然后在
shell执行 eyeD3 song.mp3 是没有问题的。下图1是我在ubuntu14下的执行结果(部分):

                              图1

可以看出确实常见的信息都显示出来了。顺便提一下一个事情,这首MP3是我从win下直接传到unix下的,以前我在windows与linux下互传文件都是通过类似百度云的方式来传递的,

但是这种传递方式有时候太过于麻烦。所以我在网上搜索了一下,发现了Putty这个好东西。PuTTY is an SSH and telnet client, developed originally by Simon Tatham for the Windows platform.
PuTTY is open source software that is available with source code and is developed and supported by a group of volunteers.
即Putty是一个SSH(安全外壳协议)远程登录客户端,专门在windows下使用的。下载地址在这:http://www.chiark.greenend.org.uk/~sgtatham/putty/download.html。下载安装之后,打开putty,然后会出现如下的界面(图2):
                              图2
这个时候,打开你的linux机器,当然我的是装在vmware虚拟机里面的了,在shell里面输入ifconfig 命令,找到你的linux ip地址,如下图3所示:

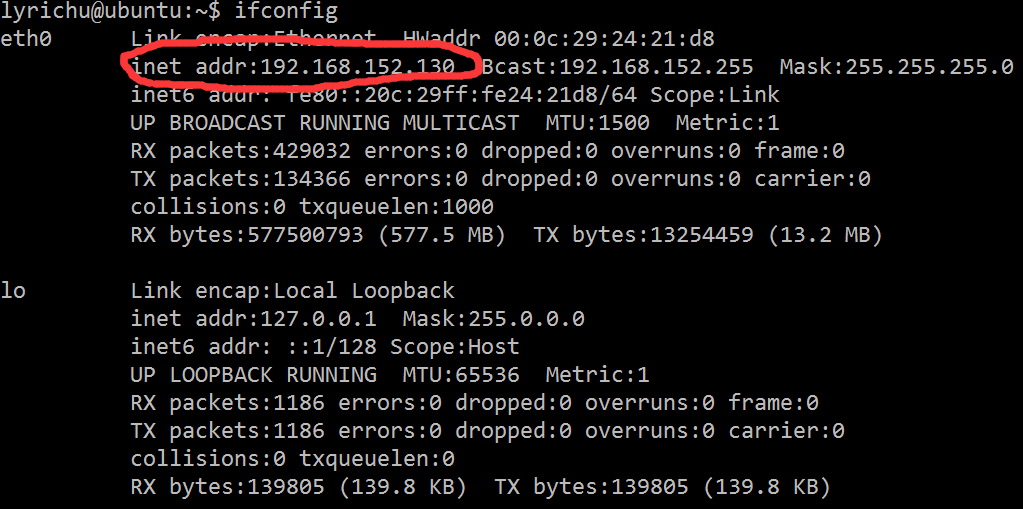
                            图 3

比如我的机器的地址就是 192.168.152.130。然后将这个ip地址填入 图2 的Host Name 一栏,注意默认端口为22,不要去改它,然后点击open,就会弹出一个登陆界面,接着输入你在linux
下登陆的用户名和密码就可以ssh连上linux啦。http://www.infoworld.com/article/2617683/linux/linux-moving-files-between-unix-and-windows-systems.html这篇文章介绍了
几种在unix与windows之间传递文件的方法。我只讲第一种,使用putty的pscp的secure copy(安全拷贝)。你安装了putty之后,会自带一个叫 pscp.exe的可执行文件,将其目录加入windows
环境变量。然后 cmd执行命令 pscp myfile.txt shs@unixserver:/home/shs 即可以把你的文件 myfile.txt 复制到 linux 下的 /home/shs 目录下了。解释一下,你在执行的时候需要把shs
换成你的用户名,@后面跟你的linux ip地址, /home/shs 是你要把文件移动的位置。执行完之后,文件就会成功拷贝过去了。其他方法不讲了,有兴趣可以自行搜索,或者看我上面说的那篇文章。
  回到正题,eyeD3 命令行讲完之后,再来说下如何在Python中使用。还是看官方给的例子吧:
 1 import eyed3
 2
 3 audiofile = eyed3.load("song.mp3")
 4 audiofile.tag.artist = u"Nobunny"
 5 audiofile.tag.album = u"Love Visions"
 6 audiofile.tag.album_artist = u"Various Artists"
 7 audiofile.tag.title = u"I Am a Girlfriend"
 8 audiofile.tag.track_num = 4
 9
10 audiofile.tag.save()
上面的代码,使用 import eyed3 导入eyeD3 库,然后使用load方法加载mp3文件,后面的几行分别是设置 artist,album等等 ID3 tag ,直接看代码就能看出来,就不说了。如果想显示mp3文件内部的ID3 tag信息,直接print 相应的tag就行了,比如 print(audiofile.tag.artist)等等,当然,前提是你的MP3 metadata得储存了这些信息。其实还有一些更复杂和高级的用法,我就不讲了,大家有兴趣直接去官方文档看吧,地址:http://eyed3.nicfit.net/index.html。eyeD3 主要就是处理 MP3文件的metadata的,至于解析音频之类的就得用其他的库了。
二、pydub
  第一个介绍的eyeD3 一般只能处理MP3文件,功能上相对来说也是比较简单一点。下面介绍的pydub库就要强大的多。老规矩,还是
先看一下它的官方介绍:
Manipulate audio with a simple and easy high level interface http://pydub.com  就一句话,简单,易用的处理音频
的高度抽象的接口,嘿,这不就是我们要找的么。github项目地址为:https://github.com/jiaaro/pydub/  有1800多的star,说明这个
库还是很受欢迎的。安装直接很简单,直接 pip install pydub 就可以安装。但是需要注意的是:
Dependencies
You can open and save WAV files with pure python. For opening and saving non-wav files – like mp3 – you'll need ffmpeg orlibav.
这里是说python自带的wave模块只能处理 wav 格式的音频文件,如果要想处理类似MP3格式的文件,就得要装 ffmpeg或者libav了。
什么是ffmpeg 呢?
A complete, cross-platform solution to record, convert and stream audio and video.
ffmpeg 是一个跨平台的 可以用来 记录、转化音频与视频的工具,如果你做过数字信号处理方面的工作,对它应该不陌生。还有一个libav,其实是从ffmpeg分出来的一个分支,功能和 ffmpeg差不多,二者你任选一个下载就可以了。windows下直接选择可执行文件安装即可。
还是看官网的例子来介绍吧。
I:打开 mp3或者mp4等文件
可以采用如下的命令:
 1 from pydub import AudioSegment
 2
 3 song = AudioSegment.from_wav("never_gonna_give_you_up.wav")
 4 song = AudioSegment.from_mp3("never_gonna_give_you_up.mp3")
 5
 6 ogg_version = AudioSegment.from_ogg("never_gonna_give_you_up.ogg")
 7 flv_version = AudioSegment.from_flv("never_gonna_give_you_up.flv")
 8
 9 mp4_version = AudioSegment.from_file("never_gonna_give_you_up.mp4", "mp4")
10 wma_version = AudioSegment.from_file("never_gonna_give_you_up.wma", "wma")
11 aac_version = AudioSegment.from_file("never_gonna_give_you_up.aiff", "aac")
可以打开任何 ffmpeg支持的文件类型,从上面可以看出,主要有 from_filetype()方法,filetype为具体的文件类型,比如 wav,mp3等
或者通用的 from_file()方法,但是这个方法必须在第二个参数指定打开文件的类型,返回的结果都是 AudioSegment对象。
II:切割音频
1 # pydub does things in milliseconds
2 ten_seconds = 10 * 1000
3
4 first_10_seconds = song[:ten_seconds]
5
6 last_5_seconds = song[-5000:]
注意pydub中的标准时间为毫秒,上面的代码就得到了音乐的前10秒和后5秒,非常简单。
III:调整音量
1 # boost volume by 6dB
2 beginning = first_10_seconds + 6
3
4 # reduce volume by 3dB
5 end = last_5_seconds - 3
+6 就表示将音乐的音量提高6分贝,-3就表示将音乐的音量降低3分贝
IV: 拼接两段音乐
without_the_middle = beginning + end
without_the_middle.duration_seconds
拼接之后的音乐时长是两段音乐时长之和,可以通过 .duration_seconds方法来获取一段音乐的时长。这与使用 len(audio)/1000.0得到的结果是一样的。
V:将音乐翻转(reverse)
1 # song is not modified
2 # AudioSegments are immutable
3 backwards = song.reverse()
注意 AudioSegment 对象是不可变的,上面使用reverse 方法不会改变song这个对象,而是会返回一个新的AudioSegment对象,其他的方法也是这样,需要注意。reverse简单来说就是 将音乐从尾部向头部开始逆序播放,我试了一下,发现转换之后还真的挺有意思的。
VI:crossfade(交叉渐入渐出方法)
1 # 1.5 second crossfade
2 with_style = beginning.append(end, crossfade=1500)
crossfade 就是让一段音乐平缓地过渡到另一段音乐,上面的crossfade = 1500 表示过渡的时间是1.5秒。
VII:repeat(重复音乐片段)
# repeat the clip twice
do_it_over = with_style * 2
上面的代码让音乐重复播放两次
VIII:fade in and fade out(逐渐增强与逐渐减弱)
# 2 sec fade in, 3 sec fade out
awesome = do_it_over.fade_in(2000).fade_out(3000)
逐渐增强2秒,逐渐减弱3秒
XI:save(保存)
awesome.export("mashup.mp3", format="mp3")

awesome.export("mashup.mp3", format="mp3", tags={'artist': 'Various artists', 'album': 'Best of 2011', 'comments': 'This album is awesome!'})
这里展示了两种保存的形式,都是使用export方法,要指定保存的格式,使用format 参数,但第二种方法多了一个tags参数,其实看一下应该就很容易明白,是保存 歌曲ID3 tag信息的。
以上只是pydub 使用方法的初步介绍,还有其他非常多的功能,请自行移步官方API 文档:https://github.com/jiaaro/pydub/blob/master/API.markdown
介绍的非常详细。
三、PyAudio
又是一个功能强大的处理音频库。官方介绍:
PyAudio provides Python bindings for PortAudio, the cross-platform audio I/O library. With PyAudio, you can easily use Python to play and record audio on a variety of platforms. PyAudio is inspired by:
- pyPortAudio/fastaudio: Python bindings for PortAudio v18 API.
- tkSnack: cross-platform sound toolkit for Tcl/Tk and Python.
Pyaudio 提供了对于跨平台的 PortAudio(处理 audio输入输出的库)的绑定,PyAudio可以让你轻松录制与播放音频。
废话不多说,直接看官方文档(https://people.csail.mit.edu/hubert/pyaudio/docs/)提供的一个quick start 的代码
 1 """PyAudio Example: Play a wave file."""
 2
 3 import pyaudio
 4 import wave
 5 import sys
 6
 7 CHUNK = 1024
 8
 9 if len(sys.argv) < 2:
10     print("Plays a wave file.\n\nUsage: %s filename.wav" % sys.argv[0])
11     sys.exit(-1)
12
13 wf = wave.open(sys.argv[1], 'rb')
14
15 # instantiate PyAudio (1)
16 p = pyaudio.PyAudio()
17
18 # open stream (2)
19 stream = p.open(format=p.get_format_from_width(wf.getsampwidth()),
20                 channels=wf.getnchannels(),
21                 rate=wf.getframerate(),
22                 output=True)
23
24 # read data
25 data = wf.readframes(CHUNK)
26
27 # play stream (3)
28 while len(data) > 0:
29     stream.write(data)
30     data = wf.readframes(CHUNK)
31
32 # stop stream (4)
33 stream.stop_stream()
34 stream.close()
35
36 # close PyAudio (5)
37 p.terminate()
当然,这个提供的是使用命令行参数接收音频文件的形式,CHUNK 是一次读取的音频byte数量,p = pyaudio.PyAudio()初始化一个
PyAudio对象,然后使用其open方法打开一个输入输出流,这里指定了output=True说明这是一个输出流,即我们是往stream中添加data,如果这里改为 input = True就是变成输入流了,一般是从设备的标准 audio device ,对于电脑来说可能就是麦克风了,来读取音频data。使用wave打开一个 .wav 文件,然后使用 readframes方法每次读取 CHUNK 这么多的数据,将数据写入 stream,直到读完为止。写入stream的audio data 就会不断通过麦克风播放出来了,于是我们就可以听到音乐了。最后在结束的时候,注意要关闭相应的对象以释放资源。
还有一种方法是使用callback(回调函数)函数,代码如下:
 1 """PyAudio Example: Play a wave file (callback version)."""
 2
 3 import pyaudio
 4 import wave
 5 import time
 6 import sys
 7
 8 if len(sys.argv) < 2:
 9     print("Plays a wave file.\n\nUsage: %s filename.wav" % sys.argv[0])
10     sys.exit(-1)
11
12 wf = wave.open(sys.argv[1], 'rb')
13
14 # instantiate PyAudio (1)
15 p = pyaudio.PyAudio()
16
17 # define callback (2)
18 def callback(in_data, frame_count, time_info, status):
19     data = wf.readframes(frame_count)
20     return (data, pyaudio.paContinue)
21
22 # open stream using callback (3)
23 stream = p.open(format=p.get_format_from_width(wf.getsampwidth()),
24                 channels=wf.getnchannels(),
25                 rate=wf.getframerate(),
26                 output=True,
27                 stream_callback=callback)
28
29 # start the stream (4)
30 stream.start_stream()
31
32 # wait for stream to finish (5)
33 while stream.is_active():
34     time.sleep(0.1)
35
36 # stop stream (6)
37 stream.stop_stream()
38 stream.close()
39 wf.close()
40
41 # close PyAudio (7)
42 p.terminate()
不细说了。
下面来看一个使用pyaudio + numpy + pylab 可视化音频的代码,下面的代码打开电脑的麦克风,然后接受音频输入,再以图像的形式展示出来。
 1 # -*- coding: utf-8 -*-
 2 """
 3 Created on Fri May 12 10:30:00 2017
 4 @author: Lyrichu
 5 @description: show the sound in graphs
 6 """
 7 import pyaudio
 8 import numpy as np
 9 import pylab
10 import time
11
12 RATE = 44100
13 CHUNK = int(RATE/20) # RATE/number of updates per second
14
15 def sound_plot(stream):
16     t1 = time.time() # time starting
17     data = np.fromstring(stream.read(CHUNK),dtype = np.int16)
18     pylab.plot(data)
19     pylab.title(i)
20     pylab.grid()
21     pylab.axis([0,len(data),-2**8,2**8])
22     pylab.savefig("sound.png",dpi=50)
23     pylab.show(block = False)
     time.sleep(0.5)
24     pylab.close('all')
25     print("took %.2f ms." % (time.time() - t1)*1000)
26
27 if __name__ == '__main__':
28     p = pyaudio.PyAudio()
29     stream = p.open(format = pyaudio.paInt16,channels = 1,rate = RATE,
30                     input = True,frames_per_buffer = CHUNK)
31     for i in range(int(20*RATE/CHUNK)):
32         # for 10 seconds
33         sound_plot(stream)
34     stream.stop_stream()
35     stream.close()
36     p.terminate()
代码应该比较容易理解。得到的大概是像下面这样的图形(图4):

图 4
需要注意的是,如果不是在交互式命令下执行pylab或者matplotlib的plot命令,其plt.show()函数是一个block函数,这会导致最后的
plt.close('all') 关闭所有的窗口只会在手动关闭了图像之后才会执行,所有我们无法看到连续变化的图像,为了解决这个问题,我们将plt.show()函数block参数设为False,这样show函数就不是block函数了,可以直接执行plt.close('all')命令,为了不因为图像刷新太快我们看不清变化,所以使用time.sleep(0.5) 暂停0.5秒。
其实还没介绍完,还有pygame模块(python的一个做游戏的模块)以及librosa库(专业的数字信号处理库)等没有讲,等有机会再更吧。敬请关注!

 浙公网安备 33010602011771号