
android学习笔记----解决兼容8.0以上和8.0之前版本通知栏显示、振动、LED呼吸灯闪烁问题(真机验证)
Android 8.0系统的通知栏适配文章讲解(郭霖大神的):
然后开始试验了:
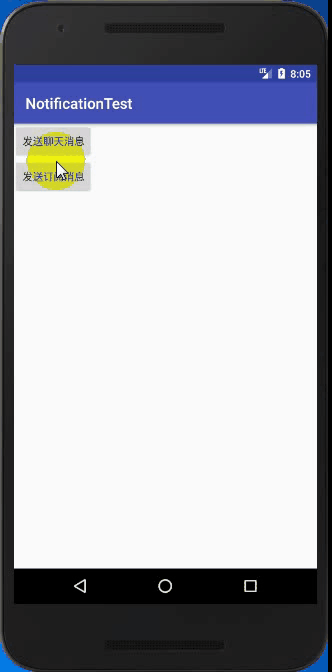
模拟器:
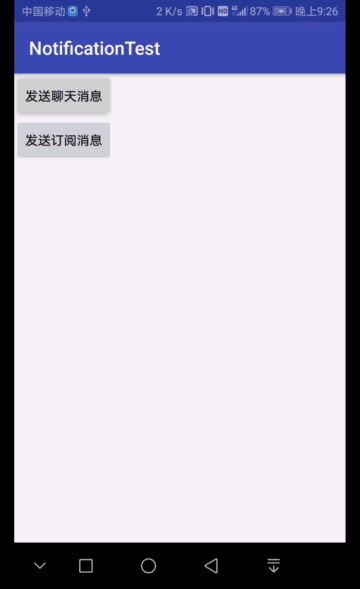
真机(华为荣耀V9,8.0系统),下拉横幅需要手动打开,除非是厂家白名单,比如QQ、微信
我在oppo手机6.0系统测试结果是这样的,需要手动打开设置,点击后会出现这样
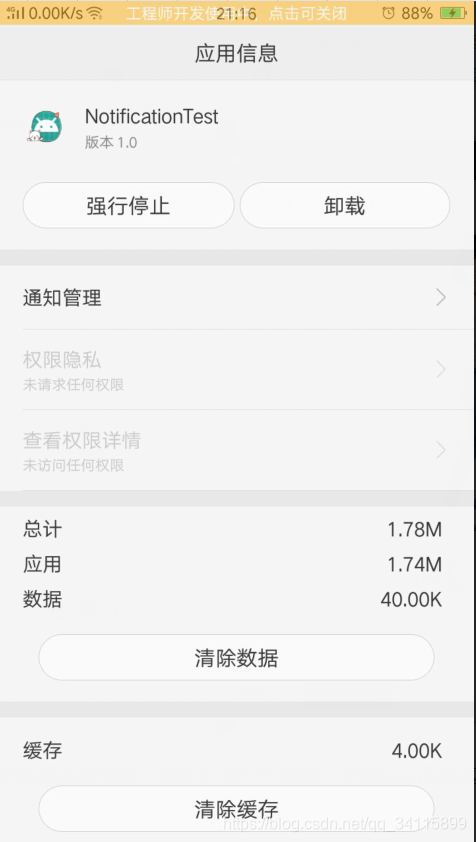
然后点击通知管理设置权限,oppo手机默认权限都是关闭的。
设置左上角通知的小图标setSmallIcon()只能使用纯alpha图层的图片进行设置,需要美工实现,具体详解请见这里:
https://blog.csdn.net/guolin_blog/article/details/50945228
activity_main.xml
<?xml version="1.0" encoding="utf-8"?>
<LinearLayout xmlns:android="http://schemas.android.com/apk/res/android"
    android:layout_width="match_parent"
    android:layout_height="match_parent"
    android:orientation="vertical">
    <Button
        android:onClick="sendChatMsg"
        android:layout_width="wrap_content"
        android:layout_height="wrap_content"
        android:text="发送聊天消息"/>
    <Button
        android:onClick="sendSubscribeMsg"
        android:layout_width="wrap_content"
        android:layout_height="wrap_content"
        android:text="发送订阅消息"/>
</LinearLayout>
MainActivity.java
import android.annotation.TargetApi;
import android.app.Notification;
import android.app.NotificationChannel;
import android.app.NotificationManager;
import android.app.PendingIntent;
import android.content.Intent;
import android.graphics.BitmapFactory;
import android.graphics.Color;
import android.net.Uri;
import android.os.Build;
import android.os.Bundle;
import android.provider.Settings;
import android.support.v4.app.NotificationCompat;
import android.support.v7.app.AppCompatActivity;
import android.view.View;
import android.widget.Toast;

import static android.provider.Settings.EXTRA_APP_PACKAGE;

public class MainActivity extends AppCompatActivity {
    @Override
    protected void onCreate(Bundle savedInstanceState) {
        super.onCreate(savedInstanceState);
        setContentView(R.layout.activity_main);


        if (Build.VERSION.SDK_INT >= Build.VERSION_CODES.O) {
            String channelId = "chat";
            String channelName = "聊天消息";
            int importance = NotificationManager.IMPORTANCE_MAX;
            createNotificationChannel(channelId, channelName, importance);
            channelId = "subscribe";
            channelName = "订阅消息";
            importance = NotificationManager.IMPORTANCE_DEFAULT;
            createNotificationChannel(channelId, channelName, importance);
        }
    }

    @TargetApi(Build.VERSION_CODES.O)
    private void createNotificationChannel(String channelId, String channelName, int importance) {
        NotificationChannel channel = new NotificationChannel(channelId, channelName, importance);
        channel.enableVibration(true);
        channel.setVibrationPattern(new long[]{0, 100, 100, 100});
        channel.enableLights(true);
        channel.setLightColor(Color.RED);
        NotificationManager notificationManager = (NotificationManager) getSystemService(NOTIFICATION_SERVICE);
        notificationManager.createNotificationChannel(channel);
    }


    public void sendChatMsg(View view) {
        NotificationManager manager = (NotificationManager) getSystemService(NOTIFICATION_SERVICE);
        if (Build.VERSION.SDK_INT >= Build.VERSION_CODES.O) {
            NotificationChannel channel = manager.getNotificationChannel("chat");
            if (channel.getImportance() == NotificationManager.IMPORTANCE_NONE) {
                Intent intent = new Intent(Settings.ACTION_CHANNEL_NOTIFICATION_SETTINGS);
                intent.putExtra(EXTRA_APP_PACKAGE, getPackageName());
                intent.putExtra(Settings.EXTRA_CHANNEL_ID, channel.getId());
                startActivity(intent);
                Toast.makeText(this, "请手动将通知打开", Toast.LENGTH_SHORT).show();
            }
            // Intent intent = new Intent();
            //intent.setAction(Settings.ACTION_APP_NOTIFICATION_SETTINGS);
            /*
            //这种方案适用于 API 26, 即8.0(含8.0)以上可以用
            intent.putExtra(EXTRA_APP_PACKAGE, getPackageName());
            intent.putExtra(EXTRA_CHANNEL_ID, getApplicationInfo().uid);

            //这种方案适用于 API21——25,即 5.0——7.1 之间的版本可以使用
            intent.putExtra("app_package", getPackageName());
            intent.putExtra("app_uid", getApplicationInfo().uid);
            startActivity(intent);*/
            // 小米6 -MIUI9.6-8.0.0系统,是个特例,通知设置界面只能控制"允许使用通知圆点"——然而这个玩意并没有卵用,我想对雷布斯说:I'm not ok!!!
            //  if ("MI 6".equals(Build.MODEL)) {
            //      intent.setAction(Settings.ACTION_APPLICATION_DETAILS_SETTINGS);
            //      Uri uri = Uri.fromParts("package", getPackageName(), null);
            //      intent.setData(uri);
            //      // intent.setAction("com.android.settings/.SubSettings");
            //  }
        } else if (Build.VERSION.SDK_INT >= Build.VERSION_CODES.LOLLIPOP) {
            if (!NotificationsUtils.isNotificationEnabled(this)) {
                Intent intent = new Intent("android.settings.APPLICATION_DETAILS_SETTINGS");
                /*intent.putExtra(EXTRA_APP_PACKAGE, getPackageName());
                 intent.putExtra("uid", getApplicationInfo().uid);*/
                intent.setData(Uri.fromParts("package",
                        getPackageName(), null));
                startActivity(intent);
                Toast.makeText(this, "请手动将通知打开", Toast.LENGTH_SHORT).show();
            }

        }


        Intent intent = new Intent(this, ChatMessage.class);
        PendingIntent pendingIntent = PendingIntent.getActivity(this, 0, intent, 0);
        Notification notification = new NotificationCompat.Builder(this, "chat")
                .setContentTitle("收到一条聊天消息")
                .setContentText("今天晚上吃点啥?")
                .setWhen(System.currentTimeMillis())
                .setSmallIcon(R.mipmap.ic_launcher)
                .setLargeIcon(BitmapFactory.decodeResource(getResources(),
                        R.mipmap.ic_launcher_round))
                .setAutoCancel(true)
                // 8.0以前的低版本中,若没有setDefaults,无论多高的优先级,通知都无法弹出横幅
                //.setDefaults(NotificationCompat.DEFAULT_ALL)

                // 这里并非多此一举,channel设置了振动只是为了8.0以上的手机,低版本的振动只能在这里设置
                .setVibrate(new long[]{0, 100, 100, 100})
                .setLights(Color.RED, 1000, 1000)
                .setContentIntent(pendingIntent)
                .build();
        manager.notify(1, notification);
    }


    public void sendSubscribeMsg(View view) {
        Intent intent = new Intent(this, SubscribeMessage.class);
        PendingIntent pendingIntent = PendingIntent.getActivity(this, 0, intent, 0);
        NotificationManager manager = (NotificationManager) getSystemService(NOTIFICATION_SERVICE);
        Notification notification = new NotificationCompat.Builder(this, "subscribe")
                .setContentTitle("收到一条支付宝消息")
                .setContentText("免费医疗金领取提醒")
                .setWhen(System.currentTimeMillis())
                .setSmallIcon(R.mipmap.ic_launcher_round)
                .setLargeIcon(BitmapFactory.decodeResource(getResources(), R.mipmap.ic_launcher))
                .setAutoCancel(true)
                // 这里并非多此一举,channel设置了振动只是为了8.0以上的手机,低版本的振动只能在这里设置
                .setVibrate(new long[]{0, 100, 100, 100})
                .setLights(Color.RED, 1000, 1000)
                .setContentIntent(pendingIntent)
                .build();
        manager.notify(2, notification);
    }
}
笔记批注:
这里我们在MainActivity中创建了两个通知渠道,首先要确保的是当前手机的系统版本必须是Android 8.0系统或者更高,因为低版本的手机系统并没有通知渠道这个功能,不做系统版本检查的话会在低版本手机上造成崩溃。
这里封装了一个createNotificationChannel()方法,需要注意的是,创建一个通知渠道至少需要渠道ID、渠道名称以及重要等级这三个参数,其中渠道ID可以随便定义,只要保证全局唯一性就可以。渠道名称是给用户看的,需要能够表达清楚这个渠道的用途。重要等级的不同则会决定通知的不同行为,当然这里只是初始状态下的重要等级,用户可以随时手动更改某个渠道的重要等级,App是无法干预的。
关于通知渠道,官方文档说明见这里:https://developer.android.google.cn/about/versions/oreo/features/notification-channels
其中App通知主要可以分为两类,一类是我和别人的聊天消息,这类消息非常重要,因此重要等级设为了IMPORTANCE_HIGH。另一类是公众号的订阅消息,这类消息不是那么重要,因此重要等级设为了IMPORTANCE_DEFAULT。除此之外,重要等级还可以设置为IMPORTANCE_LOW、IMPORTANCE_MIN,分别对应了更低的通知重要程度。
创建通知渠道的这部分代码,你可以写在MainActivity中,也可以写在Application中,实际上可以写在程序的任何位置,只需要保证在通知弹出之前调用就可以了。并且创建通知渠道的代码只在第一次执行的时候才会创建,以后每次执行创建代码系统会检测到该通知渠道已经存在了,因此不会重复创建,也并不会影响任何效率。
通知渠道一旦创建之后就不能再通过代码修改了。只有在将通道提交给NotificationManager.createNotificationChannel(NotificationChannel).方法之前做出的修改才有效,比如是否需要振动、闪光灯、和音效等。如果在提交之前作了修改,请先卸载再重新安装app即可,之前就因为没有重新安装导致始终无法振动。
关于led呼吸灯,在oppo手机上需要手动打开,在华为android8.0系统手机呼吸灯可正常显示,当然这个需要手机支持,有的手机就只有白色的呼吸灯,没有红绿蓝。
在真机上需要手动打开显示横幅的权限,否则设置最大的priority也无效,除非厂家白名单。
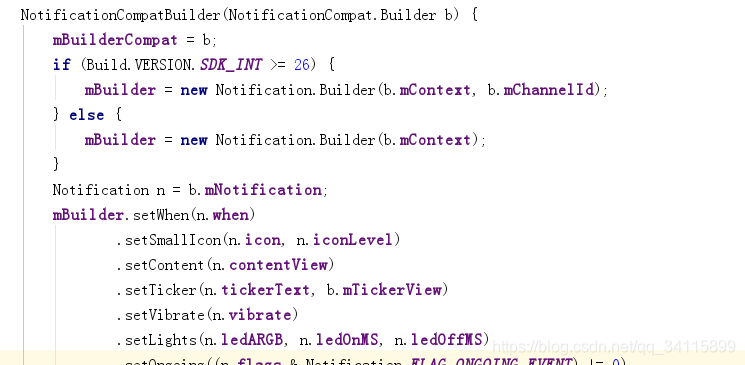
这里不用根据api等级手动设置NotificationCompat.Builder参数的个数,8.0以上版本是2个参数,8.0以下是1个参数,在.build()的时候源码里面会自动根据系统的api等级做出相应的判断。如下图:
NotificationsUtils.java(判断通知是否打开,针对8.0以下系统)
import android.annotation.SuppressLint;
import android.app.AppOpsManager;
import android.content.Context;
import android.content.pm.ApplicationInfo;

import java.lang.reflect.Field;
import java.lang.reflect.InvocationTargetException;
import java.lang.reflect.Method;

public class NotificationsUtils {
    private static final String CHECK_OP_NO_THROW = "checkOpNoThrow";
    private static final String OP_POST_NOTIFICATION = "OP_POST_NOTIFICATION";

    @SuppressLint("NewApi")
    public static boolean isNotificationEnabled(Context context) {

        AppOpsManager mAppOps = (AppOpsManager) context.getSystemService(Context.APP_OPS_SERVICE);
        ApplicationInfo appInfo = context.getApplicationInfo();
        String pkg = context.getApplicationContext().getPackageName();
        int uid = appInfo.uid;

        Class appOpsClass = null;
        /* Context.APP_OPS_MANAGER */
        try {
            appOpsClass = Class.forName(AppOpsManager.class.getName());
            Method checkOpNoThrowMethod = appOpsClass.getMethod(CHECK_OP_NO_THROW, Integer.TYPE, Integer.TYPE,
                    String.class);
            Field opPostNotificationValue = appOpsClass.getDeclaredField(OP_POST_NOTIFICATION);

            int value = (Integer) opPostNotificationValue.get(Integer.class);
            return ((Integer) checkOpNoThrowMethod.invoke(mAppOps, value, uid, pkg) == AppOpsManager.MODE_ALLOWED);

        } catch (ClassNotFoundException e) {
            e.printStackTrace();
        } catch (NoSuchMethodException e) {
            e.printStackTrace();
        } catch (NoSuchFieldException e) {
            e.printStackTrace();
        } catch (InvocationTargetException e) {
            e.printStackTrace();
        } catch (IllegalAccessException e) {
            e.printStackTrace();
        }
        return false;
    }
}
ChatMessage.java
public class ChatMessage extends AppCompatActivity {

    @Override
    protected void onCreate(Bundle savedInstanceState) {
        super.onCreate(savedInstanceState);
        setContentView(R.layout.activity_chat_message);
    }
}
activity_chat_message.xml
<?xml version="1.0" encoding="utf-8"?>
<LinearLayout xmlns:android="http://schemas.android.com/apk/res/android"
    android:layout_width="match_parent"
    android:layout_height="match_parent"
    android:orientation="vertical">
    <TextView
        android:layout_width="wrap_content"
        android:layout_height="wrap_content"
        android:text="聊天消息"/>
</LinearLayout>
SubscribeMessage.java
public class SubscribeMessage extends AppCompatActivity {

    @Override
    protected void onCreate(Bundle savedInstanceState) {
        super.onCreate(savedInstanceState);
        setContentView(R.layout.activity_subscribe_message);
    }
}
activity_subscribe_message.xml
<?xml version="1.0" encoding="utf-8"?>
<LinearLayout xmlns:android="http://schemas.android.com/apk/res/android"
    android:layout_width="match_parent"
    android:layout_height="match_parent"
    android:orientation="vertical">
    <TextView
        android:layout_width="wrap_content"
        android:layout_height="wrap_content"
        android:text="订阅消息"/>
</LinearLayout>
========================Talk is cheap, show me the code========================

