
[Laravel] 09 - Functional models
Laravel框架下的若干常用功能实现。
- 文件上传
- 邮件发送
- 缓存使用
- 错误日志
- 队列应用
文件上传
一、配置文件
- 功能
- 配置
[config/filesystems.php]
    'disks' => [

        'local' => [
            'driver' => 'local',
            'root' => storage_path('app'),
        ],

        'public' => [
            'driver' => 'local',
            'root' => storage_path('app/public'),
            'visibility' => 'public',
        ],

        's3' => [
            'driver' => 's3',
            'key' => 'your-key',
            'secret' => 'your-secret',
            'region' => 'your-region',
            'bucket' => 'your-bucket',
        ],

    ],
新添加插入其中:
        'uploads' => [
            'driver' => 'local',
            'root' => storage_path('app/uploads'),
        ],
二、画个视图
- 添加布局

- 修改布局
- 路由 --> 控制器 --> 视图
[1] 路由
Route::any('upload', 'StudentController@upload');
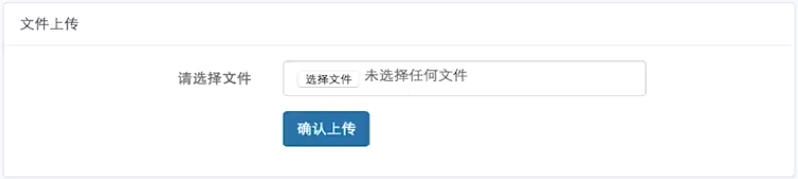
[2] 控制器:获取 字段 为 "source” 的表单。
if ($request->isMethod('POST') ) {

  $file = $request->file('source');

  if ($file->isValid() ) {

    // 原文件名
    $originalName = $file->getClientOrignalNam();

    // 扩展名
    $ext = $file->getClientOriginalExtension();

    // MimeType
    $type = $file->getClientMineType();

    // 临时绝对路径
    $realPath = $file->getRealPath();

    $filename = date('Y-m-d-H-i-s) . '-' . uniqid() . '.' . $ext;

     $bool = Storage::disk('uploads')->put($filename, file_get_content($realPath));
    var_dump(bool);
  }
  exit;
}
[3] 文件上传位置

表单内容打印出来瞧瞧:【图片信息】
邮件发送
一、配置文件
- 功能

- 配置
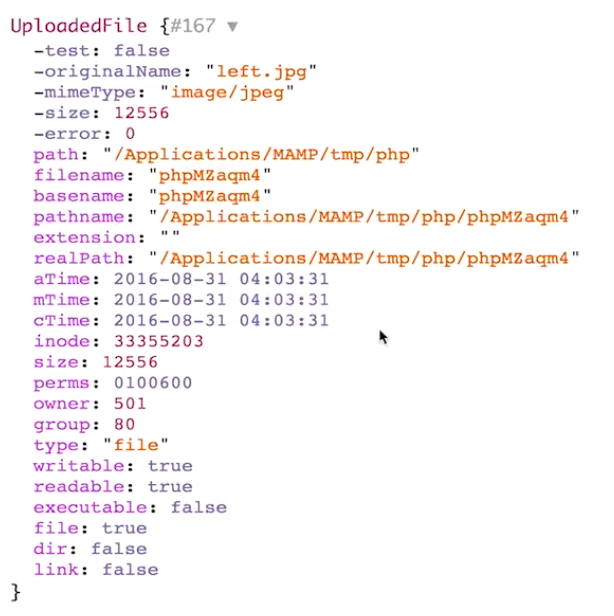
[config/mail.php]
smtp默认
'from' => ['address' => null, 'name' => null],
'username' => env('MAIL_USERNAME'),
'password' => env('MAIL_PASSWORD'),
[.env]
二、控制器 - 发送邮件
use Mail;
class StudentController extends Controller
{
  public function mail()
  {
    Mail::raw('邮件内容’, function($message) {

    }

    --------------------------------------------------------------------
    Mail::send('student.mail', ['name' => 'sean', 'age' => 18], function($message) {
      $message->to('.......@qq.com');
    });
  }
}
[student/mail.blade.php]
新建并设计一个Html模板。
缓存使用
一、主要方法以及配置文件
put(), add(), forever(), has(), get(), pull(), forget()
配置文件:[config/cache.php]
二、控制器
- Cache::put - 添加后读取缓存
public function cache1()
{
  // put()
  Cache::put('key1', 'val1', 10);    #10min
}

public function cache2()
{
  // get()
  $val = Cache::get('key1');
}
- Cache::add - 添加后读取缓存
public function cache1()
{
  // add()
  $bool = Cache::add('key1', 'val1', 10);    #key1存在则不能添加
}

public function cache2()
{
  // get()
  $val = Cache::get('key1');
}
- Cache::forever - 添加后读取缓存
public function cache1()
{
  // add()
  $bool = Cache::forever('key3', 'val3');
}


public function cache2()
{
  // get()
  $val = Cache::get('key1');
}
- Cache::has - 键值存在否
public function cache1()
{
  if (Cache::has('key1')) {
    $val = Cache::get('key');
    var_dump($val);
  } else {
    echo 'No';
  }
}

public function cache2()
{
  // get()
  $val = Cache::get('key1');
}
- Cache::pull - 取走数据
public function cache2()
{
  // pull()
  $val = Cache::pull('key1');   # 取走后值就没了
}
- Cache::forget - 缓存中删除对象
public function cache2()
{
  // forget()
  $bool = Cache::forget('key1');   # 取走后值就没了
}
- 缓存文件的具体位置

错误与日志
一、知识点
Debug模式,HTTP异常,日志。
二、Debug模式
- 简介

-
- 配置 [.env]
APP_DEBUG=true
-
- 设置 [config/app.php]
![]()
- 路由 --> 控制器
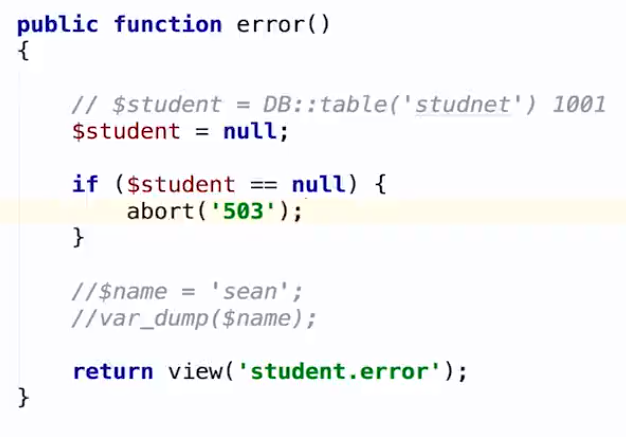
Route::any('error', 'StudentController@error');
APP_DEBUG=true后,控制器内代码有问题,会出现相对友好不易被攻击的提示信息。

三、HTTP异常
- 简介

其实就是,控制器调用abort,直接返回error.blade的视图。
- 视图


<!DOCTYPE html>
<html>
    <head>
        <title>Be right back.</title>


        <style>
            html, body {
                height: 100%;
            }

            body {
                margin: 0;
                padding: 0;
                width: 100%;
                color: #B0BEC5;
                display: table;
                font-weight: 100;
                font-family: 'Lato';
            }

            .container {
                text-align: center;
                display: table-cell;
                vertical-align: middle;
            }

            .content {
                text-align: center;
                display: inline-block;
            }

            .title {
                font-size: 72px;
                margin-bottom: 40px;
            }
        </style>
    </head>
    <body>
        <div class="container">
            <div class="content">
                <div class="title">Be right back.</div>
            </div>
        </div>
    </body>
</html>
- 调用视图:abort()
四、日志
- 简介
- 设置与配置
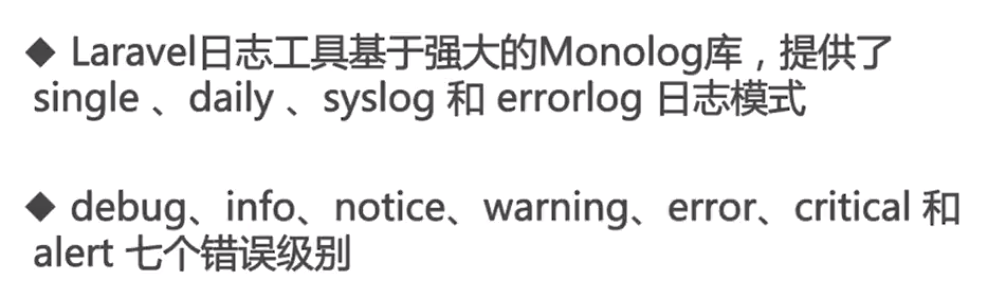
    /*
    |--------------------------------------------------------------------------
    | Logging Configuration
    |--------------------------------------------------------------------------
    |
    | Here you may configure the log settings for your application. Out of
    | the box, Laravel uses the Monolog PHP logging library. This gives
    | you a variety of powerful log handlers / formatters to utilize.
    |
    | Available Settings:"single", "daily", "syslog", "errorlog"
    |
    */

    'log' => env('APP_LOG', 'single'),
- 生成日志
public function error()
{
  Log::info('这是一个info级别的日志');
}
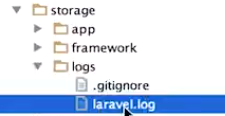
日志文件
日志内容

数组形式
Log::error('这是一个数组’,['name' => 'sean', 'age' => 18]);
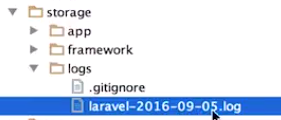
- daily日志
生成带日期标示的日志。
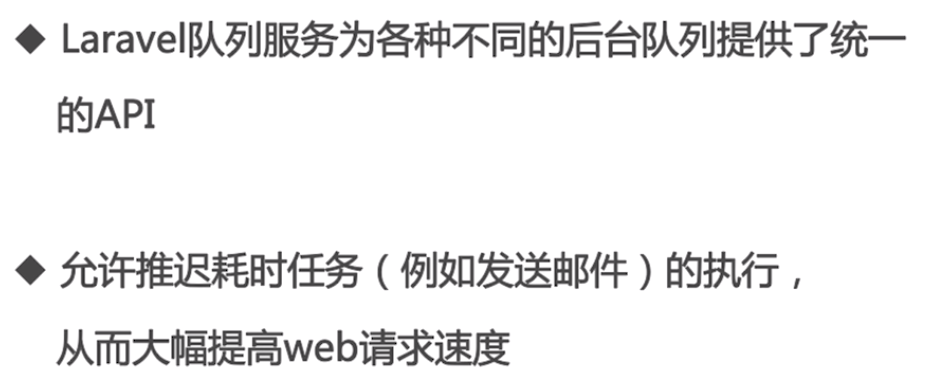
队列
一、简介
配置文件:[config/queue.php]
二、迁移队列需要的数据表
- 设置 QUEUE_DRIVER

- 创建迁移文件
$ php artisan queue:table
有了 <time>_create_jobs_table.php 文件
- 执行迁移
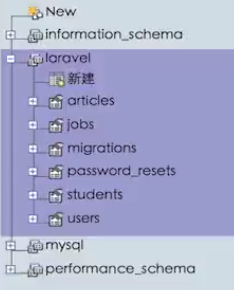
$ php artisan migrate

多了一个jobs表。
三、创建任务类
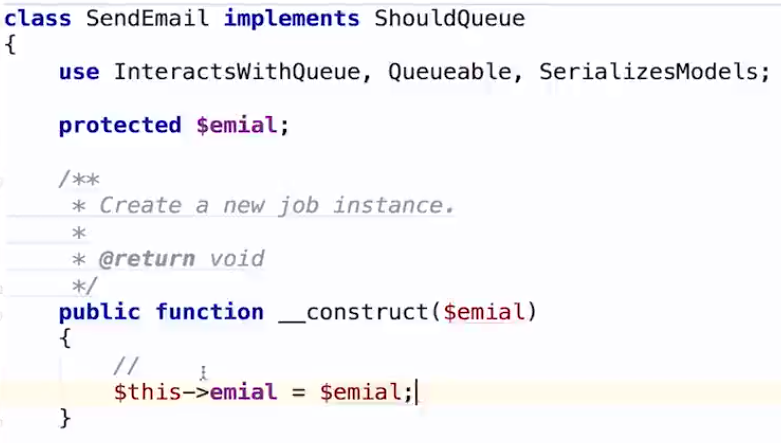
- 创建 SendEmail.php
$ php artisan make:job SendEmail
文件自动有了类的框架,如下:
- 任务加入队列
通过路由执行:route --> queue(),推送到队列中。
use Mail

public function queue()
{
  dispatch(new SendEmail('xxxx@qq.com'));
}
- 运行队列 listener
运行:$ php artisan queue:listen
public function handle()
{
  Mail::raw('队列测试‘, function($message) {
    $message->to($this->email);
  });

   Log::info('Email sent.');
}
四、处理失败任务
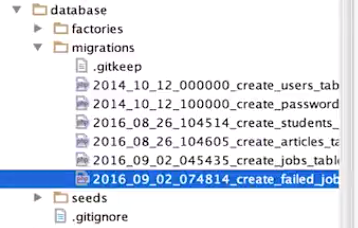
- 建立失败表的迁移文件
$ php artisan queue:failed-table
- 执行迁移
$ php artisan migrate
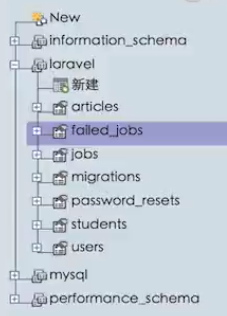
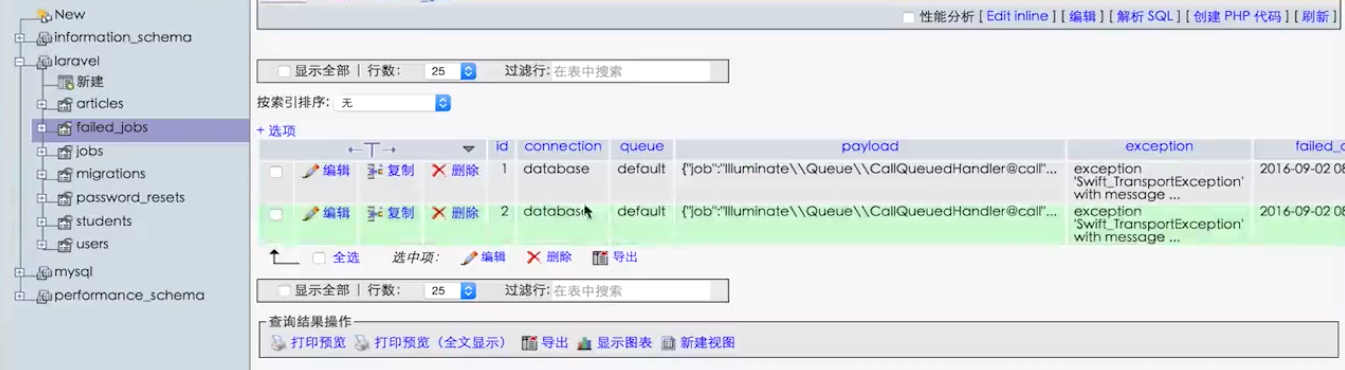
迁移成功,数据库中可见到新表。
- 失败了会有记录在数据库中
- 重新执行失败队列
列出失败队列:$ php artisan queue:failed
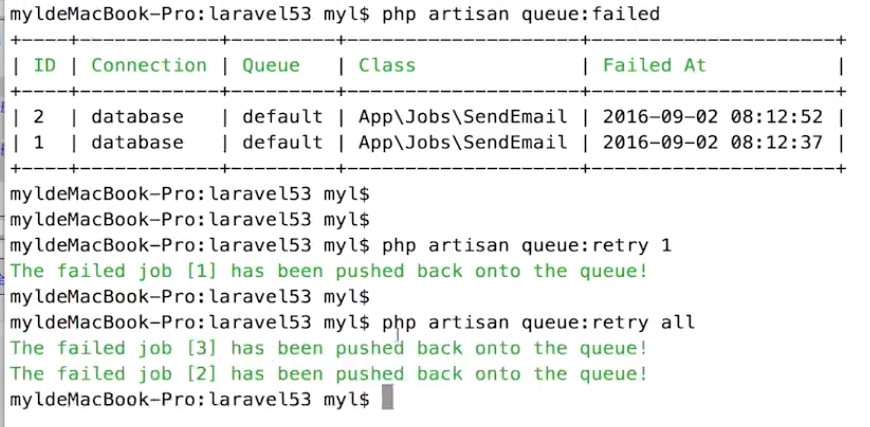
- 彻底删掉失败队列
列出失败队列:$ php artisan queue:forget 4
列出失败所有队列:$ php artisan queue:flush

 浙公网安备 33010602011771号